Up next in 10

Build a React.js Image Blur & Pixelate Editor in Browser Using Canvas API & Javascript
Jan 9, 2025
Get the full source code of application here:
https://gist.github.com/gauti123456/625b43eb77446f3a9df047616d2ee137
Show More Show Less View Video Transcript
0:00
uh hello guys welcome to this video so
0:02
in this video we will look at how to
0:04
build out a image editor inside react
0:07
Chase which will be useful if you want
0:11
to blur your image or pixelate your
0:13
image both these scenarios we will look
0:15
here so this is actually the demo of the
0:17
application of what we will be building
0:19
in this video so we have a choose file
0:22
button where the user will simply select
0:24
the image file that they want to edit so
0:26
we have coded this inside bootstrap
0:30
framework so you have a choose file
0:32
button so here you will select your jpg
0:34
or PNG file let me select it and you
0:37
will see these controls after you select
0:40
it we have the two sliders if you want
0:43
to blur your image and then there is a
0:46
button out there apply effects you can
0:48
control the amount of blur that you can
0:50
add here using the slider and as soon as
0:53
you click the button you will see the
0:55
live preview and then you can simply
0:57
download this edited image by clicking
1:00
the download button so now your image is
1:02
successfully saved so in this
1:05
way and similarly you have the next one
1:10
if you want to pixelate your
1:12
image you have the second
1:15
slider and then if you click the button
1:17
you will see the Pix uh the image is
1:20
little bit
1:23
pixelated you can control the amount of
1:25
pixelation using the
1:27
slider and once again click the down
1:29
download button to download the output
1:33
image so it will look something like
1:38
this so we will try to build this
1:40
application from scratch in this video
1:42
so now to get
1:44
started actually we are using the
1:47
concept of canvas API
1:49
so if you just write canvas API it
1:55
actually you can read more about it so
1:58
we can actually draw the image on the
1:59
canvas and then we can blur the image
2:02
and also pixelate the image both these
2:04
filters we can add it so now to get
2:07
started uh we just need to initialize a
2:10
very basic react Chase project I've
2:12
already done that
2:16
so now you just need to install the
2:19
react bootstrap module if you want to
2:21
use bootstrap inside your reactjs
2:24
application so this is actually the
2:26
command that you want to instantiate
2:28
npmi react bootstrap so simply execute
2:32
this command and install react bootstrap
2:34
inside your project so I've already done
2:37
that so I will start the development
2:39
server npm run Dev so I will start it
2:42
from scratch
2:45
so now we need to first of all have a
2:48
functional component so if you refresh
2:52
your application you will see this Auto
2:56
refreshes so now for the application we
2:59
need some state cre variables for the
3:01
first one we need a image variable where
3:05
we will keep track of which image the
3:07
user has selected for this we will be
3:10
using the UST State hook of react Chas
3:12
initial value will be
3:14
null and we also we'll be having
3:16
variables for storing the blur and the
3:21
pixel8 so again we'll be having one more
3:24
variable for blur amount set blur
3:27
amount and again be using using UST
3:30
State Hook and the initial value for the
3:34
blur will be zero when you load the
3:35
application for the very first time and
3:37
then once again we will have the
3:40
variable for keep track of how much
3:43
pixelation the user will select so pixel
3:46
size and similarly set pixel size
3:50
initial value once again will be zero
3:53
and then we also need have
3:56
a canvas reference because we will be
3:59
drawing the image on the canvas so
4:01
that's why we need to use this us ref
4:03
hook it will
4:06
be imported here you can import this us
4:09
ref
4:10
Hook from the base react Library you can
4:13
see we have done that so these are the
4:16
uh variables we will need for this
4:18
application first is the actual image
4:20
the user will select second is the blur
4:22
amount pixel size and the actual canvas
4:25
reference so these are the four
4:27
variables which are needed for this
4:29
application
4:30
now we will actually write the HTML
4:33
which will be required so in the
4:35
jsx inside this div we will use the
4:41
container this will be imported from
4:43
react bootstrap that we actually
4:46
installed so we have the container class
4:49
of bootstrap inside this we will use the
4:52
row tag row class and we need to give it
4:55
a class name of bootstrap
5:00
so we also have the column class as
5:07
well inside this we will have a simple
5:09
hed3 tag which will say image blur
5:13
and
5:16
pixel8
5:18
editor after this we will have a simple
5:21
form bootstrap
5:25
form form. group uh and inside this we
5:30
will give it a control
5:34
ID this control ID we will use it
5:37
whenever we want to get the reference of
5:39
this file so give it an ID to this
5:42
element and we will having a form
5:46
label so here you'll be showing the user
5:49
what to do so we need to select an image
5:52
here and after this we will having a
5:55
form
5:57
control so inside this form form control
6:00
we will allow the user to Simply select
6:03
the image file so type parameter will be
6:06
of
6:08
file we will be only be accepting images
6:11
files so you'll simply say here
6:14
image/
6:16
star only be accepting image files and
6:19
uh if you just refresh your application
6:22
uh bootstrap will not be applied we need
6:25
to include the CSS file for this also so
6:28
just you need to import
6:31
the bootstrap dis CSS bootstrap main.
6:36
CSS for this you do need to install the
6:38
bootstrap base package which is npm you
6:42
can install this using npmi
6:45
bootstrap you also need the base package
6:47
as well alongside with the react
6:49
bootstrap Library so I've already
6:51
installed these two packages so now
6:53
after that you can import the CSS file
6:57
using this package so if you refresh now
7:00
you will see the bootstrap classes will
7:02
be applied and now you will see this
7:04
choose file button where you can simply
7:06
select your image file so after you
7:09
select the image file we also need to
7:11
show the live preview of the actual
7:14
image which is selected by the user for
7:16
that we will be binding an on change
7:19
event handler to this input field so we
7:22
will be executing a function right this
7:24
custom function handle file input now we
7:28
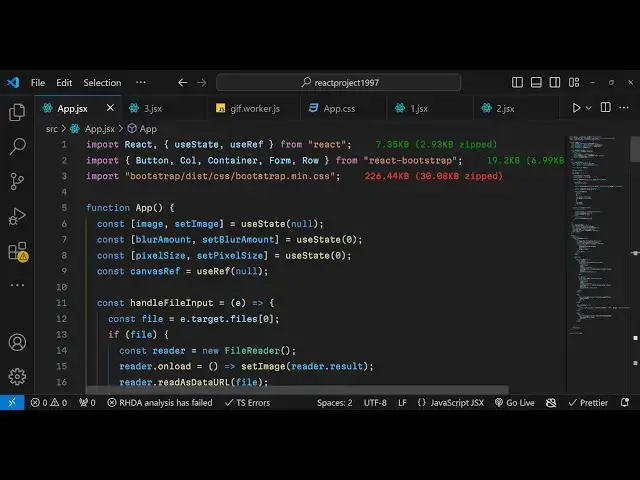
just need to Define this function
7:29
function which is handle file
7:31
input so
7:33
that when you select the image
7:36
file e parameter will automatically be
7:39
passed to this
7:41
function so inside this function uh we
7:44
will read actually the image
7:46
file for reading it we simply first of
7:49
all need to get access to the file which
7:50
we will use e. target. files this will
7:54
actually get access to the file which
7:58
the user has selected
7:59
then we'll have a if condition that if
8:01
the file is a valid file then in that
8:04
case read it using the file reader
8:08
API and then reader. onload it's a very
8:11
basic process by which we get get access
8:14
to the image which is selected reader.
8:17
result and reader read as data URL we
8:22
using the base 64 code of the image so
8:25
in this way we can actually read the
8:27
file
8:33
so after you do this uh you just need to
8:37
show the image in in the browser with
8:42
live
8:43
preview so we can simply after this
8:48
row we can simply have a jsx expression
8:52
right here if the image is selected in
8:55
that case
9:00
we will simply write this jsx expression
9:02
and
9:06
row give it a class
9:17
name we will have a column tag we will
9:21
give it on medium devices we need to
9:23
have a six
9:25
column structure and inside this
9:33
basically we will have the label for the
9:36
blur amount so when you select the image
9:39
we will actually show all these controls
9:42
so this control will be responsible
9:45
for controlling the amount of blur that
9:48
you want to do so this will be a
9:50
slider so here the input type is range
9:53
because it's a slider it will minimum
9:55
value is zero Max is 10
10:07
so if you select the image
10:10
now you will see this blur amount this
10:14
is actually a
10:15
slider you can see that similarly we
10:18
will have the second
10:22
slider again the column structure will
10:24
be
10:25
six this time this slider will be
10:28
responsible for controlling the pixel
10:31
size so again it's a type range minimum
10:34
0o Max
10:41
20 so here we have provided this
10:43
disabled attribute this will only be
10:45
disabled if the pixel size that you see
10:48
is greater than
10:50
one so it it will be disabled if the
10:53
blur amount is greater than zero so it
10:56
simply means that at one time you can
10:58
only control blur or pixel you can't uh
11:03
so at one moment of time you can only
11:06
control blur or pixel size so both these
11:09
sliders are now appearing now we need a
11:11
simple button to submit the form so
11:14
after you do this
11:16
uh we will have another
11:22
row inside
11:25
this we will have a button bootstrap
11:28
button
11:30
uh you will have this apply effects
11:35
label on that button so the button
11:39
variant I will be having the prim button
11:42
and you can basically bind the on click
11:45
listener when we click this button we
11:46
need to execute a function which I will
11:48
simply make which will be apply effect
11:52
so it's a custom
11:54
function and we just need to make this
11:56
function right here just Define it
12:07
so if you now select the image
12:16
file so it is saying that button is not
12:19
defined so I do need
12:21
to import the button so I
12:25
think this needs to be button
12:32
so if you select the image now you will
12:34
see this button and the two
12:36
sliders so now what we need to
12:50
do also after this uh button and this
12:54
row we also
12:56
need to have the canvases as
13:00
well to draw the image on the canvas and
13:04
you will basically have a canvas tag and
13:07
we attach the reference here the canvas
13:09
reference that we declared early on and
13:12
we are just having a Max withd 100% one
13:15
pixel
13:16
solid this canvas reference we have
13:19
declared early on if you see the used
13:21
ref hook it is null by default we just
13:24
attaching it to the canvas
13:27
tag using this ref
13:41
attribute so now to both these sliders
13:44
that you see the blur slider and the
13:46
pixel slider we do need to
13:49
attach the current
13:52
value the and the current value will be
13:56
getting it from the variable blur amount
13:59
the those two variables that we declared
14:02
and the pixel
14:09
amount sorry this is pixel
14:12
size so these two UST State variables we
14:15
have declared if you see blur amount and
14:17
pixel size we are just attaching it to
14:19
the HTML the
14:22
jsx and also we do need to attach on
14:25
change event handler as well so when you
14:27
change the value of the slide
14:29
this event handler will automatically
14:32
execute the
14:34
function and here you'll be setting the
14:37
pixel size the hook function and
14:40
whatever is the value e. target. value
14:42
so you'll be doing this same thing for
14:45
the blur amount as
14:48
well so this will be set blur amount e.
14:53
target. value that's
14:55
all so now they are both connected
15:00
and in now inside the apply effects
15:02
function when we click the button this
15:04
function will get execute and here we do
15:07
need to get the reference of the canvas
15:10
we can simply say canvas ref we need to
15:12
get the current reference and then we
15:15
need to get the context 2D context of
15:18
the canvas so we can easily get the
15:20
context by using this method get
15:24
context after getting the context you
15:27
can draw this image on the canvas by
15:29
using the image Constructor and then we
15:31
can simply say image. Source image this
15:35
is the very basic code we do this a lot
15:38
in the browser so inside this image
15:41
onload function we will draw this image
15:44
on the canvas first of all we need to
15:46
set the width and height of the canvas
15:48
so it will be similar to the image width
15:51
whatever is the original width of the
15:52
image and the height the canvas height
15:55
will be equal to image do height
15:59
after setting the dimensions of the
16:01
canvas now we can simply draw the image
16:04
on the canvas by using this function
16:06
which
16:08
is draw rectangle but before that we
16:11
also need to clear the previous image by
16:13
using the clear rectangle function and
16:16
here you need to specify the dimensions
16:18
x coordinate y coordinate 0 0 and then
16:21
the canvas width and the canvas
16:26
height so this we are calling because we
16:29
do need to clear the previous image so
16:31
for clearing the previous image we are
16:33
using this function clear rectangle so
16:36
this will clear out the canvas now we
16:38
can draw the image on the canvas so here
16:41
we are simply comparing that if the
16:43
pixel size is greater than one in that
16:46
case the user has selected the pixelate
16:50
effect for doing that we will
16:53
draw the image on the canvas by using
16:56
this function draw image and here we
16:58
will be drawing the image x coordinate y
17:00
coordinate again will be 0 0 image width
17:04
will we need to divide it by the pixel
17:07
size this is a simple logic that we are
17:10
applying and for the height image.
17:13
height we again need to divide the
17:16
height by pixel size so whatever is the
17:19
value we'll divide this and then we need
17:22
to set this property of uh image
17:25
smoothing
17:27
enabled so this property we need to set
17:30
it to
17:31
false and then again we need to draw
17:34
this image on the canvas by using the
17:36
draw image
17:40
function and this time the coordinates
17:43
will slightly differ the x coordinate y
17:46
coordinate again will be 0 0 but image
17:50
by high width height we will divide this
17:52
by this value pixel
17:57
size and and uh this is the one
18:00
condition if the user has selected the
18:03
pixel slider if the user has selected
18:08
the blur slider if they want to blur the
18:10
image in that
18:11
case if the blur amount is uh greater
18:15
than zero in that case now we need to
18:17
apply the blur effect for applying the
18:19
blur effect we need to set a property or
18:21
a filter inside context this filter is
18:25
the blur filter so you simply say blur
18:28
and here we need to specify the value so
18:31
whatever is the value coming which is
18:33
the blur amount we can and here we can
18:36
simply say
18:37
pixel this is actually a property in CSS
18:41
you can directly write here pass the
18:44
value in the blur function it will
18:46
actually blur your image so after it
18:49
blurred the image we just need to draw
18:51
this image on the canvas Again by using
18:53
draw image x coordinate y coordinate 0
18:57
0 and then the filter so filter will be
19:00
none so you just need to set this and
19:03
now in in the else block if neither of
19:06
these filter selected in that case we
19:08
don't need to put any effect on the
19:10
image so we just need to draw the
19:12
original
19:14
image so if either of these filters are
19:17
not selected then don't change the image
19:20
at all that's all
19:23
so if you just refresh your application
19:26
uh and choose your image now
19:29
and just click on the apply effects you
19:32
will now see as we selected the blur
19:34
slider it actually blurred the image you
19:37
can just increase the slider value and
19:39
it will even blur the image more and now
19:42
the pixel size you can't change because
19:44
only at one time you can only change
19:47
blur or pixel let's suppose I don't want
19:51
to blur the image I reset the blur
19:52
slider now if I can change the pixelate
19:56
slider if I change this value now the
19:59
you can see the image is
20:00
pixelated so now both the sliders both
20:03
the functionalities are working now we
20:05
need a simple download button so that we
20:07
can download the output image so for
20:09
downloading this image we just need to
20:11
have a download
20:13
button so we have
20:17
actually to specify this download button
20:20
just after this so we have a
20:24
row so we this success download button
20:27
will basically b a on click event
20:30
handler so we need to execute this
20:31
function download
20:33
image so just declare this function uh
20:36
which is download
20:40
image so this will be very simple we in
20:44
this function we will simply create a
20:48
first of all get the reference of the
20:51
canvas so caners ref current and then we
20:56
actually create a dynamic
20:59
anchor
21:01
element you simply say link.
21:04
[Music]
21:05
download
21:08
edited
21:10
image.png
21:12
and then link. HF will be we need to
21:16
convert this into a base 64 URL so for
21:18
this we using this function canvas to
21:21
data
21:22
URL this is a very famous function and
21:26
here need to specify not to the
21:28
extension of this image
21:30
image.png and then we need to Simply
21:32
click the link dynamically that's all so
21:36
if you refresh now the and select the
21:42
image click the download button now if
21:45
you see your image is successfully
21:48
downloaded it is blurred if you want to
21:51
pixelate
21:54
it again the image is downloaded so all
21:57
the source code will be given in the Des
21:58
description of this video thank you very
22:00
much for watching this video and do
22:02
check out my website as well freem
22:04
mediat tools.com which
22:06
contains thousands of free tools
22:08
regarding audio video and image and I
22:11
will be seeing you in the next video
#Online Media
#Multimedia Software
#Other