Up next in 10

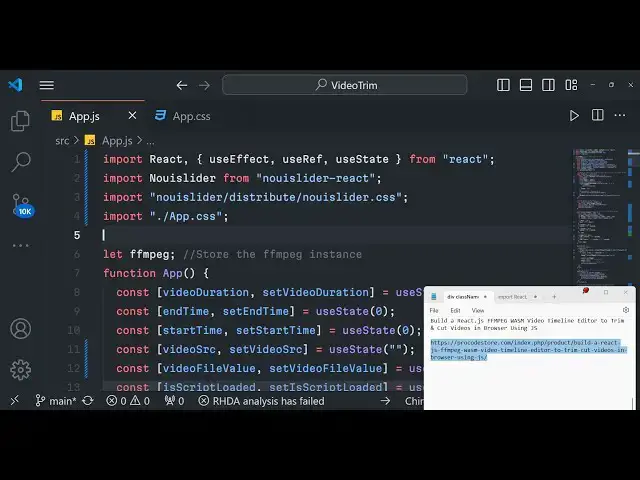
Build a React.js FFMPEG WASM Video Timeline Editor to Trim & Cut Videos in Browser Using JS
Jan 9, 2025
Buy the full source code of the application here:
https://procodestore.com/index.php/product/build-a-react-js-ffmpeg-wasm-video-timeline-editor-to-trim-cut-videos-in-browser-using-js/
Official Website:
https://freemediatools.com
Show More Show Less View Video Transcript
0:09
uh hello guys welcome to this live stream so here we are actually building
0:14
basically a video editor in react CH where we will
0:20
actually be trimming or cutting videos inside browser so it's a realtime editor
0:26
you can see right here on your uh screen right here so we have actually building right here a video timeline editor in
0:33
reacts using a very popular Library called as
0:39
fmpg fmpg guys as you all know it's a command line utility for video and audio
0:47
the this is their official DOC website and you can basically install
0:52
this library on your command line but we will be using it in the browser so I
0:58
have already installed it you will see that works in the command line very well but uh this application that I developed
1:04
which is a video trimmer which allows you to cut your videos so this application is developed in react here
1:11
so we have a simple choose file button so as I click this choose file button guys what will happen it will allow us
1:17
to open our file picker where I can actually pick out my video file that I want to trim so all extensions are
1:25
supported M MP4 Avi mov you can actually select your video video file let me
1:30
select my video file so as I select my video file guys you can see it will actually create this nice little slider
1:37
or timeline from which we can actually using our Mouse we can directly cut out the portion that we
1:44
want using this so as I am changing these sliders you will basically see that the start duration is changing as
1:51
I'm moving the slider the video is also moving here and also the ending duration
1:57
so you can basically just using these sliders you can just trim out the
2:02
portion that you want in the video so as you do this right here let's suppose I
2:09
want this portion so there are three buttons either you can play this portion something like this you can control will
2:15
play second button is for the pause so if you click this button pause the video will stop again if you click play the
2:23
video will play again if you click the pause button it will pause the third button if you see trim button so if you
2:29
want to basically cut this portion that I selected in the video Simply select that portion so now fmpg web assembly
2:37
Library will be loaded and it will actually trim out this portion using fmpg so as I click this button guys
2:44
instantly your video will be cut using this 59 seconds you can calculate here
2:50
from this portion this is a starting duration this is the ending duration this is the actual difference of these
2:56
two things and we have successfully this is our output video something like you can simply play this output video which
3:02
is and right click and download this video so inside your local machine so
3:08
now you can play this video you can if I open so without having to install any
3:13
third party video editor guys you can directly do this video trimming part in the browser itself using this awesome
3:20
application that I developed and in this live stream I will going to develop this application in react CH step by step
3:28
guys I will show you a complete process of building a this video trimmer with
3:33
timeline editor using this nice little sliders and react CHS I will show you which libraries packages we will use it
3:40
this makes it very much easy to select which portion and for the user experience it's very good because user
3:48
is able to select the portion very easily and click on the trim portion the video is cut and shown to you instantly
3:55
so the main advantage of using fmpg web assembly guys
4:00
your basically whenever you select your video file it is not uploaded to a third party server it is directly all the
4:08
processing is done right in the browser itself so no video is uploaded to a
4:14
server so it is all happening in the browser so this is the actual main advantage of using fmpg web assembly
4:21
Library so all the things all the processing is happening right in the browser itself so this is actually the
4:28
advantage of using this this library and the package that we are using guys you
4:34
can just type fmpg web assembly this is their official documentation you can
4:39
read more about it but it is developed in typescript which is a superscript of JavaScript and web assembly guys as you
4:47
all know it's a just a Intermediate Language to binary code so it is in
4:53
human readable format so what it does it actually compiles your fmpg library into
4:59
web assembly code that we can run in the browser itself so it has a documentation
5:05
you can check out all the methods that we will be using so I developed this application using this documentation so
5:11
if you are interested in the full source code guys the link is given in the description you can directly purchase it
5:17
if you need any kind of confusion if you have at the end of this live stream you can the link is given you can directly
5:24
purchase it you will get a zip file this will contain the overall directory structure of the application so now this
5:30
is our uh application which I'm running it on Local Host 30001 so what I will do
5:36
is that I will stop this application so I will delete all this source
5:42
code I will rename this
5:50
to like this so what I will do I will create a new file
5:58
app.js so so this is our functional component will be there so I will say
6:03
hello world so now I will do I will start
6:10
restart this application so npm Run start this will start your react CH
6:16
application and the default port number will be 3,000 so this functional
6:21
component that we made right here so if you see in the package.json
6:29
file guys we are actually using these packages
6:36
uh which is the package we are using no use UI slider so the slider that you see
6:44
right here this slider we are actually using it uh no UI slider this is
6:51
actually the name of the library no UI slider react this makes it really useful
6:58
if you want to trim the portion you can allow the user to actually use
7:03
this so 20,000 weekly downloads are there simple command npmi no UI slider
7:09
react this is actual package that we are using right here so this this is actual
7:18
package alongside with fmpg web assembly Library it is just starting the
7:24
development server so just wait for this to start
7:31
so these are different kinds of scripts that are required for starting this
7:49
application so the very first thing guys you will actually do right
7:55
here so you will now see this hello world is sh right here to
8:02
us so now what we need to do is that we now go to app.js so this is actual
8:09
single file which will be needed for this application so what I will do guys first of all I will show you how to load
8:16
our uh this load the fmpg web assembly
8:21
Library this is the actual library that we are using for actually carrying out the conversion for video trimming and
8:28
cutting process so first of all we actually want to use uh the use effect hook in react CHS
8:36
which will act automatically run whenever your react Chase component will load we
8:44
will use this use effect hook so this will automatically
8:50
will execute so here we need to provide empty parenthesis empty square brackets
8:56
so this simply means that whenever your uh uh react Chase component loads for the very first time this code will
9:03
automatically execute and this will only execute once this will not execute uh
9:08
multiple times so this will only execute for the very first time and here we will write the code for actually loading the
9:15
fmpg web assembly Library so here we will actually called a simple method
9:20
which will be responsible for loading the script so we will actually make this
9:26
method load script and here we will actually pass the CDN from which we will actually be pulling the
9:35
fmpg web assembly live JS deliver. net
9:40
npm at the rate fmpg fmpg at the rate
9:49
0.1.2 /d fmpg
9:54
min.js this is a overall CDN guys uh if you copy this CDN open this in browser
10:01
you will simply see this is the actual minified
10:07
JavaScript code for
10:13
your I think we forgot to add the https you can see that so this is the
10:20
actual minified code for this Library which is fmpg web assembly Library so we
10:25
are actually uh
10:31
loading this script so after you do this this uh function will actually return a
10:37
promise to you we will say dot
10:43
then this will be Asing function so this will return the promise so we can handle this using dot
10:49
then and uh we can here just compare if type of
10:57
window is not
11:03
equal to undefined so we can just simply first of
11:12
all console log window that's all so here uh we need
11:20
to make this function which is load uh script which will be responsible
11:26
for loading the script and adding it to the Dom so it will
11:32
actually accept this argument that we are passing in the source right here guys we are passing this CDN URL to this
11:38
right here if you can see right here let me disable my volume
11:43
here so inside this function guys so what what we need to do we need to now return a simple promise so return new
11:51
promise and there will be two things right here in this function it will be
11:56
returning either the promise can be fulfilled or it could be rejected so on
12:04
fulfilled and this one this will be Arrow function so right here we will
12:10
simply be creating a element Dynamic element which will be a script tag
12:16
because we just need to add the script element dynamically using this function so this
12:25
will be a async so script. async
12:31
and we also need to use defer attribute so script.
12:37
defer is equal to defer and script. set attribute this is actual function which
12:44
allows you to set the source for property of the script tag is equal to source so
12:51
whatever URL that you are passing in the uh function right here it will get dynamically attached using this line
12:59
and this basically contains this uh on ready State
13:05
change function so on
13:11
ready on ready State change script.
13:27
onload so right here we will simply say if not loaded in that we will fulfill
13:36
the promise pass the script and make this to load it to be
13:44
true if any sort of error take place on error we can basically just say that the
13:51
script failed to load and finally we will uh just add
13:59
this element to the Dom so we can say document. get element by ID get Elements by tag
14:08
name which will be head we will basically add this to the
14:14
head you can add it to the first element so dot
14:20
zero append child
14:27
script so this is the overall function guys so the link is given guys you will
14:34
get full source code after you face any problem so this is the overall function
14:41
that we written so right here guys we do need to
14:56
have uh I think all the things are correct we do need to declare some
15:02
variables State variables guys which is needed for this we will declare it later on for the
15:10
time being if I reload this application in the browser Local Host
15:22
3000 cannot read properties of undefined reading then
15:32
uh let me see guys what is the problem here
15:50
uh let me write this one again load script
16:01
so now you can see that we are basically loading this if you refresh
16:09
now so it is saying that fmpg is not
16:19
defined okay we need to declare the state variables guys that's the problem it is say so
16:37
we just need to declare this one state variable which is responsible is script
16:45
loaded and uh set is script loaded this will be a Boolean parameter
16:53
simply use State hook we will use it initial value will be false but this will be responsible for storing if the
17:00
fmpg script has been loaded successfully or Not by default the value will be
17:06
false and here we are actually making this value to be true if you see set is
17:12
script loaded to be
17:18
true so it is saying that uh line 34
17:31
and we do also need to declare this variable which is uh fmpg it's a global
17:38
variable just declare it outside here we will be storing the instance of fmpg
17:45
just make sure that you declare it and if I go into my inspect element go to
17:50
console you will basically see guys there will be this message here uh this
17:55
use fmpg web assembly versions 0.1 1.2
18:01
this is actual object which is returned guys this contains all the methods which are supported by fmpg web assembly so
18:08
the core library of fmpg has been loaded and you can just see this message fmpg
18:15
core library has been loaded so we are actually calling this function create
18:21
fmpg which is a function that we are actually calling it if you see fmpg do create
18:29
fmpg so if you don't want to see these log
18:35
messages you can put this log property to false then it the log log messages
18:41
will not show in the browser so it's very helpful that you want to see it so just make sure log to true we are
18:47
executing this create fmpg that's why your fmpg library first of all gets loaded in the browser as you load your
18:55
react Chas component you will see that now your library is loaded now we can actually
19:02
perform our video trending part so after this is loaded guys now we will actually
19:09
write our jsx instead of hello world what we will
19:18
do we will basically have a div tag here and just give it a class name of
19:24
app and here you'll simply be having a input element and where we'll be getting
19:31
the file input input type
19:36
file and we will be giving an on change to it on change when the file is changed
19:42
this param this function will get execute it we will basically call this function as handle file change we'll
19:51
call this function as handle file change now we just need to Define this function
20:04
handle file change and obviously if you see open
20:12
this there will be a choose file button which will be appearing and we do need
20:17
to have our state variables guys so I will just go and simply add my more
20:24
State variables so one will be for calculating the video duration how many
20:30
total seconds the video is there so set video duration which will be the function
20:38
State hook we will again use initial value will be 0 second this
20:44
will be the duration of the video when we start the application and
20:50
then the end time because in video trimming we need to set the start time and the end time for both these
20:57
variables U State initial value will be zero and also for the start time there
21:04
will be this function set start time initial value will again be
21:10
zero and then we will also be having video source for setting the input video
21:17
Source initial value will be nothing so once you select the input file name we
21:22
will actually convert that into blob so that it can be displayed in the browser
21:27
and then there will be this video file value for the for displaying the output
21:36
video Once the video has been successfully trimmed so for that we are
21:42
actually declaring a variable set video file value initial value once again it
21:47
will be uh empty we will use U State
21:54
hook we just say iscript loaded all that and also video trimmed URL so once the
22:03
video is trimmed we will be converting it to the blob for that also we will
22:09
declare as UST State set video trim URL initial state will be
22:16
nothing so here we will basically also be declaring a variable for the slider
22:21
initial slider value will be zero like this and also we will be
22:28
declaring sharing a reference for the video element video reference will be us
22:33
ref you will use the US ref hook like this so these are all the
22:41
state variables which are needed guys for this we have use use effect us use
22:46
state in react CH so after declaring all these variables we can actually
22:53
now do our jsx so
22:58
we now need to write this handle file change method which will be responsible when we actually input our input video
23:09
file so right here inside this function so here this code will execute
23:16
when the user selects the
23:22
video so here first of all we'll get access to that video using so this
23:27
automattic ically will e parameter will be passed here which we can call this as
23:33
event so event. target. files zero so this will get a reference
23:40
to that particular file the user selected and then we will convert this file to blob you can simply say
23:47
blob URL and we can say url. create object URL this is actual method
23:52
available in JavaScript to actually convert the video to blob we can pass
23:58
the actual file which is selected video file and then we can call this hook function which is set video file value
24:05
to be blob URL and also set video source to
24:11
be blob URL sorry here this will be file the
24:16
actual input file and the video URL will be the actual blob URL with this help we will
24:24
be displaying this in the video player so if you just execute your application
24:29
nothing will happen if you select your file it will not be displayed in the video player for displaying it in the
24:35
video player we do need to add some GSX so right
24:41
here just outside your we will simply have a break
24:52
tag and after this we will have this uh curly bracket and here we will have a
24:57
simple condition we will only be displaying this uh video player once the file is
25:04
selected by the user so we will say video Source if it contains some value
25:10
if the length is greater so right you can see we are writing some conditional statement here
25:17
tary
25:23
operator if the video hasn't been selected in that case you can simply say
25:32
nothing so right here we do need to write
25:40
here we can simply say our react
25:48
fragment so inside this react fragment we will be displaying a video tag The
25:53
Source will be equal to the video Source variable
26:03
and uh we have also have reference which will be equal to the video
26:09
ref variable that we declared if you see video ref is equal to use
26:21
ref and inside this video tag we will have the Source
26:29
tag and the source will be equal to Here video Source once
26:36
again and the type will be equal to the video file value that we
26:43
have and it contains a property called as type which will be the MIM type so in
26:49
this case if you're selecting MP4 it will be the extension MP4 Avi mov so
26:55
with the help of this if you now select your video file it will be showed in the video player you can see that so now it
27:01
is showing in the video player so now to actually play this uh we can
27:09
basically uh you can style this you can import our index. CSS
27:20
file if you want to you can import
27:26
this and just Target it or you can import app
27:34
dots just make sure that you import app. CSS so it will be right in the middle
27:41
and it will show something like this so we inside this app.css we just given a
27:47
height of 30 pixel 300 pixel only so the video player will be slightly shorter it
27:54
looks good after you do this guys we just need to
28:00
uh after we will also be showing a slider where you can actually provide
28:07
the starting time and the ending time so this will be a Break Tag and then we will actually use this no UI
28:16
slider it will be automatically be imported by V vs code this no UI slider
28:25
guys has some properties that you can do first is the Behavior this will be tab
28:31
drag you can drag it drag the slider using your mouse this is a default
28:38
behavior and by default it comes with this with
28:45
these options you do need to provide some start time and the end time these are mandatory parameters so step will be
28:52
one you can give any value step is actually whenever you increase the
28:59
slider in which Step it needs to increase so it will be increasing by one
29:04
value at a time so margin we can give it one and the range range is very
29:11
important here we need to provide the minimum value of the slider and the maximum value so minimum will be zero
29:18
and the maximum will be the total duration of the video so it will be coming in the video duration if the
29:24
video duration is undefined you'll simply set it to two so also we need to provide the starting
29:31
duration of the slider so it will be at the zero comma video duration same value
29:39
that we given to the range
29:51
so if you now select your file
29:58
there we need to provide connect as well and on
30:04
update update on slider so whenever the slider
30:10
changed the value guys this function will automatically execute so we now need to Define this function update on
30:16
slider change
30:29
and uh this uh file will be imported if you see no UI slider from no UI slider.
30:36
react but we do need to import the CSS file as well this will be imported manually by yourself just write this
30:42
import statement No UI slider SL distribute SL no slider. CSS this will
30:49
import the CSS file for this Library so if you now select the input file there will be this nice little slider guys
30:55
which will be in sync by you can see that so we can't move the
31:01
slider but the slider is showing you can see that you can do
31:11
this but uh this for updating this values it is really important that we
31:17
Define this function that we defined it which is update on slider change
31:32
so here two values will be there the values
31:38
and the handle these values will be automatically passed so first of all what we will say set video trimmed URL
31:45
to be nothing and we will say read value
31:53
Define this variable and also we will check the value for hand
31:58
if it is having some value will then you will simply read the read values of
32:04
handle if it is not defined then we will set it to zero and here we will check the end time if it is equal to
32:13
undefined sorry if it is not equal to read value then we will set the end time to
32:20
be read value
32:28
this is uh the logic guys which is responsible for doing it so this is slightly complicated so I will simply
32:34
copy and paste it and then explain to you what is happening so essentially what it is doing right here whenever we
32:40
increase or decrease the value for slider as we pick the video file it is automatically doing what it should do
33:15
so as you pick your video file guys this slider we do need to make
33:22
sure now we need to add this this part which is start duration and the end duration so as we move the slider in the
33:30
right duration and the right and left whatever part that we
33:35
want to trim or cut we need to sync it with the start duration and the end duration we need now need to display
33:40
this as we move the slider we need also need this value to be changed so that
33:45
the user can see your start duration and end duration so inside this code right here after this
33:58
we need to add this start duration you can see that we added this start duration and this
34:06
actually you can basically purchase the full source code guys if you find it complicated the link is given you can
34:12
directly purchase this full project so here guys what we are doing we are actually writing this convert to H uh
34:20
convert to hour minute second we are providing the start time and the end duration and the end time we are
34:26
providing this passing it to this this function so we have defined this function if you
34:32
see uh this function is responsible for converting to this format which is hour
34:38
minute second we actually take passing the value of the time for calculating
34:44
the seconds we are dividing the whole value by 3600 so this will give the value in hours
34:51
minutes second for calculating in minutes we are dividing this value by again 60 and then we are multiplying it
34:57
by 60 to get the SEC seconds this will have we simply at the end we are returning the
35:08
time so this is the actual thing if you
35:15
see so one more thing that we are doing guys
35:20
this is really important if you see in this function this is basically to actually
35:28
get the duration of the video using video ref so if you see
35:41
uh to actually get uh this uh duration of the video we actually
35:48
again using the use effect hook so now this time this
35:55
will execute every time this value changes which is the video
36:04
source so video Source if you see we have declared the state variable so
36:10
every time this value changes which is video Source essentially which is uh
36:17
responsible for the blob URL if you see every time this
36:25
changes this will execute so now here we are
36:34
actually so if you don't uh write this there will be a problem if you see if I
36:40
select my video file the slider will not move smoothly if you see the slider if I
36:46
try to move the slider it is not moving
36:52
perfectly so this is useful for the slider
36:59
work if you don't write this the slider will not work so here we are first of
37:05
all just saying if video
37:10
ref and uh if video ref dot
37:16
current here we are actually getting reference to the current
37:23
video dot current current video.
37:30
onload metadata this is actual event which will actually take place when you want to
37:37
calculate the duration of the video so here we will simply set video duration
37:42
to the current video do duration and we will set the end time to
37:49
be current video. duration like this so we are basically
37:55
calling this hook methods that we declared that's all that is needed for this
38:03
function so if you now see uh it is saying video ref is not defined
38:10
so just make
38:17
sure video ref Sorry video
38:24
ref so if you now select your input five now we can move the slider I
38:46
think so you can now see now we can move the slider very easily so the part is
38:51
really important guys for these the button which is trim portion so if you click the trim portion automatically
38:57
Ally your video is trimmed so now I will focus my attention of this function which is handle trim so whenever you
39:04
call this function guys this is the actual logic which is taking place if you see we are actually running this
39:12
command which is this fmpg command we are first of all loading the script and
39:18
we are actually calling this FS method which will actually write this file it is all happening in the browser so it is
39:24
not saving this file anywhere in the memory it is all happening in the memory
39:31
so it is basically writing this file using this function which is fmpg web assembly Library function which is fetch
39:38
file so we are fetching the video file value and then we are getting the MP4 or
39:44
extension of the video and then we are running this command Dash I which is the name of the video- SS for the starting
39:51
time and then to the end time and then we are not re-encoding the video we are
39:58
using the same encoding settings for the audio and video and this is your output file name which
40:03
is dot the extension after that we are uh reading
40:08
the file and then we are creating url. create object URL creating a simple blob
40:14
and then we are setting this video trimmed URL to be URL this is a simple logic of this handle trim function after
40:22
we trim the video we show this video in the video player by converting it to the blob URL and then showing it in the
40:27
video player if you see in the jsx we are actually showing it a simple condition if the video trimmed URL is
40:34
there then only show the video in the video player we have the controls out there in the source here we are showing
40:39
the video trimmed URL so you can see that so this is actual video so you can simply play this
40:46
video file right click download this video
40:53
so it's a very simple project guys but it's really powerful you will get a very
41:00
good base in understanding fmpg web assembly project so you can directly purchase the full project with source
41:07
code the link is given in the description of the video you can go to my website procore.com after you
41:13
purchase it you will actually get the full source code alongside the zip file which will get will contain the full
41:20
directory structure from Google Drive automatically after the payment is done
41:25
and uh you will actually have this nice little slider where you can actually
41:31
select it will be sync with this start duration the end duration you will automatically see in the real time as
41:37
you change the slider value and there will three options are there you can play the video you can pause the video
41:44
and then you can trim the portion of this it is really fast guys really efficient as you click the trim button
41:49
automatically your video has cut and trimmed and now it is showing it in the video player and now you can actually
41:56
play this trim portion or you can actually download
42:03
this so this is a very simple project in react CHS guys if you are interested the
42:09
link is given in the description you can directly purchase it and in the please
42:14
hit that like button subscribe the channel as well and uh I will be seeing you guys in the next live stream
#Fun & Trivia
#Flash-Based Entertainment
#Online Media
#Online Video
#Multimedia Software
#Video Sharing