Up next in 10

Build a Node.js Express GIF Editor to Change Speed & Rotate GIF Using Fluent-FFMPEG in Browser
Jan 9, 2025
Buy the full source code of the application here:
https://procodestore.com/index.php/product/build-a-node-js-express-gif-editor-to-change-speed-rotate-gif-using-fluent-ffmpeg-in-browser/
See the Live Demo of the tool here:
https://freemediatools.com/gifspeedchanger
Official Website:
https://freemediatools.com
Show More Show Less View Video Transcript
0:02
uh Hello friends welcome to this live stream so in this live stream I will basically show you a tool that I
0:08
developed inside browser which allows you to change the speed and uh the
0:14
rotate GIF animation so this is actually the tool that I developed you will see on my website free mediat tools.com so I
0:21
literally deployed this tool on my website so I've given the link in the description of this live stream you can
0:27
check out this live tool right here so if you reload this application it will look something like this here you need
0:32
to choose your GIF animation file so I will simply choose my file here you can
0:39
pick any gif file so as you select this file will be uploaded and it will be shown right here so these are the
0:45
sliders which are given here for the speed and rotation so if you want to increase or decrease the speed you can
0:52
use the slider so it will you can see that so as I change the slider automatically it will change the speed
0:58
of the GIF animation if I reduce the slider you will see that the speed of the animation you can see that the
1:06
animation of the speed will be reduced so as I just uh change the slider you will see the speed of the animation will
1:12
increase and if I decrease the slider you will see the increase the animation speed will decrease so this is happening
1:20
due to fmpg library we are actually making a simple ax called The backend Express server which is actually doing
1:27
this thing as I changing the value of the slider and same thing goes for rotation as well
1:32
so here you need to provide the angle so if I provide here 45° and click on this
1:37
button rotate GI as I click the button you will see the animation will be rotated 45° and now you can see that the
1:44
animation has been there you will see that we can see it will be you can do
1:51
this for the speed use the slider or you can rotate it at any angle 180° click on
1:57
this button so your animation will be rotated 180° and if you are interested
2:02
you can download this file as well after you make the modification simply click the download button so your gif file
2:08
will be downloaded with those modifications which are you have made right here so you will see that so the
2:14
animation GIF animation has been rotated you will see that 180° you can choose any degree uh let's suppose 170° if I
2:21
choose click on rotate again you will see that you can pick any angle 35° rotate
2:28
you will see that so you you can change the speed so the GIF animation will
2:33
reduce so let's suppose if I want to pick this one which is this animation
2:39
you will see that so GIF animation
2:44
is speed is increased if I want to rotate this you can see it will be instantly rotated no page refresh is
2:52
there because we are using Ajax we are actually making a post request as soon as I change the values of the slider or
2:57
this uh rotation angle as I just change the value click this button it is making a post request to the backend server
3:03
which is actually using the fluent fmpg package for both the speed and the rotation angle so you will see as I
3:10
decrease the slider the speed will be decreased of the GIF animation so you can increase it as well you will see
3:16
that it increasing it is decreasing as I choose it's a very simple application guys I developed this in the browser you
3:23
can check out the link is description is given of this tool you can check out on freem mediat tools.com /g speed changer
3:30
the link is given in the description of the live stream so if you're interested in the source code of this application
3:36
guys I have also given the link you can directly purchase it the link is given from my website proot store.com and
3:43
after you purchase it you will actually get the zip file which will be this directory structure this will be the uh
3:49
JavaScript code for nodejs Express and this is the index HTML file so if you
3:54
need the source code you can also purchase it the link is given in the description as well so now let's get
4:00
started by building this application so if you're watching it for the very first time please hit that like button
4:05
subscribe the channel as well so first of all let me show you the packages that we are using for this application we are
4:11
using a package called as fluent fmpg which is essentially a nodejs binary for
4:17
fmpg Library so it makes it very much easy to use fmpg library inside your
4:23
nodejs applications so it has readymade methods which are available to you to actually interact with the media files
4:30
such as video audio and gift files so it's a very good package uh it has
4:36
353,000 weekly downloads are there so we are actually using this package and then we are also using the express backend
4:42
server which allows you to make this rest API which allows you to build this application that's all these are the two
4:49
packages that we are using and also for uploading files to the backend server we are also using Walter package which
4:55
allows you to upload the GI files whenever the user selects it and we store them inside the backend server
5:01
it's also a very popular package so first of all you just need to go to your
5:06
command line and simply install these three packages Express fluent
5:13
fmpg and also you need to install molter so these three packages you need to
5:18
install it I already installed it you just need to install it so what I will
5:24
do is that I will delete all the source code and start from scratch
5:31
this is our starting point of this application index.js file is there so
5:36
first of all I will make our backend server so I will simply require this uh
5:41
Express and we will make this uh Express
5:47
app we will be listening on Port 5,000 and we can simply say
5:53
Here app is listenting on Port 5,000
6:01
so we can just make a simple get route so whenever someone goes to the homepage
6:07
we will simply
6:15
load we don't need to write this because we can basically make a public directory just make it as static so express.
6:22
static public so here inside the public directory just create a public directory
6:27
here you will store all your static assets so such as index. HTML CSS JavaScript code so here we can simply
6:35
make a just change the title which is GIF editor and we can have a
6:46
heading so if you just reload this application just start this application nodemon index.js it will start your
6:53
backend server on Local Host 5000 if I just say Local Host 5000 it will show
7:00
gift editor you will see that so now we will need to actually build this
7:05
application using a bootstrap for making the user interface so what you will do
7:11
bootstrap CDM just you need to go to W3 schools.com and uh you just need to pick
7:19
the CDN for only the CSS part so simply copy this CDN just after the title paste
7:25
it so after you just need to uh use the
7:30
container class of bootstrap and inside this we will give it a heading which is GIF
7:38
editor that's all so if you just refresh now it will
7:45
actually in the you can see it is appearing in the center screen so after this guys we will actually have a simple
7:54
form we we can have this form but we can actually have an inut field right here
8:01
input type file so this here we will allow the user to select your uh
8:08
file gif file so this will be required by the user so we can basically give it a label
8:17
that choose GI file we will basically give it a
8:23
bootstrap class of form control and we will only be accepting GIF files so
8:28
accept gif and uh we will give it a ID of file input so that we can Target in
8:34
JavaScript so if you just refresh now there will be this input field edit choose gif file it will only be
8:41
accepting the GIF files and uh you will see that so now after this we will also
8:46
be having a slider and this input type range so input type range so here we
8:53
will be accepting the user to actually provide the speed so we will give it a
8:59
label to the user just to choose
9:05
speed and uh we will also be showing a Spam tag right here just to show you the
9:11
user which speed that they selected as they change the slider it
9:16
will show you the current value of the speed so you will basically give it an ID to
9:24
it of speed value we can basically change this using dynamically using
9:29
JavaScript so initially I will simply set this to 0.5 whenever you reload the page you will now see a slider is there
9:37
so whenever you change the slider it will automatically change depending upon whichever value that you select of the
9:42
slider so this slider input type range accepts some values so first of all we
9:49
need to give it a form control class or bootstrap and it has some values that you need to provide such as the minimum
9:55
value the minimum value will be 0.1 so you can't select values below that and
10:01
also we have the maximum as well which is 10 you can set accordingly of your own choice but this is more than enough
10:09
which is maximum you can select 10 value of the speed and step value will be there which is 0.1 so it will be
10:17
increasing by 0.1% every time that you increase or decrease and the initial
10:22
value will be if you reload this initial value will be 0.5 that's all or you can set it to five
10:31
accordingly just depending upon if you reload now initial value will be set it to half value will see five
10:40
so now I can move the slider but this value will not change because we need to write some Javas script code for that so
10:46
this is our speed and then we have our rotation so we need to allow the user to
10:54
actually choose the angle so this will be the input type number field where the user can provide the rotation
11:02
angle so form control again bootstrap class and we will give it an ID to it of
11:08
rotation input so that we can Target in JavaScript minimum value will be 0 degree maximum will be 360 so you can
11:16
rotate it the maximum will be 360 and the initial value will be zero that's
11:21
all so if you see there will be this input field added choose angle initial value is zero and uh the maximum value
11:30
is 360 and minimum value is zero and if you see we
11:37
also input type we need to give it an ID to it also
11:44
for the speed which is speed input that's all so after you do this guys we
11:51
need to have two buttons right here first button will be for rotating it so rotate GIF so whenever you hit this
11:57
button we will actually make a post po request to actually rotate the gift we given an ID to it of rotate button and
12:05
we'll give it a bootstrap class of BTM BTN primary so this will be in blue color and the second button will be to
12:12
actually download the modified GI file so download and we will be giving a ID
12:18
to it of download button and a class of BTN BTN danger which will be of red
12:24
color so there will be two buttons added if you see right here guys rotate gift and download so this is actually the
12:31
user interface is almost complete guys and after lastly we just need to show the live preview of the GIF animation
12:38
whenever it is uploaded so we will give it an ID to it of preview and after
12:45
this we can have that's all we also need to include the sweet
12:52
alert Library guys which is essentially a very important Library which you if you want to show some uh
12:59
alert messages if your file is very huge gif file then it allows you to show
13:06
sweet little messages on the screen for the user to wait for the processing to
13:11
take place it's a alert Library sweet alert Library so we have actually included the CDN for this if you see in
13:18
the script tag so also we need to use the file saer Library which allows you
13:24
to download the modified file as an attachment in the browser so file saver is actually a
13:30
JavaScript third party package which allows you to actually download the files as an attachment whenever uh you
13:38
can see that so this is actually a JavaScript library it can even be used
13:44
as a CDN so I just included the CDN right here these are the two third party libraries that we using and also we will
13:51
be including our client side code which will be present client JS what I will do I will
13:59
make a folder in the public directory JS and I will write my code in client JS this will be the JavaScript code so
14:07
if I just alert high world and check out refresh the application and you can see
14:15
now it is working because we included this file script.js client.js so it is working so now inside our JavaScript
14:23
code guys so first of all we need to get all the references so what I will do is that
14:29
document. add event listener so whenever the Dom is loaded Dom content loaded
14:35
this event will automatically fire when all the elements are loaded in the browser so first of all we need to get
14:40
reference to all the elements by using document. getet element. ID which is file input and also we need to get speed
14:49
input so we have given all the these IDs in the HTML guys so we will also give
14:56
rotation input
15:04
then we have our download
15:13
button then we have our rotation
15:20
button so very simple code guys we are just basically getting the references of all the elements that we declared in the
15:26
HTML by using their ID and also preview live
15:36
preview and uh we have got our rotate button let me
15:45
call this as rotate button uh also the ID that be given is rotate button if you
15:53
check in the index. HTML we have given this ID rotate button download button
15:59
see rotation
16:04
input so that's all and now first of all we will Target our file input so we will
16:10
add this listener so whenever the file is changed this event will automatically fire this call back function will fire
16:16
whenever you allow choose this file this event will take place so what here we
16:23
need to Simply make a simple Ajax call to the backend server to actually
16:30
upload the file so for making this request we will actually use the fetch API first of all we'll get reference to
16:36
the actual input file that is selected by the user so file input. files zero this will actually get this
16:44
reference and then we'll make a simple form data object form data object and uh new form
16:55
data and we will basically append this file so form data append and we will append this file which is selected by
17:01
the user and uh now we will simply show the loading progress part to the user if
17:08
the file is really huge in that case we will use the sweet alert Library which is swell.
17:16
fire and here we can provide the title which is uh of the window which is uploading
17:25
GI HTML will be please wait dot dot dot
17:32
and so you can't click outside to actually close this so allow outside click property will be false so you
17:40
can't close this by clicking it so we have show confirm button will also be
17:46
false did open it will be a simple call back function here and here we will
17:53
simply show this loading essentially it will show this loading progress bar whenever you do it
18:01
now we will simply make a fetch API call so we will basically call this as
18:08
SL upload in the backend server we will actually make this end point where we will allow the user to Simply upload
18:15
this GI file this will be method will be post and body will pass this form data
18:21
and this will actually return a promise and this response will be coming right here you need to Simply convert this
18:28
response to Bon and this will again return a promise and this data will be
18:34
coming and now we can simply console log the
18:40
data so we also need
18:47
to just have the catch block as well if any sort of error take
18:53
place you can console log it and also we need to uh
18:59
have the finally block as well in that we will be hiding that progress bar so
19:04
we can simply hide that progress bar whenever your file is uploaded so we can
19:10
simply say uploading upload loading do close it will hide that bar that's all
19:16
so now we just need to make this fetch API call which in the backend server so
19:22
here first of all we need to include some middleware which is uh express. URL
19:27
encoded extended to false so this is required whenever you are working with forms body partel
19:34
middleware is required so express. Json so these two lines are required for if you're making an application which
19:40
involves HTML forms so this is required in the backend server you need to write these two middleware lines which allows
19:47
you to actually get the values which is selected by the form so these two lines
19:52
are necessary you need to write these two lines which is actually a body pass the middle so after you dri this we will
19:59
include the molter library which allows you to upload the file so molter so here
20:06
we will actually configure the Storage storage is essentially where you
20:14
will be actually be storing the files so molter provides this method dis storage
20:19
and here you will provide the destination where you will be actually be storing the file so request file call
20:24
back so here we will be providing the location so you will be storing it inside the uploads folder which will be
20:32
there in the public folder so public SL uploads so in the public folder you need to make a folder called as uploads so
20:39
here all your files will get uploaded so public SL uploads the second property is
20:44
the actual file name so what file name it will be given so request file call back and here again we will be giving
20:52
a unique file name so date. now so every time this value will be unique so file
20:58
do original name this is actual storage that we provided and now we can simply
21:05
make uh call the molter library pass the storage whatever the storage that you
21:11
define so we actually use the molter
21:16
function and provided the storage engine that's all so after we will actually make this
21:25
uh post request which is SL
21:33
upload so this we are calling it in the HTML file guys you will see that we are using fetch API and we are actually
21:40
making a Ajax call to this backend endpoint which is/ upload so right here in this we will actually be passing this
21:47
middleware which is upload. single it will first of all upload the file for US
21:53
upload file so this file it's a name parameter right here which you provided
21:59
right here in the right here this needs to be the same right here in the append folder whatever that you provide right
22:05
here file this needs to be the same right here so upload file so right here
22:11
we will declare a variable Global variable which will be original path we
22:17
just declared this variable we will use this variable in our code we will guess
22:23
original path is equal to request. file. paath and again we will be declaring
22:29
another variable which will be file path path dot for this we need to have our path
22:39
package like this so original path will be the actual
22:44
path and from this path we need to eliminate our public folder
22:51
so for that we can simply get the relative path path. relative public
22:58
and request. file. paath and then we can simply return this
23:05
as a Json so response. Json file path so it will actually upload this
23:13
file guys and it will return this path as a Json response back to the client site code so here we will be showing
23:18
this console log message data and let me try to refresh this application choose my GI file and uh you can see it just
23:27
happened uh the the file was pretty low and you can see the file is uploaded and
23:34
you will basically see uh in the browser this console log message will be
23:39
found a object is released and it contains this file path it Returns the full path of the file which is uploaded
23:47
which is there in the uploads directory upload SLG so now we just need to show this file in the browser in as a live
23:54
preview so how we can do that it's very simple so we have made this uh in the index
24:01
HTML we have given this diff which is we have given an ID to it of preview so what I can do we have actually have this
24:10
element so we can basically show it we can simply after this we can say
24:18
preview. inner HTML is equal to we can have a image tag image source is equal
24:25
to so we are using backtick symbol to actually dynamically put this data dot
24:31
file path we can close
24:37
this you can give an ALT parameter as well
24:44
review so if you refresh now if you select your file it will be shown in the
24:50
browser you will see that as a live preview so with this help of this code we are actually showing the live preview
24:56
so after that guys what we need to do is that we now need to make our speed input
25:04
so let's suppose if you change the slider we need to update the GIF with that values that you provide we need to
25:10
increase the speed or decrease the speed of the GIF animation so for doing this we actually we need to bind a
25:19
input for the
25:25
speed so right here
25:30
we can basically make a speed input we have have this element we can add an event listener to it of change so
25:37
whenever the slider value changes this event will automatically fire and right
25:43
here we can basically get the value of the speed input speed input. value of
25:49
the slider and we can say speed value do text content will be equal to speed
25:57
so we have actually given this pan you can see that we have given this pan an
26:02
ID which is speed value so we need to get get this uh speed value document.
26:12
get element by ID speed value so if you just
26:18
say speed value speed value do inner HTML
26:28
speed value do text content is equal to
26:36
speed speed input
26:43
dot uh if you see we have given this ID which is speed input input type range
26:51
speed input I just need to refresh here you can now see guys as I'm changing the
26:57
slider value it is automatically refreshing the value you will see 8.7 if I decrease it 0.6 again if I increase it
27:05
so you can see dynamically is it updating so whatever value that I select right here maximum is 10 and minimum is
27:12
0.1 so you can just see the automatically if I increasing or decreasing the value of the slider it is
27:18
automatically reflecting back inside the span time so now after doing this we
27:23
just need to after we get this value of the speed we need to just have a if
27:29
condition that if the value of speed is uh zero in that case we can simply say
27:35
to the user D speed can't be zero so we will not execute this code so we can
27:42
simply say return just for the safer site we are having the safe condition and then after
27:49
that we can simply again show a progress part to the user again this progress bar will simply
27:56
say processing give all these methods will be there you will
28:02
see we using sweet alert again the title will processing GI please wait so if
28:08
your file is pretty large in those cases it's very much mandatory that you show to the users some kind of a message so
28:14
that user can't navigate to a different page so it is very useful for user engagement so user Can See Clearly that
28:21
your processing the GI so after you show this message we'll make make a fetch
28:27
call SL speed to actually uh change the speed so
28:32
we'll make this method this will be a post method and we need to put the
28:38
headers we will send some information so this content
28:44
type will be equal to application SL Json because we are sending some Json
28:51
data that's why this header is important guys if you don't give this header you will get an error inside the body will
28:57
basically convert json. stringy and we will put the speed
29:03
will we will basically send this speed value whatever speed that we are getting
29:08
right here you will see speed we are sending it as a Json value so that's all guys after it
29:15
returns again a promise we need to convert this value to
29:23
Json or we can need to convert this into blob guys so sorry so this response will
29:29
be coming and here you can simply say if response dot if response is not okay in
29:34
that case we'll simply show a error message to the user that Network response was not
29:43
okay if no error take place in that case we need to convert this into a block so response.
29:49
block and again it will return a promise and this time we will actually get our
29:54
blob so that blob we can show that on the
30:01
screen just need to Simply console log it just to first of all make the backend
30:07
code so now we need to basically make this uh backend request which is inside
30:15
app. poost
30:21
speed so right here guys uh inside this
30:30
so now for this we need to import the fluent fmpg package so fluent
30:38
fmpg just make a variable require this Library fluent fmpg we installed this
30:43
package so right in this we will basically get the value speed request. body. speed after getting the value we
30:51
can simply declare a variable chunks and uh we can basically make this uh process
30:59
fmpg call it pass this original path that we stored if you see we have declared a global variable and we are
31:06
storing this original path request. file. path so whenever we upload the gif file so this path is stored inside this
31:12
variable so now we can use this variable in this fmpg method so this basically
31:18
contains some methods fmpg output options we can provide
31:26
this and this we can basically provide a filter Dash filter V and for the speed
31:32
we can say set pts and this will
31:38
be 1 divided by the actual speed
31:43
value and then we need to multiply this by pts that's all this is
31:49
actual mathematics that we need to use guys to actually increase or decrease
31:55
depending upon the speed value if the speed is larger in that case uh speed
32:00
will increase or if the speed is lower then the GIF animation will be
32:07
slow so after this this contains uh a on method which
32:15
you can basically listen for if any sort of error take
32:21
place we can say that a return a response 500 we can say error occurred
32:29
during processing if no error take place then we can
32:38
basically fmpg process. on and so if the
32:44
processing is completed then this automatically will execute this event end and here we can basically convert
32:51
the our output file to a buffer so we can say buffer do concat
32:58
and then we can provide chunks so chunks is actually the variable that we declared currently it is empty but uh
33:06
this buffer will actually have this chunks and we can say response. end
33:15
buffer so after that whenever we get some data this event will take place data and this chunk will be
33:23
there and you can simply push this chunks this push method is there in the arrays you can push the data right here
33:31
chunk which is there so whenever it is simply a pro process guys because we
33:36
don't want to create the output file in the backend server we are simply creating the output file from a blob and
33:43
then we can directly send that block back to the client site so we can also show a progress bar
33:50
as well so fmpg process and it also has this progress event
33:57
so this progress will be shown right here in the console log if you want to show it
34:04
processing you can show a progress
34:12
percentage like
34:19
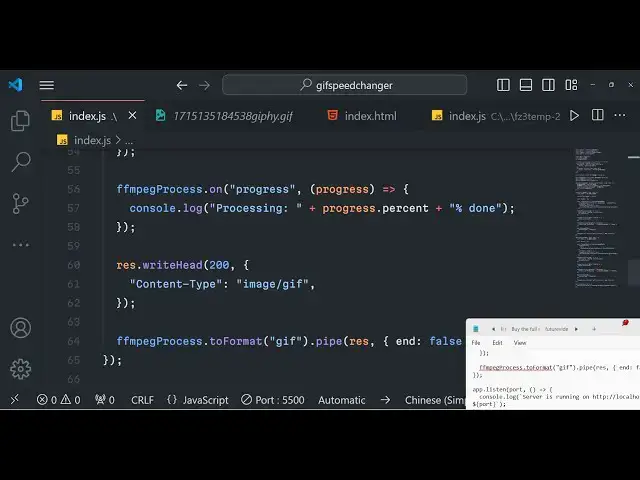
this so lastly guys we just need to send this to back to the client response
34:25
right head and 200 status code and right here in the object we will simply send
34:32
content type so extension will be this will be a image GIF animation so image
34:39
/g this you need to set before sending the response so right here you say fmpg
34:45
process dot we need to convert this into a format called as GIF and then we need
34:50
to pipe this response so dot pipe to the response and then end will be false
34:59
WR this you can see that that's all that you need to do guys it is sending this uh GIF animation output GIF animation as
35:06
a blob and we are basically catching this blob you will see we are converting this to a blob and we are console
35:12
logging it if I just refresh here and try to show you if I select my GIF animation change the speed processing
35:19
GIF if you see please wait it is showing this one and it is saying network response
35:26
was not okay if I see uh fmpg Doon is
35:31
not a function on line number index 53 let me
35:37
see F sorry this needs to be fmpg process
35:42
sorry so again if I refresh here change the speed you can see
35:49
processing GIF again some error take place I think
35:54
now you can see that guys a blob object is returned to us which is this size is one type is image/ GI we need to hide
36:01
this processing GI message as well guys for that we just need to go to client.js and if you see uh we can have this uh
36:09
finally block copy this and paste it right
36:20
here so if you refresh now uh do this so you can see that so
36:29
now to reflect this now to reflect this live preview what we can do is that we
36:35
can uh inside
36:46
this now to show this SL preview console log blog after this we Cano you can
36:51
basically say object URL we can create
36:56
URL create object URL and we can pass the blob as an argument it will construct
37:03
this URL and then we can say preview do inner HTML and then we can simply inner HTML
37:10
will be equal to the image tag again image source and this will be equal to the
37:17
object URL that we constructed
37:29
so that's all that we need to do guys we have this method in JavaScript if you want to construct an URL from blob we
37:37
have this method called as create object URL we are simply using this to actually get this object URL and then we are uh
37:45
appending it to the image tag so if you refresh click on this
37:52
uh so if I want to decrease the speed so so I think
38:01
uh let me see what is the problem it is saying
38:11
that the blob is not fine let me see I think I made some error here uh console
38:18
log blog
38:29
index.js
38:35
image/ so the full source code guys is given in the description so what I will do is that I will not waste your time I
38:42
think I made a some typo mistake so I will simply copy this
38:49
code I think some tyo mistake is there and
38:56
uh paste it this is the actual thing right here
39:07
and so this code is correct guys this code is correct if you see it is pushing
39:12
it and I think
39:19
some uh speed input is
39:44
in programming guys sometimes you can make mistakes so what I will do I will
39:55
simply paste it uh format the document this is you can
40:01
see that we have speed input we are getting the speed input value
40:07
speed all this thing is there and if I refresh
40:15
it now you can see that so as I you can see that uh the reduce GIF animation is
40:21
speed is reduced you will see that if I want to increase it now you can see that
40:27
the speed is increased you will see that so using this technique guys the
40:33
advantage is that we basically don't create output file every
40:39
time if I just uh D so these files are uploaded whenever you upload your files
40:45
so now if I upload my file so this file will be uploaded in the uploads folder
40:51
you will see input file so the advantage of this if I decrease the slider the
40:57
GIF animation will decrease the speed will be decreased if I increase the
41:03
slider it will increase so every time if I make the change the output file not be it will not be created in the backend
41:09
server it will simply be converting into blob and we are basically using Ajax to
41:15
actually showing this output GI file this is the advantage of this technique we are not every time creating this
41:21
output file so this reduces speed so this increases speed and also so you
41:28
will see that so this slider is working guys you will see for the speed GIF animation you can do that very
41:36
easily and now I will come to the download part so if I want to download this uh modified changes so what I will
41:43
do uh just go to your we have this button called as download button we can
41:49
bind a onclick listener to it so whenever we click this button what should happen
42:03
so whenever we click this button we should download the image file so preview image
42:14
preview dot query selector image and uh we can basically construct
42:22
this URL which is from preview image do source
42:27
and then the file name whatever file name that you want to give which is result. give and then we can say fetch URL and
42:36
uh it returns a promise response you need to convert this
42:42
response to
42:47
blob and again it will basically have the blob right here and uh we can save
42:53
this save as we just need to invoke this method of of the file saver Library pass
42:59
the blog with the actual file name that you did file name that's all this will
43:06
actually download the modified changes guys if you do
43:14
this if you click download the file will get downloaded you will see that the GIF
43:20
animation speed has been increased you will see that if you want to decrease
43:26
it click on download again it will get downloaded the size will be increased
43:31
because the GIF animation speed has been decreased you will see that so in this
43:36
way download button is working so now we come to the rotation part rotation part is very easy guys again we just uh want
43:45
to do the same thing that we did for Speed
43:50
again I will simply copy this the format is very simple guys for
43:58
the rotation as well we will actually get the rotation part we will bind this listener to
44:03
it so if you see we are doing the same things we are getting the value of the
44:10
rotation angle rotation input do value whenever you click this rotate button
44:16
this bind we are binding this on click event handle we are showing this uploading progressing processing GIF and
44:23
then we are making a fetch call which is/ rotate it will be a simple post request we are passing this rotation
44:29
angle as a json. stringy F and then we are actually getting a blob again
44:35
creating create object URL again inside updating this image image source object
44:42
URL and then finally hiding the uploading progress bar that's all and
44:49
now go to your this one uh this will also be the same I will simply copy this part which
44:56
is
45:02
paste it and here we just need to modify something this will be for
45:08
rotate we will get this angle request body R angle change this to
45:18
angle and original path we will get this because we are storing this original path in a global variable we have
45:24
declared it so that we can use it in different functions and this line will change guys output
45:30
options for the rotate option fluent fmpg do provides us for the rotation as
45:35
well fmpg have all the methods
45:42
so this will be video filter not Dash filter so Dash video filter and this
45:49
filter will be uh actually for rotating the GIF this is rotate angle OB rotate
45:56
angle or rotate angle so angle value that we are getting you will see that
46:01
dynamically and again this process will be the same we are sending this value right
46:07
here this will be the same so again if you refresh
46:13
now 45° I want to rotate
46:20
it so it is saying that speed is not defined
46:32
sorry this needs to be
46:40
angle if I provide 45° click on rotate you can now see the GIF animation has
46:47
been rotated click on download and now if you see it will be downloaded as a rotated GIF animation so we have do for
46:55
everything guys if you see for if you want to reduce increase the speed of GIF animation right in the browser if you
47:01
want to rotate it with a specific angle just provide it click on rotate GIF it will be rotated then you can download
47:07
the GIF animation you can check out this tool guys I have deployed this tool on my website free media tools the link is
47:14
given in the description if you want the full source code you can directly purchase the full source code of this
47:19
application you will get a zip file after you make the payment from Google
47:25
Drive this ZIP file you will get from Google Drive after you make the payment so this is actual directory structure so
47:32
if you're interested the link is given so please H that like button subscribe the channel and I will be seeing you in
47:37
the next live stream
#Fun & Trivia
#Flash-Based Entertainment
#Movies
#Online Video
#Multimedia Software
#Online Goodies
#Clip Art & Animated GIFs
#Animated Films
#Video Sharing