Up next in 10

Get the full source code of application here:
https://gist.github.com/gauti123456/5c10f6c8ce6cbe8f98d6920e9bed6046
Show More Show Less View Video Transcript
0:00
uh Hello friends welcome to this video
0:02
so in this video we'll be talking about
0:03
how to build a image converter inside
0:07
the browser using HTML canvas
0:10
API uh let me show you the demo of this
0:13
application it looks something like this
0:15
we are using bootstrap for building the
0:18
user interface of this application and
0:21
we allow the user to input the image
0:23
file then we have a lot of choices we
0:26
can convert to jpg PNG webp so it is a
0:30
image and webp converter you can convert
0:32
to any format that you want in this
0:35
drop-down GIF BMP
0:38
touf so let's suppose if I select any
0:41
image file this jpg image file if I
0:45
select if I want to convert this into
0:47
webp simply click on that and you will
0:49
see the live preview of the image
0:51
converted image there is a button out
0:53
there if you click that button you will
0:55
see your jpg image has been converted to
0:58
webp image you can directly open it in
1:01
the browser you can see that so now if
1:04
you take this webp image that you got if
1:09
you want to convert this into a PNG
1:11
image you will select drop- down
1:15
PNG now click on convert image and now
1:19
you will actually see your webp image
1:22
will be converted to PNG image so you
1:25
can back and forth you can do with any
1:27
format you can take any image
1:31
webp image you can convert this into
1:34
BMP and you will actually see the webp
1:37
image has been converted Tob
1:40
BMP so we will try to build this
1:42
application which is actually using the
1:45
HTML canvas API if you don't know about
1:47
HTML canvas API it is available for
1:51
every browser uh you can read more about
1:54
it in the docs so we will be using two
1:56
of the
1:57
methods which is two data URL which is a
2:01
very famous method which Returns the
2:03
base 64 URL of the
2:07
image so if you go to the method section
2:09
right here you can read more about
2:12
it so let's start
2:15
so I will delete everything and you need
2:19
a single index. HTML file for this
2:21
purpose no third party libraries we are
2:24
using we are simply using a single index
2:26
for HTML file and uh you will be able to
2:29
to build a image converter so just give
2:32
it a title and we also need to include
2:34
the CDN or bootstrap because for
2:37
building the user interface and after
2:40
this we will be attaching a class to it
2:44
of BG light P5 these are all bootstrap
2:49
classes then we'll be using the
2:51
container
2:52
class card MX Auto so this is actually
2:56
the card class padding for it will also
2:59
have have the Shadow and it will be
3:02
having a width let me give it a Max
3:05
width of 500
3:10
pixel inside this we will have a H1 tag
3:14
which will simply say to the user that
3:16
it's a image
3:20
converter align it in the center
3:22
position text Center FX is phone FS
3:25
phone size will be control three phone w
3:30
phone vit which is bold
3:32
mb4 so these are all bootstrap classes
3:35
so if you look inside your browser it
3:38
will look something like
3:40
this and then we allow the user to input
3:43
the image file so for that we will have
3:46
a div tag mb3 margin bottom
3:50
3 here you will be having input type
3:53
file we only be accepting images files
3:56
you say image/ star
4:00
and we'll be giving a form control class
4:02
or
4:05
bootstrap so it will look something like
4:07
this choose file
4:10
button so after this we will be having a
4:15
dropdown where we will have various
4:17
choices out
4:20
there so this will be for Target format
4:23
and you'll simply say to the user that
4:27
uh convert to format which format you
4:30
want to
4:32
convert so we be giving a form label
4:35
class of
4:37
bootstrap so here after this label we
4:40
will have different options a select tag
4:44
and inside this we will define various
4:46
options so first option will be for
4:50
image/ jpg so it will be holding the MIM
4:56
type this will be for jpg
5:02
so in the similar way we will have all
5:04
the choices let me paste the
5:07
choices we have jpg PNG webp GIF BMP Tif
5:12
you can add more choices if you have you
5:15
give it an ID here of uh to this select
5:19
field Target format giving a bootstrap
5:22
class of form
5:26
select so it will look something like
5:28
this
5:31
uh then we need just need a button to
5:33
submit the this form so after
5:36
this dgd class we will
5:44
use give it an ID to the button that is
5:47
convert
5:49
button Target it in the JavaScript and
5:52
just give it some bootstrap classes
5:55
which is BTN BTN primary
5:59
margin bottom four so this completes the
6:03
user interface and now we
6:06
concentrate on the
6:09
JavaScript so just
6:12
include the external file which will be
6:15
using
6:17
script.js so in this file you'll be
6:20
writing all the JavaScript code so first
6:22
of all what we need to do we just need
6:24
to get references of all the Dom
6:26
elements that we have declared which is
6:28
the image
6:31
input given an ID here of image
6:35
input Target format select so which
6:39
format you want to select let me get
6:43
this reference as well they given an ID
6:46
here of Target
6:48
format then we will be getting the
6:51
convert button reference
7:03
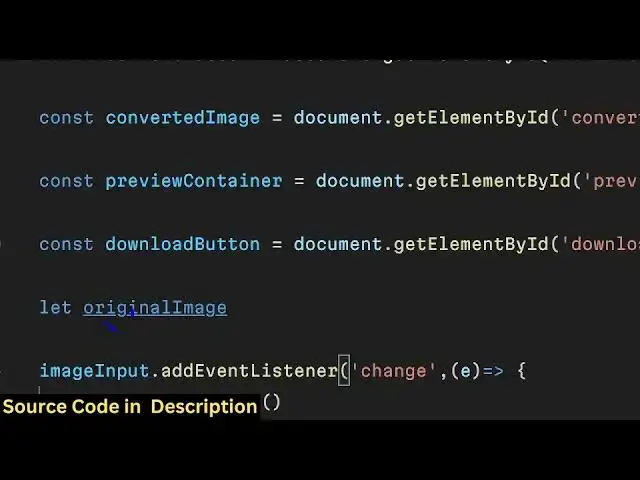
then we will be having the reference of
7:05
converted
7:08
image so this I haven't declared preview
7:12
container download button so these three
7:13
things will be coming uh after the form
7:17
when you submit the form outside this
7:20
form if you
7:22
see outside this we will have a div tag
7:25
and here we'll be showing the output
7:28
image so we'll be giving an ID here
7:31
preview container and this will not be
7:34
shown to the user so display none or
7:36
bootstrap class so it will be
7:39
hidden so this section will be hidden
7:43
whenever you load the application for
7:45
the very first time you give it
7:49
a fs5 FW
7:54
B so you'll simply say converted image
8:01
and then you'll be simply be having the
8:03
image
8:08
tag so you'll be giving an ID to this
8:10
image
8:12
tag which is converted image so that we
8:15
can Target in
8:18
JavaScript giving a bootstrap class
8:21
of preview
8:24
image and image fluid
8:34
and after this we will be
8:39
having a download
8:41
button just below this image so here you
8:45
will have this anchor tag we will give
8:47
it an ID to this anchor tag which is
8:49
download
8:50
button so this will simply say to the
8:53
user that
8:55
download converted image
9:03
giving a bootstrap class of BTN
9:07
BTN success to make it green margin top
9:12
four and it will also be not shown so d
9:14
none so we have given both these classes
9:17
right here D N D N it will not be shown
9:20
to the user early on and also make sure
9:23
you give it a download attribute because
9:25
it's a download button that's why so now
9:28
coming back to the JavaScript we do need
9:30
to get
9:34
references
9:36
similarly to the preview container as
9:42
well we have given an ID here to
9:51
this and similarly the download button
10:04
so now you have got all the references
10:07
of all the Dom elements now we can uh
10:10
declare a variable which is original
10:15
image so you'll be using this variable
10:18
in this script so image input first of
10:20
all let me bind a onchange event handler
10:23
to this input field so whenever the user
10:25
selects a image file this event will
10:27
trigger and here here we need to read
10:30
the
10:31
image first of all we do need to prevent
10:33
the auto submission of the form and then
10:35
here we will be check if the image is
10:39
correct in that case we will use the
10:42
file reader API once again to read the
10:45
image in the browser file reader API and
10:48
then this reader object contains a event
10:52
which is
10:53
onload so when the image is loaded
10:55
successfully this call back function
10:57
will execute and inside this function
11:00
we just need to read the image original
11:02
image is equal to New Image
11:05
Constructor and then original image.
11:07
source is equal to e. target. result so
11:11
e. target. result actually return the
11:14
base 64 code of the input image so this
11:17
value base 64 Cod and we are
11:19
initializing it to original image.
11:21
Source this variable Global variable
11:24
that we
11:25
declared so after reading the input
11:28
image file
11:29
now we need to attach The onclick
11:32
Listener to the convert button so when
11:34
we click the convert button this event
11:36
handler will fire so here this call back
11:39
function will execute so here we need to
11:43
first of all check if the original image
11:46
is
11:48
not so this means that if the original
11:50
image is corrupted or it is not defined
11:53
in either of these cases we'll simply
11:55
show a alert message to the user that
11:58
please upload an image and
12:02
return so if the image is already there
12:06
then in that case you will get the value
12:09
of the target format that the user has
12:12
selected Target format select dot value
12:16
so whatever format the user has selected
12:18
from the drop-
12:20
down so after we will get this value and
12:25
now we'll be using the HTML canvas API
12:27
for that we will be creating the element
12:30
using Create element function of
12:34
JavaScript and then we'll be getting the
12:36
2D context using canvas. get context
12:43
function and we'll be initializing the
12:45
canvas width is equal to the original
12:48
image width and original canvas
12:54
height original image dot height
13:00
and context dot we using this function
13:03
draw image to actually draw the image on
13:05
the canvas so we will draw this original
13:08
image x coordinate will be zero y
13:11
coordinate is zero that's all so after
13:14
drawing this we will be getting the we
13:17
can now convert the canvas
13:22
image to blob so we have a function
13:26
right here in this canvas API which is
13:28
two blob
13:29
this function
13:31
returns a blob here right here and now
13:36
this block can be converted to a
13:42
URL so we have a function right here
13:44
url. create object URL this is also a
13:48
part of the HTML canvas API so here it
13:51
takes the blob and returns a
13:57
URL and now we get this URL right here
14:00
so that we can do converted image
14:03
URL converted image do
14:07
source is equal to converted image
14:11
URL and now when the image loads
14:14
successfully converted
14:19
image we again have this onload function
14:22
so when the image is successfully loaded
14:25
we now need to show the preview
14:27
container so we need to
14:30
uh unhide it so unhide it we need to
14:33
remove that hidden class which we Define
14:35
in the HTML which is d
14:39
none and also show the download
14:48
button and download
14:50
button download is equal to convert this
14:54
is actually the file name that we are
14:56
giving so the file name will be in this
14:59
is
15:00
bracket converted image you can give any
15:03
file name converted image Dot and Then
15:05
followed by the extension
15:08
name so this depends upon which format
15:11
the user has selected so in our case uh
15:15
it is present in this value Target
15:17
format Target
15:20
format and we can now use a split
15:23
function
15:24
here to actually get the extension
15:32
the first
15:34
value this will be the full name
15:37
alongside with the extension now we can
15:39
simply say show the download button
15:42
remove the class of
15:56
D so here uh if you just see two blob
16:00
function right here if you closely
16:08
notice here we need to pass the target
16:12
format as a second argument to this
16:20
uh to this function if you
16:27
see so this is actually the canvas to
16:29
blob function so here it takes two
16:32
arguments first is the blob and second
16:33
is the target
16:36
format so both these things are there
16:39
Target format we are getting the value
16:41
from it so this completes the
16:43
application if I now test this
16:44
application if
16:48
I select convert this into webp click on
16:54
convert I think some error has taken
16:56
place cannot treat properties of null
17:02
image
17:05
input uh let me see uh image input let
17:09
me see if we have given an ID
17:13
here you haven't given an ID so just
17:16
give it an ID right here image input
17:29
convert to webp please upload an image
17:32
it is
17:34
saying file is not
17:45
defined uh let me see in the JavaScript
17:49
code right here it is telling me in this
17:52
line number
18:01
now just wait guys let me
18:05
see oh we forgot to get the file the
18:09
actual file we do need to get the actual
18:11
file which is const file and here from
18:15
this you can say e. target. files the
18:19
actual file which is zero so now we are
18:22
getting we are comparing it in the if
18:25
condition after getting that file so if
18:29
I make that change once again select the
18:33
file select the
18:35
format please upload an
18:43
image I think we do need to refresh the
18:46
page for
18:53
that uh please upload an image file
19:08
[Music]
19:13
I think some typo mistake has happened
19:15
guys so what I will do this is my code
19:18
right here you can find the full code in
19:21
the
19:25
description sometimes in
19:27
programming type of mistakes can
19:30
happen so this is the overall
20:08
let see
20:42
this was the overall application guys
20:44
the image converter right in the browser
20:51
itself so all the source code will be
20:53
given in the
20:54
description so thank you very much for
20:56
watching this video and I will be seeing
20:58
than you in the next one
#Other