live_tv
Livestream Starting Soon
00
Hours
:
00
Minutes
:
00
Seconds
Up next in 10

Get the full source code of application here:
https://gist.github.com/gauti123456/5d628f12a5a4402717f6ea9730e67d29
Show More Show Less View Video Transcript
0:00
uh Hello friends welcome to this video
0:02
so in this video we'll be looking at how
0:04
to build out a image resizer using
0:07
canvas API and right here in inside the
0:10
browser using HTML CSS and JavaScript
0:13
we'll not be using any third party
0:14
Library it directly works in the browser
0:16
using the builtin canvas API that you
0:21
have inside your browser to draw
0:23
anything on the screen so using that
0:26
canvas API you will try to resize images
0:29
so you can actually pick any image of
0:31
your
0:32
choice so if
0:36
I pick this image so as you pick the
0:39
image it the width and height will
0:41
automatically the original width and
0:43
height will be populated in this input
0:45
Fields now you can resize your image let
0:48
me make the width as 200 and let me
0:51
change the height to 200 and resize it
0:55
you will now see the image will resize
0:57
to 200 WID 200 height now you can
1:00
download the resized image by clicking
1:02
the download button and you can see that
1:04
the image has been re successfully
1:07
resized and uh you can just see here so
1:10
this is works in the browser it's a
1:12
fully client side app you pick any image
1:15
of your choice then it automatically
1:17
fills out the original width and height
1:19
and then you can resize the image
1:22
accordingly adjusting the
1:25
values like this and now you can see
1:27
that so
1:32
so all the source code is will be there
1:35
in the description of this video so you
1:37
can go to it I I am using bootstrap for
1:40
making this the UI user interface of
1:42
this application so let's start so first
1:45
of all I will make a new template we'll
1:50
simply say image
1:52
resizer using canvas
1:56
API so for that we do need to include
1:59
the boot strap CDN so just make sure
2:02
that you include this after the title
2:08
CDN and then we just need to assign a
2:11
class of BG
2:13
light padding five these are all
2:15
bootstrap classes and then we'll be
2:18
using the container
2:21
class and a card
2:24
class align it in the center position MX
2:27
Auto padding will be four and it all Al
2:30
be having some
2:31
Shadow be giving a style parameter Max
2:34
width will be around 500 pixel inside
2:39
this you will have a H1 heading which
2:41
will simply say image
2:46
resizer we align this heading in the
2:48
center position font size will be three
2:52
font W font weight will be Bol margin
2:56
bottom
2:57
four so it will look something like this
3:00
if you
3:03
refresh and after this we allow the user
3:08
to have input field input type
3:12
file and we will only be accepting uh
3:15
image files so we'll simply say image/
3:25
star we will also be giving an ID to it
3:27
so that we can Target in JavaScript
3:29
image
3:31
input so it will look something like
3:37
this we'll give it a form control class
3:41
or
3:43
bootstrap and similarly we will have uh
3:47
a button to submit the form but before
3:50
that we do have
3:53
the input fields for width and height
3:56
for controlling the size of the image so
3:59
we will have these two input Fields
4:01
width and
4:03
height width all these values will be in
4:09
pixel so then we'll be having the input
4:12
type will be here number because in
4:14
numeric value ID will be giving as width
4:18
class again form control same bootstrap
4:22
class and it should be
4:25
required so you'll simply copy this one
4:28
more time
4:30
repeat this for
4:39
height so you'll actually see two input
4:48
fields and then we will have a button to
4:52
submit the form
5:00
this will be
5:03
dgr inside this you'll have a button
5:06
here this will say resize image we'll be
5:10
giving an ID here to this button which
5:12
is resize
5:14
button class BTN
5:19
BTN
5:27
primary margin bottom
5:32
four this is actually the interface is
5:35
complete now we need to write the
5:37
JavaScript code for this and uh we will
5:42
simply include the at the bottom
5:46
script.js so we will write the
5:49
JavaScript code for this
5:52
so first of all we will get all the
5:55
references of all the Dom elements using
5:59
do get element by ID image
6:03
input which is a input field to get
6:06
access to the input file then we have
6:09
the input fields for calculating the
6:11
width and
6:13
height where the user will enter the
6:15
width and the
6:21
height then we have the resize button
6:32
then we have uh the image that we want
6:35
to show the resized image we have given
6:38
an ID to it of resized image then we
6:42
have uh the container in which we need
6:45
to
6:46
show the resized image we haven't
6:50
created this yet so I think we do need
6:53
to create this preview container we need
6:56
to give it an ID here just go to your
6:58
index.
7:00
HTML and right after we you complete
7:04
this one you need to have a div which
7:07
will have this ID of preview
7:10
container and by default this will not
7:12
be shown to the user so we have a
7:15
display nonone class in bootstrap and
7:18
we'll be aligning it in
7:20
the
7:24
center so it will actually show that
7:27
resized MHP
7:30
preview it will only be show when once
7:32
you click the resized image button
7:35
that's why we are given a hidden class
7:37
to it it will not be shown to the user
7:41
when you load the page for the very
7:42
first
7:45
time after this S2 we'll have a image
7:48
tag we'll give it an ID here to the
7:50
image so that we can Target in
7:52
JavaScript
8:02
so these are all bootstrap classes
8:03
preview image and image fluid to make it
8:07
responsive and then we will also be
8:10
having
8:11
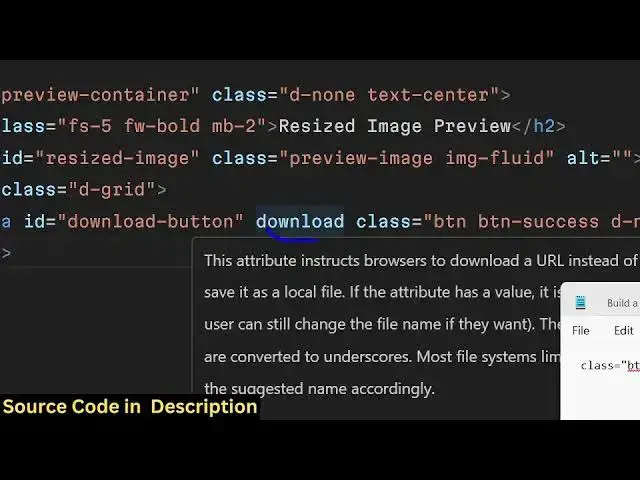
a download button to actually allow the
8:14
user to download the file image file and
8:18
give it an ID here to download button
8:29
simply say here uh download
8:33
resized
8:35
image you also be giving a download
8:38
parameter to this anchor element
8:42
download this makes it download the file
8:45
this download
8:46
attribute coming back to the so if you
8:50
refresh now your download button and
8:53
those section will not be displayed
8:54
because we assigned that display non
8:56
class so now in the JavaScript after we
8:59
get all the references you also need to
9:02
get the reference of the download button
9:04
so simply write
9:08
that after this you'll be declaring a
9:11
variable which will hold
9:13
the original image in the variable
9:17
original image and this image input we
9:21
will bind a onclick oh sorry change
9:24
event handler so whenever
9:27
user uh selects any image file this
9:31
event will fire on change event handler
9:34
you will get access to the file which is
9:35
selected by the user event. target.
9:39
files we need to only select the first
9:42
file because we are only be selecting a
9:45
single file at a time so for that file
9:48
if the file is valid in that case we
9:50
need to read the file so for this we
9:52
will be using the file reader
9:55
Constructor and it contains a onload
9:58
function
9:59
so when the file when the image is
10:01
successfully loaded this function will
10:04
execute and we need to read the image
10:07
file by invoking a new image Constructor
10:11
like this and or original image. source
10:15
and here we will get the base 64 code of
10:17
the image so in this way we are reading
10:20
the
10:22
file and again when this original image
10:26
is
10:27
loaded it again has this this onload
10:32
function and inside this function what
10:35
we can do we can adjust the width value
10:38
width input dot value and this value
10:41
will be coming from the original image
10:44
and its width and
10:49
uh and similarly the height input we
10:52
will initialize this is actually the
10:55
original image width and original image
10:58
height so so like this so we are
11:02
initializing if you open the application
11:04
for the very first time then we are
11:06
initializing those width and height
11:07
input Fields with the original width of
11:10
the image and original height of the
11:12
image so after you do this we do need to
11:15
write a line which will be reader. read
11:20
as data
11:21
URL this actually triggers this function
11:25
this onload function this line read read
11:29
data URL this actually this method is
11:33
responsible for reading the base 64 code
11:35
of the image then this this line
11:38
triggers this line and this will
11:42
execute so the order is not important
11:46
this line will execute first and then
11:48
this function onload function will
11:50
execute after that
11:53
so if you just uh choose a image file
11:58
you will actually see as you read the
12:00
image file original width and height has
12:02
been populated if you change the image
12:06
you will see the width and height will
12:08
change because the image is different
12:10
and the original width and height is
12:12
there now you can change these values if
12:15
you assign any
12:18
values and then click resize we do need
12:21
to bind a on click listener to the
12:23
resize button so you need to say resize
12:26
button. add event listener when we click
12:29
this button this call back function will
12:32
execute and now we need to get the new
12:34
width the user will change the width and
12:38
height input field so as this is a
12:41
number field we need to use parent here
12:43
to type cast the value to a number so
12:47
width input do value whatever is the
12:49
value coming we are typ casting it with
12:51
part in similarly New
12:55
Height par
13:02
so after getting all these values we
13:05
simply need to Simply say if the
13:07
original
13:08
image is not a valid image
13:16
or or if the new width that the user has
13:20
uh provided is not a number is if it is
13:23
a character or a
13:26
numeric uh special character in either
13:28
of these cases we are using the r
13:33
operator same goes with the height as
13:36
well in either of these cases we do need
13:38
to alert the user that uh
13:43
please
13:46
upload an image and enter valid
13:52
dimensions and then just return from the
13:54
program not execute
13:57
it and then we need to Simply say we
14:00
need to get reference to the canvas API
14:03
so for that we need to create a dynamic
14:05
canvas element in the Dom by using
14:08
Create element function in
14:10
JavaScript so after that we need to get
14:13
the context using canvas. get
14:16
context function we need to get the 2D
14:20
context and then canvas width is equal
14:24
to the new
14:26
width and canvas height
14:29
is equal to the new
14:33
height so this is a really standard way
14:36
then we'll be using the draw image
14:38
function in order to draw to the canvas
14:41
which is the original
14:43
image x coordinate y coordinate and the
14:46
new
14:48
width and the new
14:51
height and then you will be you can
14:54
simply get the resized uh image URL by
14:59
using if canvas. this function which is
15:02
two data
15:04
URL again this will return the base 64
15:07
code right here read as data URL reads
15:11
the base 64 code this will actually
15:13
create a new image having a brand new uh
15:17
Bas 64
15:19
code and here you need to provide the M
15:22
type we need to create a PNG file you
15:25
can even create jpg as well just write
15:27
here jpg I will simply write
15:30
PNG and then the URL you will come
15:33
desized
15:35
image do source is equal to the resized
15:38
image
15:40
URL and then if this image is loaded
15:44
successfully this function will
15:50
execute and here we need to show the
15:53
container visibility for that we need to
15:56
remove that uh d n class that we have
15:58
given of bootstrap dynamically and also
16:01
we need to show the download button as
16:03
well so resized image
16:07
URL download we also need to show the
16:10
download button so again we need to
16:11
remove that d n class that we have given
16:15
so that's all this completes the
16:17
application and if I refresh the
16:19
application now if you choose the image
16:22
file change
16:25
the
16:26
width if you increase the
16:29
height as well resize image and now you
16:32
can see that the image has been
16:33
successfully resized click download you
16:36
will actually see the width has
16:38
increased the height has increased same
16:40
goes of any
16:43
image if you make the width
16:49
smaller so like
16:54
this it's a great application guys you
16:57
can make your without any using third
16:59
party Library we are all using the
17:01
canvas API which is a built-in API in
17:03
browser and then we using simple
17:05
JavaScript to actually build this tool
17:07
thank you very much please hit that like
17:09
button subscribe the Channel all the
17:10
source code will be there in the
17:12
description of this video and do visit
17:14
my website free mediat tools.com here
17:17
you will get nice little tools every day
17:19
I will add nice quality tools on this
17:21
website so do check out check this
17:24
website as
17:26
well unlimited tools are there related
17:28
to audio video and video processing so I
17:31
will be seeing you in the next one
#Multimedia Software