Up next in 10

Get the full source code of application here:
https://gist.github.com/gauti123456/a599aabbd57cdc05e1fc9a98571fafc5
Show More Show Less View Video Transcript
0:00
uh Hello friends welcome to this video
0:02
so in this video we will again be
0:04
looking at a uh HTML canvas API project
0:08
this time we will be building a image
0:09
compressor right in the browser itself
0:12
image compressor allows you to reduce
0:14
the quality of images or save space as
0:17
well if you have a lot lot of uh High
0:21
size images you can use this tool so we
0:24
have this interface which is coded
0:25
inside bootstrap we have a choose file
0:27
button where we allow the user to Simply
0:30
select any image file let's suppose if I
0:33
select this image file JPG file and we
0:38
have this compression quality 1 to 100
0:41
you can provide from any value from one
0:45
which is lowest quality 100 is the
0:47
highest let me provide
0:51
50 click on compress image so you will
0:54
see the live preview of the image the
0:57
original size of this image is 582
1:00
kilobytes let me download this compress
1:02
image and now if you see the size has
1:05
been reduced to
1:08
50.8
1:09
kilobytes this is actually the
1:13
size almost 51
1:16
kiloby if you see the
1:20
image you can just see you can't no
1:24
notice any
1:26
difference because it is 50% compressed
1:30
and that's why you have uh redu the
1:35
compress the size from 582 to 51
1:37
kilobytes without noticing any quality
1:41
difference so this was the original pick
1:45
you'll
1:46
see both the pics looks normal this one
1:50
is 582 but the this one is 50 KB so in
1:56
this way you can choose any file that
1:59
you want to red use a compress just
2:01
select the compression quality if I
2:04
select a very low quality let's suppose
2:06
five then I will notice a
2:09
SED you can see the difference right
2:12
here if I open this in new tab you can
2:14
see the image is slightly reduced uh
2:17
very much reduced and you can see the
2:20
difference so the size will be pretty
2:23
small right here 13.6 K so in this way
2:27
you can use this application all the
2:29
source is given in the description of
2:31
this video so now let's get started so
2:34
let me show you how I build this
2:41
so so for building this you do need to
2:44
use bootstrap right here I'm using
2:46
bootstrap for the user interface so I
2:49
have already included the CDN of
2:50
bootstrap so simply include
2:58
that so so we will have a in the HTML
3:03
container
3:10
class so inside the container class you
3:13
will have
3:16
uh card MX Auto
3:20
E4
3:23
Shadow so this is all the HTML guys uh I
3:26
don't want to write HTML that's why what
3:29
I will do I will copy this HTML just to
3:32
reduce some time because it is
3:35
redundant all this HTML I just want to
3:39
concentrate on the JavaScript code I
3:41
just want to explain you what is
3:42
happening so this is all the HTML code
3:45
and
3:47
uh if you if I just open and show to you
3:51
this is actually card like structure we
3:53
have this wigets out there choose file
3:55
button comparation quality input field
3:57
and a button right here that's all that
3:59
we have in this interface so what I will
4:02
do uh for including the JavaScript which
4:05
this tutorial is about I will include
4:08
this external file
4:10
script.js so
4:14
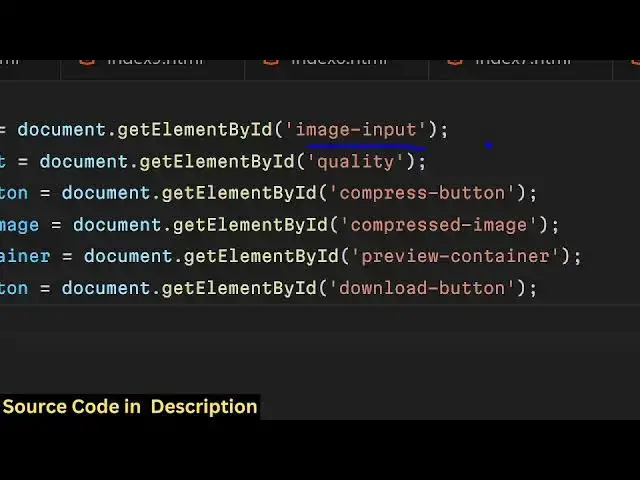
now we need to get all all the
4:18
references which we have defined so one
4:21
by one what I will do I will paste all
4:24
the references so this is for first of
4:27
all this image input from which we are
4:29
taking taking the user input the quality
4:32
is a slider of the compression quality
4:34
and then this this is a compress
4:37
button this is a output compressed image
4:40
this is a preview container where we are
4:42
showing the compressed image and this is
4:45
a download button to actually download
4:47
the output file so we have got all the
4:50
references of all the Dom elements now
4:53
we need to declare the variable for
4:55
original image so here you'll be storing
4:58
the
5:00
original image in this variable so now
5:03
inside image input we need to bind a
5:06
event
5:07
handler which is on change so this will
5:11
fire every time whenever users allows
5:15
to uh
5:17
simply when
5:19
user selects any image file this event
5:22
will fire and here will will be catch
5:26
the file which is selected by the user
5:28
by using do Target files we'll select
5:32
the first file and here in this if
5:35
condition we will check if the file is
5:36
valid in that case we will read the file
5:39
using the file reader API
5:43
so new file reader which is present in
5:47
every browser and reader it contains a
5:50
onload function when the image is
5:52
successfully loaded in the Dom this
5:54
event will automatically fire and here
5:56
in this we will be initializing this
5:58
original image with the new image
6:02
Constructor and we'll be manipulating
6:04
The Source parameter of this to actually
6:07
the result of this e. Target Ro result
6:10
this actually sends the base 64 code of
6:14
the image e. target.
6:16
result and the we also need to write
6:19
this line of code which is reader. read
6:22
as data
6:23
URL this again Returns the base 64 code
6:31
this is a very standard way if you have
6:34
studied a little bit of JavaScript you
6:36
will know what I'm doing we are simply
6:37
reading the input file which is selected
6:39
by the user in the memory of the browser
6:43
then after that what we need to do we
6:46
need to bind a onclick listener and we
6:48
click the compress button so we'll be
6:52
binding a on click listener to this
6:56
button so here you'll be comparing if
6:58
the or
7:02
image is not defined or is not uploaded
7:06
in that case we will be showing a
7:08
warning to the user that please upload
7:10
an image first and then return we will
7:13
not be executing the rest of the code so
7:16
if the image is uploaded then you need
7:19
to get the
7:20
quality so the quality here will be a
7:24
numeric value so that's why we will be
7:26
type typ casting the value coming using
7:30
par in quality input.
7:34
value and we will be dividing it by 100
7:36
to get the percentage value and then
7:40
we'll be using the HTML canvas
7:43
API we will be creating a dynamic
7:45
element using Create element
7:48
function in JavaScript we'll be creating
7:51
a canvas
7:52
element and we'll be getting the 2D
7:55
context of it by using canvas. getet
7:58
context
8:01
and here you'll be initializing the
8:03
width and the height of the canvas to
8:06
the original image
8:08
width
8:10
canvas
8:14
height original image
8:18
height after getting the canvas width
8:21
and height we'll be drawing the image to
8:23
the canvas by using the draw image
8:25
function which is available you'll draw
8:27
the original image X coord y coordinate
8:30
will be 0
8:31
0 and this actually returns a function
8:34
to us two block this function is present
8:37
in HTML canvas API and this will return
8:40
the
8:42
blob object to us and here we can
8:46
actually get the base 64 URL of the
8:53
image we can declare compressed image
8:56
URL
9:00
and here you can use url. create object
9:04
URL
9:05
block compressed
9:07
image source is equal to compress image
9:13
URL and compressed
9:17
image when it's
9:19
onloaded this function will
9:27
execute so here we can show the output
9:31
image on the download button and just
9:34
make sure you also put this function
9:37
which is two blob function that you see
9:40
if you are exporting your canvas to a
9:42
image file this function is responsible
9:45
to block it takes the second argument is
9:47
the MIM type so this MIM type will be we
9:50
are converting it to uh JPG file so the
9:55
the third argument is the quality so
9:57
here we are providing the quality of the
9:59
compression as the third argument so
10:01
quality we are taking it from the user
10:04
so three arguments are passed first is a
10:06
blob second is a MIM type third is the
10:08
quality of the image now when the
10:11
compressed image is loaded we need now
10:13
need to show it in the browser so
10:15
preview container do class list we need
10:18
to remove that hidden class that we have
10:20
given d none which is a bootstrap class
10:24
download button we will simply make the
10:27
URL of the download button to be
10:29
compressed image
10:32
URL download button we again need to
10:36
show and for the name of the image we'll
10:39
be simply be saying compressed image.
10:43
jpg download button do class list.
10:49
remove d
10:53
none that's all this completes the
10:56
application and if I now run the
10:58
application in the
11:00
browser if I pick the image the original
11:04
size you can see it is
11:06
582 if I make the compression quality 50
11:11
click on compress image you will see
11:13
that the image is showing we have the
11:15
download button if I click that the
11:17
reduce size from 582 to 50 kiloby so the
11:21
image is successfully compressed this is
11:24
a really powerful technique guys we
11:26
haven't used any third party Library
11:29
it's a buil-in browser technique how we
11:31
reduce images in the browser using this
11:34
HTML canvas API the function used right
11:38
here is two
11:41
block uh compared to other techniques
11:44
server side techniques this will not be
11:46
a good technique but still if you
11:48
haven't got any option you can use this
11:51
technique to reduce your images or
11:54
compress it it's a really good
11:56
application good online tool that you
11:58
can develop and uh thank you very much
12:02
for watching this video all the source
12:03
code will be given in the description do
12:05
visit my website free medat tools.com to
12:08
get all these tools I also deployed
12:11
image compressor tool on my website if
12:14
you want to bulk image compressor you
12:16
can Dr drag and drop multiple images
12:19
right
12:22
here so it's a bul tool right can you
12:25
can see that you can adjust the quality
12:28
click on compress and all these images
12:32
will be compressed you can then download
12:34
so you can visit my website free mediat
12:37
tools.com it's a fantastic website to
12:40
get all these tools for complete free
12:43
and I will be seeing you in the next one
#Programming