Up next in 10

Build a Fluent-FFMPEG Video Editor in Electron.js With Live Preview in Video Player & Progressbar
Jan 9, 2025
Buy the full source code of the application here:
https://procodestore.com/index.php/product/build-a-ffmpeg-video-editor-in-electron-js-with-live-preview-in-video-player-progressbar-gui-desktop-app/
Hi Join the official discord server to resolve doubts here:
https://discord.gg/cRnjhk6nzW
Visit my Online Free Media Tool Website
https://freemediatools.com/
Buy Premium Scripts and Apps Here:
https://procodestore.com/
Show More Show Less View Video Transcript
0:00
uh hello guys welcome to this video so
0:02
in this video I will basically tell you
0:04
that how to develop a fmpg video editor
0:09
inside
0:10
electronjs which will be a simple
0:12
desktop application and I've basically
0:15
developed this application you will see
0:17
that it has a rendered file and it's a
0:20
main process as you know in electronjs
0:23
there are two Global two processes which
0:27
is the actual main process which lives
0:29
in the node GS code and this is the
0:31
render process which lives on the HTML
0:33
code so we have used HTML CSS and
0:36
actually JavaScript to build this
0:38
application so we have also bundle fmpg
0:42
right here in the GUI itself so if you
0:44
don't have fmpg installed you can still
0:46
use this application we have all the
0:49
executables available inside the bin
0:51
folder fmpg FF play and FF Pro so first
0:56
of all the link is given guys you can
0:58
directly purchase the full source code
1:00
after you purchase the source code you
1:02
will get a zip file from Google Drive
1:04
you just need to extract the zip file to
1:06
actually get this directory structure
1:08
and the very first thing that you will
1:10
do is that you will simply npmi this
1:14
will actually install all the modules
1:16
which are present in the package.json
1:17
file and then it will actually create a
1:19
node modules folder you can see this
1:22
node modules folder in the left hand
1:24
side it will automatically create this
1:26
folder and that's all so after you do
1:29
this
1:30
you just need to run this application by
1:33
invoking this command which is npm Run
1:35
start so as you execute this command
1:38
guys electron will start the application
1:40
and you will basically see this is the
1:42
actual interface of the application here
1:44
you need to drag your video so whichever
1:47
video you need to process you need to
1:49
Simply drag and drop so this is my video
1:52
here I will simply drag and drop as you
1:54
see as I drag and drop the video will
1:57
play in the video player and uh 7
2:00
minutes 30 second long video is this you
2:02
can just full screen as well so the
2:05
video player will play this is the
2:06
actual title of the video it will load
2:09
this information using the FF Pro uh
2:12
Library it will get all this information
2:14
the path of the video name of the video
2:16
you can even change that also and then
2:19
we can set the start time end time save
2:21
the screenshot if you want to get the
2:24
thumbnail of the video you can at any
2:26
location in the video you can click this
2:27
button save screenshot it will take the
2:29
screens of the video and save it as a
2:32
PNG or jpg image you can even REM remove
2:35
the sound in the video or you can change
2:38
the resolution create a gif as well from
2:40
this video and you can also change the F
2:44
FP FPS as well and by default it will
2:48
use the GPU if you do have a built-in
2:51
GPU I do have a GPU installed in my
2:54
system so it will use that and it will
2:56
increase the speed of the fmpg command
2:59
and then you can even play with the
3:00
speed of the video you can change the
3:03
speed of the video to half speed normal
3:05
speed 2x faster 4X faster and then you
3:07
can have a button right here to cut it
3:09
so first of all guys I will show you the
3:11
functionality if I play the video you
3:14
will see the video will
3:18
play so I can go to any location in the
3:21
video you can see the video is playing
3:22
right here so the very first thing I
3:24
will show you basically let's suppose
3:26
you want to cut the video from any
3:28
location so I I will basically first of
3:30
all set the starting point so I want to
3:33
set the starting point from 55 seconds
3:36
so I want to cut from this location so I
3:39
will simply click this button set start
3:42
time so basically as I click the button
3:44
this time has been automatically
3:46
recorded this is my start time and now I
3:49
want to move to any location to set my
3:52
end time so I want to trim the video
3:55
between 55 second to one uh I want to
3:59
trim this portion which is 5 Second so
4:03
from 55 second to 1 minute I will now
4:07
click this button set and time so it
4:09
will basically record it will uh trim
4:13
for 5 seconds so the length of the video
4:16
will be 5 Second as you can see this is
4:18
the end time I basically just uh click
4:22
the button as I just move in the video I
4:24
just click this button and now you can
4:27
basically cut this you will also see a
4:29
progress bar as well so it will do the
4:32
processing and after that it will tell
4:34
you the location of the video it has
4:36
created you will see my video has been
4:38
created and it will automatically open
4:40
the location after it process the video
4:42
if I open the video you will see it will
4:44
play for 5
4:46
Second so my video has been successfully
4:49
trimmed for 5 seconds you will see the
4:51
length of the video is 5 Second we have
4:53
successfully trim that portion this is a
4:56
really good application desktop
4:58
application if you don't want to visit
4:59
online websites trim your videos you can
5:02
directly use this GUI application which
5:04
is built in in
5:05
electronjs and you will get all the
5:07
source code in the description after you
5:09
purchase it you will get this fmpg
5:11
Library as well if you don't have fmpg
5:14
installed I bundle this fmpg directly in
5:17
the application itself you will get this
5:20
and now let me show you some more
5:22
features of this application let's
5:24
suppose you want
5:26
to if you see basically this file has
5:29
been saved
5:32
uh let's suppose you want to remove the
5:35
sound as well
5:38
so I basically selected this again let
5:41
me select this location
5:44
3.43 second let me set the start time so
5:47
it will calculate it in seconds so the
5:49
value that you are seeing right here it
5:51
is in seconds so basically 3 minute 43
5:55
minutes so we have actually converted
5:57
that value into seconds so automatic
5:59
ially it has been in seconds so now I
6:02
will set the end time so I want to trim
6:05
the portion this portion I set end time
6:08
so the total length of the video will be
6:10
18 second you will see and now I want to
6:13
also remove the sound of this portion so
6:15
I just basically remove sound and
6:20
uh that's all so as I now do this it
6:23
will trim that portion and also remove
6:25
the sound as well so you will now get a
6:28
new video basically it will now
6:30
processing it so it will open the video
6:34
after it done processing so just wait
6:36
for the processing to
6:40
finish so you can apply multiple filters
6:43
at one time guys you can remove video
6:45
sound as well you can also trim the
6:48
video as well so you will see it has
6:50
created
6:53
that video and now you will basically
6:55
see no sound will be present so no sound
6:59
is there the video length is 17
7:02
second and no sound is there I turn my
7:05
volume up you will see that but still no
7:07
sound is
7:10
playing so in this way you can even
7:12
remove the sound as well from the video
7:15
as well by checking this portion
7:17
checking the checkbox right here and
7:20
let's suppose you want to also create a
7:23
gif GF it's a special image you can even
7:27
do that also let's suppose I select the
7:29
starting location I don't want to remove
7:32
the sound so I will simply okay I want
7:35
to remove the sound as well so I will
7:37
say I want to create a gift from this
7:39
starting location so 60c and the
7:43
ending uh
7:47
this I want to create create a gift for
7:49
5 seconds so sets end time so this will
7:52
be the length of the gift right here
7:57
so cut it so so now it will trim that
8:01
portion and convert that portion into a
8:04
GI file which will not contain any sound
8:07
so it is processing it so just wait for
8:10
the processing
8:11
to so it's nice to see this progress
8:14
part once it is there so you will
8:18
basically
8:20
see see the page will be
8:23
WR if you open
8:28
the Lo you will basically see a GI file
8:32
has been created if you see right here
8:34
in this you can open that and basically
8:37
you will see that this is actually a
8:39
give
8:41
file which is
8:43
there the extension you will see
8:45
that
8:48
gif G
8:51
dogf so it will Loop through unlimited
8:55
number of time so we are actually
8:58
basically cut that that portion for I
9:01
think it's 12 seconds so you can do this
9:04
as well
9:06
uh you can even change the resolution of
9:09
the video as well by clicking this
9:12
portion as well you can even change the
9:15
video speed as well let's suppose 4X
9:18
faster the video will play faster if you
9:21
want to do this normal speed so all
9:23
these filters you can apply and
9:28
uh
9:33
so this is a complete app and now I will
9:37
show you how I coded this app it's very
9:39
simple app to
9:42
code you will see the speed of the video
9:44
will be very faster how speedy the video
9:48
is playing right here you will see that
9:50
so you can do this processing and now I
9:53
will basically show you some of the code
9:55
that I written so this is actual
9:57
renderer file and this is ual main
9:59
process file so main process file
10:01
actually contain the actual code which
10:03
is responsible for creating our electron
10:05
app this is actually the boilerplate
10:08
code which is common in every electronjs
10:11
app this is the actual main window that
10:13
we see right here when we load the
10:15
application and uh we have binded this
10:18
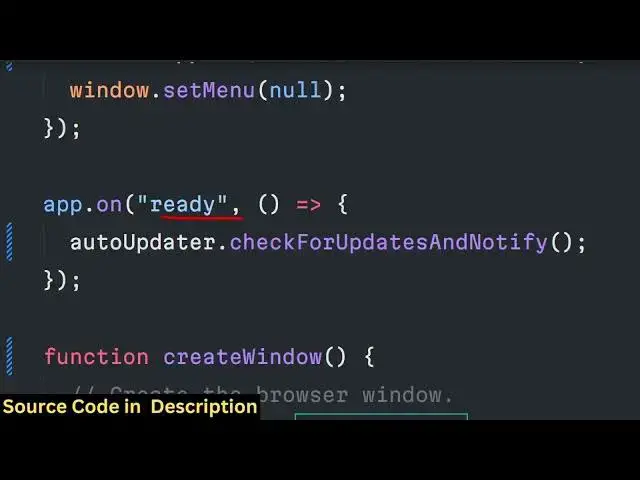
uh app when the app is ready we are
10:20
basically creating a new window new
10:23
browser window which is
10:25
of the width and height that we provided
10:28
which is 124 height is 600 title is
10:32
simple cutter and we have basically set
10:35
node integration context isolation to
10:37
true and false which is there and here
10:39
we are loading this index. HTML file
10:41
when we load the electron application
10:44
and we are loading it by the file
10:46
protocol and if you see this is the file
10:48
that we are using in the index. HTML so
10:53
this file we are loading it and we are
10:56
using custom CSS for styling it
10:59
for showing the progress bar we using
11:02
bootstrap animate CSS all the CSS files
11:05
are present in the CSS folder you will
11:07
basically see that
11:09
and you can see this is actual interface
11:12
where we drag and drop the video and uh
11:16
these are all the JavaScript code that
11:17
is responsible so this is the actual
11:20
main logic file renderer DJs it contains
11:23
all the functionality which is first
11:25
function is combined video second
11:27
function is uh
11:30
the load video function where we load
11:32
the video and
11:35
then this is a cut video if you want to
11:37
trim the video
11:42
so I will basically show you how I did
11:45
this and in the package.json file the
11:48
modules that we are using guys is
11:51
uh we are using fluent fmpg which is
11:54
actually a library package in nodejs to
11:58
actually make
12:00
fmpg far more easier if you don't know
12:03
more more about it you can just go to
12:05
the documentation and search for this
12:07
module which is fluent
12:10
fmpg and you can play with this Library
12:14
which uh allows you to process videos
12:17
using fmpg using this module so three
12:20
lak downloads are there you will see
12:22
that so now I will basically show you
12:25
guys what I did right here some of the
12:30
code that I will show
12:37
you if you are interested the link is
12:40
given in the description you can
12:42
directly purchase
12:48
it so we have basically declared some
12:52
variables right here at the top for the
12:55
current video and the bit
12:58
rate
12:59
and this is actually the function that
13:01
we written so let me just explain you I
13:03
don't want to waste your time just want
13:05
to explain you how I did this function
13:08
the first function is the combine videos
13:11
function so here the list of videos will
13:13
be coming as argument first of all we
13:16
are requiring the file system module
13:18
which is a built-in module and then we
13:21
are actually calling the start loading
13:23
function that we defined later on to
13:25
actually load the videos so then we are
13:27
basically uh simp simply in the build
13:31
build folder so we have the resources
13:33
folder in
13:35
the and inside that we have the folder
13:38
called as fmpg and then inside that we
13:41
have the bin folder and then we have the
13:44
fmpg executable so we are simply loading
13:48
that and simply checking that if the
13:50
file system
13:52
exist if this file exist in that case if
13:56
the file doesn't exist because we put
13:58
not sign then simply set
14:02
fmpg bin
14:04
[Music]
14:05
fmpg like this if the file does exist in
14:09
that
14:11
case we will require the fluent fmpg for
14:15
using this fluent fmpg guys you do do
14:19
need to require fmpg installed in your
14:21
native system that's why I bundle all
14:24
fmpg Native libraries in the app itself
14:28
so if you don't have fmpg installed you
14:30
can still use this application and then
14:32
we can simply set set fmpg path to bin
14:37
and uh then the merged name calculate
14:42
name we basically will be calculating
14:45
the name which will be given by the user
14:47
and then the command this will be a
14:49
simple command guys to actually merge
14:53
to so for merging different videos
14:56
multiple videos we will first of all
14:58
require the path mod module of nodejs
15:01
and dur name so dur name will be simply
15:04
the path here which is videos
15:15
path if you see here let me paste
15:19
it cut this is actual path and after
15:23
that here we will simply check that
15:27
if this path does doesn't exist then we
15:30
need to create this file make the
15:33
directory so this directory will be
15:36
automatically created guys which is the
15:38
cut directory in the root
15:42
directory so if I basically process any
15:45
video this directory will first of all
15:47
get created automatically in the root
15:48
directory and then after that it will
15:50
automatically get deleted as well so
15:52
after you do this we simply need to say
15:55
output
15:57
path out path we need declare this
15:59
variable and concatenate this merged
16:04
name and then we will simply use a for
16:07
Loop and then we will Loop through each
16:10
video for each video what we will do we
16:12
will
16:14
simply get the path here by using f.
16:19
path and we will simply say that if
16:22
command is nothing then we will simply
16:25
say command is equal to
16:26
fmpg path else command
16:33
input
16:43
path so then we have various events
16:46
which we can listen in fluent fmpg you
16:48
can read the documentation if any sort
16:51
of error take place then we can simply
16:52
console log message that an error
16:57
occurred
17:03
can call this to end loading function
17:06
which will hide the progress bar and
17:08
also we can change these methods various
17:11
events if the processing is done in that
17:14
case this function will automatically
17:15
execute and here we can simply show
17:18
merging
17:22
finished and here we can
17:25
basically require the shell from the
17:31
electron Base Library and then we can
17:34
open the
17:35
video in the folder show item in folder
17:38
this is a function we will use and open
17:40
the output path so what this line will
17:42
do after merging after processing the
17:45
video it will automatically open the
17:47
location where the video is created so
17:49
that the user can clearly see the video
17:53
processed this function is responsible
17:55
for that and then we can hide the
17:57
progress by by invoking this function
18:00
and then we can simply here
18:02
Target our video to actually reset so
18:08
HTML and here we can simply show a
18:11
message to the user right in the
18:13
template which is
18:20
finished so this is basically here we
18:23
are
18:26
targeting it's by uh ID name so what we
18:30
have given so we have simply showing all
18:33
these options merged name output path
18:37
all these
18:47
values so in this way guys I basically
18:50
coded this
18:52
application you can basically find all
18:55
the source code in the description after
18:57
that you will get a zip file
19:00
which will actually contain all the
19:02
source
19:03
code first of all what we need to do you
19:06
just need to npmi to actually install
19:10
all the modules which are present in
19:12
package.json it will then create a
19:14
nodejs node modules folder and then you
19:17
need to start your application by
19:19
running npm Run start so this will start
19:21
your electron app so here you can drag
19:24
your drop your video whichever video you
19:27
need to process and then you can do this
19:31
so it's a fully fleshed video editor
19:34
that I'm giving you the link is given
19:36
and thank you very much for watching
19:38
this video please hit that like button
19:40
subscribe the channel and I will be
19:42
seeing you in the next video
#Online Video
#Multimedia Software
#Other