Up next in 10

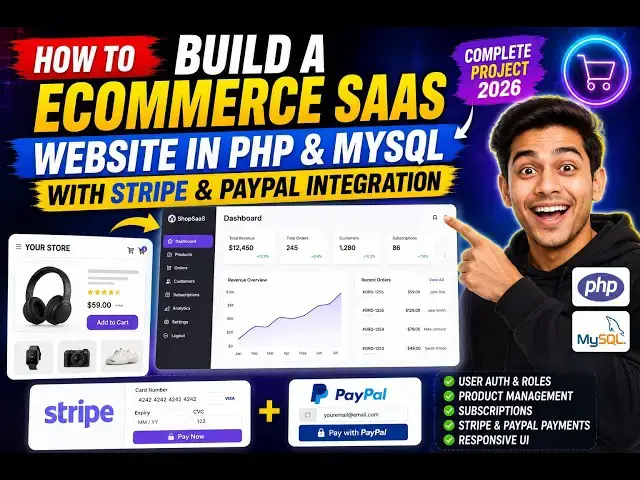
How to Build a ECommerce SaaS Website in PHP & MySQL With Stripe & PayPal Integration in Browser
Sep 1, 2026

Buy the full source code of application here:
https://procodestore.com/index.php/product/how-to-build-a-ecommerce-saas-website-in-php-mysql-with-stripe-paypal-integration-in-browser/
Watch My Visual Studio Code IDE Setup Video For Fonts,Themes & Extensions
https://youtu.be/Bon8Pm1gbX8
Hi Join the official discord server to resolve doubts here:
https://discord.gg/cRnjhk6nzW
Visit my Online Free Media Tool Website
https://freemediatools.com/
Buy Premium Scripts and Apps Here:
https://procodestore.com/
Show More Show Less View Video Transcript
0:00
Uh hello guys, in this video I'll show
0:02
you I built out a complete P e-commerce
0:05
site with authentication and also
0:08
payment gateways including Stripe and
0:10
PayPal. This is a complete PHP MySQL
0:14
project and we have also used some HTML,
0:16
CSS and JavaScript. So this is a full
0:18
directory structure. This is the main
0:20
file index.php.
0:22
Let me just show you the demo of the
0:24
application. You can easily run this
0:26
locally in VS code. So now the interface
0:30
looks something like this. If you want
0:31
to sell any digital files and make a
0:34
website with the stripe and PayPal
0:37
integration payment gateways. So I built
0:40
this PHP premium script and if you're
0:43
interested in this you can purchase it.
0:45
The link is given in the description and
0:47
once you purchase it you will be
0:49
redirected to Google Drive where you
0:51
will get this full project. It has
0:54
integrations of Stripe and PayPal. And
0:57
let me show you the functionality here.
1:00
So once you come to the actual app you
1:03
see we already logged in.
1:07
So let me first of all log out it has
1:09
this authentication system built in. So
1:12
right here you can add your own products
1:14
as well. If you click add your own
1:16
files. So right here you can add your
1:19
own digital file that you want to sell.
1:21
Just give it a name, description, the
1:24
thumbnail and whatever is your digital
1:26
file. It can be a PDF file, MP4, video
1:30
file, MP3, zip file. So maximum limit is
1:34
200 MGAB. You can even change that as
1:37
well. So you can add your own files. I
1:41
added this file right here. If I try to
1:43
purchase it, it will show me this pop-up
1:45
window that
1:47
login is required. So before purchasing
1:50
the product you need to login. So we
1:52
have integrated Google authentication as
1:54
well inside this project. So once you
1:57
authenticate and login
2:00
you will be redirected to the website
2:03
upon successful authentication
2:06
and all the user details such as profile
2:09
picture email address will be inserted
2:11
in the database. So I'm running this in
2:14
exam locally. It is PHP. We are also
2:17
running at MySQL server as well which is
2:21
actually storing all these details. If I
2:24
show you the database, we have this
2:26
three tables. We have orders table,
2:29
products table, we have users table. So
2:32
inside the users table, once you
2:34
authenticate your email address, display
2:37
name, profile picture, everything is
2:39
stored. We have then have a products
2:42
table as well. So when you add a new
2:44
product, the title, description, price,
2:47
thumbnail of the product, file path,
2:49
everything is inserted.
2:51
And lastly, we also have orders. So once
2:54
you purchase a product, that information
2:56
is also saved such as the who purchased
2:59
the product such as email address,
3:01
currency, it's United State dollar. What
3:05
is the payment method, PayPal or Stripe?
3:09
What is the status of the payment? It is
3:11
pending or paid. So everything it's a
3:14
e-commerce website clone guys. Uh once
3:16
you are authenticated you will be seeing
3:19
this your email address and you can go
3:22
to your files whatever files that you
3:24
purchased right here inside your
3:26
dashboard page. As you see you get to
3:29
see all your files which you have
3:30
purchased and you can simply download
3:32
this. If you click the download button
3:35
your file will be downloaded
3:37
automatically. So let me just try to
3:40
purchase one product here. If I click
3:42
buy now button, you see we have both
3:44
these integrations. PayPal integration
3:47
and stripe integration. So we are
3:50
running it on sandbox account. So
3:53
basically stripe does provide you with
3:56
the sample card methods different
3:58
countries. So for India it provides you
4:00
with this testing card that you can
4:03
replace. So, simply paste a credit card
4:06
number and a future date and any
4:10
three-digit CBC number. Click on pay
4:13
with stripe. As soon as you do this
4:15
guys, automatically a test card payment
4:18
will be authenticated. So, this 3D
4:20
secure page will open because stripe do
4:25
have this in the live mode as well. So,
4:27
this is actually just a sample sandbox.
4:30
So you can simply see this is a test 3D
4:33
secure authentication transaction. Click
4:35
on complete. As soon as you do this the
4:37
test transaction will be made
4:41
and it is just processing it. So now you
4:43
will see the screen payment successful.
4:46
It will automatically redirect you to
4:48
the dashboard page. So where the product
4:51
will be added. So now you can safely
4:54
download the product.
4:56
You can see that
4:58
if you click the download button, your
5:00
product will be downloaded. Same thing
5:03
happens with PayPal as well. If I show
5:05
you with PayPal, we can either click the
5:08
PayPal button. This will open the pop-up
5:10
window where you can actually enter a
5:13
test card details. So, PayPal does
5:16
provide you list a list of sandbox
5:18
accounts where you can actually test it
5:20
out. So you just need to write the
5:22
sandbox email right here to test it out
5:25
or you can pay with a credit card as
5:27
well. So just a standard flow
5:31
either you can pay now the price is $30
5:36
or we can also have the option so you
5:39
will see it's official powered by
5:41
PayPal. So we also have the second
5:43
option either we can pay using debit or
5:46
credit card. So the user have two
5:48
options. They can either pay through
5:50
debit or credit card. So it opens this
5:54
interface. So PayPal do provide you with
5:56
some testing card numbers. So let me
5:59
just paste this credit card number
6:02
expiry date. You can use it any future
6:05
date and CSC number any three-digit
6:08
code. And you just need to write a valid
6:12
zip code depending upon your country. So
6:15
I selected United States right here. In
6:18
the drop-down you can select your own
6:20
country. Simply paste it and just enter
6:24
a 10digit number.
6:32
After that you click on this button pay
6:34
$30. This will do this sample testing
6:38
credit card testing. And then you get
6:40
this message after it authenticates in
6:44
the background. Payment successful by
6:46
PayPal. You can download your file or go
6:49
to files dashboard. Automat
6:51
automatically redirects you to the file
6:55
where you can download this. So this is
6:57
a complete project e-commerce site
6:59
website guys in PHP and MySQL with uh
7:03
stripe and PayPal integrations. So after
7:06
you purchase it, you just need to
7:08
configure this if you are deploying it
7:10
inside your website. Go to config.tphp.
7:13
So right here you need to actually
7:17
replace the live keys which you will get
7:20
from stripe the stripe publishable key
7:23
and stripe secret key. So both these two
7:26
information are very secret. Go to your
7:29
stripe dashboard and get these two
7:31
things and simply replace here. I simply
7:35
created this single file config.php
7:37
where you will find out all these
7:39
details. Similarly for PayPal you get
7:41
this client client ID and client secret.
7:44
PayPal secret and PayPal client ID. So
7:47
you will get this from your PayPal
7:49
merchant account. Simply go to the
7:51
dashboard create these two things and
7:53
replace right here. So inside the script
7:57
just replace these four entries and
7:59
change this from sandbox paper mode to
8:02
live. If you're deploying it, simply
8:05
change it to live. So this will change
8:07
it to live transactions. So that's all
8:10
that you need to do guys. You can also
8:11
change the currencies as well depending
8:14
upon your country. I'm charging Indian
8:16
rupees. You can change to USD.
8:19
So this is only for stripe. This is your
8:22
site URL. HTTP localhost 3,000. So here
8:25
you will replace it with your own
8:28
official address. So it's very simple to
8:31
customize it guys. Once you purchase the
8:33
source code and also these two details,
8:35
Google client ID, client secret. This is
8:38
useful for Google authentication. So
8:41
again go to Google cloud console. You
8:43
will get these two details. Google
8:45
client ID and client secret. Simply
8:48
replace it in this file. That's all that
8:51
you need to do. These six details you
8:54
need to paste it. Google client ID,
8:56
client secret, PayPal client ID, client
8:58
secret and stripe publishable key and
9:01
secret key. After that you can run this
9:04
project very easily
9:06
and uh you can see that in the API
9:08
folder this is download PHP PayPal
9:12
capture products stripe all these files
9:16
are there.
9:18
The logic for stripe payment integration
9:22
for PayPal. Each and every file is coded
9:24
by me from scratch. If you still face
9:26
any issues, you can contact me after
9:28
payment. So we this is actually the
9:31
database. So once you purchase it for
9:33
the very first time, go to this PHP
9:36
myadmin of your hosting or if you're
9:39
doing it locally, then go to localhost
9:42
PHP myadmin. I have already created all
9:45
the databases.
9:46
So if you're doing it for the very first
9:48
time, uh let me just delete this
9:51
database and start from scratch.
10:02
So either you can delete this database
10:05
and simply import this. So we have the
10:08
import option. So you can import this
10:10
SQL file directly inside your
10:17
so automatically all these tables will
10:20
be created. So we have this import
10:22
option. You click on import and simply
10:25
import this SQL file that I created for
10:28
you schema.sql. So this file the SQL
10:33
file will contain the code here for all
10:35
the tables. So it will create all the
10:38
tables automatically for you. So you
10:41
simply need to import this file in PHP
10:44
my admin. Simply click import
10:48
and choose this file and then
10:51
automatically all the database tables
10:53
will be created
10:56
and for storing the actual information
10:59
such as products
11:01
we are actually using the uploads
11:04
directory. So here all the products
11:08
files are stored. So we have created two
11:10
folders. So inside the files folder you
11:13
will have all your files which will be
11:15
stored right here.
11:17
And inside the thumbnails all the
11:19
thumbnails of the products will be
11:22
stored. So so it's a systematic project
11:25
guys. All the things I have explained it
11:27
and also given the actual live demo.
11:34
So then you simply open it locally. The
11:37
project will open.
11:40
So again if you try to you need to
11:43
authenticate first of all click. So I'm
11:47
trying it with a different account.
12:00
So once you authenticated right here you
12:03
will see that you will get your profile
12:05
picture everything
12:13
and then you can safely purchase it
12:15
through either stripe or PayPal. All the
12:18
two options are supported. So the link
12:21
is given guys in the description. If you
12:23
are interested in purchasing the script,
12:27
you can go to the description link and
12:29
purchase it. After purchasing it, you
12:31
will get the source code from Google
12:33
Drive automatically. Thank you very much
12:35
for watching this uh video.
#Jobs & Education