Up next in 10

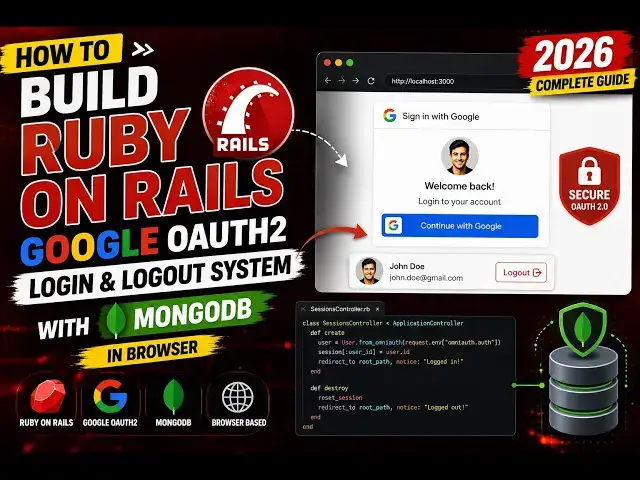
How to Build Ruby on Rails Google OAuth2 Login & Logout System with MongoDB in Browser
Aug 30, 2026

Buy the full source code of application here:
https://procodestore.com/index.php/product/how-to-build-ruby-on-rails-google-oauth2-login-logout-system-with-mongodb-in-browser/
Watch My Visual Studio Code IDE Setup Video For Fonts,Themes & Extensions
https://youtu.be/Bon8Pm1gbX8
Hi Join the official discord server to resolve doubts here:
https://discord.gg/cRnjhk6nzW
Visit my Online Free Media Tool Website
https://freemediatools.com/
Buy Premium Scripts and Apps Here:
Show More Show Less View Video Transcript
0:00
Uh, hello guys. In this video, I'll show
0:02
you how to build a Google login
0:04
authentication system inside Ruby and
0:07
Rails. Ruby and Rails is a very popular
0:10
framework.
0:11
You have known that. In this video, I
0:14
basically built out this complete Google
0:16
login authentication logout system.
0:19
And all the users which register are
0:22
actually stored in MongoDB database. So,
0:24
I'm running this MongoDB database
0:26
locally as you see, MongoDB Compass.
0:29
This is my Ruby and Rails application.
0:31
The interface looks something like this.
0:33
We are running this application
0:34
localhost 3005.
0:37
As you see in my terminal section, I
0:39
started this server locally.
0:43
If I show you,
0:45
it's running rails {dash} rails s {dash}
0:49
p port number 3005.
0:51
So, it started this rails Ruby and Rails
0:55
application directly on port 3005.
0:59
So, this is actually the application,
1:01
guys. If I try to authenticate this, we
1:03
have all the Google login methods. We
1:05
have pop-up method, Google identity
1:08
services, and also the
1:10
old
1:11
Google Auth
1:12
redirect. So, if you're logging
1:15
If I try to authenticate and log in,
1:19
you will see that it will now redirect
1:21
me to the dashboard page where you can
1:22
see the email address, display name,
1:25
profile picture,
1:26
Google ID of the person, verified.
1:30
It also display this information right
1:32
here as well.
1:33
What's the joining date, last login. We
1:36
also have the logout button as well. It
1:38
also returns this JSON response,
1:41
which shows all this information right
1:43
here.
1:44
And if I refresh the database right
1:46
here,
1:47
it will create this database
1:49
automatically Google login Rails. Inside
1:52
this, we have a collection or table. If
1:54
I show you,
1:56
we have the users table, and all this
1:58
information is successfully inserted in
2:00
the MongoDB database. We have the
2:02
profile picture, display name, email
2:05
address, Google ID, everything.
2:07
So, this is actually the overall
2:09
application, guys. If you need to
2:11
purchase the source code of this, this
2:13
is a fully functional app that I
2:14
developed it from scratch. Each file I
2:16
have written this
2:18
from scratch.
2:19
The link is given in the description.
2:21
You can directly purchase the source
2:22
code of this.
2:25
Once you purchase it, you will be
2:26
redirected to Google Drive, where you
2:28
will get the zip file of the project.
2:31
And then you simply
2:33
make sure that Ruby Rails are installed
2:36
in your system.
2:37
I've already installed it, and then
2:39
simply type this command rails s -p
2:43
3005.
2:45
It will start the local development
2:47
server 3005.
2:49
If I explain you the directory structure
2:52
inside your app folder, this is the main
2:54
folder in Ruby on Rails.
2:57
Here all your configuration files are
2:59
there.
3:00
So, views of the application are stored
3:02
in the views folder. All the
3:05
HTML file that you see in the browser.
3:07
So, this is for the authentication login
3:09
page that you see. So, basically we have
3:12
this login page.
3:14
Here we
3:15
you can easily customize this.
3:18
Once you purchase the application, you
3:20
can add more features on top of this
3:22
application.
3:23
This is our login page that looks
3:25
something like this.
3:28
Then we also have the dashboard page.
3:30
Once the user is authenticated, they
3:32
actually see this once they're
3:34
authenticated. We also have the logout
3:36
button as we see.
3:38
And
3:39
this is all coded in Ruby on Rails.
3:42
>> [snorts]
3:42
>> So, if I try this with a different
3:44
account,
3:45
if I try to open the same application,
3:49
uh let me try this with a different
3:51
account.
3:55
So, let me try a different Google
3:57
authentication. This one, Google
3:59
Identity Services. So, this will open a
4:01
pop-up window.
4:03
The authentication flow will be slightly
4:04
different in this case, Google Identity
4:07
Services. Again, as you see the profile
4:09
picture, email address, display name,
4:12
everything will be displayed.
4:14
Uh, if I try to open it once again, it
4:17
will automatically detect that you're
4:18
already logged in. It will redirect you
4:21
to the dashboard page. So, we also have
4:23
the log out button. So, once you click
4:25
the log out button, you will be simply
4:27
logged out. So, it's a complete system.
4:30
We can even show you this system as
4:32
well.
4:33
Redirect OAuth to redirect. This is the
4:36
old way by which
4:38
uh, websites use Google authentication.
4:40
They will redirect you where you can
4:42
select your Google account. After that,
4:44
you need to grant the permission. Click
4:46
on continue. So, these are the three
4:48
different types of Google authentication
4:50
type. First of all, the pop-up.
4:54
Then, we have one tap Google login. And
4:56
then, this is Google OAuth to redirect.
4:59
So, both the three logins does the same
5:01
thing. They redirect you to the log
5:03
dashboard page. If I show you if I
5:06
refresh
5:07
the MongoDB database, you will see that
5:10
another entry has been inserted.
5:13
Everything, email address, display name,
5:15
profile picture, everything is stored in
5:17
the MongoDB database.
5:19
So, our application is successfully
5:21
communicating with the MongoDB database.
5:24
And if you're doing it for the very
5:26
first time, guys, you do need to edit
5:28
this .env file. So, once you purchase
5:31
the source code, the very first thing
5:33
you need to do, go to .env file, uh,
5:36
right here, you need these two things,
5:38
Google client ID and Google client
5:40
secret. These two things you can
5:42
directly get from Google Cloud Console.
5:46
So, just have a account on cloud console
5:50
and just create a OAuth client ID. It is
5:53
totally free to create.
5:55
And just select application type to be
5:57
web application.
5:58
And in the authorized JavaScript
6:00
origins, you need to simply paste in
6:02
which
6:03
the address.
6:05
So, if you're doing it locally, just
6:08
paste the port number.
6:10
So, we are developing it HTTP localhost
6:12
3005.
6:14
You need to paste it.
6:16
And in the redirect URI,
6:18
you need to paste the authorization.
6:21
So, this will looks like you just need
6:23
to save.
6:25
This is your base URL and then {slash}
6:27
auth {slash} callback. So, this will be
6:29
the redirect URI that you will get. So,
6:32
once you click create, it will give you
6:34
these both things, client ID and client
6:36
secret. So, you just need to paste these
6:39
two things, guys. That's all that you
6:40
need to do. Once you are configuring it,
6:44
this uh .env file, simply paste your own
6:47
client ID, client secret. And that's all
6:49
that you need to do. You can also
6:51
customize this uh base URL as well if
6:54
you want to run it in a different port
6:56
number. You can change all these
6:58
settings in the .env file.
7:00
So, it's very easy, guys, as you see.
7:03
It's easy to customize this project as
7:05
well.
7:06
So, it supports all the three
7:07
authentication types in Google login.
7:10
You also have the logout button as well.
7:12
So, you can simply log out. This is
7:15
actually your one-tap authentication of
7:17
Google then via Google Identity Services
7:21
auto pop-up.
7:23
You can easily
7:26
integrate all the three authentication
7:28
types in your Ruby on Rails
7:30
authentication system.
7:32
So, you can go go to log out.
7:36
Check out all the three. It's perfectly
7:38
working.
7:39
So, this is actually the application,
7:41
guys.
7:42
I'm selling this source code. The
7:44
description link is given. You can
7:46
directly go to my website. Once you
7:48
purchase it, all the source code you can
7:51
directly get from Google Drive.
7:53
These are the different controllers.
7:54
This is the authentication controller.
7:56
So, here we write all the authentication
7:58
code.
7:59
As soon as you click the login button,
8:02
this is the file responsible.
8:04
Then we have this dashboard controller.
8:07
All these files are coded inside Ruby,
8:10
as you see RB. This is your dashboard
8:13
controller file.
8:14
So, this is used to actually show the
8:16
information once you are authenticated.
8:20
So, we simply redirect the user to
8:22
dashboard page
8:24
where they are shown the actual details.
8:27
So, all the assets files are stored
8:29
inside the assets folder.
8:31
As you see that.
8:35
These are the models
8:37
which we stored in database, such as in
8:40
MongoDB. So, we are actually storing all
8:42
these fields, Google ID, email, name,
8:45
picture, everything.
8:47
As you see that. So, it's fully
8:48
customizable. These are the views
8:50
folder.
8:54
So, this is the full Ruby on Rails
8:56
project, guys. Google authentication
8:59
project. Definitely check this out.
9:05
All the three types are supported.
9:07
And please hit that like button.
9:09
Subscribe to the channel as well. I
9:11
showed you the full demo.
9:12
If you are interested in this,
9:14
definitely check this out. The
9:16
description link is given.
#Jobs & Education