Up next in 10

React.js PHP 7 Example to Upload Multiple Files to Server Using Axios & Boostrap 4 in Browser & JS
Dec 21, 2025
Buy the full source code of application here:
https://buy.stripe.com/7sI9DU4x340wczSaKK
Show More Show Less View Video Transcript
4:58
So I think the voice was not coming
5:00
guys. That's that's the problem. The
5:02
voice was not coming. Now I have uh
5:06
uh enabled the voice here. Now the voice
5:08
will be coming here. Uh for the first
5:11
few seconds the voice will not be
5:13
coming. So I have just integrated my
5:15
voice here. Now the voice is coming
5:17
guys. So in this tutorial we are
5:18
building a fullstack ReactJS file upload
5:22
application where you can upload
5:23
multiple files using the PHP backend
5:26
server. So basically this is a uh file
5:29
here. So basically I have shown you the
5:32
demo in the earlier video uh in the
5:35
starting of the live stream. So we are
5:37
using the PHP at the back end. So
5:39
hopefully you will understand it. I was
5:42
just forgot to turn off the volume. So
5:44
that's why that was the problem. So now
5:47
we will be installing some dependencies
5:49
after it create this project guys. So if
5:52
you're watching it for the very first
5:53
time then please hit the like button
5:55
subscribe the channel as well.
5:59
So it is just installing all the
6:01
dependencies for the ReactJS project. So
6:04
after it installs we need to go into
6:06
that directory which is upload file. So
6:08
just wait.
6:11
So now it is completed guys. So just
6:13
wait. we will cd into this cd upload
6:16
file
6:18
and we will open this inside uh uh new
6:23
visual studio code text editor. So
6:24
basically guys first of all we need to
6:27
install two dependencies. First of all
6:29
we will install bootstrap and also we
6:31
will install aios to make the post
6:34
request in order to upload multiple
6:36
files inside your reactjs application.
6:39
So basically just install this using
6:41
npmi bootstrap and axios axios. Two
6:46
people have joined in guys. So if you're
6:47
watching it please hit the like button
6:49
subscribe the channel. So here first of
6:51
all guys inside our app do.js we will
6:54
delete all this code here. We don't need
6:56
the logo. Just delete this. And also
7:01
we will delete all this. And here we
7:03
will be simply render this uh file
7:06
uploader component. So here this file
7:10
uploader component guys we will be
7:12
making a new file inside this directory
7:15
which is file uploader
7:18
dot component.js.
7:20
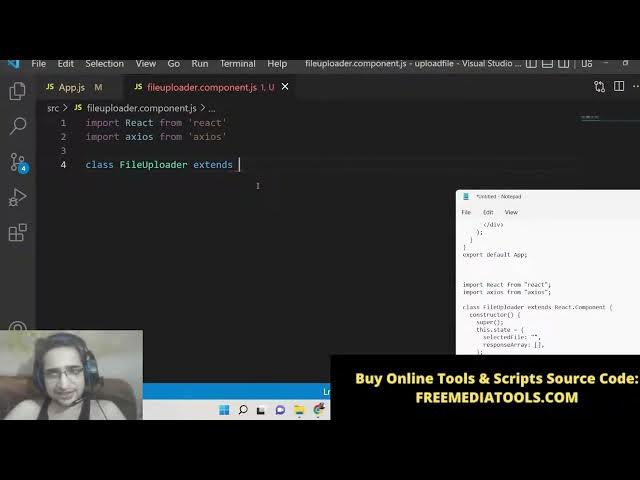
So we will make this file and after
7:23
making this file we will import the
7:26
react dependency
7:32
and after this we will also import the
7:34
AIO's dependencies
7:38
and then we will make a class level
7:39
component class file uploader we will
7:42
extends the react dot component library
7:47
and uh lastly we also need to export
7:49
this component onent so that we can use
7:51
it inside another files. So we will
7:54
export this component export default
7:56
file uploader.
7:59
So now we can simply include this
8:01
component guys. So if you see here using
8:03
the import statement file uploader from
8:06
file uploader docomponent for also using
8:09
the bootstrap guys. So we also need to
8:11
import the bootstrap at the very top. So
8:14
we will import the bootstrap module. So
8:16
dot dot node modules
8:20
and here we will be importing
8:21
bootstrap/dist/
8:25
css/bootstrap
8:28
min. CSS. So just import this line guys.
8:31
So this will be helpful to use
8:34
bootstrap. So after this guys what we
8:37
will do is that we will simply inside
8:39
this component we will first of all show
8:44
something to the user. So we will use
8:46
make use of render method and here we
8:50
will return
8:51
a div which will have a class name of
8:54
row. So these are all bootstrap classes
8:56
guys. If you have studied bootstrap you
8:58
will know what I'm talking about. Call
9:01
MD12.
9:03
So these are rows and columns classes
9:05
and inside this we will give it a H3
9:07
heading which will be simply
9:10
react
9:12
multiple file upload in PHP
9:17
7.
9:20
So we have given this heading guys. So
9:22
basically if I refresh if I start this
9:25
application npm start you will see here
9:28
it will start our reactjs application
9:31
and uh basically if I go here to my
9:34
address which is localhost
9:37
uh 3000 if I refresh it
9:40
is starting the development server. So
9:42
just wait here. So once it starts you
9:45
will now see this heading here react
9:47
multiple file upload in PHP 7. So after
9:50
this guys what we need to do is that we
9:52
need to simply have a simple input
9:55
field. So we will have div class name
9:58
form row
10:02
and again in this we will have uh form
10:05
group class.
10:08
We will have a label. So inside this
10:10
label we will show that select file.
10:16
We will select a file and inside this we
10:20
will have a input field of
10:23
file
10:25
and we will be giving a class name to it
10:28
of form control. just can do it. And
10:32
here we will be allowing the user to
10:36
upload multiple files by using a
10:38
attribute called as multiple. And also
10:40
we will be giving a name attribute to it
10:42
of file. And also we will be attaching
10:45
on change. So whenever the file is
10:47
changed this method will automatically
10:49
execute which is handle input change.
10:53
That's it. So now basically if you
10:56
refresh it you will now see a button
10:58
here choose files button. So if I click
11:00
this button you will be able to select
11:02
any image file. So now we need to write
11:04
this method which we have configured
11:06
which is handle input change. But before
11:09
that we also need to write the
11:13
which is this one. So after this we will
11:18
have another break tag
11:21
and here we will be
11:24
have another form row.
11:27
So here we will be having uh
11:31
class name which will be equal to
11:35
call md 6.
11:39
So here we will be having a simple
11:40
button guys. So this button
11:43
the text will be simply upload file. So
11:46
basically when you click this button we
11:48
need to bind the event handler to it.
11:50
Button type submit we will be giving a
11:53
bootstrap class. So btn btn success. So
11:56
this will have green color and when you
11:59
click this button on click this function
12:02
will execute this is a inline function
12:04
this dot onsubmit we will call this
12:07
function that's it. So now we need to
12:10
make these two functions guys. So
12:11
whenever on change and on click so right
12:15
here at the very top we will make both
12:16
these functions. So basically what we
12:19
will do is that we will first of all
12:21
make this handle input change function.
12:24
So it will have this event. So here we
12:27
will set the state.
12:30
Uh but before that we need to declare
12:32
some variables. So inside our
12:33
constructor of this class level
12:36
uh component we will have uh call the
12:39
super and after that we will have the
12:41
state variables. So inside our state we
12:44
will have two variables which is
12:46
selected file which will be currently be
12:49
empty and then the response array.
12:52
response array. This will be empty by
12:55
default. And then we will be
12:57
initializing this dot handle input
13:00
change to this dot handle input change
13:02
dotbind. And then we will pass this. So
13:05
basically this will initialize this
13:06
method. So here we need to set the state
13:11
by selected file will be equal to
13:14
event.target.file.
13:16
So basically we are getting the variable
13:19
getting the file which is selected by
13:20
the user using event.target.files.
13:23
This is very easy. And then we will be
13:25
initializing our response array to be
13:28
empty. That's it.
13:31
So this is all that is needed guys. So
13:34
if I refresh it now you will see a
13:35
button. If I select a file inside our
13:39
console if you see nothing is there.
13:43
uh invalid property. Let me see where it
13:47
is having.
13:49
Let me see. I have called uh class here.
13:52
Let me see.
13:55
Class name. Class name.
14:00
Let me see here. Class.
14:05
Oh, sorry. This needs to be class name.
14:08
That's why.
14:11
So now guys we will write our submit
14:13
method. So whenever you click the button
14:14
you need to actually upload this file.
14:17
So here we will uh call this method
14:19
onsubmit. We will write the definition
14:21
of this function. So what will happen?
14:24
So basically first of all we will have a
14:25
simple if if condition. We will check
14:27
here this state dot selected file. If
14:31
the selected file is not selected if it
14:33
it is not set then we will simply say
14:36
please select a file.
14:39
This is a simple validation which is
14:41
there. So we will here we will return
14:43
false.
14:46
So basically what will happen if I show
14:48
you if I don't select a file and click
14:50
this button and you will see a se uh
14:53
alert box please select a file. So this
14:55
is kind of a simple validation which is
14:57
happens in every application. After user
15:00
has selected a file then we will
15:01
proceed. We will get the data using new
15:05
form data. We will construct a object.
15:08
So whenever you upload any sort of file
15:10
we use form data. This is the standard
15:13
stuff that we do. So in this case we are
15:16
allowing multiple files. So if there are
15:19
multiple files then we will be using for
15:21
loop. So this state dot selected
15:24
file.length
15:25
we will calculate how many files are
15:27
selected by the user using this
15:29
statement and then we will increment i
15:32
++. So inside this for loop guys we will
15:35
append data.append append and we will
15:38
append the file inside this form data
15:40
object to this dotstate dot selected
15:44
file
15:46
I.
15:48
So we have done nothing we have
15:50
initialized the form data object and
15:52
then we are appending all the files
15:54
which are selected by the user by using
15:56
this for loop. It is very simple stuff
15:58
and then basically guys we will be
16:00
letting the user the server URL. So
16:03
basically here we will be uh creating a
16:06
new directory which will be server which
16:08
will be holding the PHP code
16:10
8080/upload.php.
16:13
So this will be the URL for which we
16:15
will make making the request. So now we
16:18
will make the request exios.post
16:22
and uh you can also write like this
16:25
exios.post post and then you will pass
16:28
the URL and then you will pass the data
16:31
form data and thirdly what you received.
16:36
So this this returns a promise
16:40
and uh the response will be returned to
16:42
us. So basically what we will say this
16:45
dot set state
16:49
and we will set the response array which
16:52
was empty by default. This will be equal
16:55
to the response dot data value. That's
16:58
it.
17:00
And after that guys, we will clear out
17:02
the input by using this dot reset file.
17:06
So here we need to make this function.
17:09
So basically this function will do
17:11
simple stuff which will clear out the
17:13
input. So here we will make this
17:16
function reset file. So basically what
17:19
it will do it will document.getelement
17:22
Get element by id sorry get element by
17:25
name
17:27
file
17:29
zero dot value to be it will make this
17:32
value to be null. So once all the uh
17:35
files are uploaded we need to clear out
17:37
the input. So that's why we are saying
17:39
get elements by name file zero value to
17:42
null. So now if any sort of error take
17:45
place guys so we can also have a has a
17:47
error call back error. So we can also
17:51
display the uh error message inside our
17:54
alert statement. So I think this uh
17:56
ReactJS code is complete guys. So now we
17:59
simply need to make the backend server
18:01
which is PHP. So right here inside the
18:03
root directory here uh just make a
18:06
another directory which is called as
18:08
server directory and here inside the
18:10
server directory make a uploads folder
18:13
which where we will be storing all the
18:15
uploaded files and also we need to make
18:18
a upload dotphp file. That's it. So
18:23
right here inside this upload dot PHP we
18:26
need to first of all set some headers
18:29
which is
18:31
cross origin so that we can call this
18:34
PHP script. So these three headers are
18:37
important. First is access control
18:41
allow origin.
18:44
This needs to be colon
18:48
star.
18:50
So this is very much important. with a
18:52
semicolon. Then we header access control
19:00
allow methods
19:04
get postput. So we are allowing all
19:07
these methods to be processed inside
19:09
this PHP script. And lastly, access
19:11
control
19:14
allow headers
19:18
origin
19:20
x requested
19:25
x requested width
19:32
put a comma content type
19:36
except. So these are three headers guys
19:39
that you need to do. So I have just
19:41
written it manually so that you can
19:43
understand. And then basically we will
19:45
have a variable response which will be
19:47
of type array which will hold the
19:50
success and error messages. Then we will
19:53
have a upload directory where we will
19:54
upload all the files. So this will be
19:56
equal to upload/. So we have created a
19:58
uploads directory here in the root
20:00
directory. So here we are putting this
20:02
and after this this is the server URL
20:05
where all the files will be uploaded.
20:09
HTTP localhost 8080
20:13
that's it. You can choose any port
20:15
number of your choice. This is not
20:17
limited to if you want to choose 8080
20:20
and then you can choose any port number
20:23
and then basically we will have this we
20:25
will detect if any sort of file is there
20:29
we need to upload this. So basically now
20:31
to upload this we will use the count
20:33
method to count the number of files
20:35
which are there inside this array file
20:38
and we will get the name of the file
20:40
like this.
20:42
So this will get the name. So now again
20:44
we will use the for loop to iterate or
20:47
through all the files. We will use this
20:50
for loop inside PHP
20:53
I smaller than count
20:58
and uh I ++.
21:03
So here guys first of all we will get
21:05
the file name which is file name. So
21:08
here we will get uh
21:12
file
21:14
and name
21:16
like this
21:21
semicolon and then we will have the
21:25
temporary location. First of all we will
21:26
move this file to the temporary
21:28
location. This is a logic which is used
21:32
every time when you want to upload file
21:34
inside PHP. First of all, we move the
21:36
file to a temporary location and then
21:38
from that temporary location, we then we
21:41
move the file to the final location. So,
21:44
semicolon and then we also need to have
21:47
the error. I think
21:50
sorry, we need to close this.
21:53
So, now we also need to have the error
21:55
if any sort of error take place.
21:58
files
22:02
error
22:06
like this. So make sure guys you put
22:08
semicolon of at the end of each line
22:11
because PHP will create error. If you
22:13
not put a semicolon in JavaScript it is
22:15
not mandatory but in PHP it is
22:17
mandatory. And basically now we will
22:19
check for the error. If error is greater
22:21
than zero then we obviously know that
22:24
and error has taken place. So we will
22:26
push this error to the response array
22:30
and then basically we will say
22:36
inside this status
22:40
is equal to error
22:43
and error is equal to true.
22:48
And then basically we can say a simple
22:51
message
22:54
that uh any message you can say that
22:56
error in uploading file.
23:07
That's it. So now if no error take place
23:10
then we will have else condition.
23:19
Sorry, I forgot the semicolon.
23:22
So right here guys, now we need to put a
23:25
random name to the file which is
23:27
uploading. We will use a rand method
23:30
here which is take uh random inteious
23:36
inside this range from 100,000 to one
23:39
lakh. So here we will concatenate
23:43
the file name
23:48
which will be file name I think file
23:52
name. Yeah. So put a semicolon
23:55
and but now we will have the upload
23:57
name.
23:59
So where the files will be stored. So
24:02
basically
24:03
this will be coming first upload
24:05
directory string to lower.
24:09
we will lower the characters. So
24:11
basically it makes the string lower case
24:14
and basically we will pass this name
24:16
which is we calculated in the previous
24:18
step random name. So now this is the
24:21
upload name. So basically again now
24:24
upload name we will use pre replace.
24:31
So basically to perform a regular
24:33
expression search and replace. So this
24:35
is the regular expression that you need
24:38
to have
24:42
s
24:44
plus
24:47
I don't know much about regular
24:49
expression. So just copy this code here
24:51
that I'm writing here
24:55
upload.
25:00
So regular expressions uses simply to
25:03
replace something by something. So
25:06
basically it searches the dash
25:08
characters and basically it replace it
25:10
it.
25:12
So that's it guys. So now we simply need
25:15
to move this file to the uploads
25:16
directory that we have created here in
25:18
the root directory. So now to move this
25:21
we have a function in PHP move uploaded
25:24
file. we will take the input temporary
25:28
location
25:29
to the final location which is upload
25:32
name. So if this is successful then we
25:35
will simply give the path.
25:52
Uh let me see here again. Write this
25:54
move uploaded file uh temporary
26:00
this will be temporary file temporary
26:02
name to upload name.
26:07
So inside this guys uh what we will say
26:10
here
26:12
we will give the path here.
26:17
Sorry this is creating error here.
26:21
So first of all what we will do we will
26:23
calculate the path using uh dot slash we
26:27
will concatenate the uploaded name like
26:32
this.
26:33
We will put the type
26:37
we will calculate the extension of the
26:39
image by using this path info method.
26:42
you will pass the path and then
26:44
basically path info
26:47
extension.
26:51
So this will ex extract only the
26:54
extension from the path and then
26:56
basically we will create the data file
27:00
get contents
27:02
path we will get the actual file and
27:04
basically we will put the base URL B 64
27:07
URL.
27:11
So basically this will be data image
27:14
underscore
27:16
we'll concatenate the type which is
27:19
extension
27:22
and then base 64.
27:30
This is a thing guys if you want to
27:33
print out base 64 this is the format.
27:36
Put a comma. Close this base 64
27:41
in
27:43
in code.
27:48
Then we will pass the data. That's it.
28:07
Let me paste this
28:12
paste this line once again. So basically
28:14
I missed a semicolon that why it is
28:17
creating a problem. So every time you
28:19
need to put a semicolon.
28:22
So now it is successfully uploaded guys.
28:24
So now we need to
28:27
append this inside our array which is
28:29
empty. So basically we will say that uh
28:32
array
28:35
array push method
28:39
we will push into our response array.
28:42
This array this is simply
28:45
take the following properties. The
28:47
status will be equal to this time
28:48
success because the file is uploaded.
28:52
So here we will say success
28:55
and error will be false because no error
28:58
has taken place. So,
29:04
so message.
29:13
So, here the message will be file
29:15
uploaded successfully.
29:21
The URL will be simply
29:28
uh server URL/
29:33
concatenate
29:35
base 64 URL put a comma and then we will
29:39
also have base 64 URL
29:43
of the image as well. If you want to
29:45
display base 64 URL base 64
29:53
and lastly we will have this total how
29:56
many images are uploaded. So count.
30:05
So that's it guys. So now
30:08
we will have our else condition.
30:12
So basically if the file is not uploaded
30:17
basically this function fails this
30:19
function move upload file. So in that
30:22
scenario once again we will push the
30:24
status to danger error is to be true URL
30:27
file name message error uploading the
30:30
file. That's it.
30:37
And lastly we will be having I think the
30:41
last if condition which is this. If the
30:45
files are not set in that scenarios guys
30:48
if the file is not set in that scenario
30:51
we will also have else condition.
30:55
The same else condition.
30:59
Here also we will move
31:02
we will pass status to error errors to
31:05
true message is again like this. And
31:08
lastly we will this is the most
31:11
important line we will send this to
31:13
react app eco json in code
31:19
and then we will pass over a response.
31:21
That's it. This is the most important.
31:23
If you not write this line uh we are not
31:26
sending the response back to the ReactJS
31:29
application. So this is the most
31:30
important line. We are at last we are
31:32
sending this response to JSON using
31:37
in a JSON response.
31:40
So now basically the application is
31:42
complete guys. So now if I test it
31:44
before that you need to start your PHP
31:46
server inside your directory. So right
31:49
here inside your server directory you
31:51
need to write a simple command to write
31:54
uh start this PHP server
31:58
go to the server directory wherever you
32:00
store this file upload dot PHP and
32:02
uploads folder go into that that file
32:05
and then inside your cmd I have given
32:08
this command in the description of the
32:10
live stream.
32:12
So this is a command here php- s
32:17
followed by the address. So paste it
32:21
php- s127.0.0.1.
32:25
This is obviously it is localhost-80080.
32:29
So now you can see your php development
32:31
server is started.
32:35
So if you go to that server localhost
32:38
80080
32:39
obviously it is uh this it is not
32:43
accessible using get route this is only
32:46
accessible using post route so this is a
32:50
file which is hosted here upload dot php
32:53
so now we need to call this using
32:55
reactjs so we will go to localhost 3000
32:59
and now basically using our front end we
33:01
will call this php script if I choose
33:03
the file
33:04
single file
33:07
and let me select this. Upload the file.
33:13
I think some error has taken place.
33:29
Uh let me you can see that guys the
33:32
images are uploading here. You can see
33:34
that if I but it is not showing it.
33:39
You can see that if I delete this, if I
33:41
once again upload the files here, if I
33:44
choose here 1 2 3, click open, click
33:47
upload, you can now see the images are
33:50
uploaded successfully. But now to show
33:53
them inside the browser, it is very much
33:55
easy. We need to go to our ReactJS
33:58
application. And right here inside our
34:00
component wherever we are doing this in
34:04
return statement here we need to show
34:06
this image using the base 64 URL that we
34:09
got. So now to show the these images
34:11
guys so right here after the button
34:14
inside this button here we will put a
34:16
break tag
34:20
and after this we will have this set of
34:22
curly brackets this state.response
34:24
response array and we will map this map
34:28
operator. We will response I
34:32
and here we will use like this. We will
34:36
have the div element
34:38
close this. So basically we will be
34:41
providing a key parameter to it
34:46
I and inside this we will have uh a
34:51
class name
34:53
which will be a bootstrap class which
34:56
will be img
34:59
just surround this as uh I
35:04
curly brackets and inside this you will
35:06
write this class which is a bootstrap
35:08
class
35:10
img- alert.
35:12
This needs to be in single quotes
35:16
img dash alert alert alert
35:24
dash and then followed by the response
35:27
dot status.
35:35
So close the div and inside this
35:41
we will show the image.
35:49
So this will be the message response dot
35:53
message.
35:55
So this will be the base 64 URL which is
35:58
response dot URL.
36:01
So wherever the uh upload URL
36:05
and now to show this image we will use
36:06
image tag image source is equal to
36:09
response dot base 64
36:12
and close this image tag. So basically
36:16
all the things that we are passing to
36:17
this uh reacts at last you will see
36:20
inside this array URL is the actual URL
36:23
here of the image followed by the base
36:26
64 URL. Both these things we are passing
36:29
here inside this PHP script as a JSON
36:32
response and then we are printing it.
36:35
So inside this component.
36:38
So now we can test this. If I choose the
36:40
file here
36:44
uh
36:48
I think I have made a mistake.
36:57
Let me write this once again.
37:00
Copy this. All the source code is given
37:02
guys. So sometimes typing mistake can
37:04
occur. Let me format this document.
37:09
So once again if you
37:29
uh this state.response array map is not
37:33
a function. I think we haven't declared
37:36
this that's why it is showing us.
37:40
We have to declare this.
37:44
Yeah. Yeah. We haven't uh done this. So
37:46
whenever you are getting this response
37:48
here, response array is equal to
37:55
this dot set state.
38:15
Uh I think guys I made a mistake in some
38:19
of the line here. So I don't recognize
38:21
which line I have made a mistake. So I
38:24
think without wasting time here I can
38:27
copy paste this code here.
38:29
You can go to the description of the
38:31
live stream. So I have given all the
38:32
source code. So basically let me paste
38:35
this once again. this react component.
38:41
Copy this and paste it.
38:45
So if I refresh it.
38:52
Mhm.
39:25
Let me also paste it.
39:28
In programming guys time is
39:32
very much required here because if any
39:35
sort of error take place then it becomes
39:38
very much difficult to detect that
39:40
error.
39:42
So now you can see that so I was just
39:46
making some inside the PHP script that's
39:48
why it was not. So now you you can see
39:51
that file uploaded successfully.
39:54
I can even choose multiple files. You
39:58
can also choose video files, PDF files,
40:00
text files. This is totally up to you.
40:02
You can you can see multiple files are
40:04
uploaded at the same time. Uh having
40:07
their path uploaded here. You can see
40:10
that this is a path here. And if you
40:12
copy this address, if you open image in
40:15
new tab, this is the base 64 code here.
40:17
You can see data image / PNG. This is a
40:21
format. This is a base 64 code here of
40:24
the image. Using this approach you can
40:27
display any image on the browser. So
40:29
this is the same approach that we are
40:30
also using passing this base 64 code to
40:33
the ReactJS component and just rendering
40:36
it the uploading image. So all these
40:39
images are stored inside this uploads
40:41
folder guys. You can see that.
40:44
So this is the overall application
40:45
fullstack application that we dep uh
40:48
built using React and PHP. So thanks so
40:50
much for watching this video. If you
40:52
like it, then please hit the like
40:53
button, subscribe the channel and I will
40:56
be seeing you in the next tutorial.
40:58
Until then, thank you very much.