Up next in 10

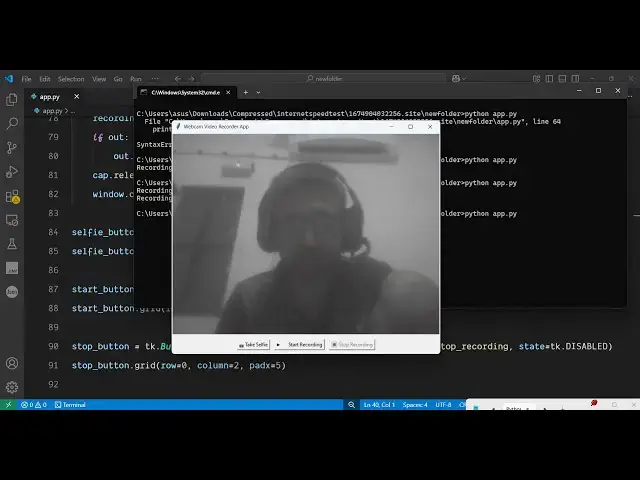
Python 3 Tkinter Script to Build Webcam Image & Video Recorder Using OpenCV & Pillow GUI Desktop App
Jun 3, 2025
Get the full source code of application here:
https://gist.github.com/gauti123456/f94e0f02047c4e3166e4141e807f065e
Show More Show Less View Video Transcript
0:00
uh hello guys uh welcome to this uh
0:02
video uh in this video I will show you
0:05
how to build a video recorder inside uh
0:10
Twinter GUI desktop app inside
0:13
Python so let me show you the
0:15
application twin is a framework for
0:17
building desktop applications in Python
0:20
so I built this script here Python
0:22
script and as soon as you will see it
0:25
actually starts this application right
0:27
here it uh basically grants access to my
0:30
web camera so you can see my video feed
0:32
is there and there are two options right
0:35
here if you see the first option is to
0:37
take a selfie or a picture the second
0:40
option is to start the recording and the
0:43
stop recording button is disabled by
0:45
default so as I click the take selfie
0:47
button you will see it will ask me to a
0:50
location where to save the image file so
0:53
let me save it in my downloads directory
0:56
click on you just need to give it a name
0:58
right here so I will
1:00
say
1:02
selfie png so it taken the screenshot
1:05
and if I open this image you will see it
1:08
has uh stored this PNG file this is the
1:11
image that it captured the next option
1:14
is that for recording the video so if
1:18
you see there is a side byside button
1:20
right here start recording so once again
1:22
you need to put the location let's
1:24
suppose I say recording i give it a name
1:27
right here click on save and now you
1:29
will see the recording will start so you
1:32
can actually speak
1:34
here so you can see that we are speaking
1:37
right here through the microphone and
1:38
our video is recording so now whenever
1:41
you want to stop the recording you click
1:43
the stop recording button and as soon as
1:46
you do this the video will be saved and
1:48
recording if I open this now you will
1:51
see
1:52
that the video has been successfully
1:55
saved and you can see we are playing
1:58
this video right in the video
2:04
player so you can see
2:06
that this is actually the application
2:09
that we will try to build inside Twinter
2:12
is desktop application where you will
2:14
able to take selfies record your video
2:17
directly using your web camera so this
2:20
is your application guys uh all the
2:23
source code is given in the description
2:25
of this video so if you want this whole
2:28
script the link is given in the
2:29
description so now first of all let me
2:32
show you the dependencies that you will
2:34
need for building this application so
2:36
quite a number of dependencies we are
2:38
using right here so the first one is uh
2:42
just go to the this website and let me
2:45
show you one by one which dependencies
2:46
are required for this project the very
2:49
first dependency is twin that I already
2:52
showed you it's a guey
2:55
desktop it basically comes within the
2:58
installation of python so if you have
3:00
Python installs Twickinter will come
3:02
within it so then we are using a
3:06
dependency which is a quite a very
3:08
popular dependency which is Open CV so
3:11
if you just write here CV2 this is
3:14
actually the package CV2 so the command
3:19
is very simple you basically here search
3:22
here open
3:23
CV open CV- Python I think yeah this is
3:27
actually the package here so we are
3:30
using this package for granting access
3:32
to the web
3:35
camera so the command is simple you
3:38
simply install this package pip install
3:40
open cv Python i've already installed it
3:44
and then we are also using this package
3:46
which is pillow pillow is actually a
3:48
image processing library inside Python
3:52
which actually is used for storing or
3:55
manipulating images
3:57
so this also required so execute this
4:02
command and uh then just create a simple
4:06
app py file so now let's start building
4:08
this so first of all you basically
4:11
import the twickinter package import
4:15
twin as
4:17
tk then from this tricker package we
4:21
need to import a file
4:23
dialogue module like this and then we
4:27
need to import the open CV library we
4:29
simply write here import cv2 and then we
4:32
also need to import the pillow library
4:34
from pillow we need to import the image
4:38
and the image tk module so in this way
4:43
we basically import all the packages
4:45
which are required for this application
4:47
so after that we simply need to define a
4:50
constant variable here which is camera
4:53
index so this will actually refer to
4:56
your default camera so I am putting here
5:00
two so this will get access to my web
5:03
camera and then we will basically
5:05
declare one other variable for recording
5:08
it's a boolean parameter by default it
5:11
will be false and then we also declare a
5:14
variable out which will have a value of
5:18
null and after that we just need to
5:20
first of all start this application for
5:23
starting this application we need to
5:25
initialize a window for initializing the
5:28
window we use this tk this constructor
5:32
after that we can set the
5:34
title you can set the title here
5:36
anything let's
5:38
suppose
5:42
webcam video
5:46
recorder app then we can set the uh
5:50
actual open CV
5:52
engine
5:53
CV2 dot video capture and then we pass
5:57
the camera index and then we need to
6:00
also set the label for in this way we
6:04
can set the label guys the label
6:06
function we pass the actual
6:09
window and then we label dot pack this
6:13
will actually add this to the screen and
6:15
then we need to simply actually add all
6:18
the necessary buttons as
6:20
well we will add these buttons here you
6:24
can see we are adding this using the
6:26
frame and then we will have three
6:28
buttons here first of all for the selfie
6:31
button the start button and the stop
6:33
button we will add all these three
6:35
buttons like this this is you can see
6:38
your selfie button then we have the
6:40
start recording button stop recording
6:43
button so these are the three buttons
6:44
that we added after that we just need to
6:47
call this function which is update frame
6:50
update frame and then after that we just
6:56
need
6:56
to start this
7:00
application we will basically add this
7:02
constant here if you close the window
7:05
the application will close after that we
7:07
simply need to call this function window
7:09
main loop this will start your main
7:12
application so if you go to your command
7:14
line just execute
7:15
python app py so if you start this
7:19
application you will actually see your
7:21
application will start it is saying that
7:24
take selfie is not defined because we
7:27
basically binded all these uh buttons
7:30
you can see we are we need to define
7:32
these functions take selfie start
7:34
recording and stop recording
7:36
so we haven't defined these functions so
7:39
one by one let me define this to
7:41
actually don't get this error so right
7:44
here we can define this function which
7:46
is take
7:53
selfie let me just write here then we
7:57
have the second function which will be
7:59
for start
8:06
recording then we have the third
8:09
function which will be responsible for
8:12
stopping the
8:16
recording so now let me just start this
8:19
application
8:21
so what you will see here it will
8:23
actually have a screen which will start
8:26
your application it is saying that
8:28
update frame is not defined sorry you
8:31
also need to define this function update
8:32
frame we are calling this function so we
8:35
also need to define
8:36
this update
8:42
frame so I just need to start this
8:45
application just to show you the screen
8:47
that you will get on closing is also not
8:50
defined so if you see we also have this
8:53
function on closing yeah so this
8:55
function will execute whenever you try
8:57
to close the
8:59
window so we also need to define this
9:01
function as well so on
9:05
closing so what this will do it will
9:07
destroy the window so for the time being
9:10
I'll
9:11
just show you so just start this so now
9:15
you will see this uh window appear you
9:18
will see that this is your window we
9:20
have three buttons take selfie start
9:22
recording stop recording button is
9:24
disabled by default so in this way now
9:27
we have initialized this application so
9:29
now we need to as I click the cross
9:32
button I need to close this application
9:34
for closing it we actually need to uh
9:38
write this function on
9:41
closing so what it will do it will
9:44
actually destroy the window or
9:46
application we will make the recording
9:49
again to
9:50
false and then if out is there we will
9:54
simply release all the resources and
9:57
after that we will
10:01
cap.release and also window.destroy
10:03
destroy so this is the main part it will
10:05
destroy the window when you click the
10:07
cross button so we binded this on
10:09
closing function so if you want to stop
10:12
this application press the Q keyword I
10:15
think yeah so this will stop your
10:17
application so now if I start
10:21
this application so if I click the cross
10:25
button you will see the application will
10:28
close click the cross button you will
10:30
see the application will close so this
10:33
function is uh working so now we will
10:37
come to the
10:39
selfie function so when we click the
10:42
take selfie button we need to basically
10:45
take the picture so for taking the
10:48
picture right here in the take selfie
10:50
function we define some
10:53
variables and comma frame we will read
10:57
this cap dot read and then we will if
11:01
read we will basically ask the user
11:05
where to basically store it so for this
11:08
we have this file dialogue module this
11:11
function contains this function ask save
11:13
as file name we basically provide the
11:16
location where the user want to save
11:18
their image so we provided these
11:20
extensions JPG and PNG after that we
11:24
basically save this by using the open CV
11:28
function function write so this will
11:31
actually save this file at that
11:35
location that's all I think that you
11:38
want to do inside this function
11:41
and now for also for if you just run
11:46
this application nothing will show
11:48
because it is saying uh name cap is used
11:52
prior to global declaration
11:55
so you just need to make sure that you
11:59
are not using this cap
12:02
function so right here cap read you need
12:06
to define this function somewhere
12:09
yeah
12:12
sorry yeah so right in this update for
12:16
function we need to define some
12:17
variables which is
12:19
uh if you see in the update function we
12:23
need to define
12:24
this this is a main function which will
12:28
actually start your web camera in this
12:31
update frame function if you see it will
12:34
actually use this pillow library and
12:36
open CV library to actually get your web
12:39
camera access cap or
12:42
treat and it will actually record your
12:47
video every frame here you will see we
12:49
are rendering your web camera so if you
12:52
execute this it is saying that global
12:55
cap at line number 50 it is creating
12:57
some kind of a
13:00
problem oh
13:02
sorry let me
13:05
just now run this application so what
13:07
you will see uh it will actually get
13:10
access to your web
13:12
camera and you can see your web camera
13:14
is started and as soon as you click this
13:17
button here take selfie button it will
13:20
ask for the location so let me just give
13:23
it a file name click save it will take
13:26
the screenshot and if you go to the
13:28
downloads directory you would see that
13:30
it has taken the screenshot and it has
13:32
saved your image as a JPG image so this
13:36
is the first part done which is for the
13:38
selfie now we move to the recording
13:41
video recording so we
13:43
actually move to this function start
13:46
recording so once again we will declare
13:47
some variables global recording and out
13:51
and then once again we will ask the user
13:54
where to save it so again we are using
13:57
this uh file dialog module and then we
14:00
simply save
14:05
this so this is again we are using the
14:08
open CV
14:10
function open CV module this contains
14:12
this video writer function we are
14:15
writing this video add that location
14:18
video writer
14:19
class and uh like
14:25
this so if you need this full script
14:28
guys uh the link is given in the
14:30
description this is little bit
14:32
complicated for the video recording but
14:35
uh once you understand the code you will
14:37
not be finding it difficult so let me
14:40
paste it this is actually the overall
14:42
function right here if you see we
14:45
actually using the open CV function
14:47
video writer once we save
14:50
it so now what
14:54
happens as you can see we get this
14:57
notification that selfie was saved to
14:59
this location
15:02
so if I restart this application
15:11
uh it is saying that uh unterminated
15:14
string lit at line number
15:16
64 uh I think we haven't closed
15:23
it yeah sorry
15:30
so now we saved it so if you once again
15:33
run this you will see now the video
15:37
recording will also work so it will get
15:40
access to your web camera and now if you
15:42
click the start recording button if you
15:45
click it it will ask for the location
15:46
you need to give it a file name click on
15:49
save and now you will see the recording
15:51
will start so now this button is
15:54
disabled and stop recording is activated
15:57
so now we need to write the function
15:59
once we click the stop recording button
16:01
nothing is happening so now we need to
16:03
write this function of stop recording
16:06
which will actually stop the recording
16:09
and save the video at that particular
16:11
location for this we declare again this
16:14
global variables recording and out and
16:17
recording we will make it to false from
16:20
true to false and if out is there we
16:23
need to release the resources and then
16:26
out is equal to
16:29
none and once again we
16:32
will disable the stop recording button
16:36
and enable the start recording button
16:39
that's all that we need to do right here
16:42
after
16:43
that let me restart the
16:49
application so now if you see the
16:51
application right
16:54
here so if you click this uh start
16:57
recording button once again you need to
16:59
give it a file
17:01
name so now the recording will start you
17:04
can see the notification coming
17:06
recording started and once you click the
17:09
stop recording
17:10
button the recording will be saved and
17:14
if you see
17:15
that if I play the video you will see
17:17
the video has been saved and you can say
17:20
simply play the video can see
17:25
that so in this way guys you can build
17:27
out a complete video recorder kind of a
17:30
or selfie it can takes images selfie
17:33
images it can record your videos
17:36
directly inside your tquinter guey
17:38
desktop application so it's a desktop
17:40
application it runs entirely in the
17:42
windows you can see we are not running
17:44
any sort of internet it works offline
17:46
that's the major part and we have used
17:49
this framework of Python tricker which
17:51
is a very popular framework for building
17:54
desktop
17:55
applications this script is given in the
17:57
description of this video guys thank you
17:59
very much for watching this video please
18:01
hit that like button and also check out
18:03
my website freemediatols.com
18:06
uh which contains thousands of tools
#Consumer Electronics
#Camera & Photo Equipment
#Programming
#Multimedia Software
#Video Sharing