Up next in 10

Node.js Express Project to Encode & Decode Images From Local PC or URL to Base64 Code in JS
Mar 12, 2025
Buy the full source code of application here:
https://buy.stripe.com/14kaHY0gN9kQbvO9Il
#nodejs #express #base64toimage
Visit my Online Free Media Tool Website
https://freemediatools.com/
Buy Premium Scripts and Apps Here:
https://procodestore.com/
Welcome Folks My name is Gautam and Welcome to Coding Shiksha a Place for All Programmers. You can learn Web Development and Programming Tutorials.
Donate to Our Youtube Channel at :
https://www.instamojo.com/@geekygautam1997
Show More Show Less View Video Transcript
0:00
download images
0:10
welcome friends today in this live stream we will be building a project here which inside node.js and express
0:17
so in this project we will be enabling we will be
0:22
encoding and decoding images from base64 to images and also we will
0:28
be encoding images into base64 code so this will be a project we will be
0:33
building in this live stream so i will be live coding so if you have any sort of questions you
0:40
can ask in the comment section so this is the library inside node.js
0:47
node base64 dash image so i i see three people have joined in so
0:54
please first of all like the stream so we will be uh encoding this uh we will be using
1:01
this module node base64 image so you can see it has got 5 000 weekly
1:06
downloads so we will be using this module here so first of all guys what you need to do is
1:13
that we need will be creating a nodejs project so i will be inside my projects
1:18
directory i will open a new directory here so i will be going into the code dash so
1:26
this will open inside my visual studio code text editor so you will see
1:32
so let me just close this so i will make a new directory so this one i will call this as nodebase64 project
1:41
so i will also deploy it inside haroku at the end of this tutorial series
1:49
so i have a cd into this node base64
1:54
project so i will open this inside my visual studio code text editor so if you have
2:01
facing any sort of problem you can ask comment in the comment section i will try to reply you
2:06
but before that please like this live stream so if you are new to the channel please consider subscribing
2:12
so here first of all guys we will uh initialize the empty package.json file
2:18
npm init y so this will create the package.json file for our
2:24
application so you have see package.json is created so it is containing the basic
2:29
information about the project which is name version description index.js
2:35
and here i will try to install this library so first of all i will show you a very basic demo on how
2:41
to use this library so you will see this is a library name node base64 image
2:48
so simply i will download this so we will say npm i know dash base64 dash
2:54
image so just execute this command so it will install this command into your
3:00
package.json so you will see it has successfully installed this node base64
3:05
image so one of the dependency you can install globally which is npm i dash g node mod
3:13
so this will restart your server every time you make changes to your application so now
3:19
inside the same directory just make index.js so simply after this guys
3:26
we will import this library so now to encode images to base64 we will make encode variable
3:33
and we need to require this library which is node base64 image you can see it is coming here in the drop down
3:39
and it contains two methods first is encode so we will encode it and the second one is decode
3:46
so we will also try to require this also node base64 image
3:51
dot decode so now we have successfully imported all the variables here encoding and decoding
3:59
now we simply need to make a function here which will do the processing
4:04
processing and inside this we will first of all try to encode the
4:10
image to base64 code so this is very easy guys so we will try
4:16
to take a url here from the internet so i will make a url variable and simply i
4:24
will go to my website freemediatools.com so you can take any image of your choice
4:29
from the internet so you will see this is the image here simply right click copy image address
4:35
and simply you need to paste it this address here like this
4:41
and now we will try to encode this image encode this image so this is very simple
4:47
here so as this is the async function if you try to read the documentation you
4:52
will find out what i am talking about two likes are there so
4:57
please like the video if you haven't liked the stream so you will see this is the documentation it give gives us
5:04
so simply you will copy paste this from this
5:10
for encoding it so now first of all we are providing the options string to true headers user agent my app so just do
5:18
that and then we are using the encode method you will see we imported it passing the
5:23
url of the image and the options and after that we can console log
5:29
the base64 code which is image so
5:34
now if you try to run this code here so it hasn't executed because we haven't
5:41
called it the function which is now we need to call this processing
5:47
so now if you run this it will try to print out the base64 code here so now you can see it has encoded this
5:54
image into this base64 code a long string you can see that
6:00
so we can also store this inside text file inside node.js so this is very
6:07
easy if you try to do this you will require the built-in uh
6:13
file system module so we need to require it file system
6:18
and there is a method inside it which is write file synchronously
6:25
and inside this you will pass the filename you can call this anything base64 txt
6:32
and then just pass the image the content to be written and now if you run this
6:38
so in the left hand side just check it will create a file txt file
6:44
so if you run here node index.js
6:50
so now basically it will create this base64 txt file and it will contain this base64 code here so simply you can
6:57
have this inside a text file also so this is the thing guys
7:03
and now we will do the reverse process if you want to convert or
7:10
if you want to decode this base64 code to a actual image you can also do this also
7:17
so this is very easy if i just after
7:23
getting the base64 code if you want to convert this to an image
7:30
which is decode the base64 code to image this is pretty simple
7:36
we will use the decode method here so if you go to the documentation you will find this code here
7:42
simply paste it again we are using the await keyword because we are here inside async function
7:48
so await decode and then we are passing the base64 code which is image
7:53
and then we are giving the file name which is example.jpg you can change this name to image.jpg
8:01
so now if you run this it will convert this to an image and store it inside
8:06
your root directory so now you will see it will create this image.jpg file here you will see
8:14
which is the actual image which was encoded to base64 so this library can
8:19
also encode it to base64 and also decode the base64 code to actual image so this
8:25
thing provides the two options that you need so at this moment if you have facing any
8:31
sort of problem you can ask it inside comment section so this is actual library which is used
8:37
to do this and now we will turn this into a nodej express app
8:44
by installing express module npm i express then we
8:50
will say ejs malter for uploading image files to server that's it
8:56
so install these three dependencies and
9:02
if you want to download all the source code i have given the link in the video description of my blog post this is a
9:07
blog post so just go to the video description to download all the source code
9:13
and you can see all the dependencies are installed here so inside package.json this is the ejs
9:20
express folder so now we need to convert this to a express application so
9:29
so we will delete all this code here and start from scratch so we will say const
9:35
of express we need to require this
9:42
constant x tap express and then we will say the port number on which the app
9:47
will be running so process dot env dot port if the port is not available then run on
9:53
5000 so app.listen we will listen on this port number and
9:59
in the callback we will say that
10:05
app is listening on port 5000
10:11
and now basically if you just see we will say app.get if i open the home
10:17
route request response we will say
10:22
response dot render index and we also need to set the view engine
10:29
which is ejs so app.set view engine dot ejs
10:36
and now inside the root directory we need to make the views folder and inside this you'll say index.ejs
10:44
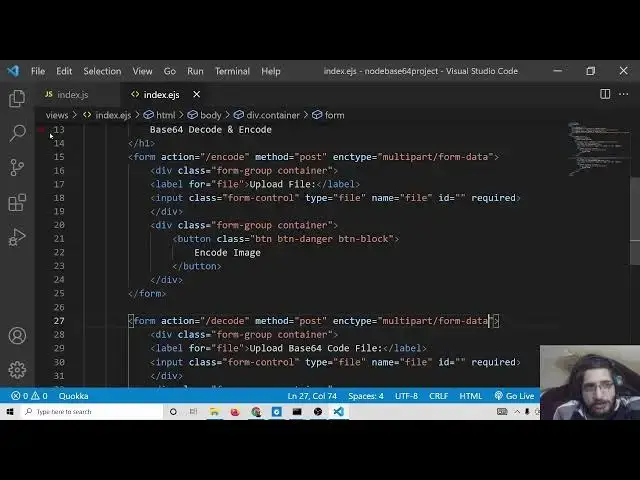
so here this will be a boots html file here simply change the title
10:49
base64 decode and encode in javascript
10:58
and let me just try to check if it is working or not so if i run this node 1
11:06
index.js so it will start this application you can see it is listing on port 5000
11:12
and if i just say localhost 5000 so you will see the application has
11:19
started here at port number you can see that this is a port number
11:26
5000. and now inside this we will try to import
11:33
bootstrap
11:39
so from w3schools.com you need to import just copy the css part
11:50
after the title paste it
11:57
and here we will be using the container class of bootstrap
12:02
and then inside the center position the heading we will say
12:08
base64 decode and encode
12:13
and then we will have a simple form here the action will go to first of all encode
12:19
and we first of all i will show you how to encode the images and inside this we will say input type file
12:28
and name will be file and this should be required
12:37
and label which will be it will be simply upload file that's it
12:47
and here we will be giving a form group and container class try to wrap this
12:53
this is a bootstrap class here and also we will be giving a
13:01
form control to this widget this is again a bootstrap class
13:06
so now if you refresh it you will see this is the heading and this is the input file if you click it you can
13:12
select image files here like this and now we simply need a button here so
13:20
after that we can again say form group
13:28
we will say btn btn danger btn block
13:36
in code image so this would have a red color attached to it
13:41
so you will see encode image so now ui is complete now we simply need to
13:46
make this post request which is encode so the method will be here post
13:52
encoding type multi-part form data because we are uploading files here
13:58
that is where this parameter is necessary so after this we need to make
14:03
this force request but before that we need to also import malta dependency
14:10
which will be uploading files from the server and we need to make a
14:17
folder here which is public folder inside this we will make uploads folder
14:22
so here we will be storing all the uploaded files so here we need to set
14:29
or we need to set this folder as static so we can say express dot static
14:34
public slash uploads that's it
14:39
so after setting it we also need to have body parts and middleware
14:48
so just write this lines so whenever we are working with forms we need to write this line
14:53
middleware dot url encoded
14:58
extend it to false body parser.json that's it
15:06
so now we need to configure the walter library we need to tell the tell it that we need to upload all the files inside
15:12
this folder so for doing this process if you just search on stack overflow
15:19
walter upload including extension of file stack overflow
15:25
this will give you a complete answer so stack overflow is a great website for programmers if you want it
15:32
this is exactly the code that i need so i will just paste it here so here we will pass the directory
15:38
structure where we need to store the files so it is public slash uploads public slash uploads
15:47
and here we will be the file name if you just see
15:56
i think we need this whatever extension the file name is we need to store it so we will
16:02
write this line which is this so all the source code at the end of
16:08
this live stream i will embed this inside my blog post so don't worry if you are not following the tutorial you
16:13
will be able to download all the source code so after having the storage we have
16:19
passed this storage to this smaller constructor and then we can say
16:25
we are we need to upload a single file and then we will give it the name attribute which is file that's it
16:31
we have given this inside this you will see name attribute that's it
16:36
now we need to make that post request which is app.post slash encode
16:45
request response and then we need to first of all upload the file
16:51
so we will say upload request response error if sony if any sort of error takes
16:58
place we will just check it inside the if block and then we can say
17:03
in the console that some error occurred in uploading the file
17:17
and then we can exit out the application and in the else block we will just say
17:23
console.log request dot file dot path so we will
17:28
just print out the path of the uploaded file so now we can check the application it has auto restarted the application if
17:35
i try to upload image file let me select this file so you will see png file is selected if i click encode
17:44
so it is saying extension is not defined let me just see
17:49
oh it is need to be path.extension name
17:56
so we need to require the path module which is a built-in module so require it
18:06
after that use the extension name function and try to file dot original name that's it write this line
18:14
and now the application it is saying path has already been declared so let me
18:21
see oh let me just delete this line
18:29
so now if you try to again
18:34
select this file image file click and try to check you will see it will
18:40
display the path here of the uploaded file that says it is appending two dots dot dot png let
18:47
me see why it is doing that i think we don't need this dot here simply remove this dot
18:54
and now try to upload this once again and let me delete this from here
19:04
and let's suppose we again upload the file
19:11
click the button and now hopefully it has uploaded this you will see this is the image file which is uploaded right now
19:18
inside public slash uploads so now we have done the hard part we have successfully uploaded the image
19:25
file inside the directory now we simply need to encode this up till now if you have any sort of
19:30
problem you can ask in the comment section
19:36
so now we simply need to upload this uh convert it to a base64
19:44
code here so we will require this library which is
19:49
base64 sorry encode
19:54
so we will require it
20:00
in code and inside this we will call a function
20:05
which will encode image or do process image
20:11
and we will pass the path which is request dot file dot path
20:17
so we will make this function which is async function
20:25
you will get the path here like this
20:30
after this if you check the documentation
20:36
so you can see this is a documentation so simply you need to
20:44
copy and paste it inside this function instead of url we will pass the path
20:51
that's it so now we will return or let me first of all
20:57
console of the base64 code which is image so if i
21:02
refresh it
21:09
if i select this image let's suppose this image click encode
21:15
so it is saying process image is not defined oh sorry let me
21:22
change the method name because we are calling process image here so let me once again repeat the process
21:29
select this image encode image and
21:37
so
21:54
oh i think it hasn't done that let me see
22:22
i think we don't need to pass this header here
22:29
let me don't pass this options here simply i need to encode this image like this so don't pass the options
22:36
and try this thing again
23:02
i think we need to pass the full url here so you will see current url is this url
23:08
so if you just see here localhost 3000 and
23:15
if i
23:20
just copy this url and paste it here
23:26
dot png so hopefully i will see the image
23:33
let me restart the server
23:42
so you will see this is the image which is uploaded because we made this directory at static so i think we need
23:48
to pass the full address so we need to make a modification here
23:55
inside this path
24:00
we need to append http localhost
24:07
5000 slash and then this like this
24:15
and we don't need to pass the full path we only need the original m property that's it
24:22
so i think this time it should work
24:29
and if i try this let's suppose once again if i go to localhost 5000
25:06
oh i think we are not providing that options area so we need to provide this
25:12
options
25:18
put a comma and provide these options let me just see if it is
25:45
i think it is not doing it it is i think it is only limited to the
25:50
files which are uploaded to the internet you should need the url so in this case
25:58
it should only print out the images which are hosted on a
26:03
particular site so if you take this url it should only do this
26:12
so this should take the url here so we need to pass this url
26:36
so now you can see it is emitting out the base64 code i think this is only limited to url so if you have an image
26:43
which have a particular url on the internet then only this library will work
26:49
so i think more very more libraries are also variable which is uh if you search
26:55
on image npm js
27:02
i think this is also a module here which is lets you do this so i can download
27:07
this module which 45 weekly downloads are there i think this is a good library
27:15
npm i image 2 base64
27:23
so if you install this module hopefully it should do the job for us
27:32
so just import this module at the very top
27:43
and simply we don't need this function
27:59
so simply paste the code here so simply you need to replace with the dynamic
28:04
path here which is coming request.file.path hopefully it should emit now
28:11
and
28:18
if i refresh the application hopefully it should choose file
28:24
and now you can see it is emitting out this base64 code
28:30
and now we can store this inside file system dot
28:37
write file so we can const
28:43
file system require it so this is a base built-in module so we
28:49
can use write file sync and
28:57
here we can just say output date dot now
29:02
so every time we will be giving a dynamic name so
29:07
output.txt so here we can just say the file name will be output
29:14
and the content will be response
29:21
after doing that we can download this file as the attachment to the user which is output
29:29
and then we can say the callback
29:35
file is downloaded
29:43
let me do this so if i try to
29:48
if i select this click encode so you will see this txt file will be downloaded and now it will contain this
29:54
base64 code is of the image so this is the online tool that we have developed here which lets you encode the
30:01
image to a base64 code if i select a different image so you will see this is again a base64 code
30:13
you can see that so in this easy way you can develop this
30:19
application base64 in and similarly if you try to provide a file which is
30:26
for decode it is pretty simple for decode
30:34
um we will have a second form which will be
30:40
similar form method will be
30:45
slash decode and again the method will be simply
30:56
post an encoding type will be multipath
31:02
in this we will only be uploading a file so we don't need encoding type
31:09
so again we will copy paste this code here copy
31:16
it paste it so here we will say upload
31:22
base64 code
31:27
file so here you will say decode image
31:37
so now if you open this there will be two forms available to us so if i try to hit this
31:44
i need to make a post request which is decode so for this it is very simple
31:50
we will say app.post stash decode again we will use the same
31:58
upload middleware function we will try to first of all upload the file
32:04
so if any sort of error takes place we will say console.log
32:10
error take place
32:15
and then we will return in the else block we will say
32:27
we will console.log request.file.path
32:32
so if i try to check here and if i upload this image for a txt file
32:40
click on decode now you will see hopefully it should decode it
32:49
what happened let me just see i think we can only have one form at a
32:56
particular moment so i should uh
33:03
comment this line here let me delete this and once again if i
33:18
slash oh sorry i think we should also have to have multi-part form data
33:24
attribute attach
33:50
what happened let me just see guys why it is not uploading it
34:04
form method oh sorry this needs to be you are sorry action
34:12
so this was the problem guys so let me also
34:21
this needs to be action
34:27
and we can also include encoding type
34:33
so hopefully it should now upload this
34:42
so now you can see it has uploaded this txt file if i check here you will see this is the file which is uploaded
34:49
now we simply need to decode this to actual image
34:55
so we can use that module which we have installed
35:02
so we can require this node base64 image and inside this there is a decode method
35:08
so include this line and here we will use this
35:13
let me make this function as async function and here we will say
35:21
await and we will use a decode method and inside this we will pass
35:28
first of all we need to read the content so you will say read file sync
35:35
request.file.path and this will be base64
35:42
code
35:48
and here we will pass this base64 code
35:54
and if you read the documentation
36:01
this is a so you will see this also contains this parameter so
36:08
simply copy this paste it
36:14
so this will create this file here and let me
36:19
have a random name so we will say date dot now
36:26
output so now we will replace this with this file here file name which is output
36:32
extension will be jpg and that's it so at the end of this we can download it as
36:39
attachment so we will say output
36:47
plus
36:52
jpg and we will say file is downloaded
37:01
so now if i try to run this application hopefully it should work
37:15
so it is saying await is only valid in async function
37:33
oh let me make this async right here
37:45
and now you can see that guys it has converted this to a jpg format
37:55
let me see why it has not let me console log base 64 code
38:22
read a file in node.js text file let me see the syntax here read a text
38:29
file how you do it
38:42
oh this argument i need to pass here which is the second argument which is put a
38:48
comma here and utf-8 so just write this utf-8
38:53
and now try to run this application
39:02
and now you can see that guys it has converted it successfully to an image we are reading this base64.
39:09
you can upload any sort of base64 and it should try to decode this also
39:15
you can see that to actual image so we have seen the both the scenarios
39:20
we have seen how to decode images from base64 code and how to encode images to
39:25
base64 code so we have developed this to a express application and if you have any sort of
39:32
doubt you can comment on this video and all the source code regarding this
39:38
application will be there inside video description so please like this live stream and thank
#Scripting Languages