Up next in 10

Javascript Project to Build Arithmetic Calculator in Browser Using CSS3 Grid Layout
Mar 12, 2025
Buy the full source code of application here:
https://procodestore.com/index.php/product/javascript-project-to-build-arithmetic-calculator-in-browser-using-css3-grid-layout/
Visit my Online Free Media Tool Website
https://freemediatools.com/
Buy Premium Scripts and Apps Here:
https://procodestore.com/
Welcome Folks My name is Gautam and Welcome to Coding Shiksha a Place for All Programmers. You can learn Web Development and Programming Tutorials.
Donate to Our Youtube Channel at :
https://www.instamojo.com/@geekygautam1997
Subscribe for more Videos: https://www.youtube.com/channel/UCR6d0EiC3G4WA8-Rqji6a8g?sub_confirmation=1
Show More Show Less View Video Transcript
0:02
foreign
0:09
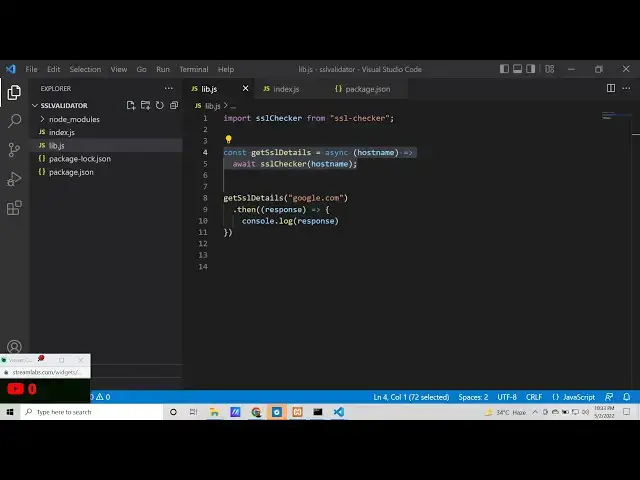
we will be building a arithmetic calculator inside vanilla
0:15
JavaScript something like this so we will be using CSS
0:20
for building this interface CSS grid like structure
0:25
you can see that on your screen so there will be this numeric buttons here basically
0:34
on every calculator you see these buttons and we will perform these four operations either we can add numbers we
0:41
can subtract the numbers we can multiply and we can divide and then after that we will have a equal
0:49
sign here basically whenever we click this equal sign
0:56
then basically the result will be shown inside this input field which is seen right here at the very top
1:02
so we will try to replicate this guys build a very simple automatic calculator using HTML CSS and JavaScript so let's
1:11
start building this from scratch so first of all guys I will just create a file which is called as calculator
1:18
dot HTML so here we will be creating the basic interface for this calculator
1:25
so here you just need to change the title which is called as arithmetic calculator in JavaScript
1:36
and after that guys we will start building this
1:42
so here you will have a div which will have a parent class
1:47
and inside this guys you will have a input field simple input field here
1:53
which will be of type number
1:59
and basically this input field will be by default it will be only read only
2:05
you can't change the value you only can read the value from this input field so
2:10
we will attach this read-only attribute and if you now open this here basically
2:18
you will now see there will be a input field you can't edit the value here you
2:24
can even just read it the result if I put a value here let's suppose 23
2:31
you can see only if I refresh it 23 will be written here you can't edit
2:37
this value you can't change it so that's exactly what we want here
2:43
so after this guys you will have a series of buttons out there basically here we will be having
2:51
a container class and after that guys we will have a
2:56
series of buttons here basically for our calculator we will need to have
3:02
these buttons out there which is one
3:08
two so if you see all these buttons will be there which is one two you can now
3:13
see so similarly we need to have more buttons out there
3:19
this is three four
3:25
five and six
3:32
seven eight
3:39
nine after that we have the zero button here
3:45
and then we will have four operators which will be either first of all for adding the numbers
3:52
which is plus here then we will have the minus operator
3:58
for subtracting the numbers then we will have the multiply operator
4:04
to multiply and lastly for dividing it so these are the four operations
4:10
and lastly we will also have a equal to sign here basically to
4:15
calculate the result so if you now look inside your design guys we will exactly see we will have
4:25
these buttons out there so now we need to use some CSS guys in
4:31
order to look something like this we need to have these these designs here
4:37
first of all you just need to include a CSS file here which will be called as style.css
4:45
so inside the root directory just make this file style.css and here guys first of all we will
4:54
Target this container class that is given here if you see we have given all these
5:00
buttons a parent class which is container so now we need to change its display type to
5:07
grid we will use the grid layout so here you will Target the container class
5:13
and then we will change the display property to grid so if you change it to grid guys basically now all these
5:20
buttons would be shown one after the other so please hit the like button guys
5:26
subscribe the channel as well so you can see all these buttons would be shown one after the other now we need to Simply
5:33
say grid template columns and here we will simply say
5:42
grid template columns so basically it will you can see nothing will change but now
5:49
we need to display only three buttons per row so here we will say 100 pixel
5:55
each column will have a a width of 100 pixels so now if you see
6:03
three buttons should be shown here each having a width of 100 pixel 100
6:09
pixel 100 pixel so if I need to change the middle button to 200 pixels so now
6:15
you will see the design will change so this middle button will have a larger width out there
6:20
so for our case we want all the three buttons to have equal sizes so that's
6:26
why we have provided 100 pixel 100 pixel 100 pixel you can see that
6:33
so after this guys we need to move this in the center of the screen
6:40
for doing this we will Target this
6:46
here also guys we also need to attach this input field Aid which is called as
6:53
result so that we can Target this inside
6:58
the style.css so first of all we will make sure that this appears in the
7:05
center of the screen because it is not appearing in the center so for that we will Target this parent
7:12
class that we have assigned here you can see this is a parent class so we will Target this parent class
7:19
and first of all we will change the display property to flex so if you changed it to display to flex
7:26
guys it will look something like this you can now see
7:32
so here we will be using Flex Direction
7:39
and here we will be using the column layout if you use the column layout guys it
7:45
will look something like this now we need to say justify content
7:52
to Center justify content Center will align this
7:59
and also item Center items align items to also Center so what
8:05
it will do guys it will place this in the right in the center of the screen all these buttons and now we need to
8:12
Simply increase the width of this input field so that it matches it so what we
8:18
can do is that basically we can Target it by the ID we have given you can see we have given this ID result
8:24
so here we can Target it by the ID that we have given result so here we can
8:30
change the width to 59 percent so if you change it to this guys now it perfectly
8:36
matches it you will now see our interface is almost complete so please
8:42
hit the like button subscribe the channel so now what we need to do guys if I hit these buttons here I need to
8:48
Simply make the calculator so what we can do is that
8:54
so here we will write the JavaScript so basically
8:59
we will say script source we will attach the JavaScript part here
9:04
script.js so inside our script.js file
9:10
just make it so first of all guys you can see we need to attach a event listener to all these
9:17
buttons out there basically all these buttons so what we can do is
9:22
that basically inside script.js we can use a for Loop to attaching the
9:29
attaching the events so here we can simply first of all get
9:35
all the buttons references so here we can say buttons
9:41
so here you'll use document.queryselector and here we will pass the
9:47
button tag or we can simply say we can attach each class to it or button
9:55
so this class will be present through each button so button
10:02
button button
10:14
so we will be attaching this guys which is like this you can just attach this to
10:19
each button out there
10:26
class button
10:34
so attach this to each of the button out there so that it makes it easier to
10:40
fetch all these buttons here
10:46
so if you have any sort of questions guys you can ask in the comment section please hit the like button subscribe the
10:51
channel as well how can we use data attribute in query
10:58
selector data attribute you just need to attach this any custom data attribute you can
11:04
Define here let's suppose data Dot X is equal to
11:11
and then you can access it inside the script.js basically provide it inside
11:16
square brackets data.x like this
11:21
so we will remove this from here basically so you can see that guys each button is
11:28
having this class which is button so now we can simply say for classes we have dot symbol
11:34
for IDs we have this hash symbol so in this case we have given the class button
11:44
so after this if you console lock buttons so what will happen now guys if
11:50
you see uh if I refresh it basically if I say
11:56
inspect element and go to console you will see only the first button will
12:04
be returned to us so for this guys what we need to say is
12:11
that there is a query selector all this is a
12:16
method that we need to use so if you now refresh it you will now see 15 buttons will be returned to us in
12:22
a array like structure so this is an array here so by now we need to Loop through this array
12:30
so here now we will be using a basically you can use a for Loop
12:36
or you can even use it for each loop as well so we can use the for each Loop here
12:44
for each button we would be attaching a event listener to it
12:50
so we will be attaching it on click so whenever you click on that individual
12:55
button basically you will say a lot you have clicked
13:03
the you have clicked the button
13:09
so if you do like this guys if you click any of the button here you
13:14
will see this alert message you have clicked the button you have clicked the button
13:23
so now do we need to detect guys which button was clicked so let's suppose I click the this button so 7 should be
13:30
printed out because we have clicked the seven button so how to detect it this is a big
13:37
question so how to detect which button is clicked basically there is a
13:42
property which is called as this property which is the label of this button so how to get this so basically
13:54
uh here we can simply say how to get
13:59
label text of button when clicked in JavaScript so you can anytime go to
14:08
this
14:15
so
14:24
so if you see guys basically we can get the value here of the button
14:30
which was clicked
14:35
how to get level of
14:47
so this is the button guys basically
14:53
uh that was a question you asked ashmeet that how to attach a custom attribute so in
15:02
this case the custom attribute will be very much important so in this case if you see event dot
15:09
current so here we need to attach the custom
15:15
attribute here to each of the buttons out there which will be very much important so in this case you can say
15:21
data ID so just attach these custom attributes
15:27
guys so so we will attach like this basically
15:34
custom attributes so if you're watching it for the very first time guys please hit the like button subscribe the
15:39
channel so for each of the buttons we will attach this custom data attributes
15:48
like this
15:53
custom data attributes
16:04
so now we just need to change the values guys here three four
16:10
five six seven
16:15
eight nine zero Plus
16:21
minus
16:27
this form it is divided by equal to
16:33
so in this case guys we have given these custom attributes so now it becomes very much easy inside this callback function
16:41
basically here we can simply get the value of this custom data attribute
16:47
something like this if I show you
16:55
so here we can simply say which button was clicked so
17:01
we can get the value of that custom data attributes so you can simply say you have clicked
17:18
so you will paste it basically this is the one here we need to pass the event object
17:25
e dot current Target dot get attribute which we have defined here basically
17:34
data.id if you see here data.id it will fetch the value in if you click
17:41
the fourth button it will fetch this value which is 4 defined here you can change this value but we will
17:47
set it to four so now if you click the button guys
17:52
basically in the alert box it will clearly show which button was clicked if you close to you have clicked button
18:01
okay uh you have clicked the button Plus like this
18:09
so now guys what we need to do is that basically the default value for will be
18:14
0 here so the result will be shown here zero so
18:20
now what we need to do is that as I click these buttons here basically we need to insert the value here
18:26
write this value here so right here what we need to do is that basically
18:32
remove this alert statement so here we will have a series of if conditions
18:40
here so basically we will have a if condition
18:48
for each button we will have receive condition so
18:55
so if you see guys basically we will compare this value event dot current Target dot get
19:02
attribute so we will have this if condition guys
19:08
so if this value is equal to 1 in that case we can simply say that
19:17
we will push this value so basically we need to get the reference to the input field so we will say dot document.query
19:23
selector and here we have given the ID which is called as
19:29
input if you see we have given this ID which is result sorry
19:36
we have given result so you here you need to replace your result
19:43
so after this guys you will simply say this is result
19:49
we need to embed this push this entry so result Dot
19:56
we need to append this so we will simply say append child
20:03
and this will be we will be a pending child here which is
20:08
event dot current Target dot get attribute
20:15
data dot ID so if you see guys if I press this
20:22
button here one just refresh it
20:28
nothing is changed here you will now see nothing is changed
20:34
I think we need to remove this read-only parameter
20:44
and if I refresh it guys let me check what happens here it is saying that failed to execute a pen child or not
20:52
oh sorry this needs to be this is not a parent child declaration it's a number
20:59
so that's why we need to Simply say
21:04
result Dot value
21:10
and here we will simply say plus is equal to
21:19
event dot targets sorry current Target dot get attribute data ID
21:30
so just refresh it you can now see
21:37
and also guys we need to uh basically remove the value which was present
21:42
beforehand
21:49
if you reload the application basically 0 is present right here so we need to
21:54
remove this value here which is of 0. first of all make this as read only
22:07
so now we need to remove this value guys which is there
22:24
foreign
22:30
and similarly guys we need to do for the rest of the buttons as well
22:42
we need the other conditions as well
22:57
so now if you see if it is equal to 2 in that case also
23:03
thank you so now we need to add all the conditions here
23:13
three four five six seven eight nine
23:19
zero plus minus multiply divided equal
23:25
to so all these conditions we have defined guys so just change it to here
23:31
three I have four five
23:40
six seven eight nine
23:48
zero plus minus
23:56
and this is multiply and then we have divide and then we have
24:02
is equal to so now if you see guys all these buttons
24:08
will be like this
24:15
so
24:21
it is saying that the specified Value Plus cannot be parse or is out of range
24:27
so for this guys we need to change this to text not number because
24:33
text input field will be shown on this
24:42
scriptures
24:56
in the console that is
25:06
it cannot be passed or it is out of range for this guy simply
25:12
paste this
25:20
plus sign can't be
25:26
appended to input field
25:52
so if you see guys sorry we have changed it to her so again this
25:58
is number so we need to change it to text so if you now change it to text here basically hopefully this time
26:05
so now you can see two plus three minus 2 so when when I click this equal equal
26:13
to button guys so the result will show now we need to show this result basically
26:20
so in place of equal to sign that is when the case is equal to we need to
26:26
remove this and the value should be equal to
26:35
calculate the result
26:44
so here guys you will be making this method foreign
26:50
which will actually calculate the result
26:58
so here guys you can see that all the we need to add the
27:07
syntax which is available so basically if you refresh your page it if I type here one plus two plus three and if I
27:16
click the equal to sign it should return 6 in place of this so now what we can do
27:22
is that basically inside this function please hit the like button subscribe the channel as well I am not doing job I am
27:29
a full-time YouTuber and bloggers so I'm not doing job anywhere so here guys inside calculate result you
27:37
will simply say input dot value
27:44
uh basically what we will say
27:52
uh input dot value
28:08
if you see here one plus one
28:23
so what we need to do is to have guys result dot value we need to add these
28:30
the operation which is available to us
28:37
so what logic we can apply here basically
28:54
so as you see here there also needs to be a clear button guys so basically
29:01
a reset button so what we can do is that after this
29:09
a new button will be there which will be the button will be
29:15
uh clear out clear the result if you see a new button will be there
29:22
here which is the clear button
29:29
sorry not here
29:36
uh the clear button
29:42
so basically we would be giving a style to it of width to 100 percent or 59 percent
30:19
so here you'll be giving your ID to it of guys which is
30:24
clear so inside script.js basically we will be attaching a event to it
30:31
document.getelement by ID which is clear so when we add a event listener to it so when we
30:38
click this button we need to remove all everything
30:45
so here you will say result Dot value
30:54
to nothing so if I basically do this
31:00
so now you can see it is cleared out so that's exactly what we wanted so basically whenever you click this plus
31:07
sign guys basically if you see inside the application if you see if I
31:14
say F4 Plus 8
31:22
so here what we need to do is that
31:28
uh 4 plus
31:43
if the plus sign is equal to then we will be
31:49
basically here we would be having a variable which is called as
31:58
calculated result and basically the initial value
32:04
of this will be 0. so now what we will say that
32:10
if anybody hits the plus icon
32:15
plus button so in this case we need to Simply make this equal to
32:26
calculated result will be equal to
32:32
um it will be equal to the
32:42
result Dot
32:47
value so if you alert this calculated result
32:53
now if you click one plus so inside this
33:04
uh sorry we have calculated
33:11
drizzle so one
33:17
so one will be there here
33:33
so 1 plus
33:43
1 plus so I put the second one
33:55
and also guys we need to also declare a variable for the operation
34:05
this will be an empty value and basically here you will simply say
34:12
we will store the operation so which operation is being performed so operation we will say is Plus
34:27
so it is calculated result will be result dot value
35:08
so same thing we need to do this so whenever we click the SQL sign
35:14
we will say if operation is equal to
35:22
Plus in that case we will
35:30
add the value so we'll simply say
35:38
basically here we need to return calculate it
37:30
foreign
37:39
foreign
38:19
foreign
38:50
uh let me try out this code guys
38:59
if you see this is the calculator
39:06
5 plus 3 8.
39:12
3 2 minus 3
39:23
6 78 minus four
39:41
so I think the concept is very much the same we need to attach one click to each
39:47
of the buttons out there you can see that
40:40
oh
41:09
foreign
41:48
foreign
45:15
foreign
#Calculators & Reference Tools