Up next in 10

Javascript Google Directions API Example to Display Routes Between Two Locations in Google Maps
Dec 11, 2025
Buy the Full Source code of Application here:
https://procodestore.com/index.php/product/javascript-google-directions-api-example-to-display-routes-between-two-locations-in-google-maps/
Show More Show Less View Video Transcript
0:00
Uh hello friends, today in this tutorial
0:02
I'll be showing you that how basically
0:03
you can build out this application which
0:05
calculates the directions or routes
0:07
between any two locations in Google
0:09
maps. So basically this is the
0:11
application that I deployed on my
0:13
website webnadveloper.com/rowoutfinder.
0:17
I have also given the live demo link you
0:19
can check out this application. So
0:21
basically if you land on this
0:23
application you will be having two input
0:25
fields out there. You will enter the
0:26
source location and the destination
0:28
location. So let's suppose you're
0:30
traveling somewhere outside you need to
0:32
get the direction on the Google map.
0:34
Let's suppose if I'm in Delhi, I need to
0:36
go from let's suppose I type the niran
0:41
vihar priyad this is the from location
0:44
and I need to go to let's suppose
0:47
subhash okay so this is basically a
0:49
location inside Delhi and as I now click
0:52
this basically so what will happen here
0:54
basically if I I need to refresh it so
1:00
first of all as I write this location
1:03
nirma command. You can see this
1:04
basically autocomplete will be coming
1:06
here. This is coming through geo
1:09
geocoding API of Google. So I need to go
1:13
to subhash. You can see that. Now we
1:16
click this button out there. As I click
1:18
this button guys, you will now see
1:20
automatically it will give out this
1:22
directions the from to location.
1:26
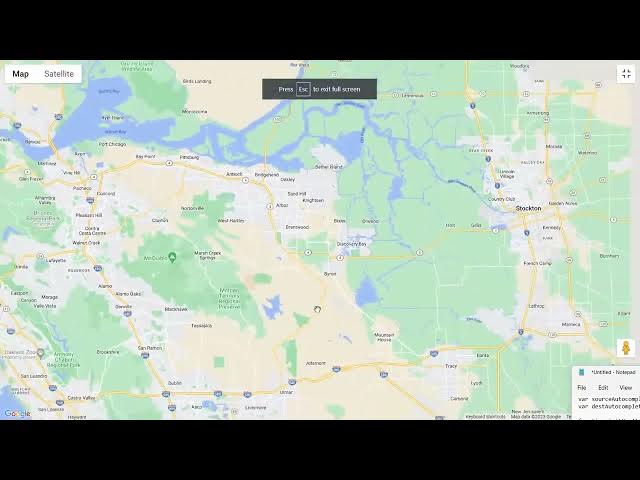
Basically you can see you can zoom in
1:29
here. Basically you can even uh go into
1:32
full size mode here. You can see this is
1:34
uh inside the blue uh blue dot here blue
1:37
border. Basically this is direction
1:40
here. This is a from location niran. And
1:43
you can see this is a two location which
1:45
is subhashnagar. You will see basically
1:47
it has given me the full direction. So
1:50
if you are traveling through let's
1:51
suppose a car here you can simply see
1:54
this uh you can download the screenshot
1:57
and basically depending upon how you are
2:00
traveling you can basically follow the
2:01
step-by-step instruction this directions
2:03
that it has given you how to travel from
2:06
niran via subage nagar basically all
2:09
these directions and routes will come
2:10
here you just need to follow these
2:12
routes to reach to your destination so
2:15
basically this is we are calling the
2:18
Google direction API for this purpose.
2:20
So Google direction API render all these
2:23
uh you will see basically these route
2:25
here these directions that you are
2:27
seeing right here these are all
2:28
calculated by Google direction API and
2:31
basically it has automatically done this
2:34
for us. So now if I change this location
2:37
let's suppose if I change this location
2:39
to any other country it is not limited
2:41
to India. So basically if I now
2:45
write here Chicago if I select this
2:48
location and now if I want to travel to
2:51
from Chicago to Texas
2:54
you will see that if I say both these
2:56
are in USA. So you need to select the
2:59
locations which are there in the same
3:01
country. You cannot select two different
3:03
countries because this is for driving
3:05
purposes.
3:07
You will see if you click this now you
3:09
will see that basically now it has
3:11
calculated the directions here. This is
3:13
H Texas and this is Chicago. You will
3:16
see that basically this will give you
3:19
the direction how you need to travel
3:21
from H to Chicago. So all these states
3:26
will come in between here. So this is
3:28
basically the route you need to take.
3:31
This is very much useful if you're
3:32
traveling it by a driving the distance.
3:35
Let's suppose these are very helpful for
3:38
you have seen these locations basically
3:41
in food ordering apps such as Suigi or
3:44
Zumato. Basically GPS tracker locations
3:47
are there. Every time someone is
3:49
traveling through a route they are some
3:52
they make use of these applications so
3:54
that they want to travel from one
3:56
location to another location. So these
3:58
routes are very much important. This is
4:00
a from location and this is a to
4:02
location. So this is really useful guys.
4:05
You can change for any location out
4:07
there. It totally depends upon you which
4:10
location you want to take. Let me take
4:12
one other example
4:16
Oakuckland Wellington. So now you will
4:18
see that basically
4:20
it is a very extensive application. You
4:22
can check out I have deployed this
4:24
website uh sorry application in the
4:27
description of the video I have given
4:28
the link. And now we will be writing
4:31
this application step by step. I will be
4:33
showing you how to make this awesome
4:34
little application. A very few lines of
4:36
code is required for this purpose. Guys
4:38
to make this awesome little application.
4:40
You will definitely enjoy it. I have
4:43
written all the source code in the
4:44
description of the video. I have written
4:47
all the JavaScript code as well in the
4:49
description of this video. So copy paste
4:51
it. Just go to it follow the
4:53
step-by-step instructions. So now first
4:55
of all you need to go to Google cloud
4:57
console where you basically enable the
4:59
APIs and also you need to get the API
5:02
key for this purpose and here first of
5:04
all go to credentials here and here you
5:07
need to make your own API key. Simply
5:09
click on create credentials and create
5:11
your own API key and uh I will just
5:15
simply copy this API key here. So don't
5:18
copy my API key guys because at the end
5:20
of this video I will delete this key. So
5:23
simply create your own API key. After
5:26
this we will now delete all this and
5:28
start from scratch. So basically here
5:30
guys first of all what we need to do is
5:32
that we need to simply include the CDN
5:35
which is required for this purpose.
5:39
So just after the title you need to
5:41
simply write this CDN here script source
5:44
and this is equal to https
5:47
maps.googleapis.com/maps/apis
5:47
googleis.com/map/api/js
5:54
question mark key is equal to so here
5:56
you need to copy paste your own API key
5:59
and then you need to load the libraries
6:01
so which is and libraries is equal to
6:04
places so we are loading the Google
6:08
places APIs as well guys for the
6:10
fetching the autocomplete location so
6:12
after this we also want the CDN for the
6:15
bootstrap also guys So for the interface
6:18
we are using the bootstrap as well. You
6:20
will see bootstrap CDN for the CSS part.
6:23
That's all. So now to load this HTML
6:26
guys. So on load we will attach this
6:29
method init map. So whenever your
6:31
application loads we will initialize a
6:34
simple map here. So right inside your
6:36
JavaScript we will write the JavaScript
6:39
here. We will initialize this function
6:41
which will basically display a map on
6:43
the screen. So for displaying the map on
6:46
the screen guys we need some HTML here
6:49
right here in the body. So for having
6:52
this we will so first of all have a
6:54
simple heading which is directions route
6:57
founder
6:59
and then basically we will have two
7:01
break tags. We will also give basically
7:04
a bootstrap class of text center to
7:06
place the text in the center position.
7:09
So after this guys basically what we
7:11
need to do is that we will have a
7:15
uh container class or bootstrap and here
7:18
we will have two fields out there. First
7:21
will be for the
7:25
from. So both these we will have form
7:27
control bootstrap classes placeholder
7:30
will be for source location. So here you
7:33
will just enter your location from. You
7:36
will give it an ID here which is of
7:38
source. We will repeat this process for
7:41
the destination location. So simply copy
7:44
this and paste it for the second time.
7:47
So this time this will be destination
7:49
location.
7:52
So here you can change your ID field to
7:55
destination. That's all. So then we will
7:58
have a simple button guys basically to
8:01
submit the form. So we will have a
8:03
button here. So button class btn btn
8:07
primary
8:09
and basically
8:12
we will have get directions that's all.
8:16
So now when you click this button guys
8:18
we need just need to call a function
8:19
which will calculate the route for us.
8:21
So calculate route but we will assign it
8:24
later on.
8:26
So lastly we will be displaying a map in
8:30
the div section. Here we will be giving
8:31
an id to it of map and the styling will
8:35
be height will be of 500 pixel and uh
8:40
the width will be 100%.
8:42
100% that's all. So here we will
8:46
dynamically display the map here inside
8:48
using this init map function. So first
8:51
of all we will declare the map variable
8:54
right here at the very top. So right
8:56
here we will assign this map
8:59
using google.m mapaps dot map and here
9:02
we will be passing the reference
9:05
document dot getelement by id which is
9:08
map and then in the second argument we
9:10
will be passing the options here. First
9:12
is the center location. So this will
9:15
basically take the latitude which is
9:17
37749.
9:23
And then we take the longitude which is
9:26
minus 122.
9:29
This is very optional. You don't need to
9:32
provide this but we need to provide zoom
9:34
level or the map 13. So you can change
9:37
all these options depending upon.
9:40
After this basically guys we just need
9:42
to add a event here which is we can
9:46
assign events to our map here using this
9:49
function add event listener. We will
9:51
assign a click event handler here. So
9:53
whenever you click inside the map, we
9:56
need to enable the mouse wheel
9:59
so that we can zoom in. So we can simply
10:01
set this call this options set options.
10:05
Inside this we will simply say scroll
10:07
wheel to true. So this simply means that
10:11
you can scroll. You can use the scroll
10:14
wheel of the mouse to basically zoom in
10:16
and zoom out of the map. So now if you
10:19
just open this here guys, you will now
10:21
see your map will be shown to you. You
10:23
can see that you can click inside and
10:26
now you can see you can scroll in scroll
10:28
out to zoom in and zoom out. Basically
10:31
this is all and you can even z.
10:36
So our Google map is loading here guys.
10:38
So now we simply need to put the
10:41
location here. Put the autocomplete
10:43
location. For having the location guys
10:46
it's very simple. After you do this, we
10:49
just need to assign some variables right
10:51
here at the very top here. Directions
10:53
service
10:54
and directions renderer. So just declare
10:58
these variables.
11:00
So after you do this, we simply need to
11:03
here
11:05
call here direction service and we will
11:07
simply say new Google maps direction
11:10
service. So here we are simply calling
11:12
the Google direction API here.
11:17
So after this we will initialize the
11:20
directions renderer. So this is equal to
11:23
new Google maps directions renderer.
11:29
So here direction render there is
11:31
basically we need to set it to the
11:33
current map. That's all.
11:37
And now basically guys we will be
11:40
fetching the autocomplete fields. we
11:43
will be assigning the data to it so that
11:45
whenever you write something this will
11:47
be source autocomplete
11:50
variable. So we will be just be
11:54
assigning these variables
11:56
just declare source
11:59
autocomplete
12:00
and destination autocomplete. So these
12:03
are just two local variables and uh
12:07
source autocomplete we have
12:10
we will assign here which is new Google
12:12
maps place we will now use the Google
12:14
places API and this contains a method
12:16
which is autocomplete and inside this we
12:19
will simply pass the reference here
12:21
guys. So we have given the ID to that of
12:25
source and similarly we will be
12:27
repeating it for the destination. So new
12:30
Google maps dot places
12:33
and it contains autocomplete and inside
12:36
this we will pass the reference which is
12:38
destination that's all.
12:41
So now guys we need to if I if I just
12:44
refresh it basically what you will find
12:46
if I now type the location you will now
12:48
see the results out there
12:49
autocompleting. So this is basically
12:51
meant by this you can now type any
12:54
location. Let's suppose if I type. So
12:57
now if I click this button guys I need
12:59
to show the directions. So it's very
13:01
easy. We need to bind a function here.
13:03
Whenever we click this button we just
13:05
need to execute a function here which
13:07
will calculate route. This is a
13:11
function. So now we just need to define
13:13
this function. So function calculate
13:16
route.
13:17
So inside this function guys we just
13:19
need to take the source location which
13:21
is present right here and destination
13:23
location and need to calculate the
13:26
routes. So we will declare we will get
13:29
the value here source value
13:36
source value and then we have the
13:38
destination.
13:45
So after we take these two source and
13:48
destination now we will simply make a
13:50
request guys to the direction API here
13:53
we will pass the origin property to the
13:56
source location and then we have the
13:59
destination property which is stored
14:01
inside destination and then we have the
14:03
three third property guys which is
14:05
travel mode. This is really important
14:08
how we need to travel between these two
14:10
locations by driving in a car. So we
14:12
will put here driving. You can read the
14:15
documentation of Google
14:17
uh direction API guys. It supports all
14:20
these options that I'm talking about.
14:23
And now we can simply say direction
14:25
service and it contains a method guys
14:28
which is route. So with the help of this
14:30
method we can now pass our request and
14:33
this takes a call back function holding
14:36
the result and the status.
14:39
And here basically what we can say that
14:41
if status
14:43
is equal to okay in that case our
14:46
request is successful and now now we can
14:49
simply show these on the map. Now to
14:51
show this on the map we will use
14:53
direction renderer and here we will call
14:56
a method of the API which is set
14:58
directions and we will pass the result.
15:00
That's all. So now this will show the
15:02
also the result on the map itself. So if
15:05
I now open the service here, you can now
15:08
see if I type a location here. Let's
15:11
suppose if I type uh
15:14
uh Jammu here
15:19
India Jammu
15:21
and now if I type here let's suppose
15:24
Japur
15:26
click on that and now you can see that
15:29
basically it will give you the direction
15:31
guys if you want to travel from Japur to
15:33
Jammu or Katra or vice versa you will
15:35
see the direction or the locations what
15:38
you need to what routes you need to
15:40
travel through
15:42
it basically tells the shortest path. So
15:45
in between two locations out there you
15:47
will see that it is basically the
15:49
shortest path and the available path
15:51
here. So in this way guys you can make
15:53
this awesome little application using
15:55
Google direction API. I have shown you
15:57
step by step. All the source code is
15:58
given in the description of this video.
16:00
You can copy paste all the source code.
16:03
Please hit that like button, subscribe
16:04
the channel and I will be seeing you in
16:07
the next video. Until then, thank you
16:08
very