Up next in 10

How to Save Google Drive Files in Google Spreadsheets Using Google Apps Script Example
Dec 21, 2025
Buy the full source code of application here:
https://bit.ly/3YbiYpL
Show More Show Less View Video Transcript
0:00
Uh hello friends, today in this tutorial
0:02
I will be telling you that how to list
0:04
out all of all your files which are
0:06
stored inside the Google drive inside a
0:08
folder inside your Google spreadsheets.
0:11
So using Google app script so basically
0:13
I'm listing out all the files which are
0:15
stored inside a folder its name,
0:17
description, size, download URL and the
0:19
actual link. If I click on this link I
0:21
will be redirected to the image file.
0:23
You will see that this is actual image
0:24
which is stored here. Same is the case
0:26
with this also. So if I click this you
0:28
will see that.
0:30
So I will be telling you that how to uh
0:32
make this application using Google
0:34
appcript. So this is a actual folder
0:36
that I am targeting right now. This is a
0:38
images folder. So these much of files
0:40
are there inside it. So now first of all
0:42
in order to make this application first
0:44
of all you just need to go to Google
0:46
spreadsheet. Just type it on Google and
0:49
the very first link which comes in just
0:50
click it here and uh just create a blank
0:54
sheet here. So Google sheet is it is
0:57
known. So just click it and uh create a
1:01
blank sheet here. So click on the blank
1:03
button here and uh this is a spreadsheet
1:08
Google spreadsheet. And now you need to
1:10
click on the tools here and click on the
1:13
script script editor. So basically it
1:15
will be redirecting you to the script
1:17
editor page here.
1:22
So if you click it in this editor we
1:24
will be writing our JavaScript code. So
1:27
now in this we will be creating our
1:30
custom function. So I will be naming
1:32
this function as uh let's suppose uh
1:34
list folder contents.
1:41
So inside this method guys first of all
1:43
we just need to provide the folder name.
1:46
So let me just zoom in. Uh
1:51
just create a new folder name variable
1:54
and inside this we will be providing the
1:56
folder name. Which folder name that we
1:58
are targeting? So we are targeting the
1:59
images folder name. So which is there
2:01
you can see that we are providing this
2:03
images folder name here. After providing
2:05
this we just need to get the actual
2:08
folder. So folders I will be creating
2:12
this variable. And now I will be using
2:13
this class drive app. And there is a
2:16
method which is there get folders by
2:19
name. We will be using this method and
2:21
we will be providing our folder name
2:24
variable here inside this function. So
2:27
this will return the actual folder. And
2:29
now we just need to
2:32
uh get the folder by
2:35
declaring a folder variable and folders
2:38
dot next. We will be calling this
2:40
method. This will get get the actual
2:41
folder to us. And now we just need to
2:44
get the contents here inside the folder.
2:47
So contents will be folder dot get
2:50
contents.
2:51
So oh sorry get files sorry get files.
2:56
So this will return the actual files
2:58
which are stored inside. You can see
3:00
that currently it is empty. It will be
3:02
returning the files which are stored
3:04
inside this folder. These four files it
3:06
will return. I can even log it. So
3:09
logger.log log and inside this we can
3:12
just pass the contents here
3:15
and after logging it let me just store
3:18
it also. So we will be creating a new
3:20
sheet sheet is equal to and we will be
3:25
using the spreadsheet class
3:28
spreadsheet app dot get active sheet. So
3:33
this will get the active sheet which is
3:34
opened right now. So this will get this
3:36
sheet here.
3:38
And now inside this sheet we just need
3:40
to load our uh data. First of all we
3:43
will be deleting all the data which is
3:44
currently there by calling this method
3:46
sheet. So this will uh delete all the
3:50
data which is currently there inside the
3:52
sheet. After calling this method, we
3:54
also need to append a new data by append
3:57
row. Inside this uh we just need to
4:01
provide the column names. First column
4:04
name will be name, name of the file. The
4:07
second column name will be the short
4:09
little description.
4:11
The third column name will be size and
4:13
the fourth column name will be the
4:15
actual download URL.
4:18
And the fifth will be the actual URL of
4:21
the image. That's it. So these are the
4:23
five columns which are there. Name,
4:25
description, size, download URL and the
4:27
URL. And now after appending this row,
4:32
we just need to create some variables
4:33
here. First for the actual file name,
4:38
description,
4:42
size, download URL,
4:46
URL, the actual URL of the image. That's
4:48
it. And also we just need to declare a
4:51
row variable. So after declaring these
4:52
variables, we will be having a simple
4:55
while loop.
4:57
So while contents dot has next
5:02
we will call this method and inside this
5:05
while loop we will be so as long as it
5:08
contains the image files we just need to
5:10
execute this loop. First of all we will
5:12
be getting the file by contents dot next
5:17
and we can just also log this. So
5:19
logger.log block file
5:22
and uh now we can get the information
5:25
name we can get by file dot get name. So
5:29
there is a get name very
5:32
get name
5:37
method which is here which will get the
5:39
actual name of the file and similarly we
5:41
can just get the description also
5:45
file dot
5:47
get
5:50
description. So this is a method here.
5:52
Get description.
5:57
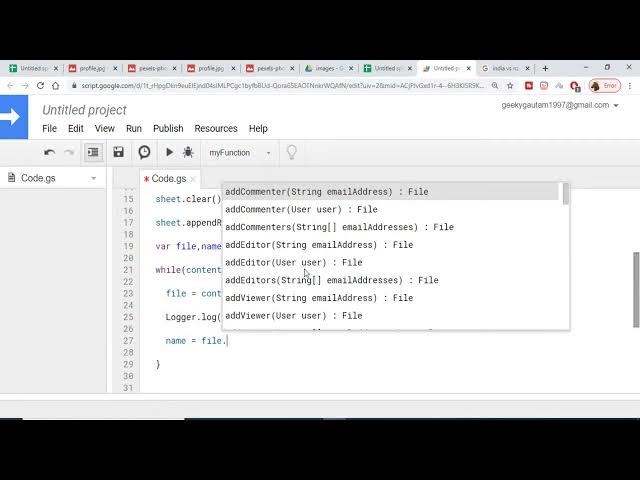
We can also get the download URL like
5:59
this. File do.get download URL.
6:05
Size we can also get file.get size
6:12
and uh also we can just get the URL
6:14
also. file dot get URL.
6:18
I think that all the things are there.
6:21
This is name, description, size,
6:22
download URL and URL. After getting all
6:24
these things, we just need to append
6:27
this row. Sheet dot append row. We will
6:29
again call this method and inside this
6:32
we will pass our data which was located
6:34
inside name variable. Size description
6:38
sorry description will come first.
6:40
description size download URL
6:45
and the URL. That's it. Close the square
6:48
brackets. And now the application is
6:50
complete guys. So now I can just execute
6:55
this uh by running this uh run button
6:59
here. You must save your project. So I
7:01
will be giving a name to it of sheet.
7:05
Click on okay. And now it will be again
7:08
just press this button. So it will be
7:11
asking for the permissions. So you need
7:13
to first of all if you run for the first
7:15
time you need to grant the permissions.
7:17
So I will select the account and click
7:19
on advance and uh click on go to shade
7:23
unsave and I will allow the permissions.
7:27
You need to grant the permissions first
7:28
of all if you run this.
7:31
So
7:33
you just need to select the function. So
7:34
now if I select this, so it is running
7:37
here. So just wait.
7:41
So it takes some time. Now the function
7:43
is completed. Now if I check this, you
7:45
will see that all the four photographs
7:47
have been listed out in the Google
7:49
spreadsheet. This is a description,
7:51
name, size. This is a download URL and
7:53
this is actual URL. If I click it, I
7:56
will be redirected to the actual image.
7:58
Here you will see that this is the first
7:59
image. This is the second.
8:05
This is a third image
8:11
and lastly there is a fourth image. So
8:14
in this manner you can just automate
8:16
this process by saving all your images
8:18
paths size description inside your
8:21
Google spreadsheet using Google app
8:23
script that I have shown to you in this
8:25
tutorial. Very simple. You need not have
8:28
to interact with the API. You need to
8:30
just write this code here simple lines
8:32
of code in order to list list all your
8:35
files which are located inside a folder
8:37
in Google spreadsheet. So thanks very
8:39
much for watching this video.