Up next in 10

How to Enable & Disable Controlled Folder Access in Windows Defender Security in Windows
Jul 7, 2025
Get the full source code of application here:
Show More Show Less View Video Transcript
0:00
Uh hello guys, welcome to this video. So
0:02
in this video, I'll show you how to
0:04
enable or disable controlled folder
0:06
access in Windows Defender Security. So
0:10
right in the start menu, just search for
0:12
Windows security.
0:15
So this option will appear right here if
0:17
you see in the start menu. So simply
0:20
open Windows security. So this will open
0:24
Windows Defender Security which is a
0:26
built-in security tool antivirus tool
0:28
for Windows 10 or 11. So then you need
0:31
to go to this option virus and thread
0:34
protection. Simply go to this and then
0:37
if you drag down you will see this
0:39
option of ransomware protection. So here
0:43
you will see this option manage
0:45
ransomware protection. Simply click this
0:47
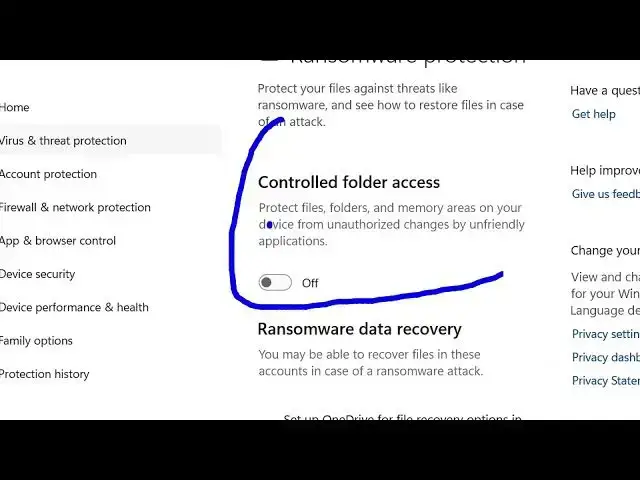
option. After that you will see this
0:50
option appearing controlled folder
0:52
access. So what this option does it
0:54
actually protects your files and folders
0:56
from uh remotely downloading any sort of
0:59
third party app which contains sometimes
1:02
malware or virus.
1:05
So for
1:07
some users turn this off or on. So
1:09
depending upon this you can turn this
1:11
on. As soon as you make this change you
1:13
will see this popup appearing. You just
1:16
need to click yes. And after that
1:20
allow existing exclusions. You have
1:22
existing antivirus exclusions. Copy them
1:24
as controlled folder access allowed
1:26
applications. So you can select yes for
1:29
after this to select it. But I don't use
1:33
control folder access. So if you just
1:36
want to disable this again, you can
1:38
toggle this off by off. And then now
1:41
this is disabled. If you just want to
1:44
enable once again click on yes. And
1:46
after that you can do this.
1:49
And one more way you can do this. You
1:51
can open if you can't access this you
1:54
can open your powershell
1:56
windows powershell and run this as
1:59
administrator. And I've given this
2:01
command here in the description of the
2:04
video. So simply copy this command and
2:06
paste it inside your powershell. So this
2:09
will enable this control folder access.
2:13
This is a command here. And again if you
2:16
just want to disable this again you need
2:18
to execute this command with the
2:20
disabled flag. So now this is disabled.
2:23
So
2:25
I've given both these commands in the
2:26
description of this video. So you can
2:28
even use PowerShell to enable or disable
2:31
control folder access. So in this easy
2:33
way you can do this and also check out
2:37
my website freemediattools.com
2:39
uh which contains thousands of tools.
#Software
#Software Utilities
#Antivirus & Malware