Up next in 10

How to Deploy a React Vite Project from GitHub to Netlify with Continuous Deployment Full Tutorial
Mar 3, 2025
Watch My Visual Studio Code IDE Setup Video For Fonts,Themes & Extensions
https://youtu.be/Bon8Pm1gbX8
Hi Join the official discord server to resolve doubts here:
https://discord.gg/cRnjhk6nzW
Visit my Online Free Media Tool Website
https://freemediatools.com/
Buy Premium Scripts and Apps Here:
https://procodestore.com/
Show More Show Less View Video Transcript
0:00
uh hello guys welcome to this video so
0:02
in this video I will show you how to
0:04
deploy your react Chas project using
0:06
GitHub to netlify.com netlify is a great
0:09
platform uh to actually deploy your
0:12
Cloud applications such as nodejs
0:14
Express react viewes any kind of
0:17
application you can deploy so I just
0:19
created a very simple account free
0:21
account in netlify.com it provides you
0:24
with 7 Days of free trial and also you
0:26
can use their free plan as well so I log
0:29
in with my GitHub account so if you are
0:31
visiting for the very first time just
0:32
login with your GitHub account and this
0:35
will be the actual dashboard right here
0:37
and uh now here first of all I will
0:40
create a very basic vat project of
0:47
react so this is uh my command line so I
0:51
will just execute a very simple command
0:55
which will
0:56
be npm create v v it at theate latest
1:02
and then I will just give it a simple
1:04
app name react app sample template will
1:08
be react so it will actually create a
1:11
very basic react CH application just
1:13
select from the drop Dr react typescript
1:16
and just CD into react app
1:27
template and just install the dependen
1:29
IES by executing
1:31
npmi so this will install all the
1:34
dependencies of this react CH project so
1:36
I'm just starting it from scratch and
1:37
just telling you all the steps necessary
1:40
so if you don't want to watch this you
1:41
can uh watch the full video and then I
1:46
will open it inside vs code so so this
1:49
react CH project will open this is
1:51
actually the directory structure and if
1:53
I try to run it locally just npm runs
1:58
Dev so it will start the development so
2:00
at Local Host
2:04
5173 so this is your simple react V
2:08
project now if I want to deploy this
2:10
there are two ways in netlify in the
2:12
previous tutorial I showed you how to
2:15
Simply deploy this the whole folder
2:18
manually so you can even deploy manually
2:21
straight away by building the project
2:22
and writing it in the dis directory
2:25
simply imploding it the second way is to
2:27
actually first of all deploy your
2:29
project GitHub and then connect your
2:31
GitHub repository to netlify so here I
2:34
will just initialize a git in it git add
2:37
Dash and then I will just commit get
2:40
commit dasm first commit and then I will
2:45
push this project git I will simply go
2:49
to my GitHub and just create a simple
2:52
repo
2:54
here and just create a simple new GitHub
2:58
depo and just let me give give it a
3:00
simple name react sample netlify and
3:04
just click on create repository so it
3:07
will create a new repository I will just
3:09
copy this URL and just paste
3:16
it so just paste it and then say get
3:20
push dasu origin master so it will
3:24
actually push this project to GitHub so
3:26
once you actually upload your project to
3:29
GitHub once you get this GitHub repo now
3:32
it's very easy you go to the netlify
3:34
dashboard simply click this option
3:36
import from git and then you need to
3:38
connect your GitHub account I've already
3:40
connected this so it will not ask me so
3:43
Ive already connected my GitHub repo so
3:45
you will see now after this you just
3:48
need to select or search your GitHub
3:50
repo so just copy this name and I will
3:53
search
3:55
here so simply paste the name and it uh
3:59
GitHub repo will come right here and uh
4:04
now you can see we have this GitHub repo
4:06
simply click on that and
4:08
then just stick to the default option
4:11
you can give a site name but netlify
4:14
give you a random name so then which
4:17
branch to deploy so I have selected the
4:19
master Branch that's all so don't need
4:22
to uh change anything now just click on
4:26
this option deploy react sample nly FY
4:29
so now it will deploy your GitHub repo
4:33
straight away and it is you can see side
4:36
deploy in progress so it is actually
4:38
deploying your project so just wait 5 to
4:41
10 seconds and then it will give you a
4:43
notification that your project is
4:45
successfully deployed to
4:47
netlify so just
4:55
wait so it is actually building it so
4:58
you can also see the
5:00
now you can see deploy success so now
5:03
your project has been successfully
5:04
deployed so you can actually go to the
5:09
URL so you can see that my application
5:12
is successfully deployed uh let just
5:15
wait let me open my zoomit tool so that
5:17
I can zoom
5:21
in so you will see guys it give you it
5:24
gives you the URL your application is
5:27
successfully deployed this is the random
5:29
name netlify gives you netlify app so we
5:32
have the same application and also you
5:35
can go to site configuration if you want
5:37
to change this name you can even do that
5:39
as well so this is actually this button
5:42
right here change site name so if you
5:44
want to change it just say geki Gotham
5:48
1997 so if you click save if the name is
5:52
available then this name will be changed
5:54
so now if you see your site name is
5:57
changed so the customized name gigy
5:59
Gotham 1997. netlify DOA so in this easy
6:03
way guys you can deploy the project
6:06
straight away to netlify using the
6:08
GitHub and now if you make any sort of
6:11
changes let's suppose uh inside your app
6:14
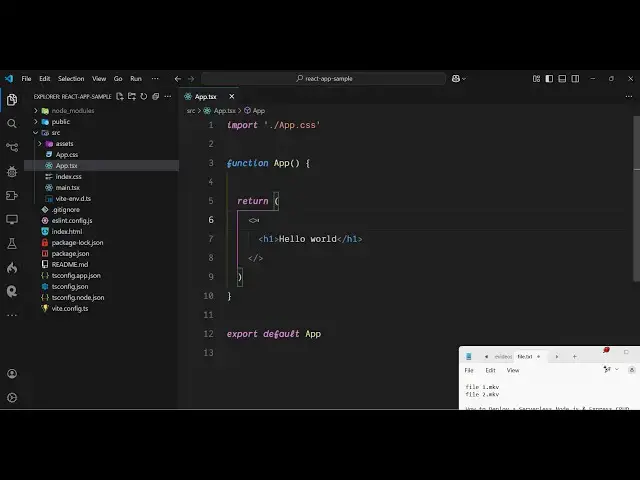
so if I delete everything here and
6:17
replace it with a Hello World message so
6:21
if you make any sort of change uh let me
6:23
delete everything from
6:25
here so if you make any sort of change
6:28
you just need to redeploy
6:30
sorry uh add this just make commit those
6:34
changes so as you commit netlify will
6:38
automatically continuously deploy this
6:40
so if you commit these changes then
6:42
again just need to say get push dashu
6:46
origin master so as soon as you push
6:49
push the changes to GitHub as this
6:51
command is successful automatically
6:53
netlify will automatically redeploy your
6:56
site you don't need to do anything
6:58
because you have success sucessfully
6:59
connected
7:01
your uh GitHub report to the nly file so
7:04
as soon as you do this command
7:05
automatically your project will be
7:08
redeployed and uh with those modified
7:10
changes you can see as soon as you make
7:12
the changes you will see it actually
7:14
fetches those changes from the master
7:17
repo it automatically start building the
7:19
project so as soon as the build is
7:22
complete you will see it is
7:25
automatically continuously deployment is
7:27
there from GitHub Master branch so now
7:31
you can open your application you will
7:33
see Hello World message is coming up so
7:36
it's very easy guys how to deploy react
7:39
Chas project to netlify I showed you
7:41
step by step the very first step is to
7:43
create a GitHub report just connect it
7:45
to the netlify platform and as soon as
7:47
you make the change you will see get
7:49
netlify will redeploy the project you
7:52
don't need to do anything it's automatic
7:55
continuous deployment from GitHub so
7:57
it's a most easy way by which you can
8:00
deploy uh project to netlify just create
8:03
a GitHub repo and just connect it with
8:05
that so thank you very much for watching
8:07
this video and also check out my website
8:09
as well freem mediat tools.com uh which
8:12
contains thousands of tools regarding
8:14
audio video and image and I will be
8:17
seeing you in the next video
#Programming
#Web Services