Up next in 10

Build a PHP Google OAuth2 Login and Logout System With Sessions and MySQL Database in Browser
Jan 9, 2025
Buy the full source code of application here:
https://procodestore.com/index.php/product/build-a-node-js-express-passport-google-login-logout-system-with-sessions-and-mysql-in-browser/
Official Website:
https://freemediatools.com
Show More Show Less View Video Transcript
0:00
uh hello guys welcome to this video so in this video we will talk about how to build out a complete Google oo login and
0:09
log out system in PHP and storing the details in my SQL database once the user
0:14
has granted permissions and we'll be displaying the details of the user something like this the display name
0:20
email address and the profile picture and a simple log out button so you will
0:25
basically see I'm currently logged in inside the application and if I go to the homepage it will automatically redu
0:31
me to the profile page because it already detect that I'm currently logged in so it is storing the information in
0:37
sessions in PHP so let's suppose if I close this tab right here and reopen the
0:43
tab it will automatically detect if I go to the homepage of the application it
0:49
will not show the login page it will automatically detect I'm currently logged in that's why it will redirect me
0:56
to the profile page and show these details to me so we are actually using exam control panel which is actually we
1:02
are locally developing this application Apache control panel we are using uh PHP
1:08
my admin which is actually a interface by which you can actually create tables
1:15
so if you see uh we have the users table right
1:20
here inside which if you see if I show you the code right here in the config
1:26
PHP we have this table out there users
1:32
and if I go to the users table you will basically see this is actually the structure we are storing the ID which is
1:39
a primary key Google ID display name email photo and Tim stamp and there is
1:45
one record out there you will see coding seure display name email address geeki goam [email protected] this is a profile
1:53
photo link that we are storing it this is a Google ID so all this information we are displaying it on the screen and
2:00
uh let's suppose if I click the log out button so what will happen it will redirect me to the login page so now
2:08
once again if I log in it will redirect me to the profile page let's suppose if
2:15
I log in with a different account like right here let's suppose I go to the
2:20
same application but login with a different uh
2:26
browser oh sorry let me put the correct spelling or
2:32
login so this is actually the interface that you will see once you run this
2:37
application login with Google so if you're running it for the very first time then it will show you this uh
2:43
account screen choose an account right here here you can actually select your Google account to actually login click
2:51
on the button to actually login Grant the permission project want to additionally access click on continue so
2:59
when was once it does you will basically see welcome goam Sharma your email address this one this is a profile
3:05
picture and if I show you the database the table so there is a single record if
3:11
I refresh now there will be a second record which will be added which is you
3:16
will see display name Sharma email Sharma you will see this is actually profile photo the link is actually being
3:23
inserted this is actually timestamp as well so automatically whenever new user
3:29
logs in the database will get a record inserted so this is actually the
3:35
application guys we will be building in this tutorial so if you are watching it for the very first time please hit that
3:41
like button subscribe the channel as well and basically all the source code is
3:47
given in the description of the video if you need the full source code of this project the full source code is given
3:54
you can directly purchase it from my website procore.com I have given the link after you purchase you will
4:00
actually redirect it to Google Drive where you will actually download the full source code files here this is the
4:06
Full Source Code Files full documentation will also be available so let's start building this project so the
4:13
very first thing guys I will do right here and you do need this software exam
4:19
control panel if you're developing PHP applications so just type
4:24
on Google download exam control panel so it's a cross platform software it's
4:31
available for Windows Mac and Linux depending upon your operating system in
4:37
install it and simply start your Apache server which will run on V 80 and my SQL which will
4:45
run on port number 3306 so go to PHP my admin and right
4:51
here in the SQL statement we will actually be creating database and table as well so first of
4:58
all what I will do uh by default all the PHP applications are
5:03
located in the C directory whenever you install exam there will be this exam folder created and the HT docs folder HT
5:11
docs you need to go to this folder and now create your directory so if I open
5:16
command line here I will make a directory here which is Google login
5:21
project I will CD into this directory Google login project open it inside vs
5:29
code so I you can see I opened this so simply
5:34
I just need to uh require a package which I will
5:42
install it using composer composer is a dependency manager for PHP applications
5:48
similar to npm and when it comes to nodejs or pip when it comes to python so
5:53
composer I have installed if you see I have installed it inside my machine so we can run it this
6:02
command composer and require Google SL API client so we will
6:10
be using the Google oo login system so for that we are using
6:16
the Google API client and you need to require it so on the left hand side guys
6:21
it will first of all create the composer. Json file and then it will actually install the modules it will
6:28
create the vendor folder in the left site all the modules will be installed so once it's installed you will get a
6:34
notification that your in modules have been installed so it will hardly Take 5
6:40
to 10 seconds depending upon your internet speed so just wait for it to
6:49
finish so in the meantime guys what we can do we can actually create our
6:56
database and table so if you go to PHP my admin go to the SQL section and right
7:03
here we will actually be creating a database so there is a create command create database we'll be creating a
7:11
database called as Google login project this will the database name put a
7:17
semicolon and then we will use this database which is Google login
7:22
project put a semicolon and then we will create table so create table followed by
7:28
the table name which is us users and set of parentheses like this this is
7:34
actually syntax guys if you don't know about SQL so right here uh we will be giving
7:41
an ID here which will be the primary key so ID int integer it will be Auto
7:46
incremented automatically it will be incremented and this will be the primary key this will be unique so that you can
7:53
actually Target Elements by using the primary key and then we have the Google
7:59
score ID so here this will be VOR V
8:04
length will be 255 and it will be not be null it should not be null it should
8:10
have some value so this Google ID will be coming from Once you log in this will be coming automatically then we have the
8:17
display name of the user again this will be varar
8:24
255 then we have the email
8:30
again this will be
8:36
vchart so just make sure that you put a comma every time the record and then we
8:43
have the photograph of the user again this will be varar 255 we storing the
8:49
link of the photograph and lastly we will store the time stamp created value
8:56
whenever the record is created this will be the default the current Tim
9:02
stamp time stamp generally means time so whenever the record is created we store the time as well so
9:10
that's all guys this is actually the SQL code and there is actually a Go Button out there if you see click on that and
9:17
now your database will be created which you see Google login project inside that we have a simple table which is users if
9:25
you see the structure of the table we have ID primary key Google ID display name email photo created uncore at so we
9:33
have actually created the database and the table which is very easy now if I
9:38
see you uh basically if I show you
9:49
the so it is installing you can see now all the packages have been installed you
9:55
will see this autoload.php file we just need to load this file so right here just create a index. PHP
10:03
file this will be the starting point of the application so right here we will
10:08
actually be having a HTML right here and we will say PHP o login and log out
10:19
system in uh using my
10:27
SQL so this is actually the typle tile and after this we will actually be having a simple heading to the user that
10:34
welcome to PHP login system after this heading we will
10:42
actually have a simple button where we will redirect the user to the login page
10:48
so this will be very simple and anchor
10:58
tag so we will say to the user go to login.php file and we'll simply say
11:04
login with Google so what it will does guys if
11:09
you if I open this now Local
11:14
Host sorry Google login project there will be this thing if I go
11:22
to this this script doesn't exist we do need to create it so as you can see we
11:27
are clicking it it's clickable link and if we just need to create our login.php
11:35
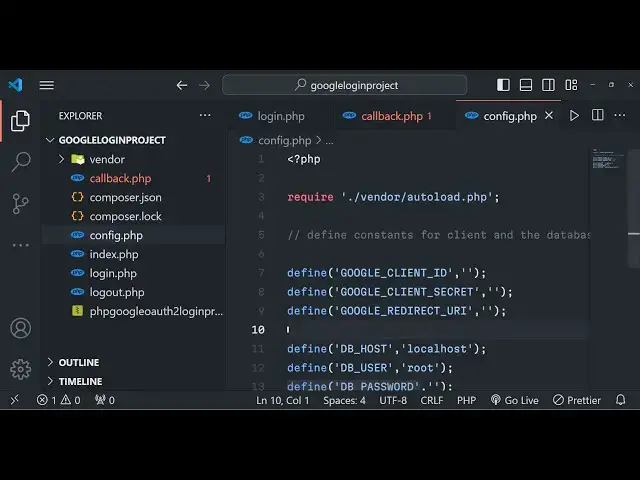
script and also guys before writing the script we also need to config some values so just create a config.php file
11:43
here we will be storing all the constants which will be required for the application all the values just PHP we
11:50
need to first of all require our vendor file so do vendor and autoload.php
11:59
so we are actually requiring the base library that we have installed in the vendor folder we are requiring this file
12:05
autoload.php which will actually load all the libraries for us so we are
12:10
loading it in the config.php and we are need to Define some constants Define the
12:17
constants for the client and the database so the
12:24
very first constant we will Define is the Google uncore client
12:30
ID so for the time being I will just make sure that I give these values
12:36
Google unor client secret so all these values I will show
12:43
you how to get these values and the third value is Google redirect
12:53
URI and then we have the database host DB host dbor host by default this is
13:02
Local Host because we are developing it on the Local Host environment that's why it is Local Host then we have need to
13:08
give user password and database name so this needs to be defined
13:15
sorry then we have uh dvore user which will be root by default if you haven't
13:22
changed the settings and then the DB password this will be nothing the
13:28
default password and then we have the database name so database name we have given
13:35
which is Google login project this is my database name so we have defined all these
13:43
constant guys now we need to get the Google client ID client secret and redirect URI so you actually need to get
13:50
these details in Google Cloud console once you actually create a project it's
13:55
very simple uh let me show you so go to your Cloud console and uh just
14:03
inside the menu apis and
14:10
services just here apis and services go to credentials and here you need to
14:17
create a o client ID and right here we need to give it the application type
14:25
will be web application and authorize JavaScript origin because we are developing it on the Local Host so HTTP
14:32
Local Host and authorized redirect URI so redirect Ur So this simply means that
14:39
whenever user cfts the permission where the Google should redirect your
14:44
application to so I will first of all this is actually
14:50
my base URL which is Local Host Google login project so first of all I will
14:55
paste this right here and Then followed by callback PHP so I
15:03
will just create this file callback PHP so this will be the call back URL so I will simply copy this and click on
15:10
create so it will give me the client secret and client ID redirect URI I will simply paste it this is the same
15:18
redirect URL that I've given it in the settings so now this client ID and client secret will be different for you
15:25
so don't copy my information just see use your your
15:35
information so then we have the client secret as well so that's all that we need to do
15:42
guys in this file simply close it now what we need to
15:48
do we now need to go to the login.php script once we go to the login page so
15:55
we need to say PHP
16:00
and then we need to again require that file which is uh config
16:10
PHP so we are requiring it and then we are invoking this client we need to pass
16:15
the information we need to say new Google uncore
16:25
client so we now need to set some information guys right here which is set
16:31
the client ID this will be coming from Google client
16:39
ID then we have to set the client secret so again this will be coming from Google
16:46
client
16:57
secret uh and then we need to also set the redirect URL so this will be Google redirect
17:09
URL so then we need to add some Scopes guys what sort of information that we
17:15
need to request from the Google API so we need to set the scope it's very easy
17:20
by using this method add scope which is available in the PHP API of uh Google API client
17:29
so you need to have in single quotes just mention
17:38
it so we need to add the scope we also need to request the profile information
17:44
which is the display name profile picture for that we also need to add the scope of profile so after you do this it
17:52
becomes very much easy we need to construct a URL which is au URL
18:02
so we will say that client create or
18:10
URL so we are creating an all URL and then we need to redirect the user so we'll use the header function we can say
18:19
location and then we will just join it by using witer Fab or
18:28
URL
18:35
and then put a comma and we need to now pass a constant here which is filter
18:40
sanitize URL and then we need to also exit the
18:51
program so this needs to be filter where
19:00
so that's all that guys you need to do here and if I just refresh here and go
19:05
to this page so you will basically see it will redirect me to the login page it will show you the list of accounts right
19:13
here you you can select it so let's suppose if I select this
19:19
account and click on continue we will now see it will redirect me to this callback PHP script which I don't have
19:27
right now at this moment we will be you can see this code parameter is passed right here in the URL this is called as
19:35
authorization code so in the oo Google oo flow whenever you first of all Grant
19:41
the permissions to login this authorization code is generated now we need to get the access token by
19:48
exchanging this authorization code so now to get the access token guys we need
19:54
to write our call back redirect URI script which is called PHP file so we
20:01
need now need to first of all get that uh authorization
20:07
code you will basically check if authorization code exist in the URL or
20:21
not so first of all we also need to start
20:27
the session so session _ start as well and then we need to require uh that
20:35
config.php file again at the
20:40
top
20:47
so so after you do this guys we now need to
20:53
create the client ID we need to create the client so for
20:59
creating the client we will simply say new Google
21:05
client and then we need to basically say set the client
21:12
ID we will say Google _ client
21:18
ID so we just need to repeat this information once again we need to set the client we need to set this three
21:26
things client Secret
21:36
and we also need to set
21:43
uh the
21:52
redirect so after this guys we now need to check in the if condition that if that uh parameter is present in the URL
22:00
which is the get I can simply say if this
22:06
parameter exist which is the code parameter if this exist in that
22:16
case uh let me just parenthesis close this so right here if this is available
22:22
then we need to access the token access token
22:29
exchange it with the access token so we can create a variable token
22:36
and there is a method available right here which allows you to get the access token fetch access token with
22:43
authorization code there is also a access to fetch access token with refresh token as well so if you got a
22:50
refresh token then you can even get it access token so for the very first time we need to fetch the access token with
22:56
authorization code that we got we'll actually use this method and actually pass
23:01
our authorization code so you say pass this code so now we actually got this uh new
23:11
we can initialize the service new service o 2 and we will actually pass
23:19
the client right here as a parameter then we will actually get our Google
23:25
user guys so now to get this Google user
23:31
oo and there is a method out there which allows you to fetch the user info
23:40
get so this is actually the method to actually fetch the profile information about a specific user using this access
23:47
token that we got and after this after we get the user
23:53
information we now need to connect to the database and store this
24:02
info store the info of the user so you will simply say my sqi new my
24:11
sqi and we'll basically pass the DB host DB user DB password and DB
24:22
name so here we'll simply check that if the connection has not been successful
24:28
if any sort of error take
24:35
place so if my sqi has some error connecting the database we can simply TR
24:41
and print out message connection to database
24:49
failed so put a semic call and after this if the connection is successful
24:55
then we will simply check if the user exist in database in table or
25:06
not so for doing this we will simply make a SQL statement my SQL I we will
25:12
say prepare so prepare and here you will
25:20
simply select all the users select star from users
25:27
where Google ID is equal to question
25:32
mark so here we need to put the placeholder we need to bind it bind
25:43
param with the generated ID user uncore ID Google user-
25:50
ID so this is uh you need to put this dollar sign right here so after we pass
25:56
the user ID we need to execute this command by using the execute
26:03
method and then we will basically say result and
26:10
statement get the result so this is actually the function that you need to get the actual result from
26:20
the of the profile of the user so it will be stored inside this result
26:25
variable now we need to actually get the user so what we can say
26:32
result and fetch an associative array of the profile of the user which will
26:37
actually contain the display name profile picture and the Google uncore ID all this information so here we will
26:44
simply have a if block right here if the user information exist then in that case and
26:54
else in the else blog we can simply redirect the user back to the
27:01
homepage and then we can simply
27:07
di so if the user is successfully found and then that case we need
27:13
to insert them into the table so we'll say prepare you can simply if the user
27:20
already exist then we'll update the information we will set the display name
27:28
question mark email to be question mark and photo to be question
27:36
mark where Google uncore ID is equal to question mark so now we need to bind all
27:42
these parameters so how we can do
27:49
that so there is a bind param VAR method so do. s so we need to first of all bind
27:57
it with the the name of the user so Google
28:08
user so if you see basically we have
28:14
uh this Google user variable that you see that we got in associative are we
28:21
are using it and one such value of this associative array is name so we are actually initializing it
28:28
to the name then comes
28:35
uh Google uncore user email then comes Google
28:44
user picture and then again Google user
28:52
ID so after binding all these parameters guys what we need to do
28:59
so just make sure you write
29:12
it paste it so now you can see that now it is not having some problem so after
29:19
you bind this you just need to execute this statement so statement execute
29:31
so so else if the user doesn't exist in that case we need to insert it in
29:40
the database so for inserting it we
29:46
have again this method my SQ I
29:55
prepare so we will have the insert statement insert into the table which is
30:01
users and we'll put this parenthesis right here which is Google uncore ID
30:08
display underscore name
30:14
email photo so here we need to give the values
30:19
as well after you inserting which which values
30:26
so we will simply say the values which is question mark question
30:32
mark question mark so these are placeholder values put
30:43
is so in insert so put
30:50
a single code right here
31:00
semicolon right here that's all and we just need to put
31:06
a dollar sign right here so we now need to bind the values
31:12
so we can simply say bind
31:17
params SSS so the very first thing which is the
31:23
Google uncore ID Google
31:30
the
31:36
name sorry name and Google user
31:43
email and Google user
31:50
picture so this will be Google uncore user
31:58
so that's all guys we have successfully binded all this now we just need to execute this
32:07
statement so now we just need
32:13
to have this user object that we have so we just need to initialize the values
32:19
the ID will be equal to statement whenever the record is created
32:24
the ID will be insert underscore ID and then the Google
32:33
ID which will be Google
32:46
user so display
32:53
name so we are actually you can see ID Google ID
32:59
so two more times what we can
33:07
do so I think if some any s sort of error
33:12
take Google user
33:22
sorry sorry put a semicolon right here
33:27
and then right here now correct so here we need to change uh this one to email and this one
33:35
to photo this one to
33:43
picture this one to email so here guys you will see that we
33:49
have initialized it this user object we have given it five properties the ID
33:55
Google ID display name email and photo so these are all the same properties we are storing it in the database if you
34:01
see the structure right here now we just if I I think it should do it so right
34:09
after this call bracket we need to initialize the
34:14
session variables so we have we will basically be creating a session variable
34:20
of user uncore ID which will be equal to user ID whatever is the user ID and also
34:28
another session variable which will be the actual user
34:33
and it will be same in the user variable that we have which we constructed in the previous step we will initialize it to
34:40
the session variable session user you can see use user variable that we
34:45
have it is having it associative array and then we are initializing it to this
34:53
like this so
34:59
so now guys what we need to
35:05
do so after this we need just need to redirect the user back to the
35:12
homepage once they are authenticated we can say header
35:21
location index.php and exit out of the program
35:30
and also right here if you uh if the authorization code is not initialized in
35:35
that case there will be a problem so in that case also we can redirect the user back to the index page
35:44
index.php this is rarely will happen in any case if the information is not correct this condition 90% will not take
35:52
place out of 95% this condition will be true authorization code will will be
35:57
there we will be getting the access token with it then we'll initialize the Google o through client we will get the
36:03
user information then we will simply check if the user already exist or not if the user already exists then we will
36:09
simply update the information right here if the user doesn't exist then we will
36:15
insert this information into the users's table and initialize the session variable as well this is a quite a very
36:22
simple logic guys that we we are developing it now we just need to go to the homepage which which is index.php
36:29
and based upon if the user exist or not we just need to show the profile
36:34
information details so right here if I show
36:45
you so in the index word PHP page right at the top we just need to add a PHP
36:51
block of code so here we will simply check we will simply check if the user
36:59
is already logged in or not so right here we will simply say if
37:08
is set dollor session variable user ID
37:13
user _ ID exist in that case user is logged in so we'll simply say the user
37:20
variable will be equal to session
37:25
user in D FL the user is null if the user doesn't
37:31
exist then in that case user is null if the user ID doesn't exist so we have
37:36
made this in at the top of the thing very simple logic and now based upon
37:42
that we can inside our HTML we can just wrap everything in a if condition that
37:49
if the user exist in that case colon in this way you can write PHP if
37:57
conditions conditional logic so we can even have a else block
38:04
as well else and then we can also have and
38:14
if semicolon so in this way you write if
38:20
and else statements inside PHP mixing up with HTML as well so now we need to
38:27
Dynam basically write
38:33
here we can actually write a very simple PHP line here
38:39
PHP Echo HTML special correctors we'll use this function because we are
38:45
fetching the data from the database from the table and we'll simply say right
38:51
here user display underscore name
39:02
so if you just refresh now guys what will happen right here just see if I go to the
39:09
homepage so Local Host Google login project if I
39:15
just uh browse it if I need to just delete everything here delete delete
39:30
I think I'm not running this
39:38
application so now it is running it tit Google login project
40:04
uh I think uh session I think in this file if you see at the very top we do
40:11
need to start the session as well guys so right here at every file you need to
40:16
start the session you need to call this function session start and also we need to require this uh config file as well
40:25
config.php this file we need to require it that's why that's why it was not
40:30
working and again just cross check in every file at the very top we need to start the session so right inside your
40:39
call back. PHP file as well if you see at the very top we need to start the
40:46
session this is your call back. PHP file and now in the login.php as well we need
40:52
to start the we are requiring this you can see requiring config.php
40:58
so now it looks good and if I try to run this application you will see I'm not
41:04
currently logged in the table is empty if I show you the record nothing is present in the table so if I click login
41:11
with Google it will actually say to me uncut my SQL statement bind parameter
41:17
cannot be passed by reference call back by 69 on line number 60 there is some kind
41:24
of error line number 60 so it exactly
41:30
pinpoint Google uncore user ID Google
41:41
username uh just wait guys let me just uh pinpoint that insert
42:02
let me paste this uh paste it here now I think it looks
42:09
correct there will be the full source code is present guys with full documentation you can purchase it the
42:14
link is given and if I try to run this once again the number of variables must
42:20
match the number of parameters in the prepared statement in okay I think uh I made a mistake
42:26
right here so what I will do is that I will simply copy paste this whole source
42:33
code sometimes in coding guys uh mistakes may happen so what I will I will don't waste
42:40
your time the full source code is present in the description you can directly purchase it so once we do this
43:00
so if I show you the table right here you can see one record has been successfully uh entered you will see the
43:07
ID is one Google ID coding fure and this is actually the email address and
43:13
photograph so it is already been
43:18
inserted so
43:27
and then we have this file right here let me see it should print print out the
43:44
information this is the index the homepage of the application let me paste it
43:57
so if you see guys basically if
44:02
I there is a log out if I click the log out button right here this script
44:08
doesn't exist so we do we just need to create a simple script right in the root
44:13
directory logout.php so here this very simple script guys it will actually log
44:19
out and destroy the session it will delete this information so it's very easy two lines of code we need to first
44:26
of all start the session and then we need to destroy it
44:34
so session destroy this is a function and then we need to again
44:40
redirect back to the user home
44:45
page and exit out of the
44:51
program so now if you just see click on log out you will be redirected back to
44:57
the homepage so now if you redirect welcome coding sea your email address profile
45:03
picture and if I close the tab right
45:08
here and reopen this application it will already detect that I am currently
45:14
logged in it will automatically show you the login page Google login project you
45:19
will see that if I click log out now if I go to the same page it will
45:27
automatically detect I'm currently logged out so it will show me the login page so this way you can see that guys
45:33
you can try out with any if I again try out with different browser Google login
45:42
project click you will be redirected to the login screen where you can select your account click Grant the permission
45:49
and you will basically see welcome email address profile picture log out button
45:55
if I see you the table as well one record if I show you where is
46:05
my uh my app so two records I think will be
46:15
inserted sorry I think yes this one Google login project users to records
46:21
you will see har you see email this is profile picture so two records are present right here
46:27
you can log out again log in so you will see that so it's a very simple application guys the full source code is
46:34
given in the description you can directly purchase it from my website procore.com so full documentation you will get full
46:41
support you will get after you purchase it the link is given in the description so you can see that it's very easy and
46:49
uh in the you can see that in the index.php we
46:57
are actually displaying this uh display name we are displaying the email we are displaying the photograph then we have
47:03
the log out button in the else blog if the user is not logged in in that case we'll show you the login with Google
47:10
button right here so conditional lodging depending upon whether the user is logged in or not we are using it mix it
47:16
with PHP and HTML so thank you very much guys for watching this whole video thank you very much please hit that like
47:22
button subscribe the channel and I will be seeing you in the next video
#Programming