Up next in 10

Build a PDF.js Web App to Export All Pages of PDF as PNG Images in Browser Using JavaScript
Jan 9, 2025
Get the full source code of application here:
https://gist.github.com/gauti123456/663054ec11c6bcb69ff129d662fb478d
Show More Show Less View Video Transcript
0:00
uh Hello friends welcome to this video
0:02
so in this video we will look at how to
0:04
actually build a pdf2 images converter
0:08
inside
0:10
browser using Mozilla PDF JS
0:14
Library so we have built this interface
0:18
using bootstrap and you can actually see
0:20
inside this user interface we actually
0:23
allow the user to Simply select the PDF
0:26
file to process so once the user selects
0:29
the PDF
0:30
file we have this button out there
0:33
convert PDF to images so what this
0:36
application does it actually takes the
0:38
screenshot of each page in the PDF
0:40
document and it converts into PNG image
0:43
so once I click this button what should
0:45
happen right here you will see in the
0:46
tabular structure for each page in the
0:49
PDF document we have taken the snapshot
0:51
and we have converted that into a PNG
0:54
image and for each a page you can see
0:57
right here we are showing this page one
1:00
we have the short little preview of the
1:02
image the user can see and then we have
1:05
the button to actually export this page
1:07
one to PNG image so I can click this
1:10
button any of these buttons so if I want
1:13
to take the snapshot of the fifth page
1:15
of the PDF document so you will see the
1:17
fifth page has been converted to PNG
1:19
image so you can just see the quality of
1:22
the image is
1:24
good so I will show you in this video
1:27
how to build this very simple
1:29
application and it works entirely in the
1:31
browser no server site code is involved
1:34
you can run this inside the browser all
1:36
the source code is given in the
1:37
description of this video and for
1:40
building this we are actually using this
1:42
Library PDF JS which is made by mozila
1:47
this their this is their homepage PDF JS
1:51
it can it's a PDF processing
1:55
Library which can be used for rendering
1:58
PDFs it can be used for parsing PDFs all
2:02
that stuff so let's start this
2:06
application
2:09
so let me delete everything and start
2:12
from scratch so I have just included at
2:15
earliest you will find the uh code in
2:18
the description I included the bootstrap
2:20
CDN and the PDF JS CDN just to use this
2:23
library in
2:26
the browser so after we do this we will
2:30
write the interface we will have the div
2:32
tag which I will give it a container
2:34
class of bootstrap and make a interface
2:38
card like interface MX
2:41
Auto do Shadow P4 padding for and we
2:46
will be giving a Max width of uh 600
2:51
pixel or 800 pixel inside this we will
2:55
actually have a heading H1 heading this
2:59
this heading will simply say that
3:02
PDF to PNG
3:05
converter and we will simply align this
3:09
heading in the center positions so we
3:11
will give it a class of bootstrap which
3:13
is text
3:16
Center font size I will set it to four
3:20
font weight FW I will set it to bold
3:25
margin bottom
3:26
four so if you just refresh your browser
3:29
it will look something like this in a
3:31
card likee structure we have a heading
3:33
in the center position so after we do
3:37
this we need a simple form where we
3:41
allow the user to Simply select a PDF
3:43
file so we will
3:45
simply have a input type file and it
3:48
will only be accepting PDF file and it
3:51
should be required you'll be giving an
3:53
ID to it so that we can Target in
3:56
JavaScript PDF file and a bootstrap CL
3:59
class of form
4:02
control so you will have this choose
4:04
file button where you can only select a
4:06
PDF
4:08
file after that we will have a simple
4:11
button
4:13
to submit the form so you'll simply say
4:15
convert PDF to images we will bind a on
4:20
click listener for that we need to give
4:22
it a ID to it this button so convert PDF
4:25
and a bootstrap class of BTN BTN primary
4:30
and width I will set it to 100 and
4:32
margin bottom
4:34
four so if you see we will have a full
4:37
size button so this is a responsive
4:40
interface which will be looking good in
4:42
mobile devices desktop devices as well
4:45
so we have built the interface now we
4:47
need to write the JavaScript code for
4:49
this purpose but before that uh just
4:52
after this button is ending we also need
4:55
a area where we will be showing the
4:56
images so for that we will be using a
4:59
table tag tabular structure and you will
5:03
be giving some bootstrap classes table
5:06
table
5:07
bordered table stript so all these are
5:10
bootstrap classes inside the table tag
5:13
we will have table head tag table
5:16
row and here inside this we will have
5:20
table
5:21
headings First Column will be for the
5:23
page number second column will be for a
5:26
short little preview of the image and
5:29
and the third column will be for the
5:31
download button so I will simply call
5:34
this as
5:36
action so in the table three columns
5:38
will be
5:39
there so we need to align it in the
5:42
center position so I will simply give it
5:44
a text Center class of bootstrap so you
5:46
will see the table will look something
5:48
like this
5:50
so after that the table head tag we just
5:53
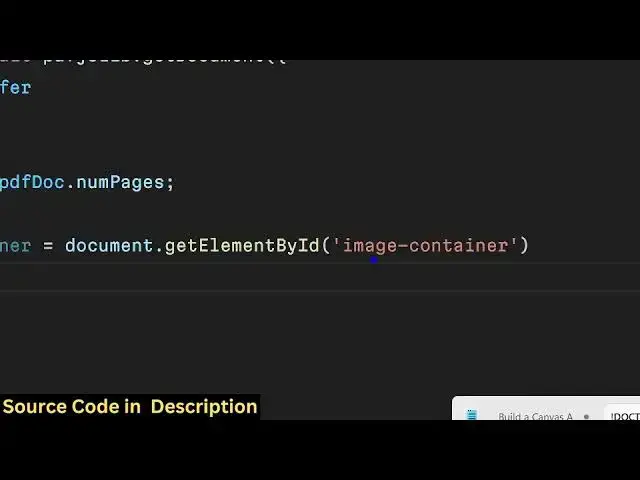
need a table body tag we need to give it
5:55
an ID to it of image container so here
5:59
we will will be dynamically be showing
6:00
the data using JavaScript code so that's
6:04
all that you need to write the HTML code
6:07
now we need to write the JavaScript code
6:10
so just make a script tag and we will be
6:12
writing the JavaScript code in a
6:14
different file so we have made the
6:16
script.js F so now for the JavaScript we
6:20
need to bind a on click listener to the
6:24
button using get element by ID we have
6:27
given that ID to the button and we will
6:30
bind a on click listner so when we click
6:32
the
6:33
button so this call back function will
6:35
execute so first of all we do need to
6:38
get access to the PDF file that the user
6:42
select for that we will again use the
6:44
get ele by ID function we have given an
6:47
ID to the button PDF
6:49
file and after getting that element
6:52
reference we can easily get the file by
6:55
using uh file input. files you only need
6:59
to get the first file so like this we
7:02
can get this and then we will simply
7:05
check if the selected PDF file is not a
7:10
PDF file in that scenario we will simply
7:13
alert the
7:14
user that please upload a PDF
7:21
file so this simply means that the user
7:24
hasn't selected any file so they we'll
7:26
simply show a message to the user please
7:28
select a PDF file file before
7:32
proceeding now if the file has been
7:34
selected now we need to read the file
7:37
now for reading the file we will make
7:39
use of uh array buffer so just make sure
7:43
that you make this function as async
7:46
because we are using a wait keyword
7:47
right here just and in order to read
7:51
this we will use the aray buffer which
7:53
is built in inside JavaScript so you'll
7:57
be using the AR buffer technique of
7:58
reading the
8:00
file and after
8:03
that we will simply again use a weight
8:07
and we will be using this PDF GS lib
8:10
library in this way you can initialize
8:12
this library in the browser and it
8:15
contains a function called as get
8:17
document so we we will be using this
8:19
function and this function takes an
8:24
object and it contains a property called
8:27
as data and here you need to pass this
8:29
array that you
8:31
read as the first
8:33
property and this returns a promise so
8:37
we need to write here do promise like
8:40
this so after you read the document it
8:43
contains a lot of properties one such
8:46
property is that how many pages are
8:48
there in the PDF document so this object
8:51
contains a property called as numb pages
8:54
so num Pages simply uh tells how many
8:56
pages are there in the PDF document it
8:58
will return that that numeric value and
9:00
you'll be storing this value in the
9:02
variable of num Pages now we need to
9:04
Loop
9:06
through all each page and take a
9:09
snapshot of each page so we will
9:12
be first of all get the reference of the
9:15
image where you need to show the images
9:18
so we have given the ID here image
9:21
container if you check in the
9:24
HTML we have given this image container
9:27
ID right here so dynamically we will
9:30
be showing those images at that location
9:33
using JavaScript code so first of all we
9:37
will simply say image container do inner
9:40
HTML I will set it to
9:44
null and
9:46
then uh we will be using the for Loop so
9:49
we will be looping through let I is
9:51
equal to Z we will take an index
9:53
variable and this uh loop will run until
9:56
this value num pages that we calculated
9:58
in the pr previous step so how many
10:01
pages are there in the PDF document it
10:03
will run until that this Loop and for
10:06
each
10:08
page we will
10:11
basically take the snapshot and for that
10:14
purpose we have this function right here
10:15
in this Library which is get page so get
10:18
page will get go to that page and here
10:22
it takes an argument which is the page
10:24
number so page number is I so it will
10:28
Loop through in this Loop for each page
10:31
it will go to that page and then for the
10:34
screenshot we need to calculate the
10:38
viewport the dimensions and it contains
10:41
a function for that which is get
10:44
viewport and here you can set your scale
10:47
of the
10:48
screenshot I will set it to two so you
10:51
can set the scale property of your
10:53
screenshot accordingly so after you do
10:56
this you need to take the snash uh
10:59
snapshot of the PDF
11:02
page and for that we need to create a
11:05
dynamic element of canvas using this
11:07
create element function of JavaScript so
11:09
we will simply be saying
11:11
canvas after that we need to Simply set
11:14
the canvas width and height to the
11:17
viewport width and height like this
11:20
canvas width canvas height viewport
11:24
height
11:26
so after that in order to take the
11:29
snapshot we do need to get the context
11:31
as well so we can easily get the context
11:34
by using this function get context and
11:36
we need to get the 2D context so now we
11:39
need to render this page to the canvas
11:43
for doing that we have this function
11:45
called as page
11:47
render this Library contains a this
11:49
function render function and here it
11:52
takes an object which contains this
11:54
property canvas context and here we need
11:57
to pass our own context that we we
11:59
created earlier and then the second
12:02
property is the viewport viewport is the
12:05
actual viewport that we created and
12:07
again it returns a promise you will
12:09
write do
12:11
promise and after it taken the
12:14
screenshot we now need to also create a
12:17
download button and show it in the table
12:20
structure so the user can download the
12:23
image and now to create that button we
12:26
will again use create
12:27
element in this time we'll create a
12:30
button element and you simply say
12:33
download button text content it will
12:35
simply
12:36
say
12:40
export and whatever is your page
12:46
number and
12:49
uh so mind you all this code that we are
12:52
writing with this is there in inside
12:54
this for Loop so all this code will
12:57
repeat for every page so let's Suppose
12:59
there are 10 pages in The PDF document
13:01
so these instructions will repeat for 10
13:03
times because we are writing this in the
13:05
for Loop
13:09
so all the buttons will you can see uh
13:14
if you have 10 pages in The PDF 10
13:16
download buttons will be created so we
13:19
have this uh template which is export
13:24
page so we are using the template string
13:27
right here
13:29
so I value will keep on
13:31
changing depending upon the page number
13:34
of the
13:39
PDF so after that we also need to give
13:42
it some download button this bootstrap
13:45
class do class
13:49
name so in this way you can dynamically
13:52
give classes in
13:57
JavaScript you can bind on click
13:59
listener as well to this button all
14:02
these buttons so when the user clicks on
14:05
any of these buttons we will take the
14:08
screenshot we will use this function
14:10
Canvas 2
14:11
blog which is a buil-in
14:14
function in the browser and it
14:18
will take the screenshot and it will
14:20
return this
14:22
blob and now to down now to convert that
14:25
blob into image we can simply use a
14:28
function
14:30
you have used this function a lot which
14:32
is create object URL it actually takes a
14:34
blob and it actually Returns the
14:39
URL document now we can download simply
14:42
document. create element we can to use
14:44
Anor tag a ATR is equal to the URL so
14:50
this URL is the actual image this
14:54
actually represents the base 64 code
14:56
this uh this is a main method that we
14:59
using Create object URL it takes the
15:01
blob and then it returns a base 64 code
15:04
of the
15:05
image and then we can simply set a name
15:10
which is
15:13
page
15:16
i.png then we can add this button to the
15:19
append child using append child then we
15:22
can click this button automatically by
15:24
using a doclick
15:30
and after downloading we can remove this
15:32
button as well we have a function in
15:34
JavaScript to automatically remove the
15:36
element from the Dom by using remove
15:40
child
15:43
and that's
15:45
all so these are all the steps and this
15:49
function which is if you see right
15:52
here in this function this function
15:54
Canvas 2 blob function it takes two
15:57
arguments first is this call back
15:59
function and the second argument is
16:00
takes is the MIM type so which image you
16:03
want to take the screenshot so if you
16:06
want a PNG image then you will write
16:07
image/png or if you want a JPG image you
16:11
will write image/ jpg I want a PNG image
16:14
so I will simply write the MIM type as
16:16
the second argument to this function
16:18
this is a these are the two main
16:20
functions that we using for this
16:21
application which is two block and
16:24
create object
16:27
URL so so after you do
16:32
this now we need to Simply create a
16:38
row for the table so for creating that
16:43
uh row we can use a create again create
16:48
element this time we can create a table
16:53
row and then we can attach the bootstrap
16:56
classes row class name we can align this
16:59
in the center by text
17:02
Center and row. inner
17:07
HTML and we can just use this template
17:11
string and here we can dynamically write
17:15
our
17:18
things so we can simply say right here
17:21
which
17:22
is the page followed by
17:29
the I variable right here you will see
17:32
that the
17:35
second data will be the actual image the
17:39
short little preview of the image so
17:42
this will be
17:43
coming so here you need to write double
17:47
quotes this is the full address of the
17:49
image so this is located in
17:52
canvas and we can simply use two data
17:55
URL so this represents the base 64 code
17:57
of the image
18:05
and we can actually give it a bootstrap
18:09
class which is image
18:15
fluid and also we can give it a Max
18:19
width to this image of
18:22
uh 150
18:27
pixel for
19:03
after you do this you can add the table
19:06
to the DA element
19:24
so so after this image tag you can see
19:27
that
19:30
we are adding this download button as
19:34
well we are using a pen child right here
19:36
to actually
19:39
uh just add this download button that we
19:42
made to the Dom and lastly we are
19:46
appending this image
19:49
container and appending this row so this
19:52
completes the application if I refresh
19:56
choose my
19:59
click that
20:02
button it is saying that invalid page
20:25
request all the source code will be
20:27
given in the description guys
20:29
if you need the full source code you can
20:31
go to the
20:37
description so now you can see
20:40
that it will actually
20:43
take for every page it will take a
20:46
screenshot and there will be a download
20:48
button you can click any of these
20:50
individual buttons to take the image
20:52
screenshot of a particular page in the
20:54
PDF you can see that so in this way you
20:58
can make a is this simple little
21:00
application so if you want
21:03
to just see the live demo you can visit
21:06
my website free mediat tools.com where I
21:08
have given this tool if you want to try
21:11
this tool you can simply write PDF to
21:14
images go to this tool simply try this
21:18
tool this is a similar tool that I uh
21:21
deploy this on my freem mediat tools.com
21:23
website apart from that there are a lot
21:25
of more tools also available related to
21:28
image video and video processing thank
21:30
you very much for watching this video If
21:32
you like this video please hit that like
21:34
button subscribe the channel as well and
21:36
I will be seeing you in the next one
#Flash-Based Entertainment
#Other