Up next in 10

Build a Node.js Express Passport Google OAuth2 Login and Logout With Sessions and MySQL in Browser
Jan 9, 2025
Buy the full source code of application here:
https://procodestore.com/index.php/product/build-a-node-js-express-passport-google-login-logout-system-with-sessions-and-mysql-in-browser/
Official Website:
https://freemediatools.com
Show More Show Less View Video Transcript
0:00
uh hello guys welcome to this video so in this video we will look at how to build out a Google authentication login
0:07
and log out system in nodejs and express and you can basically see I'm running
0:12
this on Local Host 3000 if I reload the application I just need to re restart the application right here node more
0:20
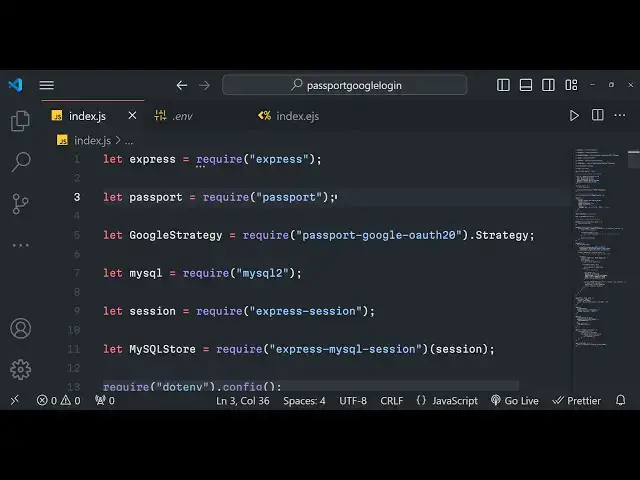
index.js so we will be using passport Library so we will be storing all the
0:25
details in a mySQL database you can see connected to mySQL data Bas if I refresh
0:31
right here and you will actually see there is a model box out there which is saying to you that login with Google so
0:39
what it does basically guys you will see we have this users table I created this if I show you the structure of the table
0:45
what sort of information it will collect the ID will be the primary key ID Google
0:51
ID will be coming after the authentication is done display name email address photograph created at all
0:57
this information guys once we Grant the permission of Google authentication all this information will be coming from
1:03
Google authentication o login and we will be storing this inside the users
1:08
table and automatically sessions table is automatically being created once you
1:13
install Express session we will look at this Library once we install this package this package already created
1:19
this table once you want to save all this information inside the session so this session table is
1:26
automatically being created we we don't need to create this table so you can see
1:32
that now if I click the login with Google button let me just try out with
1:37
the account with uh I haven't tried it because I already login with this
1:42
account so let me try it with a different account Local Host 3,000 you will just I just want to see the
1:48
authorization flow as I click the login with Google button guys what will happen it this screen will show to you that you
1:55
need to choose your account so you will simply choose your account and after that you just need to it will say that
2:02
project one wants additional access to your Google account so you just need to continue Grant the permission and once
2:09
you grant the permission guys you will actually see the profile picture and this is actually the email address that
2:16
you will see and a log out button as well so after you do
2:22
this if I refresh my my SQL table you will see this information a cookie has
2:29
been inserted you will see that in this table and also in the users table you will basically see the display name is
2:35
inserted email is inserted this is actually the photograph as well the time St time stamp is also inserted this is a
2:42
Google uncore ID as well so all this information is being inserted and we are displaying this information in the
2:48
browser in a user profile so if I close this window again open this and navigate
2:54
to the same address you will basically see the information will persist because we have have saved all this information
3:01
in my SQL table and we are fetching that information we are already detecting that the user is already logged in so we
3:07
are displaying this information in the profile page we are simply navigating it and as I we also have the log out button
3:15
as well now if you click the log out button your information will be deleted and now you can see that if I refresh
3:21
that table you will basically see now if I go to the sessions
3:27
table that information if you you just navigate to it again type Local Host
3:33
3000 you will be redirected to the login page because we click the log out button so now we are seeing the login with
3:39
Google button once you again click this button you will be redirected you so this time you don't need to go to that
3:45
screen select your account it has automatically detected that you're already logged in so it has redirected
3:51
to your profile page similarly you can choose any account of your choice guys let me choose this account you can once
3:58
you deploy this it will happen for every account so this is different account here you will see
4:04
that again the same process you just need to select your account and this is Google authentication login and log out
4:11
system this is authentication flow that you see whenever you want to login with
4:16
Google this is the actual authentication flow that you see you can see profile picture this is name address all that
4:24
stuff so this is very easy guys but we we need
4:30
to do here this is this one is you can see that this is actually profile picture
4:36
some accounts have profile pictures some accounts don't have so this account I have a profile picture so the profile
4:43
picture is also showing right here so you can see the E this is the name this is the email so if I just refresh the
4:50
table right here the users table you will now see three entries will be added in the users table this is a first entry
4:56
second entry third entry so three accounts have been Ed in the mySQL database so you can see it is a very
5:02
automated process so once you do
5:08
this so again if I login with this account you will see that again the profile picture email address name and
5:15
again if I refresh my table you will see one such account is already inserted you will see that so now four accounts are
5:21
inserted with four email addresses four names four profile pictures all this stuff so we will try to build this
5:28
application guys let me show you the dependencies that we are using right here so the very first dependency we are
5:33
using is passport passport is basically a simple o authentication Library it is
5:40
almost 2, 430,000 weekly downloads a very popular package it has various
5:48
pre-built strategies if you are building for different social networks Facebook
5:53
Google Twitter so specifically we are targeting Google right here so we'll be talking about Google authentication
5:59
system system for it so it has its own password Google O2 strategy so if you
6:05
search for this package the very first package which comes right here so this is a specific Google module for password
6:12
we will also be using this also 273,000 weekly downloads so we will also be
6:17
using this also apart from that guys we will be using my SQL 2 to actually
6:23
connect to our database in MySQL so about 2 2 million weekly downloads are
6:28
there we will use this Library we we are using Apache web server which basically
6:33
have its PHP my admin my SQL comes right here we have actually storing it we
6:39
actually created this database and inside this database we created this users and
6:44
table so we are using the mySQL database in this video to actually store the user
6:49
information and apart from that guys we also are using sessions to actually
6:55
store this information to persist information ac across users so if you
7:00
navigate to the same page once again your information will be stored uh in the code basically in node
7:07
ja you can actually configure how much time you want to store the user information so I basically have the
7:13
session secret and I'm storing this information for one year so this simply means that if the user logs in
7:19
successfully that information will be stored inside the Google browser user
7:25
browser for typically one year if the user has not deleted its cookies so the
7:30
user once you log in that cookie will be stored for one year so you can just configure it in the max age property so
7:38
this application guys you will be building it step by step if you need the full source code I have also given the
7:44
link in the description of the video where you can actually purchase the full source code files of this project if you
7:51
are interested from my website procore.com the link is given in the description after you purchase it you
7:56
will be redirected to Google Drive where you will actually get the zip file so if you're interested you can directly
8:02
purchase it and now in the next section guys we will start building this project step by step uh now guys we will start
8:09
building this project so I'm basically here in my project directory I will open
8:15
the command line here and I will simply make a new directory I will simply call this as passport Google
8:22
login I will navigate into this directory and simply open this inside
8:29
the vs code so you will see that nothing is present we are starting it from clean
8:35
slate so the very first thing we need to do right here guys we need to make a package.json file by invoking this
8:42
command which is npm in it- y this will actually create a package.json file
8:47
you'll see that so now we need to install some modules first module will be Express
8:53
which will be the backend server the second one will be the passport Library which is the base Library for invo doing
9:01
the Google authentication system and then we have the passport Das Google D
9:09
o20 this is actually a strategy in passport passport actually contains various strategies for implementing
9:16
different authentication one such strategy is password Google authentication 20 which is specifically
9:23
made for Google authentication system and then we need to connect my SQL database in noj application we are using
9:29
my SQL to package for that then we are using Express Das session which allows
9:37
you to actually store your information in sessions in cookies in user browser so that when they are actually closing
9:44
their browser and again open the browser then the user must then the user login is stayed in the browser so we are
9:51
actually storing information in sessions so that's why we need Express that session and then we also need need
9:59
Express Das MySQL D session this package is specifically made for mySQL database
10:06
to actually store the session information inside my SQL database so
10:11
this package automatically create that session table that you saw in the demo video this is required and then lastly
10:20
guys we need EnV which is used to actually store uh information which is
10:27
very crucial to you so file will create it so this package is required so just
10:34
enter and it will actually install all these modules inside your package.json it will create a node modules folder
10:41
once the modules are installed you'll see that now it has created this node modules folder so this is actually the
10:48
package.json file you will see all the modules are installed EnV Express Express MySQL session Express session my
10:55
SQL to password password Google o20 so we have successfully installed it now
11:01
we just need to create the basic index.js file which will be the starting point of the nodejs application so right
11:09
in the root directory we do need to create EnV file guys which will actually hold us all the information that we need
11:15
for this application first one we need the Google client ID you can call this
11:21
variable anything but we are just calling it like this Google client ID we need
11:28
Google client SE we need all this information will be I will be showing you in the next section how to get this
11:34
and then we need Google call back URL as well DB
11:41
host and DB password DB username as well we need DB
11:48
password and lastly we need the secret key of the session so session
11:55
uncore secret this you this you can call it anything this you can provide any
12:01
random value I will just call it at my secret this is this is required for just
12:08
having your session you need to just provide a secret key so this needs to be unique if you are developing it for
12:13
production you just need to generate a very long random string and equal to so
12:19
after you do this guys just put all these values in double quotes just to make sure it's a string value so if
12:28
you're developing uh as you can see I installed this Apache exam control panel which is actually a
12:34
crossplatform software so it comes with PHP which it comes with mySQL database so you can
12:41
install it click on download exam and install it for your respective operating system Windows Linux Mac I've already
12:48
installed and started this go to PHP my admin and here you can see that you
12:54
actually need to create a database by clicking this button I've already have a database right here so what I can do is
13:01
that let me show you how I did this so I can delete all the tables from here drop
13:07
table users and also drop this table as well so I'm just
13:14
writing a SQL statement right here drop table sessions so you will basically now see
13:20
there is no tables in now this database this database empty so now we need to create a data uh table right here in
13:27
this database users DB so let me just uh give it the name of
13:36
the you also name need database name as well so database name DB name this will
13:42
be users DB this is database name password is by default is nothing in
13:50
exam control panel Local Host environment the username is typically root if you haven't changed your us
13:56
username so by default username is root and this one will be Local Host because
14:01
you're developing it inside local environment this is Local Host the default
14:07
values so if you haven't changed any values these will be the values you can just uh write these
14:14
values and then these three values that you see right here we need to now go to Google Cloud console and actually get
14:22
these values so so just you need to go to Google Cloud owns console you just need to
14:29
create a account right here you should be having a project right
14:35
here uh already have some projects and right here simply click on this menu
14:41
option and here if you see you will actually see a option of
14:48
apis and services go to credentials the third option and right here you need to
14:54
go to the third option where you see create credentials and the second option
15:00
o o client ID you need to click on this option and then you need to create a
15:05
client ID so this web application type is web application because we are developing it for the web so simply
15:12
select this option and here inside this authorized JavaScript Origins we are
15:17
developing it on Local Host so you just need to write HTTP sl/ Local Host
15:24
followed by your port number so I will be developing it on Port 5,000 so I will
15:29
simply add this and then the call back URI so typically call back URI
15:36
for passport will be this one if you see this will be the call back
15:46
URI sl/ gooogle SL callback so this is specifically if you are using passport
15:54
if you go to their documentation they also show you that this is required
15:59
whenever you need to authorize redirect urri so redirect URI simply means that
16:04
whenever you grant permission whenever you click the allow button where should
16:10
the Google redirect you to your inside your application so in specific terms uh
16:16
pass would have this directory structure sl/ gooogle callback right here I will
16:22
just change this value to 5,000 click on create so now it will create your your
16:27
client ID and client secret so you just need to copy this information client ID
16:33
and the client secret this will be different for you so don't copy my
16:40
information and just copy the client secret as well just make sure that you put double
16:47
codes right
16:54
here so this is the client ID client secret that we got and then
17:00
the the same call back URL that you are using right where you copy pasted SL
17:06
all/
17:16
Google this is all that we need to see guys so just close this file now we will
17:21
basically start our uh basic Express app so just inside this we need to just
17:27
require the Express module right at the
17:36
top and we also need to import the password module as
17:43
well and uh we also need to import the Google
17:48
strategy which is we have installed this module as well which is password Google
17:54
o20 so dot strategy you just need to import this right
18:02
here so here we are just importing all the modules and my SQL we also need to import it so my SQL
18:09
to and then we need to also import the session module as well so this will be
18:15
Express Dash session just import that and then the my sqls session as well my
18:23
SQL store let me call it then we need to require it express my squel
18:31
session lastly we just need to also write just type casted to
18:38
session and lastly we just need to require the EnV module that we installed do
18:45
config like this that's all these are all the modules that we defined guys we installed it we are requiring it at the
18:51
very top we will use it so now we just need to Simply start Express app
18:59
listen this application on Port 5,000 and the call back we simply say that app
19:05
is listening on Port 5,000 so you will see
19:12
that if I just start my application just type here node more
19:20
index.js you will see this message appearing on the screen app is listening on Port 5,000 so
19:27
now our app is starting we just need to set the view engine ejs we forgot to
19:35
install this Library guys you will get an error right here if you just see I
19:41
think just install this module as well npmi EGS so and
19:48
then again start EGS actually is a template engine which allows you to
19:53
actually pass variables inside your HTML template so it stands for embedded JavaScript templates just create a views
20:00
folder and uh typically EGS store index
20:06
all the templates in the views folder just call this as index. e ejs this is
20:11
the actual temp uh extension of it and right here you will write HTML code so I
20:16
will simply change the title Google login and log out
20:23
system so just say H1 hello world so now how to show this on the
20:29
screen we will simply write a simple route [Music] app.get request response and you will
20:37
simply say right here response. render index so what you will now see if you
20:43
navigate to Local Host 5,000 you will see the hello world message you will see that so up till now
20:53
guys we have configured all the stuff right here we have configured the EnV file we written this much of index.
21:01
ejs now the next step is that we need to actually create the table and create the
21:06
database connection and now we'll look at in the next section uh now guys we'll be creating
21:13
the tables for storing the data uh just navigate to your PHP my admin and
21:21
uh here I will simply create a table so we have
21:26
actually created this table uh database right here you will see users DB and
21:32
inside this just go to the section right here which is the SQL section where you can
21:38
actually write commands to actually create tables automatically so here we
21:43
will actually create this uh this actually have create
21:50
table so create table followed by the table name so I will call this table as
21:55
users and set up curly bracket and inside this cly bracket you just need to
22:00
mention what information you want to store you'll be storing ID of the ID which will be the primary keys will be
22:07
integer and auto increment it will automatically be incremented whenever
22:12
the record inserted and the primary key
22:18
primary key put a comma so this is the first record the second record will be
22:24
Google uncore ID so this will be VAR charart which is variable character and
22:32
the length of it will be 255 and uh it will be not null the user
22:38
must have a valid value and it should be unique so these are validators right
22:45
here and uh after that we will be having the
22:50
display uncore name property where we will actually stor in the name of the
22:56
user again this will be varar 255 correctors not
23:07
null and then we come the email again it's varar 255 corrector limit and then again
23:15
not null and the email should be unique so only one email must be inserted
23:21
duplicate emails are not allowed the second the next field is photograph of the user so photo
23:29
so again this will be warar
23:35
255 and the next field is guys for the time stamp so time stamp is
23:44
basically whenever the record is created so it's a Time Value so put a
23:50
comma so created underscore at so it's actually a time stamp default value will
23:58
will be the current time which is the current time stamp put a semicolon right
24:06
here so I think sorry this is not curly bracket
24:13
this is parentheses sorry that's why the error is coming this is not par uh curly
24:18
bracket is parenthesis you will now see no error is now there this is the ID we
24:23
are storing Google ID display name email photograph and created ad so these are the fields
24:29
so there is a go option right here if I click it the table will be created green
24:35
option will come and you will basically see the table has been
24:45
created so if I show your structure right here guys which is ID is the primary key this is Google ID display
24:52
name email photograph and created at now we need to actually connect to this
24:58
database and this table so we will write our connection
25:04
code so just write here we will simply write here uh create a
25:13
connection to the
25:18
database and you will basically call the my SQL to my SQL module it contains a
25:25
method which is create connection and right here is set of call brackets
25:30
you'll pass you'll pass this information host name you will be coming process. EnV whatever that we call that dbor
25:39
host and the username which will be coming again from the process do. EnV
25:48
file dbor user
25:53
password process. env. dbor password and
25:59
actual database so process. EnV do DB name so
26:09
after you basically provide all these values which are storing it a EnV file
26:14
and uh there is actually a method called as in this object DB which is
26:24
connect so once you call this method you can have a call back function
26:30
and if any sort of error take place in connection we can throw that error or we can simply say to the user
26:36
that uh connected to my
26:43
SQL database so if you just uh see right
26:49
here again run this application you will see this message
26:55
coming here right here connected to my SQL database so now you connected to
27:01
database now we can actually make queries as well so the next step guys we
27:07
need to actually create this sessions table as well because only a single
27:12
table is present right here but we do need to create a sessions table for creating that sessions table we need to
27:19
Simply write a simple line of code so for this we just need to create
27:25
a variable session store and new my SQL store and we just here we need to Simply
27:32
pass inside first object is empty object curly bracket and pass the connection
27:39
object that's all if you see we are importing it this my SQL store from
27:44
Express my SQL session and passing this session right here you will see that this is Express
27:50
session passing it as an argument and then we are initializing this MySQL store passing an empty object and the
27:56
second object is the database connection so right what this it will do we do need
28:01
to create another pass in middleware which is the this session that we created and this takes quite a number of
28:09
values first one it takes is a secret key sorry
28:17
uh AB use and write here
28:24
session and now it takes actually the secret key see secret key can be coming
28:29
from the process. EnV file EnV file whatever we session is secret then this
28:37
next one is uh resave so it actually is a Boolean value resave I will put at
28:44
false save uninitialized to I will put it to True these are default values just need to
28:51
copy paste these values and then the store value and here we'll put the
28:56
session store value that we put right here and then comes the most important
29:02
thing guys the cookie information the maximum age of the cookie here you can
29:07
set right here max age so I will be storing the information in the user Brower browser for one year so it is in
29:15
seconds is 365 multiplied by 24 ultied by 60 multipied by 60 and multip it by
29:24
1,000 because we need to convert this value into microc seconds this is
29:29
actually the time period for 1 year in microc
29:35
seconds so that's all guys that we need to do right here and then we also need to pass two
29:42
more middle wees first one is the passport to actually initialize it and
29:48
the second middleware will be to actually passport. session we need to initialize the session of the passport
29:55
so once you do this guys that table that you see in the sessions if I just
30:00
refresh now restart the
30:08
application and try to open this application Local Host
30:14
5,000 and if you just refresh you will now see guys the second table is also being created this is
30:21
actually the sessions table we haven't created this table it is automatically created by that and automatically a
30:28
entry has been there session underscore ID and it expires after one year and
30:33
this is actually the data original max age expires this is actually a data of the cookie so in this way guys this
30:40
Library makes it possible to actually create the session table to actually store this information so now what we
30:46
need to do we do need to uh actually first of all do the
30:54
authentication so right here what we will do right here we initialize
31:00
passport do use and we will actually be initializing a new Google strategy that we imported
31:09
and right inside this strategy guys we need to pass this object which contains
31:15
three properties the client ID which will be coming from process. EnV
31:21
Google underscore client ID the second one will be client Secret process.
31:30
env. client
31:35
secret and the third value will be call back URL which will be process. env.
31:43
callback underscore URL so we are actually passing this object guys which contains three three
31:49
values and we need to put a comma because this actually returns a call back function once you do this actually
31:57
Returns the token access token the token secret
32:02
value and the third value is the profile and the done call back it's a call back
32:09
function having these four values so right here we can simply check if uh
32:17
user already exist in our database so basically
32:24
whenever the user grants a permission we will actually check if it a new user or if it's a existing user so right we will
32:31
simply query the database right here so we can actually use the database connection variable DB variable to
32:38
actually cury the database or cury the table so right we will write a simple
32:43
SQL cury which is select all data from the users table where we are putting a
32:50
condition right here where this value Google uncore ID is equal to question
32:56
mark and here you need to put the placeholder value which is
33:01
profile dot ID so we actually are getting the ID
33:09
which is actually the primary key if you see the users table the ID is actually
33:14
the primary key which is unique every time so we are actually targeting this value to actually get the user and what
33:21
it will do it will put a comma and it will actually return the data to us which is error or is
33:30
results so here we can simply check that if any sort of error take
33:35
place then we need to return that error return done
33:41
error and then if the results. length property is greater than zero in that
33:54
case we do need to return done
34:02
null results zero so what this means guys basically
34:09
it is checking that if the user is already present with this profile so this property will be true if the
34:15
results. length is greater than zero so in this case if condition will be true
34:20
so here we actually say the user already
34:26
present so user is already present so that's why this condition evaluates to true in that case we will return done
34:33
null as a first argument and the results. zero or in the else case if the user is
34:41
not present then we need to insert them so what we will do we will create a new
34:46
object right and right here new user so we will put these values which
34:52
is Google ID which will be coming from profile ID
34:58
and all this information that you see which is display name email address photograph you will be getting this
35:04
information display name profile dot display and name and then the email
35:11
address profile. emails Z do value and the
35:19
photograph profile. photos 0. value so
35:25
we actually constructed this object
35:30
this new user now we just need to insert it so for inserting it we again use the
35:36
DB cury method this time we'll use the insert statement insert into the table
35:41
which is users we set question mark so here we need to provide the object the
35:46
new user and then again the call back
35:53
function so right here guys we will simply again check if any any sort of error take place then we just need to
36:00
return that error if no error take place then we simply say new user. ID is equal
36:06
to results do insert ID so this is actually the primary key we are setting
36:11
it new user ID is equal to results. insert ID and then we simply say
36:19
return done function null as the first argument and new user as a
36:25
second this is this is actually the setup guys you do need to write this code whenever you are implementing
36:30
passport Google authentication we are assigning this Google strategy we are passing this object
36:37
which is containing the client ID client secret and the call back URL then this after authentication flow this returns
36:44
this access token token secret profile data object we only need the profile
36:49
object where we actually get this information which is the ID of the user display name the email address and the
36:55
photograph we get all this information and we are simply checking if the user already exist or if the user is a new
37:01
user if the user is a new user then we are simply inserting it into the users table so this much we have
37:08
done now what we need to do we need to Simply write conditionally
37:15
so we need to pass two properties right here first is the title of the page
37:21
which let me say is a homepage and the second property guys right here we need to check
37:28
conditionally that uh request in the request object there will
37:33
be this property called as is authenticated already built in because we are actually using passport Library
37:40
so this simply Returns the value if the user is already authenticated if the user is already logged in or not if the
37:47
user is not logged in you'll use this stary operator question mark if the user
37:52
is already logged in then we will simply pass the user which is located in request or user
37:58
if the user is not logged in then we will pass the value of user to be null this is actually Turner operator guys
38:05
here we put the condition if the condition turns out to be true then we put this right here if colon followed by
38:11
the condition not true like this so This is actually Turner operator in programming so here we are passing this
38:17
user object we now need to render this index template index.
38:23
EGS and we also need to write for this to
38:28
work for this to you work right here passport. use Google strategy we do need
38:34
to write these two get requested I forgot to write it
38:39
app.get so whenever the user will go to this request SL SL call
38:47
SL SLG gooogle SL callback this will be the call back request when the you have
38:53
actually granted the permission
38:58
so first of all you will we will redirect the user to this request which is/ o/g Google and here we will pass
39:07
this middle Weare password. authenticate and we are authenticated for Google and
39:12
here we will actually provide the scope scope will be right here we will be
39:17
requesting the profile information of the user and the email address and uh after
39:24
this that's all that we need to do right here if you just format this so we are
39:29
actually redirecting the user to SL o/g gooogle we are requesting this passport.
39:35
authenticate Google and we are requesting these Scopes profile and the email so after you do this we also need
39:42
to write this call back request as well app.get //g gooogle
39:49
callback so whenever you grant the permission this will be the actual request will take place password
39:55
authenticate Google once again and here we actually have the failure redirect if
40:00
the actual authentication is not successful in that case where the user should be redirected to we need to
40:06
redirect it to the homepage if the request is not successful if the request is successful in that case uh we have
40:13
the request response and here you will redirect again the user to the homepage like
40:24
this you can have a custom route as well where you can actually return them to the error message but we are for the
40:30
time being we are only redirecting it to the homepage if the request is not successful this is actually the call
40:36
back request right here we configured this call back request if you see in the
40:41
file //g Google callback so this is actually the same request //g gooogle
40:48
callback now we just need to write our index. ejs
40:54
route so we do need to include bootstrap guys right here so I am using bootstraps
41:02
just after the title paste the CDN you will get all the source code you can purchase the full source code with full
41:08
documentation the link is given in the description and we will simply embed the
41:15
title the title variable that we are passing dynamically in EGS using the
41:21
syntax if you see we are passing this title property which is homepage it will
41:26
get inserted inside right here and
41:31
uh we also need to import bootstrap JF CDN and jqy CDN as well
41:38
after the body past the CDN of both them both of them so we also need the CDM for J cury
41:47
as well so what I will do I will copy this
41:52
also so jQuery and bootstrap JS CD as well
41:58
so so we are actually passing this user object if you see guys in this template and we will simply conditionally render
42:05
out if the user exist or not so for this we will use the container class of
42:11
bootstrap and right here we will basically check in this if condition if the user exist or not if the user does
42:19
exist we will just wrap all this with this brackets eegs so it is a
42:26
conditional logic that we writing us an embedded JavaScript template EGS file so if the user does exist in that case we
42:32
will basically display the profile information but if the user doesn't exist in that case we will actually have
42:41
a else
42:46
block like
42:55
this so if the user doesn't exist we will simply write a heading
43:01
user doesn't exist so what should be the value guys right here just
43:06
see user exist so just predict what will be the value H2 or H1 if I just refresh
43:13
the application go to Local Host 5,000 so you will now see guys this
43:20
value is printed out user doesn't exist because we haven't logged in that's why
43:26
the user comes out to be null right here this value comes out to be false that's why we put null here and that's why this
43:33
else block execute so we do need to actually redirect the user to that
43:38
authentication page where the user can log in for doing that we will be having
43:45
a model and uh we'll be giving an ID to it
43:50
of authentication model we're giving some properties to
43:56
this which is T index minus one Ro will be actually a dialogue
44:02
box and div model dialogue model dialogue centered these
44:09
are all bootstrap classes guys role will be actually of
44:17
dialogue and then you model content whatever is the content inside your
44:22
model div. model title
44:28
this is actually a very basic model of bootstrap we can write a Logan box right
44:36
here if you just refresh right here it will look something like we do need to
44:41
actually write some custom CSS for this uh we need to Target this
44:48
uh model backdrop class just write the
44:53
CSS paste it uh just we need to w W this
44:59
uh inside the style tag model we have just simply giving a background color
45:04
model backdrop now to show this model box we actually given this ID if you
45:12
see uh authentication model if you see we have given this ID right here to this
45:17
div tag now to show this on the screen we do need to write some custom JavaScript uh so in the document ready
45:24
function of jQuery uh when the it has been loaded all the elements
45:31
so we will actually Target the model by its
45:37
ID we will simply say here o
45:44
model and model and simply we'll say
45:49
backdrop to be static and keyboard will be false
46:00
and then you'll simply say here Au model and model to be show so it will
46:09
actually show the model dialog box with this property if you just refresh now
46:15
you will actually see this model box and a black shadow as well uh so the size is
46:21
login right here so what we need to do right here uh
46:30
model title so this needs to be an H5 tag
46:40
H5 so you'll see that H5 it is div uh I think we some made some mistake
46:49
right here um this one model
46:57
model dialogue model dialogue centered role is equal to document not
47:03
dialogue it's a document and the div class model content
47:13
then is model header sorry mod model title model
47:19
header and then inside that this needs to be div this is model header and
47:25
inside this we need to Define the H5 tag which will actually have the class of model
47:31
title which comes out to be login so now if you
47:37
refresh like this now it will look something like this you can even Center it as well if you are have a class which
47:47
is you can just write here text Center
48:02
so after you do this uh we do need to have
48:09
another the model
48:17
body and uh text
48:25
Center so so inside this model we just need to have a simple anchor
48:31
tag AHF and it will navigate to// Google
48:37
I will say class BTN BTN primary and you'll simply say login with
48:46
Google so what it will say guys you will see refresh and there will be a button out there login with Google so that's a
48:55
button and that's complete the model and if you just click this button what should happen it will navigate to the
49:01
sign in page and it is saying that it is missing the required parameter which is redirector
49:08
URI if you are a developer of project invalid request uh I think I made a mistake guys
49:16
right here let me check in
49:22
the just wait guys I will come to the next section I will tell you the mistake uh guys I've just made a very silly
49:30
mistake if you go to this index.js file right here whenever initializing Google strategy if you see the client ID is
49:37
correct we put here Google centore ID if I just see EnV file we are underscore
49:45
call Google client secret Google uncore callback URL so but if you see right here we forgot to put Google right here
49:52
Google uncore client secret and Google uncore call back URL so this is a case
49:59
guys and now if you refresh click on this button it will redirect to your
50:04
account screen where you can actually select your account and click the allow permission
50:10
so now it is working guys and one more thing that is remaining in index.js file
50:15
guys we do need to deserialize or serialize the user using passport whenever you grant the
50:22
permission this process will automatically take place so right our after whenever you imported this
50:29
passport Library whenever you initialize the session we do need to write the code for serializing and deserializing of
50:40
user so if you don't do that because you will actually get error you will not get your user object this is really
50:47
important this is the actual passport code this is actually the serialized
50:52
user and uh user done
50:59
and you just need to call the done function and user do ID that's all and
51:05
then for desizing the user password. deize user and again we'll get our ID
51:13
and the done property and here what we need to do we need to insert this user we need to
51:20
Simply select the everything from the users table where this ID
51:27
that we get we'll pass this ID right
51:36
here we'll basically get if the if this user exist or
51:44
not so if any sort of error take place we will simply
51:49
throw this
51:55
error and and here we'll simply have a if condition that if this user already
52:06
exist if the user length double equal to zero if the user doesn't exist in that
52:12
case return done null false because here the no user
52:18
found return false so here we are doing this check if
52:24
the user is found then we will simply done null results zero this is important
52:31
guys you do need to write this deserialization and serialization now you can do this process uh you can
52:39
actually refresh your application click on this button and select your account
52:45
so once you select your account you need to Grant the permission so click on continue so it will redirect to the user
52:51
and now now if you see user exist because now the user has got some object
52:57
values if you see uh we actually have this index. DJs now this if condition
53:04
turns out to be true because user is actually logged in so now it is actually printing out this statement which is
53:10
user exist so if you also check your user table as
53:16
well you will actually see if I refresh go to the browse option you will
53:22
actually see one entry has been automatically been added guys you can see coding sixa this is the email
53:27
address this is the actual profile picture and created ad so now we just need to display this information on the
53:33
screen guys Google _ ID from the table it contains inside the user object
53:39
and uh the sessions also have this object as well if you see so if
53:47
you so this is Local Host 5,000 we need to Now display this information on the
53:52
browser instead of this user exist so what I will do
53:59
just right here we need to display the
54:05
information so we will again use the model we'll give it an idea of O
54:17
model tab index minus one and Ro is equal to
54:23
dialogue so now we just need to display this
54:29
information uh so for displaying this information model
54:36
dialogue model dialogue centered and the role will be of
54:43
document
54:57
H5 and you'll give it a class of model title you'll say user profile so here
55:03
you will display the user profile of the user if you just refresh it will look something like this
55:10
so for displaying the user profile uh we got that user object and inside that
55:16
user object we have different fields we will have model body and text
55:24
Center so first is the image we need to show the profile picture so this will be coming from user.
55:44
photo and uh we just need to give it some bootstrap classes to it which is of
55:52
uh rounded circuit
55:59
and we need to give it a fixed width of 100 and a height as well of
56:07
100 so if you just refresh now you will actually get this profile picture nice
56:12
little profile picture and uh after this guys what we need to do we
56:20
need to actually show the display name of the user so we can
56:25
display user. display underscore name so we are
56:33
displaying it this information if you see in the index.js file whenever we got the user
56:40
we inserted it and we actually got this information we call this as display underscore name email and photo so we
56:47
are actually displaying these values you can see display underscore name and uh you can see photo so whatever we called
56:54
it we are displaying it and and then the email address as
57:01
well which is present in the email variable so
57:07
user email so if you refresh
57:13
now you will see that and lastly guys we do need to have
57:19
a log out button as well so we'll simply have
57:27
a/ log
57:40
out so as I click the log out button we should be redirected to the homepage so
57:46
we just need to go to index.js file and just write this simple log out request which actually is very simple passport
57:54
does have a passport Library does have a built-in method for log out app.get log
58:02
out request response and this we will use the request. logout
58:10
function which is available to us and after it we will simply check if any
58:16
sort of error take place we will throw that
58:24
error or we you can simply say return
58:31
next request. session we need to delete the session variable so request.
58:37
session. destroy we will destroy the session once the user is log out and
58:54
uh and then we'll redirect the user to the homepage that's all you can see that
58:59
we are calling log out function of passport and then we actually destroying the session and redirecting the user
59:05
back to the homepage that's all that we need to do guys in this application if you just refresh click on log out if I
59:12
just close this window and again open it because the user is processed it it will
59:17
again detect the user is already authenticated it will redirect Local Host 5,000 sorry it will redirect me to
59:24
the profile page you will see that if you close the browser as well again open
59:29
the browser as well then also if I close the browser and reopen the
59:36
browser again go to Local Host 5,000 again it will see because we have
59:42
actually embedded this information in the user browser for actually 365 days
59:47
but if if the user clicks this log out button then the user will be deleted and
59:52
the cookie information will be deleted so if you again open Local Host 5,000 that information is gone it is no longer
1:00:00
present so this is actually the system guys again if you click log in with Google now it will redirect to
1:00:06
automatically don't need to go to that auth authorization flow so you can do this for any account
1:00:13
you can do this for this account as well again the same Pro if you're doing it for the very first time then you just
1:00:19
need to go to the authorization flow select your account once you are done then it will remember you just need to
1:00:26
continue and you will see that uh the link is given guys if you want to purchase the full source code of
1:00:33
this project if you are interested uh full documentation with
1:00:38
source code will be there for you and uh in in I will also support you as well
1:00:45
if you have some doubt as well the link is given you can directly purchase it from Pro Cod store.com after that you
1:00:50
will actually get that source code from Google Drive after you make the payment thank you very much guys please hit that
1:00:57
like button subscribe the channel as well and I will be seeing you in the next video
#Programming
#Software