Up next in 10

Build a Google Maps Autocomplete Location Tracker Using Places AutoComplete & Maps Javascript API
Dec 10, 2025
Buy the full source code of application here:
https://procodestore.com/index.php/product/build-a-google-maps-autocomplete-location-tracker-using-places-autocomplete-maps-javascript-api-2/
Show More Show Less View Video Transcript
0:00
Uh hello friends today in this tutorial
0:02
we will be building this awesome little
0:04
Google maps autocomplete kind of a
0:06
location tracker kind of application. So
0:09
here you can see you can see on your
0:10
screen this is a brand new Google map
0:12
that we are displaying it on the screen.
0:15
So there are various controls out there.
0:16
You can drag this map to just find any
0:19
location on the world. All the countries
0:21
are listed here. So this is a nice
0:23
experience that you can provide to your
0:25
users. You can also embed the same map
0:27
on your website also. So we are using
0:30
two APIs, two Google APIs for uh doing
0:33
this. First we are using is uh map
0:35
JavaScript API and then secondly for
0:38
this autocomplete widget we are using
0:40
the places autocomplete API. So I will
0:44
be telling you in detail in this video
0:46
how to implement both the APIs in this
0:48
application. So there are various maps
0:51
out there. If you want to view the
0:53
satellite map, you will see this is a
0:55
satellite map here. So this changes
0:58
here. this background color changes to
1:00
this is kind of a satellite
1:03
and also we have a terrain as well. So
1:05
if you select terrain here you will see
1:07
this kind of textures to this map. So
1:11
you will and uh this is uh this full
1:15
screen widget. So if you toggle this you
1:16
will be exit from full screen. So this
1:19
is a toggle and uh also where we have
1:23
also the zoom in also if you want to
1:25
zoom in in a particular country
1:28
like this you can also zoom in like this
1:31
if you just zoom out like this. So
1:33
various controls default controls which
1:36
you see in Google maps also it is also
1:38
present and the nice thing about this
1:40
map is guys this is autocomplete widget.
1:43
So if you want to search for a
1:44
particular country inside this Google
1:46
map, you can just search it like this.
1:51
Let me just zoom out here. So you will
1:54
see all the suggestions will come here.
1:56
France, Germany. So if you just search
2:00
accordingly. So if I search for India
2:02
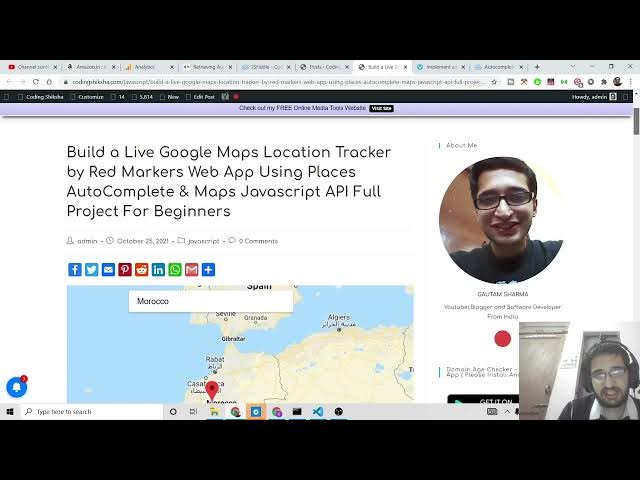
here, if I select this India country, so
2:04
it will pinpoint this location here, you
2:06
will see it is marked here by this red
2:10
marker. So basically if you just select
2:13
any sort of location it will pinpoint
2:15
you just telling you where the country
2:18
is situ situated in the map by this red
2:21
marker. So this makes it easy for people
2:24
to find out places inside the map. And
2:27
now if I want to search any another
2:29
country let's suppose Kenya.
2:32
So it will pinpoint that place for me.
2:34
You can see this is Kenya here for you
2:36
in the map. And you you can also zoom in
2:40
to better see where it is placed inside
2:42
the country. So it is placed here. You
2:44
can see.
2:46
So if I want to search another country
2:48
here, Azar, Paijan. So you will see this
2:50
is a country here. It is placed here. So
2:53
very responsive map and uh your your
2:58
users will enjoy this experience if you
3:01
provide it on your website. If you have
3:03
to impact Google maps inside your
3:05
website, this will be a perfect
3:06
application.
3:08
And this is not limited to countries.
3:10
You can also search individual cities as
3:13
well. So as you see Delhi is present
3:15
inside India. So if I put it, so it will
3:19
zoom it where Delhi is present inside
3:22
India here. So you will see this is
3:24
capital of India. So it will pinpoint
3:26
this location where you can just see all
3:27
the individual locations which are
3:29
present inside Delhi. So you can just
3:32
drag down this.
3:34
So
3:36
So you can just see how it is
3:38
pinpointing the locations. So if you
3:41
want to pinpoint a certain address, if
3:44
you want to write your own address, let
3:46
me write my address here. This is my
3:48
address.
3:53
So if I put this address here it is
3:57
put Ganesh
4:00
New Delhi.
4:03
So if you p pinpoint a specific address
4:06
it will also show you all these
4:08
suggestions here. If you click this you
4:09
will see it will pinpoint this s
4:13
this particular address here. So it will
4:15
all you see is
4:18
the locations address. So this is a nice
4:21
kind of application that we can build
4:23
here. So I was just showing the demo
4:26
here how you can experience this
4:29
yourself. Also you can also put any sort
4:31
of address then it will show you
4:34
and uh this is valid for every country.
4:37
So if you put London here so you will
4:39
see it is there inside UK. So it will
4:42
narrow down to the UK country. So it is
4:44
London here. You can see here all these
4:47
locations are there. So it's a very
4:49
awesome kind of a Google map that you
4:52
can embed here
4:54
and Los Angeles if I search it this is
4:58
inside us here you will see. So now to
5:00
implement this guys I have shown you a
5:02
complete demo of this. So this drag
5:05
pegman is also very useful if you want
5:07
to get images of certain countries here
5:09
you will also get images as well like
5:12
this. So this is a great tool as well.
5:14
If you want to get specific images of
5:17
specific locations, you can put this,
5:18
drag it on this and you will get
5:21
locations as well.
5:23
So for this guys, we are using two
5:25
Google APIs that I already told you
5:27
which we are maps JavaScript API and uh
5:30
places autocomplete API. So both these
5:32
APIs are not free and uh you should be
5:35
having a Google cloud account. So
5:38
basically I will tell you how to do
5:40
this. Go to google.com and just search
5:43
here Google Cloud Console. If you don't
5:46
have already account on this website,
5:48
make sure that you create it. It does
5:51
require the credit card information
5:53
building information as well. And Google
5:56
provides you $300 credit for using these
6:00
premium APIs every month. So, you will
6:03
get $300
6:06
credit every month to use these APIs for
6:08
free. If you exceed that usage then you
6:12
will be build. So this is more than
6:14
enough for testing these APIs. So that
6:16
is why I have created this account here.
6:18
So inside my billing section you will
6:21
see all these APIs are listed here.
6:25
So you will see you have multiple
6:27
billing accounts. So if you don't have a
6:28
billing account just create one and uh
6:32
select your appropriate API and uh then
6:36
you can add your credit card information
6:39
and then you can create a billing
6:40
account.
6:42
So now in my case what we want is that
6:44
you need to go to APIs and services and
6:47
go to first of all library. So now to
6:49
enable these two libraries, it is very
6:51
much important. Just search for first of
6:53
all maps JavaScript API.
6:57
So just search for this. So you need to
6:59
enable this. This is the API that I'm
7:01
talking about maps JavaScript API. So
7:04
there will be option to enable this. So
7:06
simply enable this API. I have already
7:08
enabled this. Second API is places
7:12
autocomplete which gives you the
7:13
information about a particular place on
7:15
the map. So places autocomplete.
7:21
So you will see this is a places API.
7:23
You should also enable this API. I have
7:26
already enabled this. You will see API
7:28
enabled.
7:30
So after enabling this now you just need
7:33
to create your credentials. So
7:38
now to do this it is very easy. Just go
7:41
back here one little step.
7:46
So here you will see your credentials
7:48
option. So just create
7:51
select credentials here and uh there
7:54
will be option of create credentials.
7:56
Click on it and create API key. So API
7:59
key will be enough for this. You don't
8:01
need client ID or service account. Just
8:03
click API key and it will create your
8:05
API key. And don't uh try to copy this
8:09
guys. I will at the end of this video I
8:11
will delete this because as you know it
8:13
is very much secure. You don't want to
8:15
share with anyone. So for the sake of
8:19
this video I will just copy this and use
8:21
it inside this video. At the end of this
8:24
video I will delete all the API keys. So
8:26
it will not work. So don't try to uh
8:29
just use my API key. Just try to create
8:31
your own. And uh for the example guys we
8:35
are using Visual Studio Code text
8:37
editor. So simple index html file is
8:39
needed and make sure that you create a
8:42
basic HTML document and just change the
8:45
title
8:47
that is uh Google
8:50
location tracker
8:53
app and Google
8:55
maps and places autocomplete.
9:03
So basically it will be kind of a
9:04
location tracker kind of application
9:06
where you will put your location and it
9:08
will pinpoint the map pinpoint in the
9:10
map with direct marker.
9:13
So the very first thing that you need to
9:14
do is that you need to go to the blog
9:16
post that I have given in the video
9:17
description. So inside the video
9:20
description I have given the full blog
9:22
post which guides you step by step with
9:25
images as well. So you will see so only
9:28
this index html file is needed. So you
9:31
will see this is all the source code
9:32
that you will need here. So first of all
9:34
I will tell you step by step how to use
9:37
this. So you need to include this script
9:39
tag here which is very much necessary.
9:41
So I will include this. So this is
9:44
nothing but this polyfill dot. You need
9:46
to include this for the map to work. So
9:49
make sure that you go to the video
9:50
description and uh go to the source code
9:53
that I am telling here. And next guys we
9:56
will be having our input field and uh
10:02
so inside this what we want we want
10:05
input field
10:07
of type is text and we will give it a id
10:11
of autocomplete
10:16
and uh then you can just also add a
10:19
placeholder as well. Enter your
10:21
location.
10:24
Then we have a div. We will attach it id
10:27
of map. So here we will display the map
10:30
which is shown to the user. So you will
10:34
see this is the all that stuff here. Now
10:37
guys this is the most important thing.
10:40
You need to have this script tag
10:42
attached to your application. So here
10:44
you will copy paste your own API key. So
10:46
here we are just loading this uh main
10:49
business logic of the application. We
10:51
are use loading all the both both the
10:53
libraries which is maps javascript API
10:55
and places library. https
10:58
mapaps.googleapis.com/maps/api/js
11:02
question mark key is equal to. So after
11:05
this key is equal to you need to copy
11:07
paste your own API key. So what I will
11:10
do is that I will just uh
11:13
go to my console here. So wherever I
11:16
created this API key, I will copy this.
11:18
I will paste it here.
11:22
And make sure guys you do first of all
11:24
billing on that particular project where
11:27
you have created the API key and then
11:29
only you include it. If you don't uh do
11:32
billing then this API key will not work.
11:35
And after that guys we need to
11:40
initialize a function where we'll put
11:42
all that. So the next step is very
11:45
simple. I will
11:47
guide you step by step. So just inside
11:50
your custom JavaScript
11:52
inside the script stacks I will paste
11:54
this code here which is very much easy
11:56
code document.adde eventlister and this
11:59
is DOM content loaded. So it is very
12:02
much easy. Whenever all the content on
12:04
on the DOM is loaded you need to uh just
12:07
invoke this function which is init
12:09
autocomplete. So we haven't written this
12:11
function. This is a custom function that
12:13
we need to write here. Function
12:16
init autocomplete. So here we will we
12:20
will set the map and we will also bind
12:24
the location autocomplete location field
12:27
to this input field. So this is very
12:29
easy. We will break down into steps
12:31
here. Small chunks of step where you can
12:33
just understand what is happening here.
12:36
So the first thing we will do is that we
12:39
will put all the maps.
12:42
We will select the map here. We have
12:44
given the id to it of map here. This is
12:46
an empty div. So we have selected
12:49
through document.getelement by id map.
12:52
And then we are using this method here
12:55
google.m mapaps do map. So here we are
12:58
initializing a new map. We are providing
13:00
a center to it by giving latitude and
13:02
longitude which is coordinates on the
13:04
map 48 and 4. You can just change these
13:07
coordinates to whatever coordinates that
13:09
you want. And then this is a zoom level.
13:12
So what whichever zoom level that you
13:15
like you can change this number to any
13:17
number of your choice 4 6 8 and this is
13:20
disable default UI. So if you want to
13:24
disable the default controls that are
13:25
appearing on the map, you can also
13:28
change this to false here.
13:31
If you don't want to disable it, just
13:33
click on true.
13:38
And then guys, we will attach this uh
13:40
input field as well which is
13:42
autocomplete. So the next step is very
13:44
simple. So just
13:47
paste it here. So we are selecting we
13:50
have given this ID of autocomplete. So
13:51
we need to change this
13:56
autocomplete. So after getting the
13:58
reference of the input field, we are
14:00
calling this method which is
14:01
google.maps.places
14:03
dot autocomplete and we are passing the
14:06
reference of the input field and then we
14:08
are placing at the top center position
14:12
which is autocomplete field here and
14:14
marker we are placing we are also
14:16
placing the marker as well. So marker
14:18
Google dom maps domarker.
14:21
So the last thing that we need to do is
14:23
that it is very simple. We need to
14:25
attach this. So if you see here,
14:33
if I just open this with live server at
14:35
this moment of time, you will see.
14:46
Let me just see.
14:50
I think we need to add these uh
14:57
The next step is very much important. So
15:00
just
15:02
see here in the blog post as well you
15:04
will see you need to set the fields as
15:08
well. So whichever fields
15:11
after that just paste this code here.
15:14
So whatever it is saying it is adding
15:16
this autocomplete field to the map. Here
15:18
you will see and it is adding these
15:20
fields address components geometry name.
15:23
So whichever information it will display
15:25
after you select a particular address.
15:27
So this two two lines are very much
15:29
important. So once again if you load
15:32
this.
15:41
So you can see all these suggestions are
15:43
here. It is here. You can see all these
15:46
suggestions are here. So this is a auto
15:49
field is currently working but uh
15:59
so it is saying the provided API key is
16:02
expired.
16:04
So you must use an API key which is
16:06
requested to Google maps platform API.
16:09
So this error guys you can also receive
16:12
this error. So I intentionally uh did
16:15
this process in this way so that you can
16:16
also see this error which is showing up
16:19
to me. So if you also uh created the
16:22
wrong API key. So there are various u
16:26
platforms out there inside Google cloud
16:29
APIs. So one such process is Google maps
16:33
platform API. So if I just show you the
16:35
dashboard here. So there are various
16:37
kinds of dashboards available. So this
16:39
is the general dashboard. This is not
16:41
Google maps dashboard. So each and every
16:44
project will be assigned a certain
16:47
set of APIs. So if you just select here
16:52
um this is my
16:56
kota here you can see Google map
16:57
platform. So this Google map platform is
17:00
different from Google cloud platform. So
17:02
you need to make this difference. So I
17:04
will select go to the Google map
17:07
platform. So here you can see this is a
17:08
logo is showing here of Google map. So
17:11
you only need to create uh credentials
17:13
here only don't need to create the
17:15
Google cloud credentials. So it is
17:17
different and now you simply need to
17:20
create or I can also copy this API key.
17:24
I have already created this. So simply
17:26
you need to paste this API key. So this
17:28
will work.
17:30
So I intentionally did this like this so
17:32
that you can understand the problem. So
17:34
if you face it inside your tutorial also
17:37
if I now open this
17:42
so let me just see what is
17:47
I think I haven't save
18:04
Let me create
18:12
create credentials once again. Create a
18:14
brand new API key. Let me create it. So
18:17
this is the API key here.
18:28
So if I open this again here. So why it
18:31
is not opening here? Let me just see if
18:34
I go to console here. So
18:48
Uh let me just paste all this code here
18:51
which is there. So go to the video
18:53
description and uh copy all the source
18:55
code here. So I think I made a typing
18:57
mistake here whenever I typed it.
19:01
Sometimes you can make mistakes while
19:03
coding here. So simply copy all this
19:05
code and paste it. So here whatever you
19:08
will see here you will see your API key
19:10
here. So here in this place you need to
19:12
paste your own API key. So simply
19:15
paste your own API key by going to your
19:18
dashboard.
19:24
So
19:26
if I just now load it, you will see now
19:28
it is loading properly because uh I have
19:30
made some typing mistakes. So you will
19:32
see this uh for development purposes
19:35
only. It is showing because you haven't
19:37
provided a valid API key. So that is why
19:39
it is showing this uh copyright text
19:41
text here. So this page can't load
19:44
Google maps correctly. So for this for
19:46
removing this you don't want to see it.
19:49
To remove this it will also not show the
19:51
suggestions as well. So you need to
19:53
provide a valid API key. So for doing
19:55
this it is very easy. Go to your
19:59
dashboard copy the API key and uh paste
20:04
it. So now your application should work
20:06
here. You will see this is your
20:08
autocomplete widget. You can search for
20:10
any any sort of country here.
20:23
So in this way you can just see here all
20:25
the things are working properly.
20:35
So it is saying Google maps JavaScript
20:37
API error.
20:45
So it is expired. So we need to create a
20:47
new API key as well.
20:59
We paste it here. this API key.
21:11
So this is the API key. If I now open
21:13
with live server
21:29
sometimes it can happen guys in Google
21:32
strange things can happen. So make sure
21:36
that you refresh your application once
21:38
again.
22:04
If you once again provided it. So just
22:06
wait.
22:25
So you can see guys sometimes it can
22:27
happen but I have given this full source
22:29
code here inside the video description.
22:31
So this is the source code. So simply
22:32
you need to copy paste your own API key
22:35
and you can enjoy this application. So,
22:38
thanks so much for watching this video.