Up next in 10

Angular 13 ngx-file-drop Example to Drag and Drop Multiple Files to Upload to Server in TypeScript
Dec 22, 2025
Buy the full source code of application here:
https://buy.stripe.com/9AQ3fw9RnfJe43m1zt
Show More Show Less View Video Transcript
0:08
Uh hello friends, today in this live
0:10
stream I will be talking about a new
0:12
library of uh angular which lets you
0:16
drag and drop your files and try to
0:19
upload it to the server. So the library
0:21
name is uh ngx drag uh file drop. This
0:26
is the library name. With the help of
0:28
this library, you will be able to drag
0:30
and drop files to the server and upload
0:33
it. So if I want to show you the demo of
0:36
this library, this is the demo
0:38
application. So basically this is the
0:40
interface which you get. So simply you
0:43
need to drag and drop your files
0:45
whichever files you need to upload and
0:47
uh after that it will give you the path
0:49
size and the last modified date. So
0:52
basically if I open this here,
0:55
if I see here, go to the downloads
0:58
folder.
1:02
So basically if I see here, go to the
1:05
any file that I want to upload. You will
1:09
see if I drag down this file here, this
1:11
will be able to drop. If I go to the
1:15
downloads,
1:18
if I drag drop, you will see that now
1:20
this file is uh successfully uploaded
1:22
and this has got a name. This has got
1:25
the size and also last modified date. So
1:29
with the help of this you can drag drop
1:32
you will see that once again like this
1:36
depending upon the size it will take
1:38
some more time in order to upload it. So
1:41
once it is uploaded it will give you the
1:43
size
1:46
you can see that
1:51
it is simple drag and drop
1:53
functionality. So first of all it will
1:56
give you the name. It will give you the
1:58
size and last modified date. So
2:00
basically this is the library guys. Here
2:03
you can also select multiple files in
2:05
order to upload it to the directory. So
2:08
if you select multiple two files. So,
2:11
so you can just upload it multiple
2:13
number of times. And now you will see
2:15
this is the name, this is a size and
2:17
this is the last modified date.
2:20
So this is a library we are using here
2:23
which is NGX file drop. So you can just
2:26
see this is got a weekly downloads of
2:29
128,556.
2:33
So it's a very popular module [snorts]
2:35
and the instructions are very much
2:37
simple. You just need to install this
2:39
module by simply invoking this command
2:42
which is ngx filerop. After that there
2:45
is a simple users instruction.
2:48
So all the step-by-step instruction is
2:50
given and all the source code is also
2:52
given and I have written a complete blog
2:55
post on my tutorial website coding
2:57
section. So if you want to download all
2:59
the source code you just need to go to
3:02
the video description link to download
3:03
all the source code. So inside my live
3:06
stream you will see this is the link. If
3:10
you go to this uh video description you
3:13
will find out this link. So simply you
3:15
need to download the source code. Simply
3:18
go to the video description link and
3:21
download all the source code and you
3:24
will be able to download the source code
3:26
of this application. So let's start
3:28
building this application from scratch.
3:30
So I will just uh go into my projects
3:34
directory
3:36
and make a new directory drag drop.
3:43
So first of all guys we will make a new
3:45
project which will be drag drop.
3:50
So [snorts]
3:51
this will create a new project inside
3:53
this directory. So first of all it will
3:56
ask some questions to you that once if
3:58
you want to include routing and it will
4:02
also ask you about the stylesheet. So we
4:06
don't need routing and we only need CSS.
4:09
So if you just create it will install
4:11
all these packages. So once these
4:13
packages are installed we will be able
4:15
to build this application.
4:18
So if you just search for this library,
4:22
so it's a very popular library which is
4:24
NGX file drop which is essentially used
4:28
for drag and drop files and upload it to
4:30
the server. So 128,000
4:34
weekly downloads are there. So it is
4:37
just installing the packages. So just
4:39
wait.
4:41
So if you're new to the channel then
4:43
please hit the like button, subscribe
4:44
the channel as well for more videos like
4:47
this. So it is just installing it.
5:16
So now guys you can see it has
5:18
successfully installed the packages. So
5:20
now we can open this uh we can go to the
5:24
projects directory and open this inside
5:27
visual studio code text editor. So now
5:30
you will find out this is a brand new
5:32
angular project. So it doesn't contain
5:35
anything. So it's a brand new angular
5:37
project. So first of all what we need to
5:39
do is that we need to install this
5:41
library which is uh npmi ngx file drop.
5:45
So simply we need to install this
5:46
library. So npx
5:49
file drop.
5:52
So if you just install this uh library
5:54
sorry this is ngx not npx.
5:58
So ngx file.
6:01
So install this module. So this will
6:04
install this.
6:07
So now after installation you just need
6:09
to include this library inside your
6:11
angular application. For doing this it
6:14
is pretty simple. You need to go to app
6:15
domodule.ts file. And first of all we
6:19
need to import the HTTP client module
6:22
which is
6:25
this module which is HTTP
6:31
client
6:33
module and this needs to be imported
6:36
from
6:39
at the rate angular/
6:42
common/
6:46
HTTP
6:51
So after that we also need uh the form
6:54
module as well. So
6:57
we will import it.
7:02
So this is available from angular forms
7:06
package. So install this and also we
7:09
need to import the ngx
7:13
file drop module. So include this
7:16
module.
7:18
So this is included from
7:21
ngx
7:26
file drop. So after doing this guys we
7:30
just need to go to the imports array and
7:32
uh include all these modules
7:37
which is forms module and ngx file drop
7:41
modules. So now after including all this
7:43
simply close this file just go to your
7:46
app.component html file and here we need
7:49
to write the HTML for the application.
7:53
So this is drag and drop and for this we
7:56
will have a simple div which will have a
7:58
class of center. So this module guys ngx
8:02
file drop.
8:05
So basically this is the actual module.
8:08
It takes some properties. If you look at
8:10
the documentation about this module. So
8:13
if you just go to the prop properties,
8:15
it takes on file drop. These are all the
8:18
events which it takes. It can just
8:22
accept uh only a particular extension of
8:25
files such as PNG, JPG. It can also
8:28
accept a whole directory to be uploaded.
8:31
All these attributes are supported by
8:33
it. So we will be looking at uh one by
8:35
one how to attach this. So inside this
8:39
property
8:42
in order to allow multiple files we will
8:44
put this multiple property inside to
8:47
true.
8:51
It's a boolean property. And then
8:57
if I just
9:02
then we have got uh
9:05
another property for
9:08
drop zone
9:13
drop zone label.
9:15
So basically it is saying that uh what
9:17
is the label that you want to give. So
9:19
we will simply say drop files. Here
9:23
we will simply say that.
9:27
So if you just now execute this
9:30
application, if you just run this
9:31
application for ngsurf,
9:36
so [snorts] now basically it will have a
9:38
button, it will say to us that drop
9:40
files here.
9:43
If I if it runs and it will be able to
9:46
upload multiple files to the server
9:48
because this multiple property is true.
9:51
So it is just in generating the browser
9:58
just wait.
10:00
So it is compiled successfully. So we
10:03
can simply go to localhost 4 2000.
10:07
So now basically guys you will see this
10:09
is will be a button out there and it has
10:11
got this label of drop files here. So
10:15
basically you can change this label to
10:16
any label of your choice. Let's suppose
10:18
I change to this you will see that
10:21
instantly it will change. So this you
10:23
can customize accordingly. So this is
10:26
the functionality it comes with
10:28
directly.
10:29
So
10:31
after that we also have some more events
10:34
out there. So whenever you drop some
10:36
kind of a file there is a event out
10:39
there which is called as onfile drop. So
10:43
let's suppose you drop a file so this
10:46
event is called as onfile drop. So you
10:49
will initialize a function to it. So
10:53
this function will trigger automatically
10:55
whenever you submit or drag drop the
10:58
file. [snorts] So I am calling this
11:00
method as dropped. So whenever you drag
11:02
and drop any sort of file, this method
11:04
will automatically trigger which is this
11:07
dropped event. We have written this. We
11:10
have passed the event. This is the way
11:12
by which you can uh know the user. So
11:15
now we need to go to app.component.ts
11:18
file. And now we need to actually write
11:20
this method which is method to handle
11:24
upload.
11:27
So this method will be pretty simple
11:29
guys if you see how to do this. This
11:32
will be a simple public method which
11:34
lets you handle this. So public dropped.
11:38
So basically it will have the actual
11:41
number of files which are uploaded. So
11:43
we will uh call this as ngx file drop
11:48
entry. So this will be automatically uh
11:54
uh just imported automatically by visual
11:56
studio. You'll see from ngx file drop.
11:59
[snorts]
11:59
So this will be an array because there
12:02
will be multiple files. If uh you upload
12:05
multiple files so inside this we can
12:08
just say console log
12:12
files.
12:14
So we will just uh print out the
12:18
information about the files which are
12:19
uploaded. So now basically uh this is
12:23
functional out there. So basically if I
12:25
try to upload any sort of file here
12:28
and if I check the console you will see
12:31
that it will be printed out this
12:33
information. This is contained two
12:36
elements out there which is this file
12:38
entry. This is the full path of the file
12:41
which is uploaded.
12:43
uh it is not a directory it is a file.
12:45
So it is a file. True. This is the name
12:48
of the file and this is a second entry
12:50
of the file. You will see that. So if I
12:53
change this automatically this will
12:55
trigger
12:58
you will see that now again there will
13:01
be another entry.
13:04
You can see that sample pdf. So in this
13:07
way guys uh we are drag and dropping the
13:09
files to the angular application and it
13:12
is detecting it. So in this way we have
13:15
written this method which are printing
13:17
out the information about the files
13:18
which are uploaded. So basically we can
13:21
print out the information inside a
13:24
table. For doing this it is very simple.
13:26
We need to initialize this into a
13:28
variable which is this dot files to
13:30
files and we need to declare this files
13:34
parameter at the very top. So public
13:36
files this will be a array ngx file drop
13:40
entry
13:42
and this will be a empty array by
13:44
default. So now every time you drop any
13:47
sort of file this will be initialized to
13:49
this. So after this we can display this
13:53
inside a simple table table like
13:55
structure inside the HTML. So we can
13:58
just give this div a class of upload
14:02
table.
14:06
So inside this table guys we will have a
14:09
simple class of table
14:11
table head and inside this we will have
14:15
a simple name attribute
14:18
and uh inside the table body
14:22
we will
14:25
have the table row and we will loop
14:27
through using the ng4 directive that you
14:31
already know which is used for looping
14:33
out arrays. So we are passing this
14:36
information guys you will see that this
14:38
do files to files you will see this is a
14:40
files information that we are passing.
14:43
So we have this uh let item of files
14:49
and then we are taking a index variable
14:51
which is used for looping through. After
14:54
this we are declaring a index variable
14:56
which is equal to index and inside this
14:59
we will print out this information
15:00
inside table data.
15:03
So inside double curly brackets we will
15:06
just write we will print out the
15:08
relative path of the file which is
15:11
uploaded. So now if I refresh it you
15:14
will see that if I refresh the
15:16
application
15:18
drag and drop you will see it will be
15:21
printing the name of the file which is
15:22
uploaded which is sample.pdf.
15:25
So if I upload multiple files it will
15:27
also work. Let's suppose
15:36
So now you can see it is uploaded four
15:38
files. This is first file, second file,
15:40
third file, fourth file. So it is
15:43
displayed the names of all the four
15:45
files. So in this way guys, you can
15:47
print out the names of the files which
15:49
are uploaded. So this is very easy way.
15:52
And coming back to the more events, we
15:55
can look here guys. So if you just read
15:57
the documentation you will find out the
15:59
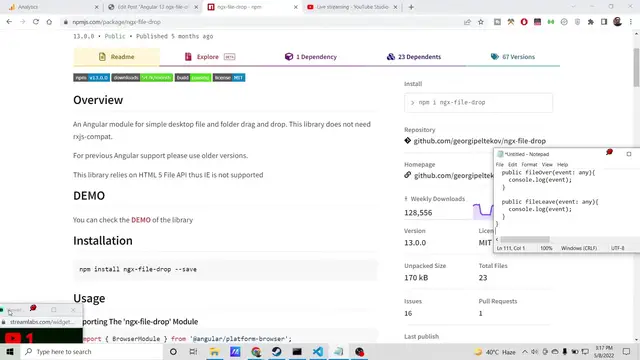
events. Uh there is also a hover event
16:03
also. So basically when the file is over
16:06
there is also this event which is on
16:08
file over.
16:12
So you can initialize it to file over
16:15
again pass this event.
16:19
Again event uh another event is on file
16:23
leave. So you can just make this a
16:26
little more customizable using these
16:27
events. Just add some animations to it
16:31
because these events are customizable.
16:35
You can track whenever the file is
16:38
uploaded using these events
16:43
and also you can have a customize button
16:46
if you have to have using this tag which
16:50
is ng template.
16:56
ng template and uh inside this we can
17:00
have a simple button
17:03
of browse files. So basically whenever
17:06
you click this button you will be also
17:08
be able to upload files. So this will be
17:11
a type of button
17:14
and we can attach a onclick listener to
17:16
it also. So when we click this button
17:18
what will happen? So simply it will call
17:22
this function which is open file
17:25
selector.
17:29
So
17:32
inside this template what we can do is
17:34
that
17:37
we can paste this code here.
17:50
So basically now you can see we are
17:52
initializing this uh let open file
17:55
selector to open file selector method.
18:01
So inside this file you can initialize
18:04
this method.
18:11
You can initialize these two events
18:13
which are there.
18:20
If you refresh it,
18:22
you will also see this browse files
18:24
method also. So if you click this method
18:27
you will also be able to upload files
18:30
and also you can drag drop also which is
18:32
also available.
18:39
So in this way guys we have looked about
18:41
this uh angular library which is a very
18:43
handy library if you want to do drag and
18:45
drop and upload files to the server. So
18:48
it's a very powerful library which has
18:50
got 128 weekly downloads 128,000. If you
18:54
want to get all the source code, you can
18:56
go to the video description link. Please
18:58
hit the like button, subscribe the
18:59
channel
19:01
and hopefully
19:04
I will be seeing you in the next
19:05
tutorial. If you have any sort of doubt,
19:08
you can ask in the comment section and I
19:12
will be seeing you in the next video.