Up next in 10


Have questions? Ask in the Chat!
Don't forget to check out Odyssey Custom Vans latest build currently For Sale here: https://www.odysseycustomvans.com/
Whenever you’re ready, there are 2 ways we can help you:
1. If you need a vetted parts list, download our → FREE DIY Van Build Cheatsheet to help you save time and money on Van Parts and Gear: CLICK HERE: https://vanbuilderhq.com/
2. If you want to get Done-For-You Van Build help, book a → FREE Consultation with my Calendly Link: CLICK HERE: https://calendly.com/odysseycustomvans/intro-call
Show More Show Less View Video Transcript
0:01
[Music]
0:58
w [Music]
1:20
hey everyone welcome back to the live stream tonight we've got a lot of stuff on the list to cover and uh we're going
1:25
to try to make it about an hour Stream So the stuff that we want to cover we're just going to get right into it we're
1:31
going to continue talking about the ecoflow um setup and we're moving on
1:37
from the floor so we're actually going up to the ceiling today but that ecoflow
1:43
uh Second alternator cable I've got that on order and then I'm waiting to hear back from uh tech
1:49
support just to make sure that that's something it I'm sure it's going to be something that we can do but uh you know
1:55
it's always good to double check with the people who made it um SO waiting on that back to get back with that um but
2:03
we're switching to the van ceiling and the wiring um and then taking down the
2:08
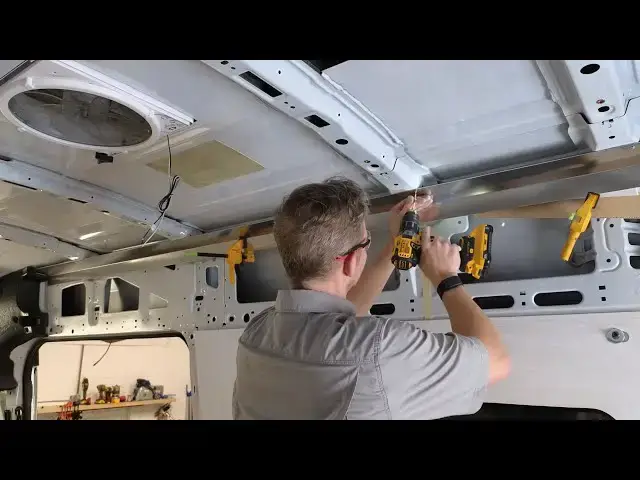
panels so if we can hop to this camera so what we have is our ABC rig ceiling
2:16
panels and we've got three of them we're going to take those down and we're going to install some support members that go
2:22
on the left and right hand side so if you guys are doing a ceiling in your van
2:28
and you want to cut your own panels out but you have a hard time uh transitioning from the ceiling to the
2:34
side walls there's a product that ABC makes it's not sponsored but what we're going to look
2:42
at is this right here so we're going to look at this piece show how it goes into the
2:51
van um so we're going to install that today and then we're going to uh once we
2:57
get the panels in we'll talk about the connectors how we're going to do the wiring moving the Ford wiring that's on
3:04
the driver's side you guys can see right there the big drooping cable we'll show
3:10
you how to move it where it's going to go um in relation to how we're doing
3:17
this uh van ceiling and then we're going
3:23
to uh talk about Puck Light placement now the ABC
3:28
rig ceiling panels that we're using they have pre-drilled holes
3:34
now that's not bad however it makes it really really hard when you are using a
3:41
hole saw because if you have a hole saw you need uh that pilot bit or the center
3:47
bit to actually bite into something to guide the hole saw as it's cutting and if you have pre-drilled holes it's it's
3:53
almost next to impossible to um to make that happen so we'll be putting the
3:58
lights in a different location not far off from it maybe you know 3 or 4 in um and then we've got let's see what
4:06
else here yeah ceiling panel support um we're
4:11
going to talk about modified truss screws so these are the components that
4:17
you may need to purchase if you're doing putting panels in your van we're going to use them to put in the support strips
4:23
on the left and right hand side of the ceiling um and a bunch of other things in the van and and so if you're going to
4:30
Lowe our home uh Home Depot uh what you want to look for is uh
4:37
two products so they're either going to be called self drilling lath
4:45
screws right there and these screws are going to have this
4:51
uh self-tapping feature on the bottom and then there's this
4:57
uh truss head essentially so it you can use this to hold down stuff
5:05
so if you're doing an upholstered panel or a painted panel um and then you can special
5:11
order these in Black so these black ones we're going to use to neatly put
5:17
in the upholster panels in the van so if you guys saw our door panels these door
5:23
panels have those black screws in there and it's just an aesthetic thing um but
5:28
you definitely want to have screws that are either uh you know zinc plated uh in
5:33
a perfect world you would get stainless steel so these black painted screws
5:38
they're actually stainless steel screws at their core um and then you have the
5:46
modified trust screw so again this is stuff I think I picked up from
5:53
Lowe's and so this one's going to um almost identical to
6:02
uh what the self- drilling lath screws look like and you can see I have these
6:09
anywhere from 1 in to inch and a quter you just want to be careful when
6:16
you're using these and drilling into the van because always think about what's on the other side of the van so just as a
6:22
safety Factor you know limit yourself when you're drilling the ceiling of your van to you know maybe an inch or so um
6:29
and speaking of drilling into the van the ceiling of the van
6:35
uh in some areas of the van of the Ford van is something called boron steel and
6:42
you can correct me if I'm wrong but um I've been told it's boron steel and it's that section that
6:50
goes It goes from here up and this is really it's thin so it it
6:59
accepts uh self tapping screws pretty well but these reinforced riveted places
7:05
or these columns or anything like this it's a completely different type of
7:11
Steel and it's impossible if you don't have a solid carbide drill bit and uh I
7:18
mean solid carbide I don't mean carbide tipped or that sort of thing um you're
7:23
going to need something really uh aggressive to drill that and ask me how
7:29
I know it's because when I installed the adventure wagon kit in the other van um
7:34
there were some places where they give you two drill bits and they're they're the really nice ones but I burned
7:42
through them and I had to buy another one so I think the uh turn that camera
7:49
back on I think the um yeah I think the drill bler they're
7:54
like 65 to 100 bucks they're pretty expensive but they will do the job
8:00
and then we're going to talk about uh I'm going to make sure that I'm going to make a ceiling drill gauge and I'll talk
8:07
about what that is I'll do it briefly here so you kind of know what we're getting into but
8:14
we're going to makees uh essentially a Woods uh a vinyl strip and we're going
8:21
to use it to take a permanent marker we're going to mark all the locations where we can drill into the rib of a for
8:29
Transit Vans of the ceiling supports and then we're also going to identify where these two
8:37
uh uh bolt locations are because we're actually not going to use these bolts to hold the ceiling panels in I just did
8:43
that temporary um but what we're going to do
8:48
is these will be uh those trusted screws will hold this in and then we're actually going to do a cedar quance
8:56
cedar tongue and groove ceiling so a really light uh Cedar tongue and groove ceiling and
9:02
it's going to look pretty awesome it's uh pretty easy to put in but we're going to wait till we do the
9:07
cedar because we're going to want to have the cedar in and as we build it
9:14
we'll drill our hole saws we'll take our hole saw and we'll drill the center of the cedar strips just so we're not going
9:20
through a half of a cedar strip um and it it make sure it looks
9:26
good let's see then we're going to uh wrap it up with talking about the AC
9:32
unit and Max fan cutout how we're going to do that with the ceiling panels we're
9:37
going to run the 48volt power cable and we will need to drill into the side of the van uh not the outside of the van
9:44
but within the upper part so I'll show you how to do that and then we'll end with talking
9:51
about um consideration of your solar panel uh your solar solar roof gland
9:58
location so if you guys uh have seen me build vans on this channel in the past I
10:04
used something called uh it's a
10:11
waterproof change it over here there we go waterproof adjustable cable gland
10:17
set and so in here we've got these big cable
10:24
glands and these things are really cool they comess compress down onto cables so you got a big chunky one you can have
10:32
small wires and instead of cutting a big you know two or 3inch hole in your van for
10:38
that uh double-sided tape gland that sticks down that most people use for
10:43
their solar what you can do is you can uh individually put the wires in your roof in their own gland and what that's
10:50
going to help you do is if you need troubleshooting or say like I don't know like a wire gets snagged and gets
10:56
damaged instead of ripping the whole cap off and moving all the wires through that gland the bigger one um you can do
11:04
it individually so you can just loosen it up you can pull the wire out replace it and then clamp it back
11:09
down um so that's just something I discovered I like to do that uh typically I'm only doing two wires so
11:18
two of these glands and two wires from solar and we're we're set and they're
11:24
also small holes uh let's see
11:29
that's it all right so that's what we're doing in this video today and uh let's go ahead and get to work
11:44
here I will mention this um so if
11:52
you just here for just a moment this is the puck light that we're going to be
11:57
putting into the ceiling of the van and this is spring loaded so these Wings come up like
12:03
this and then you can squeeze this into the ceiling and then what they do is they expand and then they'll hold this
12:09
puck in what's nice is if you ever have one of these burn out on you you use these wo connectors and then you can
12:16
just uh open it up replace the light and then pop the light back in so we'll
12:23
we'll probably talk about that um we'll get into too much detail but that'll also be in the video
12:31
so we're going to start with laying out our uh support pieces so these pieces
12:38
right here so I'm going to go ahead and get a drill and let's uh let's actually
12:45
go over here to the computer and just show you what this is so this is not sponsored just some easy information for
12:50
you so we're using the ABC uh interior wall panel
12:55
kit and what you need to if you are not using that kit you're doing your own
13:00
thing but you want some ceiling support to help you with uh this transition between the ceiling and the
13:09
sidewall uh this is pretty cool uh this it's simple um
13:16
it's it's a very thick gauge uh I think it's
13:23
stainless it's not aluminum for sure thick gauge stainless and um we'll
13:29
actually be an upholstering this so we'll spray adhesive on it like this photo and then we'll actually put our
13:35
fabric on there because there's going to be about a/ inch and a quar inch Gap and that reveal is what you're going to see
13:42
so if you upholster with the same fabric as your wall panels you're going to have a really
13:47
nice transition you won't see that Gap plus it's going to hold back these cables um including the Ford Transit
13:55
cable or the Ford factory wiring harness that's going from the driver's side all the way to the back of the van so it'll
14:02
help out with that uh we still need to rip these
14:09
uh uh ceiling members here so if you guys can see this uh piece of Baltic
14:16
Birch right here we're going to rip two of those not in this video but that is what we're going to mount the panels
14:24
to so we're trying to going to stick on the trying to stay the wire train right now I'm trying to get get this wiring in
14:33
um that's why I paused on the floor because I want to I want to put this uh Eco flow cable I want to put it in the
14:40
floor and I'm going to hold off before I glue it in because I don't want to
14:45
retroactively cut through the floor or go through the the panel because we can move on to other things while we're
14:51
waiting on something to come in for example behind the scenes behind this
14:56
door over here we've got our saw set up and we have got everything mapped out for the uh kitchen Galley that we're
15:03
going to be building so this is the one that actually will be going into John and Susan's van so this one over here is
15:09
just uh the demo piece so we can reference for measurements and stuff like that but we have the uh Rockler
15:17
undermount drawer slides coming in tomorrow um so depending on where we get
15:22
to tonight and what I'm working on tomorrow in the shop we may hop on over to the kitchen Galley show you guys how
15:28
that's coming on but now we're going to hop over and
15:33
we're going to get the ceiling panels out change my microphone get the ceiling panels out and uh get going
15:57
here
16:05
now we used a Riv nut to make these
16:10
uh you know bolts be able to go into the ceiling and where the location of these
16:15
are what's nice is if you want to put a piece of L track you can do that going down the van or what they're what I've
16:23
used them for is in Thomas's van this was the uh
16:29
is what bolted in the 8020 structure to the the driver's side and then to the passenger side and then the ceiling went
16:36
in between that um on this van we'll make sure that we can reference these
16:42
and use it for uh a bookshelf our our storage over
16:57
here okay so we're just going to put these over here because we will be putting
17:02
them back in the van shortly um if you took out your
17:08
foam pieces like this you're going to need to put them back in your van because that is what's going to
17:14
reference the Ford section of this support
17:21
member and you guys are in for a laugh for this uh front ceiling panel part I
17:28
just it was really it was really awkward doing it uh solo so I do remember that so we're
17:36
going to see how I actually get it get it taken
17:54
out uh Pro tip if you ever order ceiling panels or anything like that make
18:01
sure that leave it in the Box until you're ready to actually work on the project if you're doing this DIY um I'm
18:09
in an air conditioned shop which I'm very thankful for but if I were outside
18:15
you're going to have uh these panels warp on you
18:21
potentially and just just kind of prepare to uh it's not the end of the
18:26
world if they start to warp because when you uh put them back into the van um you're going to be bolting them
18:34
in and it'll kind of get that uh shape back for example this right here is nice
18:39
and flat in the front um but this has a
18:44
crown to it that you don't actually see right now so when we're finished and we have that those
18:50
wood that Baltic Birch Runners coming down or the furring strips if you want to call it this is actually going to
18:58
compress like that so it'll have a uh an arc to
19:27
it okay it went way easier than when I put it in
19:33
earlier yeah these can just stay
19:38
here
19:57
okay and grab a tape measure so I'm going to go ahead and cut
20:04
this uh little tool that I'm going to
20:11
make that you guys should definitely make is going to show us where we can can and can't
20:17
put screw holes into the ribs of the top of the van so let's get a tape
20:27
measure
20:34
so when I was putting in a Thomas's
20:40
ceiling uh it was very difficult to figure out uh I did an underlayment on
20:45
the bottom that I painted black a matte black and then it was that simulated
20:51
slat design and then I needed to tie it in after the fact into the this
20:58
so there's a bunch of holes here and you need some type of uh something to
21:05
reference so that you know once this uh ceiling gets put back in where you can
21:10
drill so you're and for me it's just to make sure everything looks nice um you
21:16
could just go for it you know DIY and you don't have to uh be per too perfect with it but we're going to I'm going to show
21:24
you how to make one if you want to make one so we got 62 in let's just cut this
21:30
to
21:54
62 and we're going to we'll ride on this later but if you guys can see what I'm
22:00
doing here I'm going to take this and this is going to go up
22:05
here
22:11
um and I'm going to find out once I put this I'll trim it to when we put the the
22:16
two pieces of stainless up here it's going to be a little bit of a different measurement um but what I want to do is
22:22
when I bend this up I basically want to copy and say you know this is where
22:27
there's no so make a big X here so can't drill here can't drill here can't drill here and
22:34
then this the places I can drill um so I'll use a black marker for
22:39
where I can't and I'll use a blue for where I can and then that way when I get ready to do my Cedar
22:46
seiling I can put the underl it down and then I can start working my Cedar just going you know left to right
22:55
and um actually what we'll probably do is maybe right to left because over here we're
23:01
going to have a shelf and then a refrigerator that might be work out better anyway the point is once we have
23:07
the cedar ceiling in as we go we can put the cedar in hold this up drill into the
23:15
ceiling and we'll do it'll help us with a couple things we'll have this we'll have a nice neat path for the screws
23:22
that go up in the ceiling so we have those stainless steel black screws um
23:27
have all spacing very neat and so it'll look very uh polished and
23:33
professional but this this uh piece of Vine right here will be a gauge so we
23:39
can you guys get the point all right next we're going to
23:46
tackle this cable so two things we're going to make sure we need zip ties and then we're
23:53
going to get um we need a flush
23:59
cut trimmer if you guys don't have one of those uh I suggest you buy one
24:04
they're super cheap on Amazon but they're awesome they flush cut they don't keep those sharp edges on the zip
24:10
ties so it makes things enjoyable to use I'm grab my phone so we can hop back
24:17
in the van there we go move this to this
24:26
side
24:34
if you guys are watching this video you can also check out uh our website as well van Builder hq.com got a lot of
24:41
awesome uh blog posts on there talking about van conversions solar cabinet
24:47
choices uh you know what's the best van to actually convert for your van conversion low medium high roof um just
24:56
a bunch of cool blog posts uh that we've written and uh it's a lot
25:01
of feedback that we've gotten not only from you guys uh talking about the channel but all the shows that we go to
25:06
so as if you check it out you'll see a lot of the shows uh a lot of photos from
25:12
um the Expo shows the van shows that we've gone to they're on there so yeah
25:17
it's fun to check out so it's on Van Builder hq.com and a lot of the stuff that I'm using
25:24
here uh my blades the drill um stuff like that the rivet
25:32
nut gun that I use to put this in uh it's going to be on something called the
25:37
DIY van build cheat sheet so it's a essentially an Excel document that I put
25:42
together of the past three years and all the stuff I bought in the shop it's on that list and it's about 250 items
25:50
currently it's always growing but that list is free so there's a link in the
25:55
description below you guys can go over there put your name email address in and get it sent right to you uh you can
26:01
search it but if it's something I've bought off Amazon in the past three years it's on that list um and I really
26:09
just use it to reference stuff I've already bought um makes it really easy so for
26:15
example you know these lights that I buy the wio connectors stuff like that so
26:21
it's kind of my little sheet for chicken inventory the links are there from Amazon but um it's completely free so
26:28
Link in description if you guys want to pick one of those up and uh I think it'll really help you with your van
26:35
build also as I'm going through this whole entire thing if you guys have any questions there's a live chat you can
26:40
ask me anything van related while I'm working I'll pause and then hop onto
26:46
that and uh ask answering some questions for you back to this um be extremely careful
26:54
these rivets right here there's these little little Tails from where
26:59
everything was uh spot riveted and they're they're like a surgical blade
27:05
I've I know they're there and I've still cut my finger I don't know probably 10
27:11
or 12 times um they are just extremely sharp so if you're going over here be
27:17
very careful these things little Tails hanging out as we start on this wire the very
27:22
front of the van this is a very important cable this goes to your uh antenna on the top of the van um and I
27:30
believe it's for you know the XM uh Ford
27:35
sink and stuff like that so you do not want to damage this so we're going to make sure that we
27:41
just kind of move this up here and we're going to zip tight out of
27:47
the way but we're going to make sure that we're not
27:53
um damaging it in any way uh I'm going to come back to this
27:59
because there really not a good way to hold this up here and we got one we got one
28:05
spot but before I got distracted we got to put our foam pieces back in
28:12
here so let's go ahead and get this piece put
28:26
up now we covered this piece right here in
28:33
another uh live stream earlier and what I want to mention about it is this if you follow it all the way
28:41
to the back of the van and they go straight down there's the grounding terminals for the Ford Transit for the
28:47
brake lights the rear lights and stuff like that and those grounding terminals what you going to do is you want to
28:53
loosen them and then take all those plugs out and then pop off these little snaps that hold the cable in and there's
29:01
some slack that you can free up in the bottom and then you can actually pick this up so in the ABC Rigg
29:10
video it's not wrong but I learned this from the adventure wagon tutorials so
29:16
Adventure wagon we really need uh they need this cable really high
29:22
ABC um I think they just pushed it up here and they didn't do all that but if you need more SL like
29:29
this you can actually pull about another foot of slack by loosening those terminals you will have to create you'll
29:36
have to make your own uh ground extension but if you're doing electrical you can do that anyway uh by yourself um
29:46
it's just an extension piece so if you buy an adventure wagon kit interior conversion kit they give you a little uh
29:52
wiring harness to extend the grounding terminals of this cable
29:58
um so that's just a little little Pro tip for
30:10
you and I'll probably tell you just say this a million times but just very very careful about the sheet metal it is
30:18
so so sharp all right so we're taking this
30:25
let's go ahead and cut that trim this piece
30:44
off
30:49
okay yeah we're just going to go step by step that way we don't have to go back and fix anything so we're going to go
30:55
ahead and zip Tire satellite cable up just keep everything nice and
31:01
tight and if you think about it places where you're not going to be insulating um like we're going to
31:08
insulate here but you know we're going to have a wall panel here uh you know use zip ties electrical tape anything to
31:16
keep vibrations at a minimum uh would be my recommendation for
31:24
you okay so we're just going to temporarily put this in I might let that snap in just one
31:32
little snap just to hold
31:47
itself that was more snaps than I wanted but that's okay um by the way when you pull this
31:53
foam out don't worry when this plastic goes through through the foam and you
31:58
think you've broke it um there has been a Transit where I have successfully gently taken this out and it's not gone
32:04
through uh it doesn't hurt anything just if you want to fix it later just put a a washer behind the piece of plastic and
32:10
then pop it back on all right so let's get our cable
32:16
satellite cable let's pop it up here now there's a lot of back and forth
32:23
when you're building a van so um for example I need to take this back out I need to reupholster it but I
32:30
need to do the cabling I need to do this ceiling so this uh this will be
32:38
upholstered all right making our way towards the back and then we're going
32:48
to now I haven't put in this ABC rig rig thing before so if for some reason where
32:55
I'm I've already watched the the video but if I'm putting these zip ties in the wrong location and I have to cut them
33:01
off and that's just what we'll have to
33:10
do but I like how this is holding them here cuz it's it's in an area that's
33:16
not this is not going to rub and cut
33:21
anything also this is stuff I've already removed this is the uh cable that
33:28
actually plugs into your cargo lights so you'll need to remove those cargo lights um if you're putting your van
33:55
together
34:26
if you guys have any questions don't be shy don't worry about me working and stopping from
34:31
working I'll get the I'll get this done but if you guys have a question in the
34:37
moment I'll be happy to answer
34:55
it
35:31
all right when ABC rig made their video they said when you get your kit there's
35:37
going to be two links so my kit
35:43
um let's see here am I just losing my mind nope so they're supposed to be two
35:49
of one length and two of the other length uh they must have changed that I think one was the extended van obviously
35:55
I chose 148 so we're going to going to try to copy their install
36:03
method as best as possible so what they do is there is a
36:10
little indentation right here so you get a square hole and then you got a round
36:16
hole and there's this little lip and they want you to take
36:22
this and see I already poked myself with that metal yeah sneaks up on
36:31
you okay um so they're doing they do the
36:37
rear first and then they come overlap
36:42
and then butt up to that so let's
36:47
see see what that looks
36:55
like I might move the camera since we're
37:01
working in the top of the van
37:06
here but you guys can see that looks pretty
37:14
good yeah let me just change the camera
37:22
angle perfect there we go
37:29
okay so this one looks
37:41
[Music]
37:55
like okay we're going to add more zip
38:25
ties
38:42
so that it's actually laying on the cable in their video that's why there's that
38:55
offset just make sure I'm doing this
39:10
right okay that's the short side so this is the this is the
39:25
video okay that's the one that's why that needs to be on that line
39:30
okay all right so this does get
39:39
offset so that would be touching the wire but we pull it off the
39:45
wire just like that okay I like that design that works for me you still need
39:53
to get this up as high as possible
40:04
we'll see how this back section goes they don't extend theirs all the way to the back but I want to have something
40:11
to you always need to think eight steps ahead in a van because even if I have this put up
40:18
we got our wall panels and ceiling remember we need to finish this back section we need to cover the holes we
40:24
need to wrap it but then we need to to keep in mind how are we going to transition the wrap section to the
40:31
ceiling when nothing exists because even though we put the ceiling panel in that's for a kit there's still like an
40:38
inch and a half or two that's open exposed back here
40:44
um so the kits don't do everything that's why you need to now you might be someone that doesn't
40:52
care about the back being finished and you just want to hit the Road and I don't know maybe you're just hauling
40:59
motorcycles or going camping but if you want to have you want things to be a finished look you always think about how
41:06
is that finish look going to be achieved you know what are you putting uh how are you building a van so
41:12
it's going to be able to support something like
41:25
that uh let me see if I can actually
41:44
this okay we are up as high as we can go got everything set let's just clean this
41:52
up don't cut your van wires
42:01
now with the offset that they're providing for the install you should we should be able to sneak our wires up
42:07
over that Ridge
42:13
um while we're working on it okay let's get the uh screws
42:20
out see we're just going to use the 1-in self-drilling lath screws
42:38
remember we're choosing this because we would I mean we could use like a 2in screw but uh we don't want everything
42:45
to um am I trying to
42:51
say we don't want to go through the wires all right
42:58
so that is why they did what they did okay so what they did is this piece
43:05
right
43:23
here okay so that butts up to that
43:30
all right we're going to clean up our satellite cable because we won't be able to see it
43:37
again it's going to be hidden forever so let's make sure it has
43:43
a good home over
43:55
here
44:01
okay we're just going to lightly put that in there we don't want to Super zip tie that
44:12
down all right this kitchen gal is nice put all my tools on
44:20
it so they start from the back and then they overlap going to the front um
44:27
I'm not going to do that because we're going to be doing it just a little bit
44:33
differently so
44:38
this okay we're just going to do that there see guys I'm telling you my hands
44:45
are going to be cut up with this sheet metal just be really
44:54
careful okay so we're going to need to be a little
44:59
bit more precise on the Scribe marks that we put up on the ceiling so I'm
45:05
just going to get a
45:14
square I'm going to describe that there we
45:24
go this does not have to be perfect
45:32
um I just like it it' be
45:38
perfect okay there you go see they didn't take
45:49
long okay name of the game is to not drill through the factory harness
45:58
now this Chucky piece of plastic right here it looks like I'm going to have
46:07
to reorientate my zip tie this Square thing is in the
46:24
way
46:54
okay I'm just going to put two dots on the
47:01
top that way I can see where I want to put the screws
47:10
in that okay finally we're going to
47:24
drill
48:05
it's going to happen a lot when you're trying to get these screws
48:11
[Music] [Applause]
48:24
started
48:50
you will find a couple bad screws in your box so just be patient
49:29
[Music]
50:03
okay so now we got those in we're going to put some more screws in later we just want to get this held in place so that we
50:09
can move towards the
50:24
back
50:38
so now we're dealing with this back wiring harness we need to uh I'm going to
50:45
temporarily zip tie this really high and up so it goes up and over this and then I'm going take that piece and I push it
50:53
all the way back and then I'm going to use it's a pretty cool product here let me
50:59
grab
51:11
it where
51:24
go
51:54
for
52:28
so I put this on there later but if you need to some uh push something all the way towards the back or it's touching
52:35
metal in a van we're not going to do this uh we're going to upholster that
52:41
but if you had to what you can do is you can actually uh have you can buy this
52:46
felt tape and you can wrap stuff um we did that in Thomas's van a lot of well
52:52
he he wanted a whole subwoofer and sound system system so to make sure stuff didn't rattle I put a fill tape over
53:00
everything um for this one we're going to leave that open um and
53:07
actually I think we're going to need to see if we can move
53:16
this all right start working on this cable little cable
53:24
management
54:59
and if you're in the middle of your build you're kind of doing what I'm doing just do things that you're you know do
55:05
things well so you don't have to go back and redo them so I'm trying to get this done so I do it one time and I just move
55:13
on so let's see that needs to
55:19
be that
55:39
okay I just want to leave enough space so that I can upholster it and then I can
55:44
also uh wrap this uh
55:51
uh okay that's good
56:53
okay
57:08
[Music]
57:16
sometimes you got to persuade it a little bit Yeah the still these Vans is is
57:24
really strong some in some places so takes extra
57:34
effort also you don't want to lose the
57:53
screws
58:03
okay this s looks
58:19
good need to do about three more screws and
58:25
and we can move on to something
58:46
[Music]
58:53
else
1:01:00
it's really nice is very strong all right
1:01:23
perfect
1:01:29
moving to the other
1:01:53
side
1:02:47
now some of these ribs may not be all in the same location
1:02:52
so don't be too hard yourself if it starts to get off cuz
1:02:58
it's uh these ceiling pieces can be riveted
1:03:06
in sometimes different are different ways looks like the wiring on our uh
1:03:14
pater size is going to be easier not because we don't have the big Rope Rope wire but it's because uh it
1:03:23
goes through the back channel of the van so we don't have to deal with
1:03:29
that all
1:03:46
right let's get a better C camera angle that's not good all right hold on
1:04:01
I don't have the uh humble Road helicopter sound effect I'll leave that to
1:04:23
George
1:04:46
see I like to come back with this camera just a little bit if
1:04:53
possible
1:05:02
okay so yeah we're going to bump up to that foam
1:05:08
thing and I'll move it to the back when we get to the back
1:05:23
section
1:05:46
yeah this time is going to be harder CU we don't have a cable to push against was kind of our cheat on the
1:05:53
other one let's see if there's any way to I
1:06:02
don't think there's another
1:06:09
way actually that looks to be maybe a half
1:06:23
inch
1:07:52
h
1:08:48
got to work smarter not harder
1:08:57
of course you would fall down of course you would fall
1:09:05
down
1:09:22
see
1:10:35
so what I'm doing I'm just pulling this back a little bit
1:10:43
because uh it's kind of touching up here on this front piece and I don't want it
1:10:49
to do that okay that's all right right
1:11:01
there okay we'll just we'll put some fabric up
1:11:13
[Applause]
1:11:22
there
1:11:30
May wonder you may want to ask you say Nick why aren't you pre-drilling this I
1:11:37
promise you that is extremely difficult to
1:11:52
do
1:12:08
[Applause]
1:12:14
okay that looks
1:12:22
excellent and that's our little trick to get that piece
1:12:29
in and so now I know why their wall panels are obviously shorter than you
1:12:35
think they should be and it's basically just so they can uh what was I trying to say they
1:12:43
can have that Contour kind of come up make it look
1:12:50
nice um the adventure wagon was different because everything's Uh custom molded
1:12:57
but it is much more
1:13:21
expensive same thing here we're going to make make sure that we put it in the right orientation but
1:13:29
we leave an offset for our Fabric and then our we're actually going to be using four-way stretch fabric in the
1:13:36
back so we just want to make sure we leave enough room to stuff that behind
1:13:43
the
1:13:52
back
1:14:15
okay so excellent doing good let's get this up
1:14:39
here that's just kind of barely going to hang there I think that'll hold while we
1:14:45
do
1:14:52
this
1:15:14
[Music]
1:15:52
than
1:16:06
you can see I'm covering it with my hand because I don't want to don't want to lose the
1:16:12
screw in a place in the van where you cannot pull it
1:16:20
out that's the worst [Music]
1:16:47
I need to actually
1:17:13
right there we
1:17:19
go okay
1:17:35
put those last three screws in and keep on
1:17:50
going see when we have uh everything in you can put more force and it's
1:17:59
Gonna Keep the screw from moving on
1:18:10
you I need to turn this clutch onto something so I don't strip
1:18:18
these there we go much better
1:18:49
okay that part is done um so let's spend the
1:18:58
next minutes um I want to do
1:19:08
the see
1:19:14
here I'm going to reinstall the panels we're going to change the agenda
1:19:20
a little bit we're going to reinstall the panels because um I need to go ahead
1:19:25
and uh let's see oh yeah let's make our let's make
1:19:33
this template piece and then I'm probably end the stream because I just need to get to work on some other things
1:19:38
in the van off camera but let's get this camera in a position to where I can show
1:19:45
you how to make this uh piece
1:19:51
to hold on
1:19:59
now we're going to make this scale reference piece I don't know what
1:20:06
you're going to call
1:20:21
it okay we're going to do it on this back
1:20:29
rib so then now that we have our side to side pieces
1:20:35
in what we can do is let's
1:20:45
see oh yeah we definitely need to cut that now so this one's okay let's just mark
1:21:03
that okay I think that might do
1:21:21
it I guess we could call it a go noo gauge but technically those they're made
1:21:27
a little bit different all right let's trim it off a little bit
1:21:46
more there you go that's perfect all right so the first thing we want to do is uh just make up something so that you
1:21:55
know where the center of the van is so I'm just going to do like a
1:22:00
little Crosshair right there so that'll be the
1:22:06
center then we'll color code this in a second but essentially what we're doing is uh we want make a line
1:22:13
here and here and so that's a
1:22:21
no then we'll Trace these little
1:22:31
slits you guys can see that while I'm doing this and we'll clean this up when we
1:22:37
take this
1:22:48
down and so right here I'm going to make a circle
1:22:54
and that'll let us know that that's where our Riv nut is and then this one will be no and
1:23:03
then that's
1:23:15
no okay and then I'll clean this up I'll show you then we'll see if you guys got any
1:23:21
questions I think that'll be the stream for
1:23:51
tonight okay I'm going clean this up and then
1:23:56
I'll I'll show it to
1:24:08
you so behind the scenes all I'm doing is I'm just taking a square and I'm going
1:24:15
through cleaning up these
1:24:21
lines
1:24:32
so you guys have any questions this will be a good time to put those in the chat and I'll come
1:24:37
back answer them oh also make you sure you do a
1:24:45
leftand side and a right hand side or you can do drivers and P pass
1:24:52
driver and
1:25:14
passenger now when we put our ceiling panel
1:25:19
in um
1:25:26
there you will be drilling screws into the ceiling uh just for looks but just this is to reference
1:25:34
and tell you that hey these screw places are not uh supporting so get your
1:25:40
supporting ones in first and then come back with the ones that are to
1:25:46
make it look you know I guess decorative might be a good
1:25:51
word
1:26:00
but I did this on Thomas's van and it worked out
1:26:08
excellent guys just a couple more seconds I am actually I'm halfway through
1:26:20
here all right I'm not going to completely finish this uh just so we
1:26:26
can get back to the video give me one
1:26:33
second I need to double check something because I think I missed a
1:26:51
section
1:26:57
okay where did I mess up I messed up
1:27:05
somewhere I heard something coming in on the computer what what do we have coming on the
1:27:10
computer I think that was a new subscriber maybe I couldn't see it anyway all right
1:27:18
so if you guys can see here um oh that's my big that's the
1:27:26
big okay let me do that real quick that is for the big x marks of the
1:27:42
no okay so here you go this is what you
1:27:49
want to make and I finished it on the left side just for a lack of time here
1:27:56
um this actually needs to be like
1:28:02
that but we need to make sure that this is the kept as the center okay so what you do is you black
1:28:11
out or hat do a little hatch or whatever um these are the places you cannot drill
1:28:17
so these will not be a structural point so if we do our
1:28:22
uh tongue and groove we'll be doing a tongue and groove here here so you can
1:28:28
see most places we'll be able to tie it in um but there may be one or two places
1:28:33
but with tongue and groove it's going to hold each other in and uh we we'll put probably a little bit of glue
1:28:40
too but this way we'll just slide and we'll go to each one um and as we're working we we have a
1:28:48
map of what's underneath the ceiling that you can't see anymore and then we'll just put this up and uh
1:28:55
so this is something that just I created and it help me to
1:29:01
uh see what's behind um each part uh yeah let's hop back on
1:29:10
the
1:29:20
computer all right guys hope that uh live stream
1:29:27
was helpful for you um I'm going do some more work behind the scenes as usual and then we'll recap some stuff uh we didn't
1:29:34
get to everything on this list but it's just some stuff to think about as you're building a van um if you just want to
1:29:40
kind of keep it keep up to date with what I'm doing in this van um plus hey I
1:29:46
use this video to go back and reference stuff that I've done that I may have forgotten to do um if you guys are not
1:29:52
subscribed get subscribed to the channel hit that like button uh if you like this
1:29:57
video share this video to anybody that needs help building their DIY van if they're working on their ceiling uh of
1:30:04
their van um and also don't forget to check out our DIY uh van build cheat
1:30:10
sheet this is that cheat sheet I talked about earlier in the video it's an Excel sheet that I put together over 250
1:30:16
curated items it's all of my Amazon purchases for the shop over the past 3 years
1:30:22
and it's got a ton of information all kinds of stuff and this is stuff I have bought I literally went to my past
1:30:29
orders copied them put them in here and it is completely free for you guys to
1:30:34
help you out with your DIY van build help you get started and uh there's new
1:30:40
products all the time that we're adding to this list so it will be updated as the list goes and uh if you want to get
1:30:47
it go to Van Builder hq.com click on the link put your name in email address will be sent directly to your inbox also
1:30:54
there's a link in the description below that you can also click on and uh yeah don't forget to check out vanit hq.com
1:31:01
the website itself we have a bunch of blog posts and articles stuff from the shows that we've gone to photos of Vans
1:31:08
the shows we've gone to helpful tips for building your DIY camper van as well as
1:31:14
other types of van conversion articles and information and
1:31:20
uh that's van Builder hq.com last but not least go ahead and take a look at
1:31:26
Odyssey custom vans this is my personal van convis conversion business and um if
1:31:32
you guys are looking for a professional van conversion like the one that I'm doing right behind me this is what uh
1:31:40
this is where to go website we have uh current vehicles that we are working on that are
1:31:46
currently for sale if we're doing a spec build this one behind us is John and
1:31:51
Susan's van so this is a customer build just like Thomas's was which is Marine
1:31:57
one you can check out John and Susan's behind me with other live streams and
1:32:02
then you can go to uh V hq's YouTube channel check out Thomas's build we have
1:32:07
a awesome tour of Thomas's build this is uh some photos for the spec build that
1:32:14
we have for the shop that is currently for sale as a posting this video um if you're interested in that
1:32:21
van contact me here the best way is to click
1:32:26
here to schedule a call you have access my calendar pick a date pick a time and I'll talk to you about the current vans
1:32:33
for sale if you'd like to have your own personal van conversion use the same length link and in the left-and side
1:32:39
over here um little info about what to expect during the phone call for the
1:32:45
consultation we'll talk about you know pricing build schedules stuff that we have available and just use the same
1:32:50
thing go over here to the right hand side pick a date pick a time that's most convenient for you we'll hop on a phone
1:32:55
call and we'll talk about your future van conversion but that's all we have today for this live stream guys hope you
1:33:02
enjoyed it make sure you guys get subscribed if you have any questions put those in the comments below I'll be
1:33:08
happy to answer them in a future video and we'll see you guys in the next live
1:33:20
stream
#Autos & Vehicles
#Campers & RVs
#Home Improvement
#Construction & Power Tools