Up next in 10


Have questions? Ask in the Chat!
Don't forget to check out Odyssey Custom Vans latest build currently For Sale here: https://www.odysseycustomvans.com/
Whenever you’re ready, there are 2 ways we can help you:
1. If you need a vetted parts list, download our → FREE DIY Van Build Cheatsheet to help you save time and money on Van Parts and Gear: CLICK HERE: https://vanbuilderhq.com/
2. If you want to get Done-For-You Van Build help, book a → FREE Consultation with my Calendly Link: CLICK HERE: https://calendly.com/odysseycustomvans/intro-call
Show More Show Less View Video Transcript
0:01
[Music]
0:47
all right guys welcome back to the live stream glad to have you it's been a minute we've been knocking out this van
0:53
and just pushing through to the end for delivery day so uh I know and Susan are
1:00
very eager to get this done but I want to take a pause because I'm getting ready to put the last piece of Cedar in
1:07
and it kind of uh does a full circle with uh how I'm doing this kind of
1:13
behind the scenes um so if you're trying to figure out how to contour and Scribe
1:19
lines onto different pieces of wood and then take that and actually make it look nice in your van so you look like you
1:26
did a professional job if you're doing it DIY that's what we're going to go over today um so we're going to just look
1:33
inside the van and I'll show you uh this top right section over
1:41
here so uh let's just hop in the van and then
1:47
I'll I'll go over this um if you guys are wondering what this piece of wood here is this is the partition that is
1:54
being uh fabricated so this will be the partition between the bed
2:00
as well as the um you know kitchen area
2:05
microwave stuff like that uh but this needs to be centered and squared off first so everything can be built off of
2:12
that into the kitchen Gall area all right so enough of that that is what that is let's
2:20
um let's get this camera where we want it and then we'll hop in the
2:28
van okay all right hop into the van and as
2:34
always guys if you have any questions make sure you put those in the chat um and we'll uh I'll try to answer them
2:42
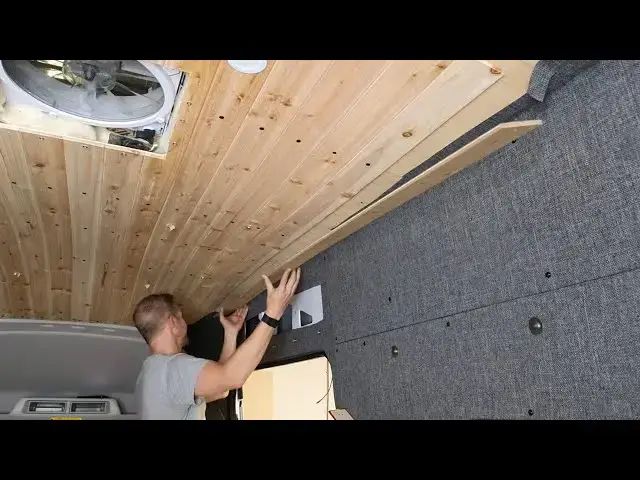
for you so inside the van here uh what we've been using is a 1/4 in
2:51
Cedar uh planks um so they are grooved so they or
2:57
they're interlocking and I start started in the middle and I work my way to the outside
3:03
and then speaking of templates the way that I get all of the holes
3:09
drilled is I have a
3:15
master uh piece of wood right here and what this does is it has all the all the
3:21
holes pre-drilled and lined off and then also the direction of the wood which way
3:26
it's going cuz obviously you need the groove on one side and so what gets complicated and I think
3:33
this will really help you on your build if you're doing the same thing even if you're doing slided ceiling uh or you're
3:40
doing um like Tong tongue of groove or you wanted to do the
3:47
uh uh I'm trying to think what it's called it's like a staggered ceiling with like the the black part in the
3:53
middle um it'll come to me in a second anyway the challenge is when you drill a hole you usually get blowout on
4:00
the back side so what this template does is it keeps you on the good side so what
4:06
it does is it allows the good piece of wood so this is the final piece we're actually putting in right here today on
4:12
the live stream allows you to take this piece of wood and drill through it and
4:17
then you control the blowout that happens on the back side which is what's glued to the top of the ceiling so that
4:23
will uh help you with appearance this template also helps you
4:29
with the the screw holes um one thing that I'm very picky on is make sure all the screws line up so every single one
4:35
of these have been templated which means the screw is in the exact location and
4:41
the template is going to be is is really important when we get to these uh places
4:47
where we have to scribe out around these uh Ford blobs and so if you can imagine
4:54
this first one that we cut and I'll Zoom let me zoom in the camera
5:00
but that first one's easy because you have you can still have you have a remainder of the starting
5:06
material uh you've got a piece of the material that you you started
5:13
with so it makes it easier to measure
5:19
from so for example right here is our ceiling and
5:26
then right here is the next piece that's cut so this piece piece can still align
5:31
and you're going to have the same exact length but when we move to the next one you don't have a reference anymore so
5:38
now you're having to uh reference from the back which is very hard so what I
5:44
did was I went and made a paper
5:53
template and so let's see
5:58
here
6:04
so I've got a paper template looks like this and so what this does is it keep
6:10
gives me like an imaginary um that's not same there we go gives me like an imaginary line right here so that I can
6:17
measure from here and then trace my line once I trace my line this part right
6:24
here is going to be this part right here is going to be cut off so this
6:30
part is going to be removed but because I kept this on a template this is my
6:40
starting point so after I get cut off the point in the very back of the van
6:45
can remain the same uh and that way it's just it's just an easier way to to do it
6:52
um let me change over to my phone here it's got to
6:57
be removed but because I on
7:05
template after I get cut off point in the very back of
7:11
theand the same okay and that way just an easier way to there we go all right
7:16
so we got our phone working let's get back in the
7:24
van so your first cut around this blob if you're doing it this way is easy
7:30
straightforward um you're just going to take a piece of paper and you want
7:35
to put the paper up here and then kind of smush it in this corner and it'll grab this
7:41
Edge and then you can take this and you can apply it to your three pieces first
7:47
piece is going to be here simple cut second one is more complex and then if
7:53
you're doing the same thing that I'm doing this final one um you could cheat a little bit because this doesn't have
8:00
to be a contoured cut it can just be straight so what we've done is we've measured this one
8:06
straight and that has given us uh this piece right here so this is our final
8:14
piece that goes in here and we also want to make sure that there's a smooth side and a rough
8:20
side and uh our smooth side we want to make sure that that goes
8:25
in correctly so I actually need to
8:31
flip this [Music]
8:48
around let's see
8:57
here okay actually have one more hole to drill but that's
9:03
okay we've got our template so it's going to make it really easy so let me reset the
9:09
camera and we're actually going to install this piece and then we'll see if you guys have any questions so camera's
9:15
going to go crazy for a second hold on
9:24
okay all right we're going to be over here
9:49
okay that should give you a good view of the whole
9:57
process so let's the last hole that I I forgot
10:03
about and we'll keep on working on
10:15
this I was drill this last hole and I was like you know what I need to do a live [Applause]
10:28
stream okay we're just going to set our so this piece this is the last time it'll be
10:35
used so we can set that aside um make sure we have all our ZIP wall uh pieces
10:41
in place so that we can so I use these to hold up these
10:49
pieces so they're spring loaded and then you can just put them in and hold
10:56
up a piece of wood you just want to have those ready to
11:02
go um see where my glues in the back let's get our glues and screws now
11:11
we're using a tight Bond original glue um as far as my research goes you don't
11:18
want to use uh the waterproof version
11:24
because uh the bonding strength is actually not as hard now this is just my
11:30
research but there's like this red bottle then there's a green and a blue I
11:36
think you want to use the
11:42
red and this glue does not need to be waterproof because uh it's not going to rain inside
11:49
the van so
11:57
um see all right there they
12:06
are so we're using a 1 in uh stainless steel black
12:13
painted sheet metal screws and then uh there's we're using two inch and a half
12:19
on certain sections that need to go into the uh
12:28
crossmember
12:44
okay so I'm just doing a last little final test
12:58
fit
13:23
this is a good example to show you guys cuz this is really this is really tough for what I'm doing just cuz it's it's a
13:30
oneoff ceiling uh so if it takes a lot of
13:36
patience a lot of patience because the wood is so uh thin That these channels
13:43
if you're not if you try to force anything you're going to split it and you're going to have to start all over
13:51
again um I'm trying to find you're also going to need some type
13:57
of uh piece of wood something to have like a little lever action as well as a
14:05
rubber mallet CU we're going to have
14:10
to coorse this piece of wood to go into its home the challenge about building
14:17
in a van is you have a forward curve on a Ford Transit that's fairly aggressive
14:23
here as well as a curve here so you you get two curves and they don't want to
14:30
play well and then over here you got this so we got we're going to be under
14:36
compression and we got a slide in the channel and we got glue we didn't want to get the glue anywhere and we got
14:42
drill so obviously I've figured out the process
14:47
but just give you a heads up this is not this not easy at
14:55
all but the results are really cool so I'm just putting a bead of glue on
15:01
the middle here um we don't want to do it on the
15:08
edge just want to do straight in the middle it's going to smush out
15:13
when we uh get to the end and if you do have some
15:19
glue that went to the edge you need to move it back to the middle um you don't want glue
15:27
dripping dripping
15:39
down and then just do a very little bit out of glue over here
15:46
um enough to make it hold so that's why we're doing wood to wood Bond but not
15:52
too much as to uh have a drip and then also this not
15:59
Cedar it's a Pacific naughty Cedar it has knots in it because that's
16:05
what makes it look cool um but the
16:10
uh see what I'm trying to say
16:16
um the knot have holes in them sometimes
16:22
so if you put glue on the knot it's going to squeeze out and you might not want that
16:29
so just a heads up
16:35
um so I'm actually going to see I need
16:48
to I'm going cut away a little bit of that
16:57
fabric make sure we get a good
17:27
Bond
17:44
okay then we'll just go back here a little bit just so we don't forget to do this on the back
17:57
side
18:04
now on the driver's side we had the tongue sticking out of the wood and what
18:09
we did is we took a razor and we sliced it off to make it clean now we don't have to do anything to this side
18:16
because we have a little bit more of a gap on this side and we have uh we've
18:22
got some uh other stuff that we're dealing with um so this piece right here
18:28
is really brittle so what we're going to do is uh we're going to glue this back
18:34
in once we get this whole process done actually I'm G to do it right now so let me get a piece of
18:48
foam so you will be uh you know
18:54
accidentally nicking some of these um just because they're so sensitive but
18:59
it's it's okay because all you're going to do is just put a little bit of glue on
19:09
here be good as
19:27
new just leave that and I promise you it
19:34
will happen you will be cracking like little pieces of it um it's just the
19:39
nature of the material so just a heads up on that
19:46
part okay so watch where you're putting this up so you don't get uh glue
19:57
everywhere
20:07
okay so I'm going to try to show you the process here so
20:17
first need to get our need to start compressing this where
20:23
the bend is
20:31
that's our first spot second we're going to move to the
20:37
middle and we're making sure we don't pinch the
20:43
uh uh the this edge of the wood as you can see
20:49
here because until this bin comes in it snaps in the channel this is going to bow out so the wood the wood is actually
20:56
not bowed itself it's just it's the ceiling it's the transit van
21:04
it's not the tongue and groove piece of
21:17
wood yeah just take your time and
21:23
so now we're going to start to try to pop it in
21:29
the channel a little bit okay so one in the
21:37
back which is good now we're going to take this and push it
21:43
up okay now we're going to need one of
21:48
these pieces right here and and a rubber mallet CU we're going to tap it
21:53
Forward um as we get closer through the process
22:57
and you got to have so much much Pat patience when you do this this
23:03
is I I can see a lot of people giving up at this step because it's it's pretty
23:16
tough so these little sticks are what I'm talking
23:22
about uh
23:27
see
24:25
so all we're doing is gently moving this tongue into place
24:56
if there's any places where it hasn't gone in yet you're going to need
25:05
to figure out how to get it in
25:18
there so this one needs a lot of pressure there we
25:27
go
25:33
I thought the other one was hard this one is the harder one it's going to go in it's moving
25:40
so there's just a flex in the ceiling right here where it doesn't want to pop in the front's good the back's good but
25:48
this middle
25:55
part for some reason is
26:10
that there we go got it okay so this is the fun part it's
26:19
still going to want to come out so you're going to have
26:25
to keep moving this
26:35
all right since this is the final piece right
26:41
here see if I
26:50
can take this
26:57
out
27:23
and try to see if we can put a screw in here and hold it
27:40
give a little more
27:51
pressure okay so this one I need see if we can let that go for a
27:57
second okay
28:02
good all right let's take a break that one was
28:08
tough all right so that one's got us locked into position um this is the piece we have a piece of
28:16
birch a Baltic Birch on the top side and it's the support that mends the
28:22
two quarter inch pieces together so you've got half inch
28:28
and then another half inch so using a
28:34
um 1 in screw is why doesn't grab that final bit but it's holding it in our position so now we're just going to grab
28:41
our inch and a half screw and we're going to go
28:47
finish finish what we started over here so we're going to support it like
28:57
that take a screw
29:07
out now we're going to replace it with a inch and a half
29:23
screw and now this is going to do some wild stuff because it's got to go we got to tap through this
29:30
uh the piece of wood up there okay we got
29:37
it okay so now we can take this off there we
29:47
go all right okay now we can move back
29:57
here
30:13
okay so that's that's holding its position which is very very good and the reason why we're very happy that that's
30:20
working is uh this part up
30:26
here um this is held in with the glue glue only so no
30:34
screws okay so we're going to make sure we get that uh pushed together really
30:44
well um got a little bit of our glue from that part that got repaired right
30:51
there okay let's go ahead and get a screw in here so let's see how much this
31:02
moves okay just a little
31:15
bit so this is the part of the build where if um if you're in a section where this
31:22
is good enough like it looks pretty good uh don't go for perfect on this
31:28
because you'll go too far and then you'll you'll crack this piece of wood or you'll do something like that and
31:34
have to cuz once the glue's in you kind of just kind of know going
31:44
back so this one also is going to get
31:50
a inch and a half screw how we doing am we get any
31:55
comments or chats thanks Linda appreciate
32:08
it yeah and this ceiling's uh this just natural so
32:14
um it does look cooler with age
32:19
uh but I have I did the same thing in my personal van and I didn't finish it and it looks great um but I mean if you want
32:26
this to pop if you just put if you put a little bit of uh oil on it or something like that I mean this thing would look
32:39
incredible okay now we got to be very careful right here because we're going into the sheet
32:45
metal and if we don't put a lot of pressure on the drill we can crack our
32:56
wood
33:11
okay all right so now we can move on back and everything looks super
33:16
clean so I think and we'll just use this for a
33:22
little bit of insurance and this one was
33:56
okay [Music]
34:04
[Music] okay so this one also needs to be inch and a
34:12
half and you'll notice the inside is okay for an inch as you go to the outside the curve is making the distance
34:19
further away so that's
34:26
why we're running into this stuff there you
34:33
go two more and we can get back to scribing
34:40
with our foam which is very exciting because that means once
34:47
these uh the two pieces of foam are cut I can start bringing in the fridge and the
34:55
microwave I can start dying all that in it's going to be really exciting cuz the van comes to life really quick um once
35:01
you pass these stages and
35:06
uh when you can actually see the van coming together you get gets really
35:21
exciting so notice if you guys see these These are uh Riv nut that I put in the ceiling
35:29
so just in case in the future John and Susan want to uh hang something or we want to put something up here uh these
35:35
are actually threaded mounting bolts that we can
35:47
access again be very careful because right up here you can split the
35:52
wood you don't keep pressure on [Applause] it
36:00
[Applause]
36:05
looking good all right perfect perfect
36:14
perfect well let me get out of the way of the camera so you guys can see our final process here and so now
36:22
what I do is I go through and uh this section right here um I'll put an
36:30
extra uh support I'll probably do one
36:36
here and then we'll move this uh now we'll keep that
36:42
one see that one's in pretty good so we'll move it to the
36:49
back yeah so any of these dips there we
36:55
go and so that's just going to keep our glue uh so our glue is really going to
37:01
be bonding this the screws are just a bonus
37:06
um for this but we need the screws because we have we have uh three layers on the on
37:15
this so we've got the quarter inch we've got the quinch cedar quarter inch uh
37:21
underlayment and then where we don't have ribs the transit ribs so we have a
37:26
Transit rib here a Transit rib here and this is a transition section this section has a third layer which is a
37:33
half inch uh piece of Baltic Birch so the sandwich here is an inch um
37:41
that we need to sandwich together so that's why we're using an inch and a half
37:46
screw and that's just for the Integrity of the ceiling but if you guys can
37:51
imagine this whole entire ceiling is wood glued in I mean it's pretty much um you know bomb proof it's
37:58
uh yeah it's going to be really really good
38:05
um so let's see what else yep let's hop on the computer see
38:12
if you guys have any questions uh if not I will end the stream and get back to
38:18
work here uh let's see see how many people got hanging out
38:23
with us today all
38:31
right get the camera back
38:36
on okay guys so uh yeah thanks for watching the live stream um don't forget
38:41
to check out van Builder HQ uh that's our blog and website where we have uh a
38:48
bunch of Articles where we go over all kinds of stuff DIY van related as well
38:54
as shows we go to shows that's my brother over there on the left he's one it curates the web page makes everything
39:00
look really nice um and uh that's me of course and I go
39:06
through and pretty much just do a big brain dump of everything that I know van
39:12
wise um you know talking to vendors when we go to shows um and then we have this DIY van
39:19
build cheat sheet so if you see this it is awesome so I created this for you
39:24
guys it's completely free and what it is is the last 3 years of all of my Amazon purchases put into an Excel sheet
39:31
organized it's got over 250 items that I've purchased and I think it's just an easy way to help you get kickstarted
39:38
with your van conversion if you don't know where to start and you're looking for parts and you want some advice so
39:45
it's free to download just put your name and email address and uh go right to your inbox and I think it'll really help
39:51
you out um and you can also go to the main page so if you go back to the homepage it's right here at the top of
39:57
the homepage you just click the link and put your name and email address
40:04
and it'll come straight to you um yeah and if you guys want to get contact with me for a personal van build
40:11
all you got to do is head on over to Odyssey custom vans so Odyssey custom.com as you guys
40:19
can see in the shirt this is my business converting Vans and uh the van you see
40:26
behind me is John and Susan the van that's scrolling through the screen uh is our adventure van build and coming on
40:33
down we have contact information so if you guys are interested in having a van
40:39
converted by me reach out to me uh click this link down here below and what it's
40:46
going to do is it going to bring you to a calendar appointment and you can just find a time
40:51
date that's convenient for you hop on a phone call with me and we'll talk about your custom van conversion with Odyssey
40:57
custom vans so look forward to hearing you um yeah guys don't forget to subscribe to this channel turn on the
41:03
notification Bell because I go live at random times throughout the week um happy to answer your questions in the
41:09
chat uh I have a bunch of comments and questions so um next week we'll plan a
41:16
dedicated day to start Trucking through all those questions you guys have a lot of great questions I just haven't got to
41:21
them yet um working on this build uh trying to get it knocked out but looking
41:27
forward to uh the next live stream with you guys uh it's been too long and uh it's really fun doing this helping you
41:33
out with uh showing you how the van is built but I will see you guys uh well
41:40
thanks so much for watching and I'll see you guys in the next live [Music]
41:50
stream