Up next in 10

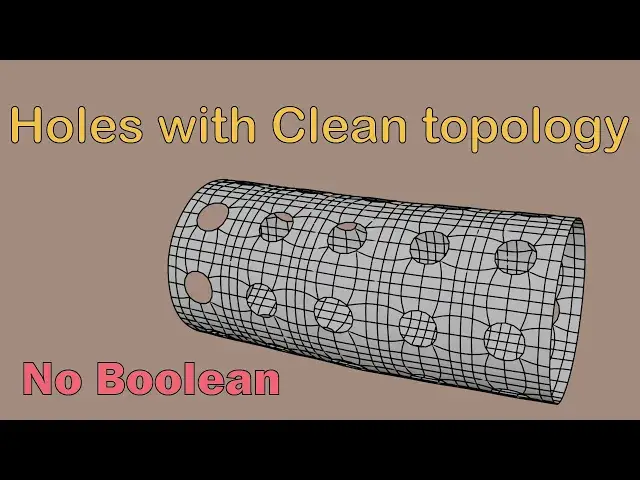
We will make holes with clean topology, without using Boolean modifier.
The mesh will be very clean and usable.
Detailed tutorial available here
https://usamababar.com/blender-tutorial-make-holes-in-pipe-with-clean-topology/
#3d #modeling #topology #clean topology
Show More Show Less View Video Transcript
0:00
holes with clean topology without
0:03
Boolean make pipe with holes with clean
0:06
topology start with a plane rotate it
0:09
and subdivide it add some Edge loops and
0:12
delete the middle vertex form the shape
0:14
of circle use array modifier to add the
0:17
number of holes to your mesh deform the
0:20
mesh
0:21
360° to make it circular use subdivision
0:25
surface modifier use weld modifier to
0:28
merge the disconnected edges apply all
0:30
the modifiers use array and curve
0:33
modifier to move the mesh along the
0:35
curve make holes in Geometry without
0:38
Boolean and keep the geometry
0:41
clean start with a plane and subdivide
0:44
it here we have set the subdivision
0:47
level to three delete the middle vertex
0:50
as it will act as the hole for our
0:53
geometry form the shape of a circle on
0:56
the
0:57
geometry select all the vertices on the
0:59
corner corners and scale them using S
1:01
key this way we can make the circular
1:03
hole in the geometry to avoid stretching
1:06
we can extrude the hole inwards this is
1:08
done for cleaner
1:12
topology rotate the plane 90° on the
1:17
x-axis we will now Define the number of
1:19
holes we want in the pipe using the
1:21
array
1:23
modifier this mesh will have seven holes
1:25
in the Z
1:27
axis change X to Zero and z 1 in the
1:30
relative offset settings of array
1:33
modifier we will deform our object
1:37
360° to form circular shape like a pipe
1:40
add a simple deform modifier and change
1:43
the type to bend change angle to
1:46
360° and AIS to X this way a pipe likee
1:49
shape will be formed this does look like
1:52
a piece of pipe but it has some problems
1:54
right now we cannot use subdivision
1:56
surface on it since we have used array
1:59
this each instance of the object is
2:01
being treated like a separated object we
2:03
need our geometry to behave like a
2:05
merged
2:08
object enable the merge option from the
2:10
array modifier arrangement of the
2:13
modifiers is very important we see that
2:16
most of the issue is resolved except for
2:18
one this highlighted area is still not
2:20
connected because we have used array
2:23
modifier and simple deform modifier this
2:26
area could not be merged from the array
2:28
modifier because this was top and bottom
2:30
part of our
2:33
mesh for this we can use weld modifier
2:37
this modifier merges the vertices that
2:39
are close to each
2:40
other add the weld modifier and place
2:43
the modifier before the subdivision
2:45
surface modifier as
2:48
shown at this point you can choose to
2:51
apply all the
2:53
modifiers as you can see that we have a
2:56
very clean topology with holes in
2:58
them
3:00
we can use curve to make the pipe along
3:02
a path click add curve path to add a
3:08
path select the pipe mesh and add array
3:11
modifier and the change the type to fit
3:13
curve this way length of the pipe will
3:15
fit the
3:24
curve enable the merge option in the
3:27
array
3:28
modifier
3:31
add curve modifier by clicking add
3:33
modifier deform curve this will deform
3:36
the object along the curve in the curve
3:38
modifier select the curve we just
3:45
added now select the curve and extrude
3:48
it by pressing e key and move it using G
3:50
key you can see that we are making mesh
3:53
along the
3:58
Curve
4:03
you can choose to add solidify modifier
4:05
to add thickness to your
4:09
model visit my website for the detailed
4:12
tutorial Link in the
4:17
description