Up next in 10



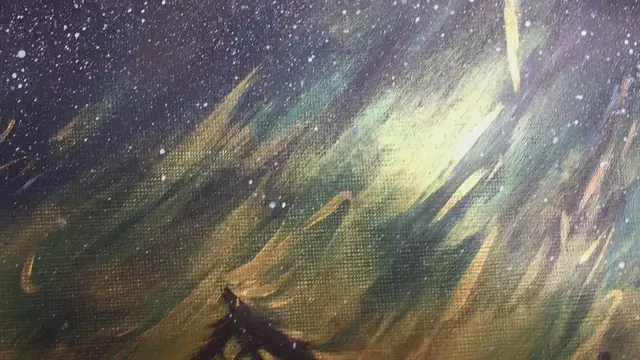
We are painting the Nativity scene in this easy and fun step-by-step acrylic painting tutorial for beginners. This painting has a slightly different approach to the Nativity, focusing on the guiding star and showing a smaller stable - but it truly captures the magic and majesty of Christmas.
Show More Show Less View Video Transcript
0:00
In this video, I'm going to show you how you can paint your very own beautiful nativity scene
0:07
It's bold and it's slightly different from what you see in typical nativity scene paintings
0:11
but it just hits the right chord. So grab your brushes and grab your supplies
0:15
and get ready to recreate this holy night. Let's go. Hey there, my gorgeous, beautiful, wonderful fiend bees. It is your girl, Amanda
0:26
the buzzed artist. Welcome back to my channel. So for this nativity scene
0:30
only going to use just a couple of basic colors and a few brushes. Specifically, you're going to be
0:36
using some Mars Black, Ultramarine Blue, Titanium White, a Raw Sienna, and optional, but if you have
0:43
it, some gold paint. This is the Arteza Metallic Gold Paint that I had, and I thought, why not use
0:50
this to add some glimmer and shine for the night sky in this nativity scene? We're only going to
0:56
use technically two brushes. So we're going to be using a three-quarter inch flat wash brush
1:02
a number two over zero, or just your typical small detail round brush. And optional, you can use a
1:08
number 10 shader brush as well. And we're going to be using a 9 by 12 canvas paper, but you can
1:16
really use any size canvas that you have on hand. We'll be following along and you can vary the
1:22
the proportions as you go in this painting. And you're also going to need a cup of water, a nearby
1:27
towel, so you can wipe up any excess paint. And without much further ado, let's go ahead and get
1:32
started. To start off with our scene, we're going to make the background. This is going to be very
1:38
background-centric, and I thought this was such a cool way to do the nativity scene. It's a little
1:43
different. It doesn't quite hyper-focus on the little stable. It's more focused on the big star
1:50
and just like how humble the scene is. So I thought that would be very cute and also just profound
1:56
So we're going to take our three-quarter inch brush, we dip it in some water
2:01
Then I'm going to go and grab our blue and just a tad bit of black
2:07
Not too much black because when it comes to black, just a little bit goes a long way
2:13
We're going to make a nice like midnight blue. I'm going to load my brush
2:18
and then we're going to do a sweeping motion on the side kind of at an angle so we're just going
2:28
to take our brush and just make some sweeping strokes like so so I'm going to try to do
2:38
a good number of strokes taking up the majority of like the top third or the top two-thirds rather
2:46
of this painting. And if you add a little too much black
2:54
don't worry, just add a bit more blue in. And sometimes you can vary the amount of
3:04
combinations of the black and blue that you do here. Like you can add, you know, just go straight up
3:10
with the blue on your brush without rinsing it and just go back in and add some strokes
3:17
And that actually helps to create a lot of variety in the brush stroke
3:23
And I don't know, just gives it something really cool to look at
3:28
Now I'm going to take that same color and I'm just going to add a bit more black to it
3:34
because I want to make more of a, like a vignette, like all the outer edges of the scene are encased in more of a black blue. So same strokes
3:48
I'm just going to kind of concentrate those brush strokes around the edges of our painting
3:57
And I just dip my brush in my water every now and then just to help spread that paint out even more
4:03
so I'm just concentrating most of that black blue on the edges once again
4:12
okay and I'm just gonna dip my brush back into that blue that blue slight black color
4:33
because I just want to fill in the center here. I want to bring this down a little bit more
4:43
So yeah, you basically just repeat this process over and over until you've got something
4:48
that you kind of like. But I want to make sure that this center-ish layer
4:55
is still kind of wet. Okay. So now that I kind of have that, I'm going to quickly dry, or I'm going to quickly clean my brush
5:08
Make sure it's nicely clean, and I'm going to go in now and grab that Raw Sienna
5:16
and I'm just going to take it off to the side here, take a bit of that blue and combine it
5:23
Okay, and it'll take a little bit of white, combine that. A bit more blue to that as well
5:31
Okay, so what I'm going to do is go to the bottom portion here, and start to fill this part in
5:40
And I'm just going to take a bit more of the raw sienna this time
5:47
put that right in and again I'm following the same strokes like we did with the background
5:55
and I'm not afraid to blend my colors so I'm really taking if you're noticing my brushstrokes
6:08
are wide I am taking whatever I made here I'm dragging it up whatever I did down here I drag
6:14
it down and that's really the essence of blending and if you guys want a little
6:23
bit more heads up on what blending is and what you can do I have a video that
6:28
I will link in this video you can check out I'll take and talk about blending in
6:36
more detail. So a bit more down here with a bit more of the raw sienna. Okay, so I'm
6:57
gonna get my brush a nice clean. Okay, now I want to go back in and just kind of do a
7:02
few touch-ups so I'm gonna go in with the blue again a bit of white then with
7:13
the tip of my brush again I'm just imitating the same brushstrokes that
7:18
we've been doing before just repeating that over and over again but this time
7:24
I'm just using the tip of my brush and I'm just kind of like chopping away at
7:29
at what we just laid down previously with our raw sienna And then I to go back in with the raw sienna and do it again
7:42
But this time just using that same brush stroke with the tip of the brush to carry some of
7:47
that raw sienna up. Really, you're just going to repeat this back and forth until you kind of got a combo that
7:59
you're happy with. And this really adds a lot of cool looking depth and texture
8:08
into your background. Okay, you know I'm gonna go back in and just fix up the
8:16
beignet portion of this as well. The black. All right, so now that you have that, you've pretty
8:31
much done the majority of the background. You can keep adding to it and playing with it just a little
8:36
bit more, but I'm just going to let it dry and then we'll move on to the next step, which is
8:41
starting to add the forefront aka the nativity set to the scene. So now that your background has
8:48
dried just a little bit we're going to start to work in some of the details. So you can either
8:53
take your number 10 shader brush or you can go with your detail brush. I'm just going to go with
8:59
the shader just to show you what I'm going to do with it. So we're going to start to make the scene
9:05
of Bethlehem. So we're going to take the shader dip it in some water so we just want to lubricate
9:10
just a little. We're going to grab some black. Okay. And what we're going to do is this is going to be
9:20
mostly like a sky painting with a little town at the bottom. So I'm just going to concentrate
9:26
like at the lower, oh man, let's see, the lower like seventh of the painting like this
9:34
So I'm maybe going to go up about an inch and a half from the bottom. And I'm just going to
9:40
I'm just going to make some squiggly lines that begin right at this point right here
9:51
So that's kind of representing like the skyline of like mountains. Okay
9:58
And then we're going to do another set on the right. Okay
10:02
So once again, I'm just going to go up about an inch and a half. is going to make some squiggly lines
10:11
And I'm making sure to kind of leave a space here that's lower because that's where our manger, the stable, is going to go
10:20
Okay? This is very tiny compared to like typical nativity scenes. But I thought this was just so beautiful because of how simple
10:29
and yet how powerful it is. usually you see the nativity scene is just like, you know, it's right up and the stable is so big
10:39
But if you know, in the Bible story, the stable is such a humble little place. It's tiny
10:47
tucked away in a corner. But yet, such a tiny little place has such majesty
10:55
It, you know, it's almost like the biggest place in the world. so once i have that i just fill in the mountains
11:04
just like so so this is just going to represent the the background like the horizon line
11:12
of the city of bethlehem then we're going to just clean this brush we're going to put it away
11:19
because now we're going to grab in our detail brush and start to put in our nativity scene
11:26
so I'm going to dip brush into some water. Now I'm going to include a stencil here for you all
11:33
so that you know you can go ahead and just use a stencil if you don't really want to follow along
11:38
to how I'm painting this but once you put in the stencil you could literally just paint in with
11:44
the black. So I'm just going to take my my detail brush. Now I'm going to I'm actually going to take
11:50
the beginning of the stable, and I'm going to put it right around here. So the stable has
11:57
the wall. It's about an inch tall. Then I'm going to start doing the roof
12:05
So I'm going to tilt my brush, going to put a 45 degree angle, and bring it up like that
12:12
Just like so. Okay, it's small, you know, compared to this whole canvas, it's on the smaller side
12:18
but that's okay. And then we're going to do the other roof line, which is going to go up a little
12:23
higher than this roof, and then kind of slope downwards like that. Okay
12:34
Then kind of have a curling up like this, and then the lines are going to go down. Okay
12:42
This is what's so cool about the stable. It doesn't have to be perfect. It doesn't have to
12:47
look perfect you but you still get the point across okay and then we're gonna
12:52
connect the two roof lines together like so and then I'm just gonna do a couple more like trusses just like that
13:09
very simple you don't really have to do anything else just for added detail I
13:14
I just want to make it appear like it's a thatched roof. So I'm just adding a few feathered brush strokes
13:21
Nothing too much besides that. Okay. Again, it's a humble little stable
13:30
There's really nothing to it. Now, this is where I want to start putting in the gold
13:38
This is a way to embellish what's really going on in this scene
13:43
which is, you know, the Christ child is here and there's just light emanating in this, you know, in this tiny, tiny little place
13:50
So I'm just going to take the detail brush and dip it in some of my gold. If you don't have gold, but you want to use, you know, your Rossiena with a little bit of white, that's also a good alternative
14:02
Although I like the gold because, again, it just kind of like pops and it really like shimmers in the light
14:13
which I thought was so appropriate for this. So I wanted to do this before we paint in our characters as well
14:22
just so, you know, the paint doesn't get in the way of them
14:28
And, you know, you can use your hand, your few little fingers to just pat it in
14:36
I'm just using the tip of my finger, too, to just pat it in on the horizon part of where the stable
14:41
meets the ground like that. Okay. And I'm also just going to do a little bit
14:52
here between the trusses of the roof. I just going to nicely fan this out I just going to go to the corners just fan it out like that
15:17
And you know I'm just also going to just do a little bit on the mountains as well
15:24
just to add a little bit of a highlight. And I'm doing a bit of it you know kind
15:29
of in the the right side of the mountain just to just to kind of give it a
15:34
little bit more of an intrigue like the lights bouncing emanating from the
15:42
stable to the mountains here same thing on this side I'm concentrating them more
15:49
on the left you can use your finger just to blend that in a little it doesn't
15:56
have to be precise it's just kind of a way to abstractly represent something
16:01
that's happening here. I'm also gonna do some at the roofline. I'm not putting too
16:18
much paint on the brush or on the canvas itself either. I just want to like very
16:24
very lightly. Just take the color and put it in. So while we wait for that to dry so
16:38
we can do our characters, I'm going to go back in with a 3 quarter inch flat and
16:42
I'm going to grab some of that gold because now I want to start adding in
16:49
parts of it to the sky. So using the same strokes as we did before, I'm just going
16:58
to start using the tip of my brush and then I'm just going to kind of blend it
17:10
with my finger. Have fun with this part. Sometimes I use the broad side of my
17:25
brush but I blend it with my finger. But I just want to do a little bit at a time
17:34
And I eventually just dry brush it towards the top here. Okay
17:40
And of course, if you think you did too much like what I may have done, we'll just go back in, make that same blue sky, like that sky blue color, that blue with a little bit of black in it
17:58
And just... It almost acts like an erasing motion, right? You just go in there, erase some of the stuff, and boom, it kind of starts
18:11
going away. That's the really nice thing about acrylic paint. It's just so extremely forgiving
18:18
in that way. So you can always just go back and forth with the gold if you so wish to
18:26
and because your background is kind of wet still, this makes for a nice blend
18:56
And of course, you know, if you got, if you're thinking that, oh my gosh, you know, this is
19:20
looking messy and it doesn't look right. keep blending keep layering that's a really good way to for you to kind of figure out what's going
19:27
on it's just by um by blending a little bit adding more layers as you go because you start to see
19:36
more depth show up in your painting as you're doing it and in fact i'm noticing too if i put
19:46
that blue over the gold the the gold still kind of shows up underneath and it's forming this
19:52
really pretty color so i'm kind of a fan of that
20:06
Go ahead and add our people. So I'm going to grab my detail brush, and I'm going to go into the black
20:21
Okay, so these are all really just kind of silhouetted in the background, but you get the gist
20:27
So we're going to start. We're going to go in the middle of our stable
20:30
I'm going to put a horizontal line and then two lines coming in like so
20:37
This of course is just to represent our baby Jesus in the manger
20:46
Just like so. And then we're going to do a little bit of a round shape coming out just to represent his head
20:53
and then we're going to add Mary so she's just like in the corner here
21:12
she's got her hand on the manger she's kneeling down And then you've got Joseph, who's just standing
21:31
So he's going to be taller. And he's going to be holding a staff
21:53
Okay. It's simple and it's small, but man, do you notice how with the, with that glow
22:18
it just looks like it's emanating from the manger. So just with my detail brush now, you can now take this opportunity to add more mountains
22:29
more peaks in the background if you wish. Play around with that scene a little bit
22:36
Again, I'm just kind of experimenting. I use my brush and my fingers too to go back and forth okay so now that we have that set up we gonna go ahead
22:52
and do the star now the star is really what's gonna pop out in the sky here so I'm gonna take
22:58
some white and I'm gonna make the star like right around here and it's gonna be big okay so that's
23:05
kind of like the focal point of this painting I would say so I'm gonna maybe
23:09
go about two inches from the top right right here and maybe about two inches
23:14
from this location and I'm just going to make a line going down like so and that
23:25
line is gonna be so it's a good like I'd say three and a half to four inches
23:31
long. And then I'm going to do another line in the middle of it, horizontal, not as big
23:45
but still, you know, pretty significant. And then we're going to do another, like an X. Okay
23:54
It's simple, but this is, this is the, the guiding star. This is the star that the Magi see
24:01
that all the characters in the Bible see, signaling the coming of Jesus
24:08
So, I kind of just go ahead and start embellishing the star
24:12
just adding a bit more to it. I got the base
24:26
I'm also going to go in with the gold. and lay that right on top
24:47
That gold is just kind of like echoing what the manger, like what the stable scene is emanating with that same kind of color scheme
24:57
Okay. so I'm gonna leave that alone for now but now we're gonna start working on our
25:04
stars I'm gonna go back to our flat wash brush and we're gonna dip it in water
25:09
get it nice and wet and then I'm gonna grab my white and I'm gonna load the
25:18
brush okay it's important that your brush is still pretty wet because you're
25:25
going to start to do a flicking motion to flick the paint off of the brush so
25:30
I'm just gonna take my brush pull it back and then go forward then I'm just
25:37
gonna start adding a ton of stars in the night sky and I'm concentrating more of
25:44
the stars in the top portion here it's again just to give it that give it that
25:50
focus. And what's cool about doing the flicking here is that some of the stars
25:58
come out big, some of them come out small, but they just look so spontaneous. And
26:02
you know, you can also do a tapping motion to get even bigger stars if you'd
26:06
like. Just like so. But the main areas of stars are right up here
26:20
now the star is probably dried up a little bit so I'm just gonna go back in
26:26
with the gold and again just there's a bit more on top of it and just using my
26:37
finger just to push it again I don't want the star to look perfect I just
26:50
want that to be like the main focal point. And you'll notice I'm kind of like increasing my brush thickness as I'm
27:15
doing this because again I don't want it to look like this perfect pristine star I really want it
27:22
to look like it's just this like it's big and it's fiery and it's just like it's just ever so expanded
27:29
expanding okay so I'm gonna now take this opportunity just to add a few more little
27:37
details onto the mountains as well as to some of the some of the scene in front
27:47
here just to kind of make it look like they're on some sort of land
28:07
just like that man it really it really just pops when you look at all of this
28:21
together we're just adding little well we know there's more details I'm gonna
28:35
to just take a little bit of white with that gold kind of add a bit more emphasis around him of course I'm just going to sad
28:53
Just little lines, not too much. I want to spread them out a little
29:03
Just use my finger to blend it out
29:21
And that's how you can go about painting your own nativity scene. I hope you guys enjoyed this different take on the traditional nativity scene
29:28
and see it in a new perspective and also just take in the grandeur of it all
29:33
If you guys enjoyed this video, please be sure to give it a like and to subscribe to my channel. Hit that like button. You know what to do so that you can see more videos like this from me to you in the future
29:42
Well, Christmas is in a few days and I'm going to be taking a much-needed break. I hope you all are practicing self-kindness and really taking in the joyous part of this season
29:51
and not being wrapped up in all of the commercialism of it all
29:54
but learning to accept the love and joy that's in your heart and with your family and others
30:00
I hope you all have a Merry Christmas, Happy Holidays, and I will see you all next time
30:05
Bye
Visual Art & Design
Painting
Painting
Crafts
Crafts