Up next in 10


In this video, I assemble and give my first impressions on the Dowinx Gaming Chair.
Check it out here:
USA: https://amzn.to/3V8Z91B
CA: https://amzn.to/3RdhfP0
DISCLAIMER: This video and description contains affiliate links, which means that if you click on one of the product links, I’ll receive a small commission. This helps support the channel and allows us to continue to make videos like this. Thank you for the support!
Show More Show Less View Video Transcript
0:00
So Dowling's just sent me this gaming chair
0:01
So in this video, I'm going to do a quick assembly and give my first impressions of it. So here's everything that comes in the box
0:07
So the first thing to do is to assemble the base. And we're going to go ahead and grab this piece, face it downwards
0:12
And we're going to grab the five legs and insert it into each one of these holes. So starting with the first one, we're just going to hold it like this
0:19
And then push it down until it locks into place. Just like that
0:22
And then do that for all of the other sides as well too. And now we have to go ahead and use more force and just push it in
0:30
like that and then when we flip it upside down we could give it a final push and everything should
0:37
lock into place and avoid putting your hands near these holes just so you don't accidentally pinch
0:42
your skin so now it's time to attach these casters to the bottom so we can just go ahead and flip
0:46
this upside down and then very carefully insert each of these one by one and now the cylinder can
0:52
go right on top followed by the cover so now we're going to screw in the tilt mechanism along with
0:58
the armrests But first there going to be a bunch of screws at the bottom that we just have to go ahead and loosen and take out So now make sure to screw in the tilt mechanism correctly So orient the front with the front which is going to be this big section over here
1:11
Now it's time to install the armrest. And as far as orientation goes, it should be held like this
1:16
So the button should be at the thumb. And this should be towards the outside
1:22
So in other words, this one right here, I'm holding with my right hand. This is going to go towards the right side
1:27
And this one over here is going to go towards the left side. and then make sure to install these pieces on the correct side as well too
1:33
So this would be for the left and then this one would be for the right
1:40
And now to attach these to the armrest themselves, these screws do have to be loosened first
1:49
And now we can screw in the guide rails right over here. And so this seems to be moving fairly smoothly
1:54
So now we can go ahead and attach these rubber rings to the end. and now the footrest won't accidentally come off
1:59
Alright so now it's time to attach the seat to the base. So now it's time to add the reclining mechanism
2:03
So on the right side we gonna have this hefty one right over here and on the left side we gonna have the other one Just make sure to first unscrew these screws just like this and like this And now screw in the backrest over here
2:16
And now the plastic cover is going to be screwed in. And now the lumbar support and headrest can be installed here
2:21
So here's what the finished seat ends up looking like and there's a bunch of different things to go over for this
2:25
So starting with the seating for it, it's going to be pretty soft. It's not going to be like memory foam soft, but it's going to be very comfortable
2:31
especially when I do have the backrest, the lumbar support portion. and the headrest just makes it a lot more comfortable
2:38
I have more support for my back and also for my neck. Now, one thing I did notice about the neck pillow
2:43
is because I'm a little bit taller, I do have to go ahead and slide the neck pillow up a little bit
2:47
just so it hits the right spot. Now, as far as the armrest goes, there's gonna be a bunch of different customization
2:52
For starters, there's gonna be a button on the outside. When we go ahead and press it, we can move the rest down or up
2:58
Now, going towards the inside, we can slide the whole railing either back or forward
3:02
And then finally, there's gonna be one more button on the inside, we press it and this will go ahead and move side to side
3:08
And then we of course can go ahead and move these more towards the inside If you like it a little bit more angle or more towards the outside if you like it angled out Now my favorite feature is going to be the reclining thing I never had this on a chair before and we can move from 120 degrees all the way to 165 degrees and it gets very comfortable
3:26
I felt like I can go ahead and take a nap over here. Moving the footrest forward also is going to make this a lot more comforting
3:32
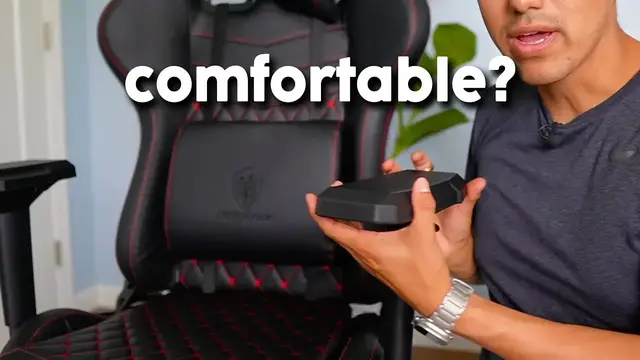
Now the last thing to take a look at is going to be the lumbar support pillow because this isn't just a lumbar support pillow
3:37
It's actually going to be a massage pillow as well too. And when I connect it, it immediately turns on
3:42
Now, as far as the massage feature goes, it doesn't feel like a full-on massage chair that you're going to get like needing that you kind of get in like a foot massager
3:49
This feels more of a kind of like a massage gun, like with the vibration going on and off
3:53
It's not going to be powerful, like you're not going to get hurt from this. And as far as I can tell, you can't change the setting
3:59
There's only going to be one setting for it. And the only way to turn this off is with disconnecting it
4:04
So overall, I'm pretty happy with this gaming chair. It's going to make sitting at the computer a lot more comfortable
4:09
and I'm actually going to go ahead and give this to my brother because his old gaming chair is pretty beat up so he needs a new one anyway so I'm sure he's going to be excited about this one
4:16
but yeah that's a quick look at the Dao Wings gaming chair
#Computers & Electronics
#Consumer Electronics
#Product Reviews & Price Comparisons
#Other