Up next in 10

Are you ready to revolutionize your financial game? In our latest video, “Online Loan Management System 2025”, we break down all the essential steps on **How to Build a Bank Loan Website** that stands out!
From user-friendly interfaces to robust security measures, we cover everything you need to know to create an efficient online loan management system. Discover powerful strategies and industry insights that will not only streamline the loan process but also enhance customer experience.
DOWNLOAD!
https://store.roladel.com/item/RapidLab
Don't forget to like and subscribe.
____________________________________
Official Website
https://www.roladel.com/
Buy scripts, themes, plugins etc.
https://store.roladel.com/
Get paid to watch videos
https://tube.roladel.com/
____________________________________
Telegram
https://t.me/roladel
____________________________________
Corporate Soft by LesFM | https://lesfm.net/positive-background...
Show More Show Less View Video Transcript
0:00
in today's video I'm going to teach you
0:01
how you can create an online loan
0:03
management system using PHP scripts I'll
0:06
give you a discount coupon for The
0:07
Script if you stay with me to the end of
0:09
this video as you can see this is the
0:10
homepage of the website and this is the
0:12
hero section of the website this is the
0:14
about section of the website and this is
0:16
the loan packages section of the website
0:18
so we have some loan packages here we
0:20
have a mega loan we have a car loan we
0:22
have a house loan we have a quick loan
0:23
we have the business loan and we have
0:25
the student loan so a user can just come
0:27
here click on apply now and he will be
0:29
read directed to the login section where
0:31
he can log in or register you can also
0:34
click on see all where you will be
0:35
redirected to our packages page this is
0:38
the frequently asked questions section
0:40
this is the testimonial section this is
0:42
the blog section and this is the footer
0:44
we also have some pages we have the
0:45
about us page we have the plans or the
0:48
packages page we also have the blog page
0:50
and the contact us page the website is
0:53
responsive on all devices as you can see
0:55
this is the PC version this is how it's
0:57
going to look like on mobile phones and
0:59
if you go to Mac this is how it's going
1:01
to look like so the next thing I'm going
1:02
to do is to register as a user on this
1:04
website to see what the website has for
1:07
us so the next thing I'm going to do is
1:09
to click on get started so this is the
1:11
registration page and I'm going to fill
1:12
these fields quickly so the next thing
1:14
I'm going to do is to just click on
1:16
agree to the terms and conditions of
1:18
this website so let me click on it and
1:19
I'm going to click on the register I am
1:21
to complete my profile so the next thing
1:23
I'm going to do is to write my first
1:25
name my last name click on submit so I
1:27
have successfully registered on this
1:29
website so my my balance now is 0 0 so I
1:31
can deposit and withdraw so let me click
1:33
on the deposit to see what we have so
1:35
click on deposit and I can select my
1:37
deposit payment Gateway let me click
1:39
here I can deposit using a bank I can
1:40
also deposit using usdt if I click on
1:43
the bank and an amount lets me enter $60
1:45
and you can see this I can click on
1:47
submit and now see this instruction to
1:49
pay through this bank with the bank's
1:51
name and then the bank's account number
1:53
so you can just pay and click on pay now
1:55
let me go back to deposits I can also
1:57
pay through usdt let me write and let me
1:59
click on submit and as you can see this
2:01
is you pay through the address below so
2:03
you just take the address and go to your
2:04
crypto platform and pay through this
2:06
address so the next thing I'm going to
2:08
talk about is withdrawal so you can just
2:09
click on this button here you can come
2:11
here select your withdrawal method and
2:13
just write the amount then you submit so
2:14
the next thing we are going to talk
2:16
about is the dashboard so this is the
2:17
dashboard as you can see the dashboard
2:19
displays your successful deposits your
2:21
withdrawal and then the loan so the next
2:23
thing we are going to talk about is
2:24
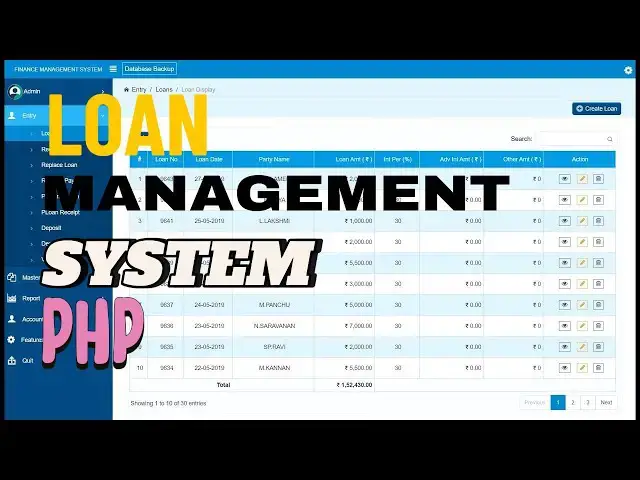
taking out a loan so click on take loan
2:26
so these are all the loan packages that
2:28
we have on this website you can apply
2:30
for one so let me go to student loan and
2:32
I'm going to just click on apply now and
2:33
I'm going to write the amount that I
2:34
want to take so I'm just going to write
2:36
$200 so I'm going to click confirm so
2:38
this is what you see at the end of the
2:40
period we are going to pay this so the
2:42
next thing I'm going to do is to click
2:43
on apply so your application is pending
2:46
this is your loan number so the next we
2:48
are going to talk about is my loans so
2:50
click on it and it will bring you here
2:51
so the next thing I'm going to talk
2:53
about is deposits we have talked about
2:55
it here already and transactions so the
2:57
transaction talks about all the
2:58
transactions that you have have done on
3:00
this website so you can open a ticket if
3:02
you have any problem you want to discuss
3:03
with the administrator you can just open
3:05
a ticket and write to him so you have
3:07
two Factor authorization here so you can
3:09
also configure that we have your profile
3:11
here where you can set your images and
3:13
you can change your login details we
3:15
have changed the password here and the
3:17
last thing is log out so the next thing
3:19
I'm going to do is to log in as an admin
3:21
and I'm going to approve this guy's loan
3:23
to see what will happen so let me open a
3:25
new browser here so let me log in so
3:27
this is the dashboard of the
3:28
administrator so you can see these
3:30
notification signs here so the next
3:31
thing I'm going to do is to click on
3:33
loan spending so this is the guy who has
3:35
just registered on our website click on
3:37
details details if you are comfortable
3:39
you are with the details of the
3:41
applicant what you can do is to approve
3:43
it you can also reject it so I'm going
3:44
to approve it so I'm going to click on
3:46
approve are you sure you want to approve
3:48
this loan if yes you click on yes if no
3:50
you click on no but I'm going to click
3:52
on yes the loan has been approved so you
3:54
can see the status here it is running so
3:56
let's go to the dashboard of the user so
3:58
this is the user's dashboard I'm going
4:00
to refresh the dashboard and I'm going
4:01
to click on my loans as you can see the
4:03
loan is running so I can click on it you
4:05
can see the details if you want to pay
4:07
you can make your installment through
4:09
here you can click on installments so
4:10
this is when you pay so what we are
4:12
going to do now is to log out and I'm
4:14
going to click on home so I'm going to
4:15
teach you how we can create exactly this
4:17
but if you are new to Rodell Channel
4:19
please consider subscribing so that you
4:21
receive our amazing videos in the future
4:23
and if you have any comment or any
4:25
question for us you can drop it in the
4:27
comment section below we will find our
4:29
possible best to answer you let's get
4:31
started so the next thing we are going
4:33
to do is to go to our C panel so this is
4:35
the C panel so I'm going to close this
4:37
tab so the first thing we are going to
4:39
do is to create our image so go down and
4:41
click on email accounts I'm going to
4:43
click on create so for your email
4:45
account you can write info you can add
4:47
admin support so I'm going to write
4:48
about Arthur so it will be info at your
4:50
domain name so the next thing I'm going
4:52
to do is to add a password here so I'm
4:54
going to autogenerate that so this is my
4:56
password make sure you copy it and click
4:58
on create so as you can see we have
5:00
successfully created our email go to the
5:02
C panel so the next thing we are going
5:04
to do is to create our database so let's
5:06
scroll down and click on the myql
5:08
database so the next thing we are going
5:09
to do is to enter our database name so
5:12
I'm going to write DB so this is my
5:13
database name I will just write DB and
5:16
I'm going to click on create database so
5:18
make sure you copy the database name go
5:20
to your notepad and paste your database
5:22
name there click on go back scroll down
5:23
you see your database username here I'm
5:25
going to write DB again and for the
5:27
password I'm going to autogenerate that
5:29
so click on the password generator copy
5:31
the password click on use password let
5:32
me go to my notepad and I'm going to
5:34
paste the password there click on create
5:36
user Make sure to copy your database
5:38
username go to your notepad and paste it
5:40
there make sure to save it click on go
5:41
back scroll down and you see ads click
5:44
on ADD so the next thing you're going to
5:45
do is to give privileges so click on all
5:48
privileges and click on make changes so
5:50
we are done creating our database so
5:51
what we are going to do is to click on C
5:53
panel here to go to the C panel the next
5:56
we are going to do is to get our script
5:58
ready so that we can upload it here so
5:59
let's go to the script so I'm going to
6:01
minimize this and I'm going to open this
6:03
folder and I'm going to open this online
6:05
loan folder and I'm going to open this
6:07
folder so this is my script by the way
6:09
the name of the script is here you can
6:11
get it from the Radell store this is the
6:12
official website this is where you can
6:14
buy it for the regular license you pay
6:16
this amount but you can buy the extended
6:18
version for this amount but we have this
6:19
version so in the description below you
6:21
will see a link you must click on the
6:23
link and you download it for with
6:24
discounts coupons I will provide you at
6:26
the end of this video we have this
6:27
version so this means that you can use
6:29
it for your client you can also give it
6:30
to your friends go to the description of
6:32
this video you will see a download link
6:34
there click on the link and you'll be
6:36
taken to a website so let's continue so
6:38
I'm going to close this tab let me go to
6:39
the folder so if you purchase and
6:41
download the file this is what you are
6:42
going to have so the next thing we are
6:44
going to do is to unzip this or to
6:46
extract this so I'm going to right click
6:48
on it and I'm going to click on extract
6:50
here it's getting a strategy so this is
6:52
the extracted folder so the next thing
6:54
we are going to do is to open this
6:55
folder you will see these folders and if
6:57
you open this one this is the update and
6:59
this is the main file that we are going
7:01
to upload onto our server and we have
7:03
something here the document here you can
7:05
open this
7:06
index.html file and you can read it so
7:08
you can upload a folder so the next
7:10
thing you are going to do is to zip this
7:12
folder so right click on it and I'm
7:14
going to zip it so as you can see we
7:16
have our zipped file here so this is
7:18
what we are going to upload onto our
7:20
server so let's go to the C panel so the
7:22
next thing we are going to do is to go
7:24
to our file manager click on file
7:26
manager so the next thing we are going
7:28
to do is to open our public HTML folder
7:31
so click on it so this is where we are
7:33
going to upload the file so the next
7:35
thing we are going to do is to click on
7:36
upload here click on select file so this
7:39
is the file so our file has been
7:40
uploaded successfully so the next thing
7:42
we are going to do is to click on this
7:44
go back this is the file so the next
7:46
thing we are going to do is to extract
7:47
the file so right click on it and click
7:49
on extract click on extract files and
7:51
once everything is done click on close
7:53
so we don't need this file again so let
7:54
me right click on it and click on delete
7:56
so open this folder so I'm going to
7:58
click on select all and and I'm going to
7:59
move them to the main folder public HTML
8:02
folder so click on move and I'm going to
8:04
clean here so this is the folder I'm
8:06
going to click on move files so let me
8:08
go back one level by clicking on this
8:10
these are the files the next thing I'm
8:11
going to do is to delete this folder
8:13
because it is empty if I open it there's
8:15
nothing in it so let me rightclick on it
8:17
and click on delete so the next thing we
8:18
are going to do is to open a new tab and
8:20
enter our domain name/ install then hit
8:23
on enter so the next thing we are going
8:25
to do is to click on agree Next Step so
8:27
we are going to give some permission to
8:28
this so you can see we are saying we
8:30
should go to the core folder and we go
8:31
to the bootstrap folder then we have a
8:33
cache then we are going to change the
8:35
permission from 0755 to 0775 I'm going
8:38
to show you how we can do that for
8:40
storage go to the core folder go to
8:42
storage change the permission from 0755
8:45
to
8:45
0775 then for the core storage and app
8:48
then for the framework and the logs let
8:50
me show you how we do that so let me go
8:51
to where we have uploaded our files so
8:53
let me go there so let me click here and
8:55
they say we should go to the core folder
8:57
so open the core co-founder and the
8:58
first one is is you should go to the
9:00
bootstrap so open the bootstrap you will
9:02
see cash here and we should change this
9:03
permission from 0755 we have two ways we
9:06
can actually change the permission the
9:08
first one is simple we will just make
9:10
sure you click on the folder here and as
9:11
you can see it is selected you can see
9:13
this light blue color here this means
9:15
this folder is selected so the next we
9:17
are going to do is to rightclick on it
9:19
and you see change permissions click on
9:21
change permissions you see a group here
9:23
then you see right here this box as you
9:25
can see the permission is the permission
9:27
is 755 but if I click on the this box
9:29
under the group this box it will change
9:31
to 775 so let me click on it as you can
9:34
see the permission has changed from 755
9:36
to 775 then click on change permission
9:39
so you can see that here too has changed
9:41
so this is one way you can change the
9:43
permission so let me go back one step
9:45
they say we should change the permission
9:46
of this folder so make sure you click on
9:48
it so that it is highlighted I'm going
9:49
to show you the second method the second
9:52
method is to come here to be on
9:53
permission here and you are going to
9:54
click it once so that gives you the
9:56
ability to change
9:58
0775 and click on save so as you can see
10:00
it has changed so they say we should
10:02
open the storage folder change the
10:03
permission of app framework and logs so
10:06
click on it go here change it to 0775 go
10:08
to the framework come to permission 0775
10:11
click on Save come to logs 0775 click on
10:15
save you can just refresh here and let's
10:16
go back to the installation and we are
10:18
going to recheck so click on it so we
10:20
are done with that so the next thing we
10:22
are going to do is to click on the next
10:23
step so this is where we are going to
10:25
enter our database particulars so go to
10:27
your notepad and copy your database
10:29
details the first one is the database
10:31
name so I'm going to copy my database
10:33
name paste into my database name the
10:35
same as the database username so I'm
10:36
going to paste the same thing here for
10:38
the database whose's it is Local Host
10:40
please don't give space between the
10:42
local and the host for the password so
10:44
this is where we are going to set our
10:45
administrator particulars so if you want
10:47
to log in to the back end of this
10:48
website these are the particulars that
10:50
we are going to use after writing them
10:52
make sure you copy them and put it on
10:54
your notepad I think I have mine here so
10:56
I'm just going to copy them so make sure
10:58
you use your professional email here so
11:00
the next thing I'm going to do is to
11:01
click on install now so if everything is
11:03
done well then this must be successful
11:05
so click on install now as you can see
11:07
your system has been installed
11:09
successfully so they say we should go to
11:10
the folder and delete the install folder
11:13
so before that I can click here to go to
11:14
the website congratulations so this is
11:17
the front end of the website as you can
11:18
see it is the same as the demo I showed
11:20
to you so the next thing I'm going to do
11:22
is to go to the folder and I'm going to
11:24
delete the installed folder so the next
11:26
thing I'm going to do is to log in to
11:27
the back end of this website so to do
11:29
that I'm going to enter my domain name/
11:31
admin and hit enter they are going to
11:33
ask me for my login particulars but
11:35
something has happened here they have
11:36
set recapture on this website and the
11:39
recapture is not working for this reason
11:41
you can't log in so what we are going to
11:42
do is to go to the C panel and I'm going
11:44
to show you how we can disable this so
11:46
that we can be able to log in to the
11:48
dashboard after that we will reset this
11:50
recapture okay so let's go to the C
11:53
panel so let me go here so this is the C
11:55
panel I'm going to click on PHP my admin
11:58
so make sure you select your database
12:00
for this website so this is the database
12:02
for this website look for extensions as
12:04
you can see it is here so click on it
12:05
this is where you can see the recapture
12:07
as you can see this is the second one
12:09
here Google recapture 2 this is it so if
12:11
I go to the status you see that it is
12:13
set to one this means that it is active
12:15
so what I'm going to do is to double
12:17
click on this one so I'm going to change
12:18
the one to zero so you can click
12:20
anywhere so that this will be saved as
12:22
you can see it is saved so the next
12:23
thing I'm going to do is to go to the
12:25
login page and I'm going to refresh the
12:27
page as you can see the error recapture
12:29
is gone let me quickly type my
12:30
particulars here I'm going to click on
12:32
login so this is the dashboard of the
12:34
administrator this shows the summary of
12:36
whatever is going on on the website you
12:38
can see total users you can see active
12:40
users you can see everything here you
12:42
can see the loan that is running you can
12:44
see pending loans you can see du loans
12:46
paid loans you can see everything here
12:48
rejected withdrawal pending withdrawal
12:50
and everything when I come down you can
12:52
see a graphical representation of
12:54
mentally deposition and on withdrawal
12:56
reports you can see the transactions
12:58
reports and everything that is for the
12:59
dashboard so the next thing we are going
13:01
to do is to add our KRON jobs to our C
13:04
panel so you know cron jobs is
13:05
responsible for the repetitive actions
13:08
of this website so if you come here they
13:10
have not added the cron jobs command you
13:12
can see Cron job settings here but if I
13:14
click on action here you can only run we
13:16
don't have the row link that we can add
13:18
to our C panel but I have a format of it
13:20
that I will be putting in the
13:22
description of this video I'm going to
13:24
show you how you can add your domain
13:25
name in that Cron job so that you can
13:27
paste it I'm going to open my notepad
13:29
and I'm going to go here so this is cron
13:31
jobs so what we are going to do is that
13:33
you put your domain name here so I'm
13:34
going to copy my domain name here and
13:36
I'm going to paste it so make sure
13:38
there's a space here so curl space dpace
13:40
then your domain name/ Chone so this is
13:43
what we are going to copy and go to the
13:44
C panel go to the search box here and
13:46
search for Cron job it is here so click
13:49
on it I have an existing one here I'm
13:51
going to delete it and I'm going to come
13:52
here and I'm going to choose the command
13:54
it should be 5 minutes and come to
13:55
command here and paste it here and click
13:57
on add new Chron J job so you can now
14:00
refresh the page go back to the
14:01
dashboard you can come here and click on
14:03
run so let's go to the dashboard now so
14:05
the next thing we are going to talk
14:06
about is this manage users so click on
14:08
it we can have our active users and
14:10
users these ones we can have our kyc
14:13
pending this is a new website so we
14:14
don't have any users we don't have any
14:16
active users banned users for the kyc
14:19
know your clients or customers we don't
14:21
we have not set anything like that yet
14:22
so I'm going to minimize this so the
14:24
next I'm going to talk about is
14:25
categories click on it and we are going
14:27
to enter our package category the first
14:29
category I'm going to have is student
14:31
loans you must give a description you
14:33
can add as many as you want okay I have
14:35
another onec car loan I'm just setting
14:37
three so the next thing I'm going to do
14:39
is to click on loan plans so this is
14:40
where we set our actual loan plans so
14:42
click on it and click on add new so this
14:44
is where you set the name of your plan
14:46
and the category so I'm going to choose
14:48
the first category which is student loan
14:50
and I'm going to type the same thing
14:51
here student loan for the title I'm
14:53
going to type the same thing for the
14:55
amount you can set any amount for the
14:56
minimum amount I want them to take $500
14:59
and then for the maximum I want them to
15:01
take $5,000 installment interval how
15:03
long would they be able to pay so it
15:05
will be 30 days which is a month and how
15:07
many times are they going to pay in a
15:08
month so for this one I'm going to write
15:10
only once because at the close of the
15:12
month they must be able to pay the loan
15:13
as they are going to pay once in this
15:15
what percentage would they pay so I'm
15:17
going to write let me write 50% let me
15:19
see so if you write 50% you see negative
15:21
that means you will not have any profit
15:23
you'll see even o so you must try this
15:25
until you have a positive answer here so
15:27
if I even write 100 it will give you
15:29
something like zero let me see 100 will
15:31
be zero so I need something like 20%
15:33
that means they are paying 120% of the
15:35
installment if they are able to pay that
15:37
then I will get 20% profit that is cool
15:39
and the next thing I'm going to do is
15:41
charge an application fee I don't need
15:42
any application charge for the
15:44
percentage I don't need it but if you
15:45
want to add you can add it and I want to
15:47
make this a featured package you can
15:49
write your instructions here I will not
15:50
do that if they delay payment for once
15:52
which is one day they are paying only
15:54
once in 30 days that means at the end of
15:56
the month so if they delay payment for
15:58
that day once they'll pay a fixed price
15:59
of zero but for the percentage they'll
16:01
pay 5% of the total amount that you are
16:03
going to pay click on submit the plan
16:05
has been successfully added let me
16:07
quickly add one click on submit so if we
16:09
click on plans we have our two plans
16:11
here so we can now view our website on a
16:13
new browser so let me open the website
16:14
on Firefox so let me click on this
16:16
browser let me enter the domain name
16:18
here click on enter as you can see we
16:20
have about two loan packages that we
16:21
have just set let me go to the backend
16:23
admin dashboard so I'm done with the
16:25
loan plans you can add unlimited plans
16:27
so the next thing I'm going to do is to
16:29
click on loans pending loans running
16:31
loans do loans paid loans we don't have
16:33
them so I'm going to minimize it the
16:34
next I'm going to talk about is the
16:36
payment Gateway so I'm going to click
16:38
here so this is where you can set your
16:40
automatic Gateway so click on it so we
16:42
have a lot of automatic gateways Here
16:44
Pay stack coin payments stripe PayPal to
16:46
checkout so you can come here and click
16:48
on edit and add the details I will not
16:50
say that what I am interested in is the
16:52
manual Gateway so I'm going to click on
16:54
manual gateways I'm going to click on
16:56
add new so I'm going to fill this in the
16:58
name let me go to my notepad so the name
17:00
United Bank for Africa and then the cash
17:02
I'm still going to use the dollars and
17:04
is equal to $1 the rate the minimum
17:06
amount that you can deposit is $50 and
17:08
then the maximum is as much as they have
17:10
a lot of money they can deposit a lot
17:12
the fifth charge is zero the percentage
17:14
charge is zero so you can put an
17:15
instruction here so let me go to my
17:17
notepad and I'm going to copy this
17:19
instruction I'm going to paste it here
17:20
they should pay the equivalent loan
17:22
amount to our official Bank Account
17:24
Details so these are the details you can
17:25
just click on should be zero the next
17:27
thing I'm going to do is to click on
17:29
submit I'm going to add another Gateway
17:30
which will be cryptocurrency usdt let me
17:32
enter the name the currency is the
17:34
dollar the rate is one the minimum
17:36
deposit amount should be $50 the maximum
17:38
should be for the charge I'll put zero
17:40
for the fixed charge for the percentage
17:42
charge zero I'm going to add
17:43
instructions here this should be to our
17:45
official usdt address click on submit so
17:48
if I click on the manual payment Gateway
17:50
these are the two that I have just set
17:51
or configured the next I'm going to talk
17:53
about is deposits if they deposit money
17:55
this is how you see them this is where
17:56
you see the pending deposits approved
17:58
deposits successful deposits rejected
18:01
deposits initiated deposits and then all
18:03
deposits we don't have it this is just a
18:04
new website so we don't have any
18:06
deposits so I'm going to minimize this
18:08
the next I'm going to do is click on
18:09
withdrawal methods click on add new and
18:11
the first thing I'm going to set is the
18:12
bank so I'm going back copy my bank name
18:14
add the currency the rate should be $1
18:16
the minimum amount 50 the maximum fees
18:19
charge zero percentage charge will be
18:21
zero the withdrawal instructions should
18:23
be this so send your bank details to us
18:25
for us to pay you instantly you can add
18:27
a new field it should be this area an
18:29
issue you can just add anything I'm just
18:31
going to add these make sure it is
18:33
required click on ADD click on submit so
18:35
you can also add crypto here so let me
18:37
quickly do that click on ADD and click
18:39
on submit so we have successfully added
18:41
our withdrawal methods so the next we
18:43
are going to talk about is this pending
18:45
withdrawal we don't have a pending
18:47
withdrawal approval withdrawal we don't
18:48
have them so minimize it so I'm going to
18:50
talk about tickets this is where the
18:52
admin can receive messages from the
18:54
users on the website if they have any
18:56
problem they can write to the admin and
18:58
he will see the ending tickets the
18:59
closed answer ticket and all tickets we
19:02
don't have any tickets I'm going to
19:03
close it report this is where you see
19:05
all the reports on transaction logs
19:07
login history notification history so
19:10
I'm going to minimize subscribers on the
19:12
website we have a subscribers section
19:14
anyone has subscribed to our website
19:16
this is where we are going to see them
19:17
we don't have any of them so it is empty
19:19
so the next I'm going to talk about is
19:21
under settings general settings so click
19:23
on it so this is where you give your
19:25
website name so as you can see here it's
19:27
called rapid lab so so I'm going to
19:29
change it to my website name so my
19:30
website is Rock loan limited and you can
19:32
change the color so if you go to the
19:34
website here the color here you can
19:35
change it you can actually change it to
19:37
any color you want this color click on
19:39
submit so the next I'm going to talk
19:41
about is system configuration I've
19:42
talked about the Chrome jobs already as
19:44
you can see it is working every 5
19:46
minutes so system configuration this is
19:49
where you can set if you want someone to
19:50
register on your website you want to
19:52
receive email notification and cool so
19:54
the first one I want people to register
19:57
so I'll pick this Force SSL let me force
19:59
it I want people to get that Force
20:01
secure password you can turn it off or
20:03
you can just allow it kyc verification I
20:06
don't need it email verification I will
20:08
disable it you can enable it for the SMS
20:10
notification I will disable it for the
20:12
push through I will disable it so the
20:14
next thing I'm going to do is to click
20:15
on submit the next thing we are going to
20:17
do is to click on the logo and favicon
20:19
so click on it so this is where we
20:21
change our logo and our favicon so I'm
20:23
going to click here select my logo so
20:25
I'm going to the desktop projects online
20:27
loan and I will see my logo here so this
20:29
is my logo so I'm going to choose this
20:31
one for the main logo this will show on
20:33
the side here and for the second one the
20:35
second one here will show here so mostly
20:37
it should be white so let me choose the
20:38
White Version and this is the favicon or
20:40
the site icon it is here so you can come
20:42
here and you select it when I save it it
20:44
will not change instantly as you can see
20:47
they say if it hasn't changed instantly
20:48
go to the cash and that you will get
20:50
there then you clear the cash or you
20:52
just leave it for some time then you
20:53
refresh the page it will change so click
20:56
on submit so the next thing I'm going to
20:57
talk about is social media so if you
20:59
want to log in here let me go to the
21:01
front page and click on log in you see
21:03
this social media thing let me go to the
21:05
dashboard social media so this is where
21:07
you set them so you can click here and
21:08
configure them the next I'm going to
21:10
talk about is called extensions click on
21:12
it you can see all the extensions here
21:14
the one I'm going to activate is Google
21:16
recapture because if we don't do that
21:18
people will be spamming your email so
21:19
what I'm going to do is to add Google
21:21
recapture to this login and register
21:23
page so let me go to the back end and
21:25
I'm going to go to click on enable and
21:26
I'm going to click on configure so open
21:28
a new tab and search for Google click on
21:31
Google recapture click on this one I
21:33
have signed in already so the next thing
21:34
I'm going to do is to click on three
21:36
admin consoles I have generated one
21:38
already so what I'm going to do is to
21:40
come here and click on the plus icon
21:42
here to generate a new one so I'm going
21:44
to name it this for the recapture type
21:46
select challenge 2 and this is where we
21:48
are going to enter our domain name so go
21:50
to your website copy the domain name
21:52
paste it there make sure you clean the
21:54
slash clean the https it should just be
21:56
your domain name after that click on sub
21:58
MIT we are going to copy the site key go
22:00
to your website site come here so we are
22:02
going to copy the secret key and I'm
22:04
going to click on submit so we are done
22:06
with the recapture thing so the next
22:08
thing we are going to do is to refresh
22:10
the page go to the front end we are
22:11
going to refresh the page you can see
22:13
the Google recapture here it's working
22:15
perfectly let me go to the dashboard the
22:17
next I'm going to talk about is the
22:19
language you can come here add new make
22:21
sure you add the language name if it is
22:23
French add the language code go to
22:25
Google and search for the language codes
22:27
they'll give it to you then add them so
22:29
SEO manager click on it this is where
22:31
you add your website details so here you
22:33
add your website name and this is where
22:35
you add the keywords so I can delete
22:37
these ones and add new ones so you can
22:38
add several keywords here when you are
22:40
done click on submit let's go to the kyc
22:43
setting this is where you add your
22:44
document form if you want people to
22:46
submit their document this is where you
22:47
do it I will not do that come to
22:49
notification click on it Global template
22:51
you can add your info here your email
22:53
info so I'm going to add my info let me
22:55
go to my notepad copy my email click on
22:57
submit so the next thing we are going to
22:59
do is to click on email setting click
23:01
here and select SMTP for us to do this
23:04
we must go to the CP Nel so go to the C
23:07
panel go to email accounts select the
23:09
email that you want to use so I'm going
23:11
to use this one click on connect devices
23:13
so we are going to use these details if
23:15
your website does not have an SSL
23:17
certificate you must use these details
23:19
let me go to the dashboard the website
23:21
host the host is your domain name so
23:23
copy your domain name paste it there
23:25
clean the Slash and https your Port go
23:28
to your email you'll see the outgoing
23:30
server you'll see the port copy it the
23:32
username go to your email this is the
23:33
username the username is the same as
23:35
your email and then the password so the
23:37
password to your email so make sure you
23:39
copy it paste it here and click on
23:40
submit so the next I'm going to talk
23:42
about is SMS settings you can use any of
23:44
these if you want to receive OTP on your
23:47
phone so you can use twillo I will not
23:49
go into that you can set push
23:50
notifications you can set this this is
23:52
where you change all the messages that
23:54
your users will receive if they deposit
23:56
this is what they will receive if they
23:58
pay their loan this is what they will
23:59
receive so let me minimize this the next
24:02
thing I'm going to talk about is
24:03
managing templates so let me click on it
24:05
this website has only one template and
24:07
that is the template we are using this
24:09
design so the next we are going to talk
24:11
about is the managed pages so this is
24:13
where you can manage the pages it is not
24:15
necessary so don't even touch it so the
24:16
most important thing is the section so
24:18
click on manage sections about us so if
24:20
you go to the front page about us these
24:22
are the tests let me go to the dashboard
24:24
this is what you see if I change it to
24:26
my company name and click on submit to
24:28
the front end click here I'm going to
24:30
clear the history and refresh the page
24:32
you can see the changes we go to the
24:33
dashboard go to the banner the banner is
24:35
at the top here the hero section so you
24:37
can change this let me go to the
24:39
dashboard so you can go to the blog
24:41
section so make sure you go through all
24:43
of these and configure them contact us
24:45
so let me click on it this is where you
24:46
can add your information let me go to
24:48
the front end it will affect this let me
24:50
enter my email there the dashboard I'm
24:52
going to talk about how you can get this
24:54
Google Map link because if you go to the
24:56
contact us you can see this map and the
24:57
address is shown on the map this address
24:59
this address I'm going to show you how
25:01
you can generate this let me go to the
25:03
back end so the next thing we are going
25:04
to do is to let me close this tab and
25:06
open a new tab I'm going to type here
25:08
Google Map hit enter click on Google
25:10
Maps so this is where I'm going to enter
25:12
my company address so let me go to the
25:14
front page of the website copy the
25:15
company address go to the back end and
25:17
I'm going to paste the address here I'm
25:18
going to hit enter or search so this is
25:20
the company so what I'm going to do is
25:22
to click on it can you see it so the
25:23
next thing I'm going to do is to come to
25:25
share so I'm going to click on share and
25:27
I'm going to click on it embed a map so
25:29
this is what I'm going to copy so I'm
25:30
going to copy the Hasty ml code go to
25:33
the back end of your website and I'm
25:34
going to paste it here I'm going to
25:35
delete the frame we don't need a frame
25:37
can you see the frame here you don't
25:39
need it so I'm going to delete the frame
25:40
go to the beginning of the code and I'm
25:42
going to delete from here to the frame
25:44
so this is what we need so hit on submit
25:46
if I go back to the website the front
25:48
end and I clear the history and I
25:49
refresh the page you must see your
25:51
company name here it must show on the
25:53
map as you can see it is here and then
25:55
the address is shown here let me go to
25:57
the dashboard again so make sure you
25:58
change these things they will show here
26:00
and they will show at the contact page
26:02
two go to the back end so the next thing
26:04
I'm going to talk about is the footer so
26:06
click on the footer you must change as
26:08
you can see go home scroll down I must
26:10
change this you know as you can see the
26:12
footer has the demo logo but it will
26:13
change because of the cash it will
26:15
change so let's change this one to our
26:17
company name so let's go to the back end
26:19
and I'm going to write it here click on
26:20
submit so make sure you go through all
26:22
the sections here the section and change
26:25
everything on the section so we are done
26:26
with the section the next thing I'm
26:28
going to talk about is the maintenance
26:29
mode so click on it so you can put your
26:31
site on maintenance mode what we are
26:33
going to do is to click on it now it is
26:35
disabled so click on enable and click on
26:37
submit go to the front end of your
26:39
website clear the history and refresh
26:40
the page you can see the site is in
26:42
maintenance mode but you are seeing
26:44
construction so you can rewrite this go
26:46
to the back end and you can rewrite this
26:48
to maintenance mode make sure you
26:49
disable it click on submit the next we
26:51
are going to talk about is the cookies
26:53
so click here and it is enabled let me
26:55
show you how it works now it is enabled
26:57
so when I go to the website and I clear
26:58
the history and I refresh the page you
27:00
see the cookie notification here can you
27:02
see that so make sure you click on allow
27:04
so let me go to the back end it is good
27:05
so we make sure you can rewrite it but I
27:07
think everything the next we are going
27:08
to talk about is the system the
27:10
application gives you information about
27:12
the server then the cache this is where
27:13
you can clear the cash of the website if
27:16
you do any change on the website and the
27:17
change does not reflect on the front end
27:19
you must go and clear this cache but
27:21
sometimes when you clear it it doesn't
27:23
change but you wait for some time so it
27:24
still will change so update so if you
27:26
have any update this is where you can up
27:28
upad it so next thing we are going to
27:29
talk about custom CSS this is where you
27:31
can add custom CSS so let me go to the
27:33
dashboard so I have talked about
27:35
everything on this dashboard at the
27:36
beginning I talked about how you can
27:38
register so there's no need for me to
27:40
register again if you see this video
27:41
useful subscribe to Radell so that you
27:43
watch more videos like this
#Credit & Lending
#Loans
#Debt Management
#Other