0:00
Hello this is a very quick look at the Dragon Touch 8 inch photo frame. This was
0:04
kindly sent to me for review by Dragon Touch. Around the back you've got the
0:08
specs, so it's 8 inches, it's got 16 gig on board and it's very easy to share
0:13
photos and videos to this frame because it connects to your Wi-Fi network. We'll
0:19
get that later. When you open the box you get the frame, you get a little box of
0:24
bits. The box of bits contains the power plug as well as the stand and a couple
0:30
of cables. The power cable is a USB cable. On the front is a set of instructions and
0:37
a little sticky tape that just helps you get started. It's very simple to get up
0:42
and running. The screen's a little bit reflective. Around the back you've got
0:47
controls. That's to manually control this although it is a touch screen. There's a
0:52
a little hole there to allow this to stand upright and around the side you can see the inputs so
0:58
you have a selection of inputs including the power, mini USB, USB headphones and an SD card slot so
1:06
you can pop in your USB or SD card filled with photos to this but it does have on board memory
1:13
It comes with a two manufacturer warranty as well as a short user guide and it dead easy to get set up First thing to decide if you want to wall mount this by popping a screw on there or whether you want to pop this on a desk and if you want to use the desk you simply screw in this
1:28
little arm and that just allows this to stand up straight. Take the sticker off the front and when
1:35
you power it up you'll first be asked to enter a wi-fi network. You can skip this but you'll lose a
1:40
load of features if you don't do it. It's got a touch screen on it and this is basically an android
1:45
tablet set up as a photo frame so it's very easy to use you can have auto on auto off time very
1:52
handy if you want to save some power during the day or night if you're out and about and then
1:57
you'll need to download the app to get the most out of this the app is free on ios and android
2:03
and you have to add the photo frame to your account so you can have multiple frames and what this
2:09
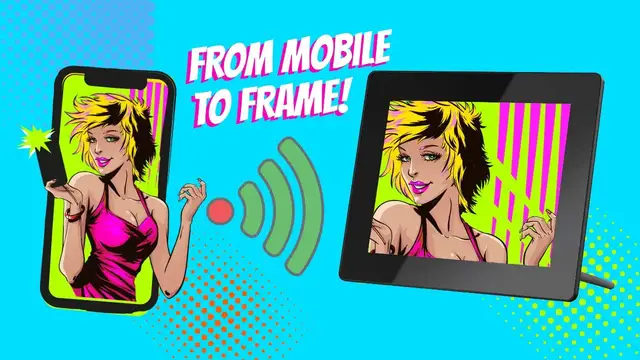
allows you to do it's really clever you can take photos and video on your phone and send them to
2:15
the frame you don't have to be near it you don't have to put in an SD card or USB stick you have
2:20
to go through this process to accept a user request once done you can now send photographs
2:28
from your phone to the frame so this makes this a brilliant gift if you've got elderly relatives
2:34
and you'd like to be able to share some of your digital photos with them this is the ideal gift
2:39
So here I am I going to take a picture of the frame there we go and you can press send You can send multiple pictures if you want It will take a couple of minutes Of course it depends if you on Wi and if you using a mobile network
2:52
but then it will notify the frame that there's a new picture. And there it is ready to use
2:57
So this is a really quick and easy way of setting up your frame because most of us have a load of really great photos on our phone
3:04
and now you simply select them, press send and if you wait a moment it's now
3:09
sending them via the interweb and they'll land on the frame ready for viewing
3:15
So this is perfect if you've got relatives who you don't get to see too
3:19
often you can take pictures of your kids or pets or activities or yourself, press
3:24
send and then they'll be able to see your photos and you can see that actually
3:28
the frame looks really good it does a great job in replicating the colours. The
3:32
transitions it changes quite fast but that's all editable so let's first of
3:37
all let's go back and get rid of that rubbish photo so this is the other nice
3:41
thing as well if you send the photo that's not to their liking or you send
3:44
your own photo frame it's not to your liking you can delete it from the frame itself most of the time you'll be on the photo view but if we go back to the main
3:52
menu you can see there's the photos you can set alarms if we go into settings
3:56
you've got a nice layout very easy to use you can see who are the users you can
4:01
upload things via FTP you've got Wi-Fi control you also got album settings which allows you to change things around the slideshow whether you want it to show them randomly what kind of transition effects I personally prefer to show pictures for a longer time so it not constantly changing quite so quickly but it totally up to you
4:20
you've also got system settings where you can adjust the volume date time language etc
4:25
knowing where you are it will pull up the weather on the main frame and it's also got a little
4:31
calendar view and you can view files via the SD card or USB favourites. I'm using all internal
4:38
It's a little bit reflective on screen but actually when you put this down and stand back
4:43
it's actually very easy to see and the reflections haven't really bothered me at all. You can also
4:49
play video from this frame. This is a quick test of the video, let's see how it looks on the frame and let's hear the audio
4:58
Is the audio any good? Once the video's stopped playing, it's reached the end, it will loop back around and start playing from the beginning again
5:09
There are touch controls around the back, but you don't really need to access these that often
5:14
You might just need the power button once in a while. So this is a really great option if you're looking for a digital photo frame that looks good
5:22
It's got a nice screen and that you can send photos to remotely without having to actually be in the same room as it
5:27
This is a fantastic option. I hope you found this short review useful