Up next in 10


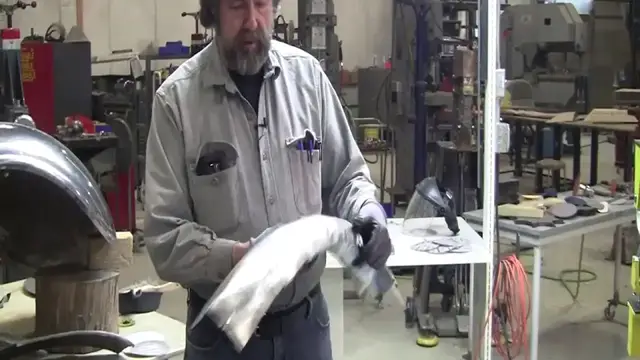
Part two : showing the process of making a motorcycle fender.
http://www.proshaper.com
Show More Show Less View Video Transcript
0:00
Okay, all right, so now we have the piece all cleaned up with the lacquer fender all the asphalt residues off
0:06
And now the question is we want to planish this out in a process of making a fender like this
0:12
You don't want to do it all in one go you want to do it in stages in a fender
0:18
Typically, I would do it in three stages. You might be able to get in two but three would be a better
0:24
method so the Typical is what everybody would try to do is wheel it this way
0:31
And if you wheel it this way, of course you can't get on the sides
0:34
And you're gonna have to use a real high crown wheel and on it to wheel it that way
0:40
Unless you take it out of arrangement so this is sort of like the the big trick and and shaping sheet metal is being able to
0:49
change your arrangement Just like a piece of paper can be changed in arrangement a million different ways metal can be too
1:03
Arrangement is nothing more than bending so what we're gonna do is put this into the curl arrangement
1:10
And we got a little Bug there we squash him down Like
1:18
Squashes down always try to use a blanket or some soft surface on your bench so you don't scratch up your aluminum all bad
1:25
so Knock those edges down a little more
1:36
Bring that around And you can do half of it at a time. You don't have to get the whole thing in the curl arrangement
1:46
so Here we got say the front half and the back half is still semi curled
1:52
So now when we do that you see This had a radius of this value. Now you have a very
2:00
Almost flat radius a low crown radius right here so we can use a wheel that doesn't have a lot of
2:08
to it not the advantages If you use a high crown wheel your contact area is going to be very very narrow
2:15
And it's going to make a lot of wheel marks So what we doing now is we just going to knock all these Lumps and out and smooth this up
2:39
Now the hobbit freight wheel is really not a real stiff wheel you can add
2:44
Stiffness to it by strengthening up the backbone It'll make it a little bit better. I
2:50
intend to Possibly offer another stifter stiffening kit Later on
3:01
But you can't get good results out of it just the way it is here We're knocking these walnuts down
3:20
I just do half one half of the fender And now we're going to
3:34
Induce the curl a little bit by pulling down when I pull out of the wheels
3:43
That flattens it out Now Now let me put a lower crown wheel in here and easily pop this up change the wheel out
4:02
This one's got a pretty pretty low crown With the kit now
4:14
It's really easy to operate the The adjuster and you can set your contact area with
4:23
These adjusters here on the bottom So that your contact area is right in the center of the anvil
4:40
Right now I running right dead in the center turn these little quarter bolts on the bottom And it will adjust the yokes attitude relative to the top wheel So now we got a
4:55
Flatter wheel and there will get a little bit wider contact area We'll get a nice finish
5:02
Now we don't want to wheel too much on the side just enough to knock those shrunk areas down
5:09
When we wheel in the center Will actually help make the fender that'll stretch out the center a little bit. So that's advantageous
5:21
But on the edges only a little bit So wheel this up a little
5:39
Now this is a real good example again, I got it in this curl
5:49
Arrangement and if you see this is going to come around and
5:54
Formally the adjuster would be there. So that'd be fouling on that adjuster every time it came around
6:01
I'm going to work this fender in a really Flat way the curl
6:20
And you can see now the panel after a few minutes of wheeling is starting to get
6:27
The shine of the top wheel printed on it So it'll shine right up
6:34
Looks like it's buffed It's actually just an impression of the top wheel and did a YouTube video. I
6:43
Don't know a couple weeks ago. We could a couple days ago. I think Showing how to polish your anvils and your top wheel real simple method
6:53
It's on my YouTube channel. Just look on the pro shaper. You'll find it. I had a bunch of other videos there, too
7:01
Let's start doing Maybe a video a week or so Different items of interest in coach building
7:22
You can see that was just a couple minutes now Let's see what we got. It doesn't look like a motorcycle fender. It's still rough on this side. We haven't done it
7:30
We haven't smoothed it out. This side is close. So now we're going to set the arrangement
7:37
Back the way it wants to be As you set the arrangement
8:00
you can see we got a A good arc started here, but this is only stage one and making this fender
8:07
Like I said you do it in stages. Otherwise, you're asking the metal to do too much. So
8:13
Now we put this back in the shrinking facilitator shrink another round on the edges
8:20
They'll pop up in Spots that there were already not sure that would that were
8:26
Never not shrunk yet in between the spots that were shrunk if you look close
8:31
You can see this little residue of the shrink still there That'll all come out eventually
8:38
That's thickened the metals thickened there. We're going to be stretching this metal and thinning this metal here and
8:48
After about three applications of this process which will take a minute an hour or so
8:54
Isn't of one we did earlier same system same shrinking facilitator And that's got the right finish diameter. This one isn't totally finished. It needs a little planishing on the edge
9:08
But you can see it's a really nice job Shined up nice and
9:16
Anybody can do this it just takes a little effort to do it So that's all we're gonna do tonight. Thank you
9:28
You can find all this the tools at that I used at my website
9:34
Pro shaper comm it's racially and thank you
#Motorcycles
#People & Society