Up next in 10


https://www.proshaper.com
Our Amazon Storefront: https://www.amazon.com/shop/proshaper
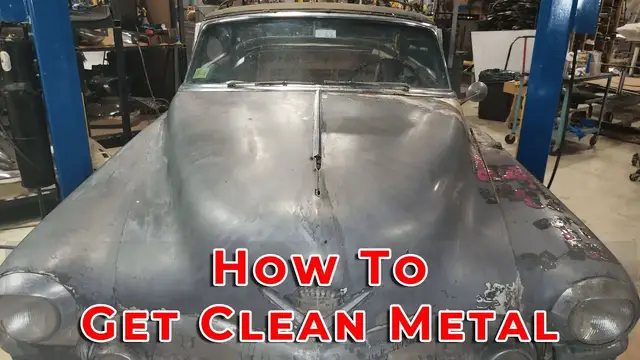
How to get clean metal
The last video we had removed all the paint but there was still rust on the hood and front fenders. Today Mark removed the naval jelly from the hood and fenders with a putty knife, used concrete and metal prep from Klean Strip to scrub the remnants from the naval jelly. This also helps remove and surface rust we weren't able to scrape off. Now we also had a guest at the shop who brought in a grill that had a lot of rust and some serious pitting that naval jelly just won't remove. For something like that you would probably want to dip but the better option would be just to remake the whole thing.
Hopefully the next video we start tackling the rust from underneath the Cadillac.
Email: [email protected]
Website: https://www.proshaper.com
Facebook: https://www.facebook.com/ProShaper/
Instagram: https://www.instagram.com/proshaper/
Twitter: https://twitter.com/ProshaperM
Linkedin: https://www.linkedin.com/company/proshaper
Show More Show Less View Video Transcript
0:00
all right here was the Cadillac we showed the other day in the last video and we had most of
0:23
it cleaned up but now we're back on the lift and we want to show the process of actually taking the
0:30
rust off and here you've seen we've uh we've loaded up a few of the spots that were a little uh
0:37
uh sticky that means uh the rust was a little thicker there so you have to hit the spots two
0:44
or three times and i think this is probably the third time on this rust here so these are the
0:50
little remnant spots and we actually dosed these up with navel jelly last night and Mark is now scraping them off. It's probably about 12 or 14 hours later
1:03
and it turns black the navel jelly or dark gray and it looks really horrible but that will all wash off really nice and clean as you watch
1:14
So Mark is just taking a putty knife and giving it a light scrape there
1:18
and the black spots are where there's real sticky rust and we'll have to dose a few of those spots up again
1:26
You'll see that. So he just continues scraping and it's very easy work
1:32
and there's no skill set involved here at all. It's just a job you have to do
1:38
And it's not on the whole body. It's only in certain spots where the rust took a better hold
1:43
most of the lighter surface rust on this is was very easy to take off now someone pointed out that
1:54
they brought an old Ford grill in today a 37 Ford pickup truck grill and he's watched my videos and
2:01
he says well can I use navel jelly on this grill well the grill was really horrible and
2:07
And it didn't have the Cadillac had what I'd called severe humidity rust syndrome, meaning that it wasn't exposed to the rain or salt from the road or anything
2:23
It was all it was in the garage, but the garage door was open a little bit so the humidity could come in
2:30
And even if the garage door was closed, the humidity level would still change inside that garage
2:35
but it's a totally different story with a car outside in this 37 Ford truck drill that this guy Steve brought over today to let me look at he wants to take my class and he wanted to fix the grill And the whole bottom was like rusted away
2:50
And I said, well, we can reproduce that bottom by making a Bondo representation of the shape
2:57
And then we'll make flexible shape patterns. But then I really looked at the grill and it had been painted over
3:03
And it had been outside for, you know, 70 years or more. And there was severe rust pitting on it
3:09
and someone had some paint on most of it, and you don't know what's underneath that paint
3:15
It could have been painted right over the rust. And it has really delicate little grill tines that are very simply bent grill tines
3:26
You'd have to make a little hammer for them in order to make them
3:30
And it was all steel, probably 19 gauge, 40,000ths thick. and I'm looking at it and I said you know it's almost crazy to try to de-rust these and I said
3:43
if you're actually de-rusting these grill tines the best way would probably be to sandblast it
3:49
there was no point no problem about the sand being encapsulated or you know trapped anywhere
3:56
and it'd come out later and you're not going to bend up those grill tines and the sandblasting
4:01
would be more effective than maybe rust 9-11 or navel jelly certainly but more more so on the navel
4:08
jelly would be really slow on those grill times as they were severely severely rusted and i said you
4:14
know the time you spent replacing or trying to remove all that rust on these grill times it would
4:22
be so much easier just to take and make new ones and i said this not that it wouldn't be that hard
4:30
I don't think to do that and I'd say if I if I was doing it I said you know I'd make them out of
4:35
stainless and now you have a really nice almost a chrome-like grill instead of having a painted
4:40
grill which would be a nice little feature on your truck so he kind of agreed with that he says well
4:46
how do I weld the stainless well the stainless will weld really nicely to the steel that's not
4:51
a problem or you could make a framework or whatever and and there was a surround that
4:57
goes all around and you could have a little framework and you could bolt the tines in if you
5:01
wanted you could do a custom grill uh opening but the the shell itself that was severely pitted and
5:10
it needed that whole bottom section so i said you know what it makes more sense instead of chasing
5:16
after all the potential rust underneath this paint and the rusted out bottom i said you take my class
5:22
and we just we make the whole grow shell totally so what I my point is on this is that if you got a field card that been subject to 50 years of rust you might not be able to do a navel jelly cleanup on it like we done on this caddy
5:42
The navel jelly has its limits. It will do really heavy rust, but that's asking a lot for it
5:52
So in that case there, you'd be better off dipping it. And it might take a good amount of time with the rust 911 even to dip it
6:02
But that said, it's going to be a lot better than sandblasting because if it's got heavy rust
6:09
you're going to have to really dwell on it with a sandblaster. And not only on one side, but also on the other side, which is going to be nothing but trouble
6:18
so all right so mark is uh working away here as you can see the panels are getting better and
6:25
better and now what he's got is a piece of steel wool it's a coarse piece of steel wool and we spray
6:32
on the uh phosphoric acid out of a that we get at home depot clean strip i'm sorry clean strip
6:38
spray that on and that acts like a reactivator agent because the navel jelly is essentially a
6:45
phosphoric acid in a gel form and this is in a real nice liquid form and
6:53
whatever he didn't get with the putty knife this steel will will do will clean
6:58
up that little residue now there's still probably going to be a few spots you can
7:02
see some of the little dark spots there we just wiped it with a paper towel and
7:07
those dark spots are where it's really heavier rusting but it's not really
7:12
pitted. It's just like a micro-rusting process that goes a little bit below the surface
7:20
And you have to get in there and draw that all out. Again, if you were sandblasting that
7:26
you would have to dwell on those spots a long time to get all of that cleaned up. And that's
7:32
where the heat buildup comes and where the warping happens and get into all kinds of trouble
7:39
now you can see with this phosphoric acid on it I mentioned in one of the videos how cool it is that
7:45
you uh it's similar to like if you're power hammering you put oil on the panel and that
7:52
allows you to see a really nice shiny surface to see any flaws in your in your in your panel work
7:59
and this phosphoric acid lays down really nice and it actually leaves a little protective coating
8:08
on there so it won rust and it works really good to it discolors the metal a little it gives it that dark gray so if you want to use a file or a sanding block or something to find any
8:23
highs and lows similar to if you use in a m or magic mark or whatever it will
8:30
it will show up really nice so this that clean strip concrete and paint cleaner I
8:39
I think it's called. Works really good. You saw those spots. They're a little dark
8:44
Now, you know, we're going to juice those up with some more navel jelly. And we'll probably have to do the, you know, the bad spots get smaller and smaller as we
8:53
go along. This really major bad spot on this hood and the rear of that front fender, those are beyond hope
9:00
And I'm going to have to replace the metal there. But, you know, that's all cleaned up pretty nice compared from the video the other day
9:09
You can see the sheet metal on this car. It's just magnificent. I mean, it's just amazing how good condition it is other than that anomaly on that hood, which was the raccoon piss problem. So that has nothing to do with the condition of the car. It was just a crazy thing that a raccoon got in there that caused the problem
9:32
So a little bit more re-dosing and the same process, but much smaller now tomorrow
9:40
And we'll have this probably about 99% done. And then there's a few spots here and there as we come
9:48
We're going to be taking the panels off and address those little spots later as we take each fender off
9:55
And that's what we do. We just pour it right out of the little 16 ounce bottle and dob it on with the brush
10:02
You want a nice, thick, heavy coat that does the best. And if you leave it overnight, it'll turn black
10:09
It does do its job in about two or three hours, too, if you want to do multiple times in one day
10:17
But that should cover this. It gives you a good idea of what you're facing if you're doing this type of rust removal
10:25
And it works really good, as you can see. But it's not the answer to really heavy outside exposure that's, you know, like 70-year rust
10:37
It will do that, but it might be really slow and turn you off
10:40
Hope you enjoyed the show. And it's Ray from ProShape-A-Workshop. And please subscribe and give us the comments
10:47
And thanks for all the support. Remember, the metal is clay
#Classic Vehicles
#Vehicle Repair & Maintenance
#Vehicle Modification & Tuning