Up next in 10

English Wheel Masterclass: Restoring Overdeveloped Panels on the Exner Studebaker
Sep 24, 2024

https://www.proshaper.com
Our Amazon Storefront: https://www.amazon.com/shop/proshaper
English Wheel Masterclass: Restoring Overdeveloped Panels on the Exner Studebaker
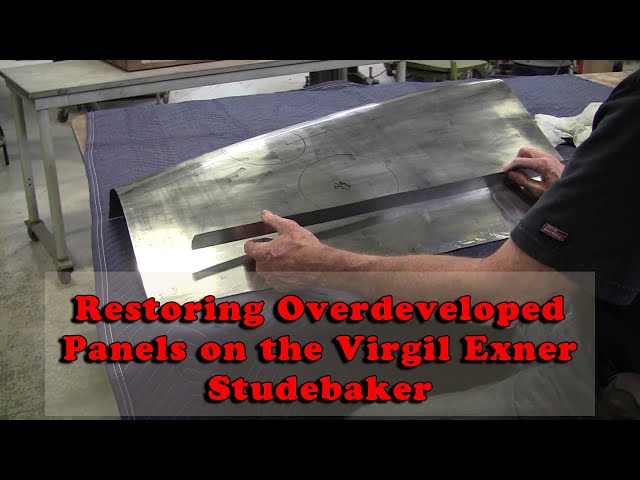
Join us for a masterclass in metal shaping as Wray takes you through the process of correcting overdeveloped panels on the iconic Studebaker Future Car, designed by the legendary Virgil Exner. After teaching students the fundamentals of panel-making, Wray demonstrates how to use the English wheel to address common mistakes, such as overdevelopment, and brings the panels back to perfection. Whether you're a seasoned metalworker or just starting out, this video is packed with valuable insights and hands-on techniques to help you master the art of car restoration.
Email: [email protected]
Website: https://www.proshaper.com
Facebook: https://www.facebook.com/ProShaper/
Instagram: https://www.instagram.com/proshaper/
Twitter: https://twitter.com/ProshaperM
Linkedin: https://www.linkedin.com/company/pros...
Show More Show Less View Video Transcript
0:00
hi it's Ray from Pro shaper Workshop in
0:02
Charlton Massachusetts tonight we're
0:03
going to do a little video on this 1948
0:07
stud Baker Future Card designed by
0:09
Virgil exner now he did one rendering of
0:13
this in pastels on a piece of sandpaper
0:16
and this is in the Henry Ford Museum
0:18
right now like five years ago we wire
0:22
formed from that picture at first I had
0:24
to do fullscale drawings of my drawing
0:27
board in the back and then using those
0:30
scale drawings we made this wire form
0:32
and the whole object of this vehicle in
0:35
quotes was to use it as a teaching
0:39
vehicle to my students at the time I
0:43
really didn't trust my students to use
0:45
aluminum aluminum is a lot more than uh
0:47
steel when you buy it so uh I prefer
0:51
aluminum but I use 20 gauge steel which
0:53
is easy to work with and we made almost
0:57
the entire skin of this with 20 gauge
1:00
steel with I don't know probably about
1:02
five or six different classes and some
1:05
of the panels were were not perfect and
1:07
I had other classes remake the panels So
1:11
I says you know it really needs to be in
1:13
aluminum so I started to have students
1:16
do panels in aluminum these panels here
1:20
and that's what we're going to focus on
1:21
tonight is just this panel here what has
1:24
happened now is this been has been on
1:26
hold I'm not teaching the classes
1:28
anymore and I'm trying to think of what
1:30
I'm going to do with this project and
1:32
several others that I have so I got a
1:35
phone call and I got invited to a
1:37
prestigious concour and there won't be
1:40
until next summer and uh they said we
1:44
don't care if it's a driving running
1:46
driving car but we' we'd love to feature
1:49
it in our in our show and if you could
1:52
bring it all you know together as weld
1:55
it together maybe on a dummy chassis or
1:57
something uh but I think I can probably
1:59
do more than that who knows I might be
2:00
able to get a little bit of help uh from
2:02
local students and stuff I'm going to
2:06
tune up all the panels that are on here
2:08
they all need edging they need trimming
2:11
and some of them got uh have some um
2:15
problems and this one here I thought
2:17
would be a really good one uh and this
2:19
was a problem that was always uh present
2:22
when you worked with the students is
2:24
that they didn't know when they went a
2:29
little too too much so this is supposed
2:31
to have a little compound here uh and a
2:35
little bit this way and a little bit
2:37
that way and it would be uh just to fill
2:40
the panel out and when you have a little
2:42
compound like that it makes a a much
2:44
better looking panel it's like a door
2:46
skin it need needs a little compound
2:49
this P this actual door skin here would
2:52
would have be just a a kind of a curve
2:54
and it gets some of its strength from
2:56
the curve a simple curve but adding a
2:58
little compound to to it was would not
3:00
be a sin and probably do that it might
3:03
only be a little bit more than a 16th of
3:05
an in in 16th of an inch of compound
3:08
this might have as much as a eighth of
3:10
an inch of compound but uh see right
3:14
here you've got a hollow that means the
3:16
edges are up higher than the center and
3:20
then you have what right here that's
3:23
probably the worst you have an inch and
3:25
a quarter of rock right there so how do
3:28
you fix that that that's the question do
3:30
you throw this panel away or do you save
3:35
that panel and this was the problem I
3:37
had with uh just about every student one
3:40
of the skill sets that they didn't
3:42
quickly adapt was when when was a panel
3:45
good enough they couldn't feel or see or
3:49
had difficulties with seeing
3:52
overdevelopment and underdevelopment so
3:54
you have to arrive at that Goldilocks
3:56
point where it's fully developed and you
3:59
have to be able to see that and feel
4:02
that and you have the light to tell you
4:05
what to do you have your hands to tell
4:06
you what to do you have your eyeballs to
4:08
tell you what to do I us just tell all
4:11
my classes there's four ways to do every
4:14
human task so we can attack this with a
4:19
uh a torch and heat shrink all that
4:23
stuff down and you can get a pretty good
4:25
result and that's the thing those four
4:26
ways will all yield uh result else that
4:30
will be S acceptable two of the methods
4:34
will probably yield a little bit better
4:36
quality uh success on the effort like we
4:40
have the torch we could use we could use
4:43
one of my shrinking discs and um I have
4:47
the stainless steel shrinking discs
4:49
which work really good on aluminum the
4:51
problem is they they do Gall so you have
4:54
to use a lot of magic marker on aluminum
4:57
and it'll still scratch and you'll have
4:59
to sand it out well this car is not
5:01
going to be a bare aluminum car it'll be
5:03
painted so you could sand those out and
5:06
they're not that deep but it's annoying
5:08
but we've got a new shrinking disc that
5:10
we'll be selling soon hopefully um that
5:14
won't scratch aluminum that that will be
5:16
coming out on my website sometime soon
5:19
and then also if you had an echoed
5:21
machine echoed machines have a pie dye
5:26
that will shrink internally so you could
5:29
put it in cold machine uh it's probably
5:32
at least 5 grand for one of those uh
5:35
internal shrink dyes and it's great for
5:38
just this the die is made for exactly
5:41
for this situation so you need a echo
5:44
machine which could cost anywhere from a
5:47
minimum of 30,000 to
5:49
$150,000 with tooling on it so that's
5:52
not going to be the solution for most
5:54
people but there are people out there
5:55
that have those eold machines and uh
5:59
they probably have that dye and they
6:00
could get out of this fix really quick
6:02
if you had that
6:04
echoed uh Dy specialized dye um another
6:08
way to do it is to stretch the outside
6:13
edges and you would have to stretch them
6:16
quite a bit and what happens there is as
6:20
you stretch them that will make this
6:22
hollow out again so if we put that
6:25
straight edge again here um this curve
6:32
should have a little compound in it it
6:34
because this is a real strong compound
6:37
curve right here uh we'll check the
6:39
wires we'll take this off and see see
6:41
what the wires uh say as far as how much
6:44
curve is there but
6:47
um this has an excessive amount you can
6:50
see that it's way out there so we might
6:52
have to use a combination we can do that
6:55
too we can use uh heat and we can
6:57
stretch the edges so uh that's what
7:00
we're going to do uh make a video
7:02
showing how to se save this panel so we
7:06
don't have to make it over again and
7:08
we'll find out how long it takes it uh
7:11
I'd guess probably 3 hours at least
7:14
maybe to save this
7:16
panel so we'll take this one off
7:20
here and this one this one wants to come
7:23
on we'll have to put those on the bench
7:26
now we'll take this off and let's just
7:28
look at what the wire say
7:33
and I don't have this straight edge
7:35
isn't long enough but look at that
7:37
that's dead straight between here and
7:40
then there's a little tuck in because
7:43
you're uh coming down to a tapering to a
7:47
narrow rear where the tail light will be
7:50
it it does have a little compound right
7:53
here so there's there's your rock that
7:55
you want to have here
7:58
so one of the things that you have to be
8:01
concerned with is when you're making one
8:03
of these panels you have to clamp it up
8:06
really tight to find out where you are
8:09
in in relationship to the wires uh and
8:12
that's what the the nice thing about the
8:14
wire form is you can actually see really
8:17
closely uh where where you are as far as
8:20
development uh goes so if you've got it
8:23
clamped up you have to clamp it in the
8:25
exact same spot every time otherwise you
8:28
get a different reading
8:30
so I didn't follow uh really closely how
8:33
they U made that
8:36
mistake but um that's what I'm going to
8:39
do is I'm am going to wheel the edges
8:43
the edges will what will happen to the
8:45
edges as you wheel them you'll put more
8:48
uh metal into the edges or more linear
8:50
distance in the edges and the edges will
8:52
stop to go into a wave like that once
8:56
you see that wave form this is when
8:58
you're working on it on the wheel then
9:01
what you do is you work in board from
9:04
where that wave is and you let that wave
9:07
settle down and what that does is it
9:10
opens up the surface area of the
9:13
material so you create the wave the
9:16
metal opens up like this and then um
9:20
it's goes into the wave and then you
9:22
bring the the the work into here which
9:25
seems
9:26
counterintuitive but that actually
9:28
brings the the stretch material into
9:30
here which relieves the OV development
9:33
over in here we got to clean the panel
9:36
all up I'm going to scotchbrite the
9:37
panel I'm going to Mark where the radius
9:40
is I might take it out of arrangement uh
9:43
before I work it but I'll scotchbrite it
9:46
so I can see where I'm at as far as
9:48
every time I roll over with the wheel
9:51
the scotchbrite will leave a dull
9:53
surface but then the wheel will polish
9:55
the surface back up again so we'll bring
9:57
it on the bench we'll Scotch br it and
9:59
clean it up we have the high spot right
10:03
here you can see that I what I always do
10:07
is I'll I'll Center it like a seesaw
10:09
here it's a high by about at least maybe
10:13
5/8 of an inch right in here we'll
10:16
Circle
10:17
that there's where the bad spot is and
10:21
we'll do analysis with
10:23
the all right so we got a low spot here
10:27
that needs to be developed this this
10:29
might be
10:31
okay and we got a low spot over here
10:34
which means this Edge is stretched a
10:35
little bit but there's a little bit of
10:38
high spot in the middle right here too
10:41
so we got a major and a minor High spot
10:43
here and we got to solve those I want to
10:47
scotchbrite this whole thing and that'll
10:49
give me a new Surface to work with I'll
10:52
be able to see where I'm tracking and
10:53
everything so we're just going to give
10:55
it a light Scotch braid and that'll
10:58
clean off all the accumulated dust this
11:00
panel is probably last worked on two
11:03
years ago or a year and a half ago at
11:06
least I said it was a Canadian guy and I
11:10
think it was the first panels two two
11:12
friends both Canadians well they might
11:14
have met up here and became CR here I
11:17
don't know so making this
11:20
panel um you have to
11:23
shrink up here to because you got a
11:27
strong curve going this way and then Aur
11:29
of going here so that's the the compound
11:32
so there was shrinks taken all along
11:34
here we just do a manual shrinking
11:37
technique we've got thumbnail dies but I
11:39
very rarely use them and uh his shrink
11:44
marks these are called
11:46
curtains uh there's still a little
11:48
residue of them out there in there on
11:50
the other side there's there's none and
11:52
and usually to get those cleaned up he
11:55
he probably did two or three courses of
11:57
shrinks and Then followed up with maybe
11:59
a couple over here to pump this out here
12:02
and uh that's why they're
12:04
showing
12:06
so Scotch Bri that a little bit and this
12:09
is 063 aluminum so it's got some
12:13
substance to it on the back side he
12:16
picked up a little
12:18
dirt on the bottom wheel and it's
12:21
printed the patent quite a few times in
12:24
here but it was really minor it'll all
12:26
sand out with uh probably like two 20
12:29
sandpaper so this is going to be a
12:31
painted car anyway it's not a polished
12:33
car but we will polish it after we get
12:36
it all smooth up nice we'll polish it up
12:39
and it just looks beautiful it's a good
12:41
picture to take when that's cleaned up
12:44
we'll take a paper towel just wipe that
12:46
dust off going to Mark here again this
12:50
is the minor
12:52
overdevelopment this is the
12:55
major and this is the transition where
12:58
it starts a do over here
13:00
so that's for setting the arrangement
13:08
after so what I have to
13:10
do is this is overdeveloped this is
13:13
overdeveloped what I have to do is work
13:16
all around it in order to bring the
13:19
upper the outer uh regions around the
13:22
overdeveloped regions up to its
13:25
level and um that will even that out so
13:30
we can do again a rock measurement a
13:34
straight edge is one of your best tools
13:35
you'll have you put that on
13:38
the and it's like 5/8 of an inch on
13:43
either end when you have it
13:45
scentered right there and this one is
13:48
about 38 to a quar or so we'll call it
13:52
38 we call this
13:55
5/8
13:57
and so we wheel this
14:00
out um we can do it Wheeling it all
14:04
around like this but I'm going to show
14:07
you another trick which I call taking it
14:10
out of arrangement so we'll take this
14:14
Bend
14:19
out and that make the
14:22
panel a lot flatter you can see where
14:24
that dives in like that and it Dives in
14:27
over here we can take that out more the
14:30
more we put it in the curl
14:32
Arrangement that will flatten
14:35
out so you got to muscle it a little
14:55
bit I'm just got to get that little bit
14:58
right there with without poking my eye
15:02
out do it this
15:15
way
15:16
yeah so what that does is kind of make
15:19
the panel a much flatter
15:22
panel of going this way so the advantage
15:26
of that is now you can wield that panel
15:29
out with a fairly low Crown wheel you
15:32
don't have to use a a high Crown
15:50
wheel so this is where the major culprit
15:54
is so I'm going to have to stretch a lot
15:56
right in here to relieve that that and
15:59
then I can stretch over in here and a
16:01
little bit over in here and I'll have to
16:03
do here but these three sections here
16:06
around those two overdeveloped areas and
16:09
then this one be the one one would be
16:11
the worst two three four in the order of
16:16
uh being the
16:22
culprit so as we wheel you'll be
16:26
adding length or area to that that edge
16:30
and it's the center of the wheel that
16:32
does all the work that's where the the
16:34
pressure is and it's not that much
16:36
pressure but you see what happens you
16:38
get a wave
16:39
forming and everybody gets scared to
16:42
death when they see that wave that wave
16:44
is your buddy that's what we want to see
16:48
so we'll bring that wave
16:51
up let do what happens is the the uh
16:56
amplitude of the wave gets taller and
16:59
taller
17:02
there we'll tighten it a little
17:06
bit and
17:08
then then we'll start bringing that in
17:11
this way but that's not stretching here
17:15
now well it is stretching here but it's
17:17
bringing that stretch in board so it's
17:20
going like that
17:23
so uh by stretching that edge it'll
17:26
relieve or appear to relieve cuz what
17:29
you're doing is you're bringing this up
17:31
to match this
17:33
height and as you come in the wave will
17:36
go away but if you dwell too long in
17:38
here then you reverse the operation and
17:40
you start stretching in here which is
17:42
bad so I I've got the wave almost gone
17:45
already so now I got to put the wave in
17:57
again and I couldn't do this like this
18:00
unless I had high Crown wheel if I
18:02
didn't change the arrangement
18:08
initially and that Arrangement is a
18:10
baffling thing but it's it's a real
18:12
simple mundane rule that you have to
18:15
follow if you're really going to master
18:17
this craft of shaping sheet metal
18:20
there's a lot of really accomplished
18:21
Shapers that don't do that they probably
18:23
don't even know it exists I don't
18:26
know but um a lot of Shapers do a
18:29
different technique where they
18:34
carefully put shape into the panel in an
18:37
incremental manner accurately measuring
18:41
how you how much you're putting in and
18:43
and that's a very good way of doing it
18:46
um it's just that that and I do that too
18:51
but it beginners are going to make
18:53
mistakes and the question is how do you
18:55
fix the mistakes even a master can make
18:58
mist mistakes and you got to know how to
19:01
make those mistakes go
19:08
away now we could have took this torch
19:11
and shrunk that down and we still might
19:13
do that I don't know we'll see what kind
19:15
of results we get after just a few
19:17
minutes here we've got I don't know
19:19
probably 10 minutes into this now we'll
19:22
probably go to a 15 20 minutes and see
19:26
what kind of results we get
19:30
it might be a combination of stretching
19:32
the edge and shrinking the the over
19:35
developed area with the
19:37
torch and then I have a new shrinking
19:39
disc I can use as well it's a new
19:41
technique shrinking disc it was actually
19:44
one of my students that developed it and
19:46
he gave it to me he says uh try that out
19:50
and it works really sweet so we're going
19:53
to be making them and selling them
20:05
this panel is going to be trimmed a
20:07
bunch on the edges and stuff
20:20
still so I'm looking for where the low
20:22
spots are I developed the edge and I got
20:25
to bring the stretch in board up to my
20:30
overdeveloped
20:31
areas that's what I'm
20:33
doing now I'll do this Edge a little bit
20:36
right here I don't have to go too much
20:39
with this one but a little bit will
20:42
help I'm going to go one more run on
20:44
this one too
21:18
see another thing you do when you wheel
21:20
is that it's not intuitive NE
21:22
necessarily is that you lift and push
21:26
down quite a bit like this this is going
21:30
like this and I don't want to go like
21:31
that so I'll lift up on it a little bit
21:34
cuz I can make that uh as much as a flat
21:37
plane as I I possibly can it helps
21:40
Wheeling
21:48
out and you see where I scotch brighted
21:50
and now the wheel is polishing up the
21:54
panel I can watch where my tracking is
21:57
there's a scotch bright Reveals All the
22:01
tracks now I'll go this
22:04
way stretch this Edge a little
22:11
bit put bit over
22:22
here I got to be careful that I don't
22:25
stretch this Center region out too much
22:27
so I only have to do a little bit on
22:28
that so now I'm going to go back
22:31
to this top Edge I'm going to give it a
22:36
little little more stretch
22:48
there so there's
22:51
that
22:53
wave this the the sheet metal has
22:55
nowhere to go but to wave and the more
22:58
it's stretches the higher the the wave
23:00
will be then you get that
23:03
wave and then you come in board with
23:06
it and the wave will go
23:08
away so you got to learn that technique
23:11
it's a real common technique there a
23:16
little dirt there or something let me
23:17
see what the hell is that let me get a
23:20
little pick and check it might be the
23:21
gloves are coming a pot on
23:25
me they got some little black marks on
23:28
me I'm going to get uh a pick and see if
23:30
I can pick that stuff
23:32
out looks like the I don't know little
23:35
fign material it could be those gloves I
23:37
didn't notice it before but it might
23:39
have been there I tell you the truth I
23:42
didn't really look really
23:44
close I don't know if you can pick it up
23:46
with the camera there's a little bit of
23:48
just a little spot here
23:59
all
24:01
right give that a go I'll try it without
24:04
the gloves just in
24:08
case it's always important to have your
24:10
edges pretty good actually these edges
24:12
got some bugs on them so they should be
24:14
sanded but I'll be careful it's when
24:17
your hand slips on it you can get
24:19
yourself
24:23
cut now I say I got the wave I got to
24:25
bring that wave in and get rid of that
24:27
wave
24:29
but remember you got to watch The Wave
24:31
really
24:32
closely and as soon as that wave goes
24:35
away which is pretty much gone
24:39
now then you're going to start
24:42
stretching so you have to go back and
24:45
create another
24:52
wave got another wave
24:55
going it's a good one
24:58
it's like surfing you worked the
25:03
wave it's one thing I've never done I've
25:05
never
25:07
surfed I guess not in this lifetime
25:21
anyways still pretty prominent right
25:23
there it needs a bunch I think because
25:26
one of the wires are there I think but
25:28
uh I think we're going to have to use
25:29
the torch as well on
25:37
it all right so now let's take a we'll
25:41
put it up to the riseon view we see what
25:43
we got
25:45
here we put it up to the Horizon View
25:49
don't know if you can see it but there's
25:51
actually looks like a little low right
25:53
in here but uh I think I might leave
25:57
that right no yeah I Pro well I'll give
26:01
it a few passes through
26:03
there listen this up and
26:13
out then we get a little low over in
26:15
that corner
26:21
too this bottom skirts pretty flat but
26:25
not totally flat because we're always
26:27
going to leave a little little bit of
26:28
crown in
26:47
it I should have taken a measurement
26:49
with the we took the uh the Seesaw
26:52
measurement the high and how much the
26:55
Seesaw would have a gap on either either
26:58
end of it we took that measurement when
27:00
the panel was in arrangement I should
27:03
have took the same measurement with the
27:04
panel out of arrangement and we could
27:06
probably gauge how much we've done if I
27:10
had a flexible shape pattern of this
27:12
panel the way it's supposed to be the
27:15
flexible shap pad would tell me exactly
27:17
where I'm at cuz the flexible shape pad
27:20
doesn't care what the arrangement
27:23
is yeah
27:28
now you're going to see a lot of other
27:30
shape is using the term form and
27:34
shape and I abandon that years ago
27:37
because when you look it up in the
27:39
dictionary form has described as shape
27:43
when you look at up uh shape has
27:46
described as form so when you try and
27:49
express an idea it's pretty hard when
27:51
there Anonymous so and then um I I
27:55
mentioned this before in other videos
27:57
they read a Jeweler's
27:59
book
28:01
and the Jewelers use the term form and
28:04
shape as well but they use them exactly
28:08
opposite the way that metal Shapers have
28:10
been using them so I use the term area
28:14
an
28:16
arrangement and the arrangement is the
28:19
bending that you do to make it look like
28:22
the panel that you
28:24
want and the area is
28:28
how much you have to shrink and stretch
28:30
it to make it look like what you want
28:33
now a lot of
28:34
Shapers will
28:37
shape both the area and Arrangement
28:40
simultaneously they wield the panel the
28:43
way it's going to look like as a
28:45
finished
28:46
product but as I will prove with this
28:49
panel you don't have to do it that way
28:52
there's four ways to make anything in
28:56
the human experience at least four four
28:58
ways sometimes eight ways
29:01
but they'll all do the
29:04
job the problem happens
29:07
when one group of Shapers say I'm our
29:11
way is better than the other you can
29:12
learn from all the techniques this stuff
29:14
is 5,000 years old and nobody's uh
29:19
really added a whole lot to it it's been
29:22
it's all out there you can add a little
29:24
infimal amount to when you process of
29:28
trying to master the craft but uh you
29:32
know what I'm doing here a jeweler might
29:34
have done in Egypt 4,000 years ago so
29:39
it's an old old craft one of the oldest
29:42
human crafts is working with sheet
29:44
Metals mostly gold and silver and
29:50
copper
29:55
and but that's looking pretty good now
29:58
of course it doesn't look anything this
30:00
is the opposite panel it doesn't look
30:01
anything like that but we know our Bend
30:04
is supposed to start here I put that
30:06
bend line in so now we're going to set
30:09
the arrangement this is the what I call
30:11
the working arrangement and now we're
30:13
going to send it set it into its
30:16
finished Arrangement which is a little
30:19
persuasion that's
30:23
all now it might fight us a little bit
30:25
because I might have taken out some of
30:27
the value that I really
30:29
needed we're going to find
30:32
out so you can do it this way this is
30:35
your full chrum and this is your lever
30:38
here so I've got leverage because the
30:39
metal is longer here and I can do it
30:42
this
30:43
way uh a couple sets of hands really
30:47
helps you can bend it over a pipe with a
30:50
big fat blanket on it that works really
30:52
good and you can also use the wheel
30:54
which I'll show you in a minute
31:00
so this side's resistant coming over so
31:03
now I'll put this in
31:07
here loosen this
31:11
up and I just pull down on it now I want
31:17
to start pulling down on it on that line
31:19
that's where it transitioned from almost
31:21
a flat down here to the curve at the top
31:29
so as I'm pulling it towards
31:31
me I use the leverage that I have over
31:34
here now the the bottom wheel is a lever
31:37
I mean is a an um a fulcrum it's an
31:41
anvil of course yes but it's a fulcrum
31:44
and this becomes the lever
32:01
all right so this is all balled up over
32:04
here this has got way too much curve
32:05
going this way so I'm going to lift up
32:07
on it and tell it oh no I don't want you
32:10
going that way now I lift up instead of
32:14
pulling
32:19
[Music]
32:21
down that's called the baring panel
32:24
don't be afraid of the baring panel
32:33
[Music]
32:46
so the panel was already made was
32:48
probably about 90%
32:51
development and it was done pretty well
32:54
especially for a first
32:56
panel but
32:59
they weren't paying
33:01
attention and they
33:03
overdeveloped and often times when a
33:06
student
33:07
overdevelops they go into frustration
33:10
mode frustration mode is not a good
33:13
thing you can uh waste a lot of time in
33:16
frustration mode if you feel like oh God
33:19
I can't understand how this is what how
33:21
am I going to fix this I'm going to
33:23
throw it away and start all over again
33:24
you got maybe five or six hour eight
33:27
hours in invested in this thing so I got
33:29
a little knot right there see that see
33:32
that's where the the curve is supposed
33:34
to start but I got a lot of curve up
33:35
here so I got to straighten that out
33:38
with the using the bottom wheel as a
33:40
fulcrum and just carefully I have very
33:43
little pressure on here back it off a
33:45
little more CU I'm I'm not interested in
33:48
stretching right now I'm interested in
33:56
arranging so now I got that knot out of
33:58
there it's not totally out of there but
34:00
most of it but I haven't been able to
34:02
get this pulled over yet I got to pull
34:04
this over some more
34:10
so tighten that up a little
34:18
bit now once the panel gets sort of in
34:21
the arrangement that's
34:23
desired um it will move easier manually
34:28
with your
34:46
hands starting to look pretty good I
34:49
still got a little humpage here I think
34:52
but it's great uh improved greatly
35:10
now this wheel I call my medium wheel I
35:13
have a
35:15
uh a wheel that will flatten this more
35:18
and that's probably what I'm going to
35:19
finish it with my finish wheel use it on
35:24
door skins and hoods and stuff
35:47
we
35:48
still it's got to come over a little
35:50
more all right so let's uh see what we
35:52
got here now
36:02
all right so we got we have some rockage
36:04
here that's easy to get out because I
36:06
can stretch that edge right
36:08
there um this is not too bad got a
36:12
little rockage here that's not bad
36:15
remember that was like 5/8 of an inch
36:17
look at that oh boy see that so we're on
36:20
the road to recovery here so we're in
36:24
good shape next I I'll try to get some
36:27
of that out I think Uh I that shouldn't
36:31
be there so we'll stretch this Edge
36:33
right here and I'll get that little puff
36:36
out right here so we're right it's
36:40
overdeveloped a little bit right there
36:43
but this was the the main demon here we
36:46
slayed that demon it's supposed to have
36:49
a little rock here because it's going
36:51
down but as you come into here look at
36:52
I'm actually low here which is good
36:55
because I can puff that up really easy
36:57
so I I took that uh overd development
36:59
right out of there now it didn't come
37:01
out of here it came it it it corrected
37:04
by bringing this all up so I don't think
37:08
I'll finish the panel tonight but I'll
37:11
get it pretty close and then we'll do
37:13
the Finish video uh next week sometime
37:16
probably so all right so I got to
37:19
stretch that edge a little bit let's
37:22
check that measurement what do we
37:24
got we got um no it's almost a half an
37:28
inch right there so let's stretch right
37:31
on that
37:39
inch this one's close to the edge this
37:41
one was way in board so that's a
37:43
trickier one this is much easier to
37:50
fix if I had a flexible shape patent I
37:53
wouldn't have made that I basically made
37:55
that mistake when I was stretching lower
37:58
here and I pumped the center up a little
38:00
bit too much
38:05
so I got my wave and now I got to come
38:09
in until the wave goes
38:15
away this is pretty flat through here so
38:30
all right so I still got a little wave
38:32
but let's see what happened
38:34
here it's going to be low now
38:37
watch yeah see it's low in there but I
38:40
got a little bit of high the wave move
38:42
from here to here so I'll do a little
38:44
bit here and a little bit
38:46
here that should fix it the thing is you
38:50
can't be intimidated by this you got to
38:52
be the boss all the time it's just
38:54
learning a few
38:56
rules and and uh you can correct any
39:00
mistake and if you're going to master it
39:03
you have to be able to correct
39:09
mistakes going to come around this side
39:17
there knock my camera guy my office guy
39:20
he follows along and keeps the action
39:23
going he does all the editing
39:33
so now what we do is we'll 45 that and
39:37
this 45 procedure is 45 to the edge
39:41
that's bringing the stretch in board a
39:43
little bit to even out all that wave
39:45
stuff that settles just about any panel
39:48
down and every panel you do as you make
39:51
the panel The Edge is going to go wild
39:53
on you and first thing everybody does is
39:55
go over and use a kick shrink and make
39:57
kick shrinker marcks in the panel and I
40:00
hate shrink mocks in a panel I like the
40:04
panel to
40:05
be absolutely perfect there's no reason
40:08
to use a kick
40:16
shrinker so let's see what that says
40:23
now all right so that's getting pretty
40:26
good now I got a little Hollow here we
40:28
got a 45 it's still there this is all
40:31
coming up nice so what I'll do now is I
40:35
can probably finish that panel with my
40:39
uh finish wheel and that has to be uh
40:42
polished and cleaned up so I think what
40:46
we've done is we've taken the curse out
40:47
of this and now what has to happen is we
40:50
got to do the uh finished uh fix
40:55
basically with the the wheel we might
40:58
use this one a little bit more but yeah
41:00
see that's that's reading really really
41:02
nice here and there's a little little
41:04
high right there but that'll come out
41:05
real easy so I think I'm going to call
41:08
it right there there'll be another video
41:11
to actually finish it all right thanks
41:14
for watching it's rayelene from Pro
41:15
shaper Workshop in Charlton
41:17
Massachusetts