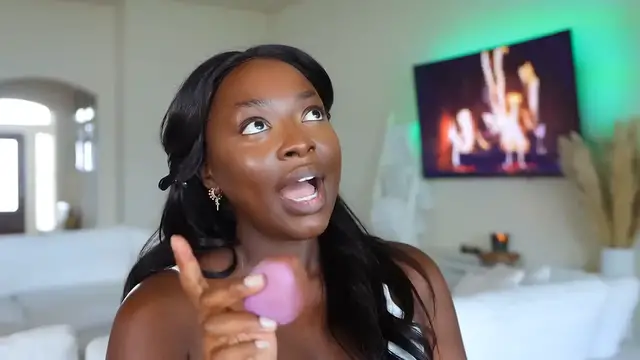
FULL FACE USING AMAZON BRUSHES STEP BY STEP DETAILED MAKEUP TUTORIAL FOR BEGINNERS MenaAdubea
Dec 13, 2023

FULL FACE USING AMAZON BRUSHES STEP BY STEP DETAILED MAKEUP TUTORIAL FOR BEGINNERS | MenaAdubea
//Creative Commons Attribution Licence video (Reuse allowed)
Show More Show Less View Video Transcript
0:00
These are loads of some kind of teen honey so like, they're kinda the same way
0:03
You know what I mean? I-K-Y-J-K-Y. I-K-Y-K-Y. I-Y-K-K. I-Y-K-Y-I-Y-K-Y-K. I-Y-K-Y-K
0:15
Ooh, oh yeah. I like this smell. Oh my god. This is Gregory's song
0:22
This is lighter than I need it to be today. Gorge, yes, hello, hi, welcome
0:30
Wow, looks really good. What up everyone, it's your friend, Itzy Felden, not the D.I.N. in this video
0:49
We are updating our Amazon Brush Makeup Look Set video, right? It did really, really well years ago
0:57
And I realize that it's been a while since I've done one, so let's do that today
1:01
Follow on IG and TikTok, because when I'm not here, I'm over there
1:05
Also, I post three videos a week, so make sure you all subscribe here. So, this is a set that I picked up
1:10
This is a different one from the one that I used in the initial video, because why not
1:14
give you another option, right? So this is Dew Care. Crafted with care, honey
1:19
It'd be these random brush sets from Kanya, but let's be honest
1:22
These are our most favorite, tied-and-true American brands. Meaning, you buy them here in the US, they're not necessarily American brands
1:29
Understand me. And even though it's from Kanya too, honey, so like, this one's my favorite. Yay
1:34
So you will find that these brushes really are good, okay? So, this is another set
1:41
I will have this and all the products that I use linked below
1:45
So the goal is to use this brush set for a full-face look that's not too bomb
1:50
And we already had a look on Bethania. I don't know. Oh my god
1:55
These feel very, very strong. Chemicals, all the things. This feels extremely strong
2:00
The minute I take it out of the flask as well. Okay, so there's that. Of course, you can wash them and let them dry, but girls, you have time
2:06
I have to get another film. So we're going to just go with it just like this. Wowzers
2:10
So let's see. This is a 32-piece makeup brush set. What's nice is that it does come with a pouch, so you can put your brushes inside here
2:17
But of course, this would only be good if your brushes are clean. If they're dirty, this is not going to work. But it's a nice addition to add into it
2:22
The thing about these brush sets, though, I'll have you know is that lots of times, there are far too many brushes in here
2:28
More than we actually need. But let's go through and I'm going to just tell you which ones I'm using
2:33
I'm not going to use all of them because we don't need 32 brushes for one makeup look, obviously
2:39
All right, let's put this hair back because we don't need this all up. Now, the goal of this video is obviously to want to take you to a very affordable brush
2:49
set for you to choose. Really, any look or any makeup look if you want to choose
2:53
But secondly, to show you that the price of the brushes do not matter
2:57
It's all about the technique, okay? Now, you know first thing you got to do is press the lips, honey
3:02
And I'm pretty sure all cosmetics are on. You know, my cosmetic task of prepping prime lips
3:07
Go ahead and grab that one. I'll link that one below because this one is no longer available
3:11
Lately, I have been pressing my face with a powder. So today I'm going to use this Laura Mercier Translucent Honey Loose Setting Powder
3:19
To set my T-zone and then do foundation. I almost reached for my existing stash
3:24
I'm gonna just cover it so that I'm not tempted to take my existing brushes
3:29
This is a number 11 brush, right? I'm sure that this brush in the kit is called the brush brush
3:34
But it's far too small, okay? You're not too. So I'm gonna just take this one because in my mind, this is a very miscellaneous brush
3:41
I took some of the product into the pack. Always pack around the excess
3:45
And now I'm going to apply this in my T-zone. So that's what I want you to take away first
3:51
Is that if the brush has a certain name on it, you'll find some brush bundles that you'll
3:56
be writing on there. Blush brush, eye brush, face powder brush, cheek, whatever, right? Yes
4:01
Sometimes it'll work for that. But many times it's like, who wrote this
4:05
Y'all don't know what you're doing, okay? And then I'll use it for something different and it works perfectly, okay
4:10
There's that. And now it's on to foundation. And you know that this brush is my fave
4:15
The shape of this brush. If you've been here for a while, then you know that I always use a flat kabuki brush
4:20
So this obviously comes in a kit. I'm going to use the Lancome Ponce Eagle Ultra Wear foundation
4:27
I wear 555 JC, and I just took three pumps of that
4:33
And I'm just flat kabuki. Now you see what I'm doing. I like to spread it out because it's far too narrow
4:38
Let's get this to open up a little bit. I love using a flat kabuki
4:42
If you saw my video where I tested applying foundation with a brush and a sponge
4:48
a flat kabuki brush, then you'll know why. And it's because it allows for me to get the most color payoff
4:55
Because I don't want to be sheared out. It's a full coverage foundation. If you want to shear down your foundation, then using a beauty sponge is the way to go
5:04
I like full coverage. I want to see the full coverage. So I do not use a sponge
5:09
Now when I'm using a balm like the KVV Vegan Balm, oh yeah, you're flying because it's a balm
5:16
So it gets picked up a lot easier on the spine and it looks so pretty
5:20
It does not shear it out much because the product is so concentrated
5:24
So that's the only time where I'll use a sponge. Now let me just tell you about this brush right here
5:29
Normally these flat kabuki brushes are a lot more dense. This one isn't that dense because look, it's able to bend tremendously
5:36
So there are some kabuki brushes that are really, really stiff. When you do this, it's not going to bend like that
5:41
And then there's some like this that obviously are deeper. It won't bend. Are they both going to work? Yes
5:46
Which one's going to absorb the most product? This one is, okay. But the other benefit is that this comes in a kit
5:53
So if you're trying to get something affordable, which is the whole point of this video
5:58
then this is going to be an affordable option for you because you get, what did I say? 32 brushes or whatever it is for the price
6:04
Which I can't figure right now. But again, it'll be below. But it'll be very, very affordable. Okay
6:08
And now onto the forehead, going between my brows and pouncing. You know that I do not like to go to the hairline per se
6:14
I'm going to pounce it onto the face and then take the remainder of the product onto the hairline or around the jawline
6:22
I do have microblading, but I like to create a different brow when I do my makeup
6:26
And that is what I'm going to do. So I am going to put this foundation on the end of my brow because again
6:32
this is what I like to do. Everyone should do what they want to do. Okay
6:37
This is what I want to do. So going over the brow with excess product, not just a lot of the product
6:42
Because one, I don't want any more demarcation. Two, I don't want to take it onto the brow, for instance, except just on the sides
6:50
So let me take some more and do that. Because a little bit of this is going to cancel out the end of the brow
6:54
We're going to do the whole contour and the highlight and all of that. Taking more product now to focus on the middle of my face
7:00
Because I'm using my nose. Don't be getting a lot of coverage. I don't know what that's about. Because of the shape of it
7:05
Near my chin, of course. This is now the excess product that is on the brush that I am pouncing onto my chin
7:12
I'm not going to go directly from my wrist or from my hand to my chin
7:16
Because if I do that, then I'm putting way more product along the jawline
7:19
than I actually want to be there. I want it to be faded. I want it to be blended in the whole line
7:24
So here we go. Looking real good. Masking my body. No foundation on the eyelids because you are going to do eyeshadow
7:30
And I don't want any complications, you know what I mean? I have not used LA Girl Pore Conceal in a long time
7:36
Let's use her today, okay? Right in the back of my hand. So let's go ahead and do that
7:41
Anyhow, make a mess. You know how these, you settle it and when you squeeze it, it be looking like oil
7:45
You are going to use a makeup sponge. These are on Amazon. I'll link again everything below
7:49
This is already damp. If you don't have clarity on the whole dampening of the beauty sponge
7:55
make sure you watch my video that I did specifically on that. Where I showed you the right and wrong way
8:02
Now this is the color coffee. I haven't used this in ages. This is mad light
8:06
But we're here and we are going to make this work. Wowzers. This is lighter than I use these days
8:12
You've been here for a while and you know, this is mad light. This ain't what I've been using, honey
8:15
Okay, other side. Now as you see, we are blending it little by little
8:20
Starting in the middle of the under eye area and then making our way for the inner part
8:25
Heading down the side of the nose because I like to highlight the side of my nose
8:30
Now I'm going up towards the outer part of the eye and then toward the hairline
8:34
Not making it all the way to the hairline because what do you not want
8:39
Lines of demarcation. So just really blending it in a light manner into that area
8:46
Turning it around to then further blend it out to avoid what
8:51
Lines of demarcation. Then looking up, of course, you need to switch your eyes a bit on the side of the nose
8:57
Going on the side of the inner eye because that does make a difference
9:01
Light in there. Getting it to be nice and highlighted. Oh yeah
9:06
Oh baby. This is lighter than I need it to be today
9:11
We are now highlighting the chin under the cheek. Okay, this is leftover product because no need to add because this is already wicked light
9:23
You know what I'm saying? You don't need to highlight under the cheek if you don't want to
9:28
I would consider that to be an advanced touch. You know, if you're beginning, that might be a lot for you
9:35
Okay, I'm looking down now and I pinched this and I'm going right in the middle of my nose
9:41
Normally, I would take the wand of the concealer and draw it in these areas but because
9:49
whenever I use the Elegant Pro, I always put it on the back of my hand
9:53
So because I did that, this is what we're doing. But normally, I would take the wand and go down the nose or whatever
9:57
You get it. You get it. You get it. Okay. If you know, you know. I like it. I like it. The eyelashes are pulling at my forehead
10:03
God, oh my, I'm seeing stars. Now, it's time to contour. What do you want to use today
10:08
I don't want a bronzer. I do want a contour. Oh yeah. I'm blinded by the lights
10:13
I do not belong to you. Have you tried this? Comment and let me know
10:19
This is a bronzer that is definitely looking like a contour. I used this once before and I forgot how it looked
10:25
We're going to do it again, okay? For this season, I am going to use this sponge because again, like I told you
10:30
balms, creams like this do really well with the spine, okay? Back of the spine
10:35
I'm going to start right here. Now, Vivian, Julie, I'm going to push this wig back to get this right, right, whatever
10:43
Oh my gosh. I'm pinching it to get right in the area where I need it and then letting it go in this area
10:52
because I do want it to spread out more on the cheek within a blend, but I do need it
10:56
to be really concentrated up here toward the hairline. Getting some more product
11:00
Getting it really in the hairline here, okay? I'm in a good grip today and I'm very excited because usually I use the combs and dig it
11:10
into my hair, but I recognize that that does break off my hair, so the wig grip makes me
11:14
feel happier, more free. I'm free. I'll feel my way. I'll come for me
11:22
That's really, really high for me today at 10 AM. Getting more product to go around the hairline
11:30
Okay, now that we have more sun, this is looking warm. It is looking warm
11:35
It was getting more contoured. What I like is that it is cool
11:39
It's not so red, okay? So what I like is that it's not too good
11:43
All right, so now I'm going to further define my nose and I normally take a brush like this
11:49
that is fluffy, but also narrow. So think about your nose and just, oh, it could work
11:56
It's smaller than the one that I normally use, but let's go ahead and use it because I see another one that I want to use for eye shadow, so let's do that
12:02
This is my number 18 brush and I'm going to take some of the product and go real easy
12:06
with the application of it. I like to blend this into my brow
12:10
It just makes everything look so seamless. Now, this is not a beginner's step
12:15
You can totally skip this if you are worried that it's not going to come out right
12:21
Like, this is definitely advanced, so feel free to skip this part, okay
12:24
But I do like to bring it together to a point to help make the nose look elongated
12:29
So the nose contour is contouring, okay? So back of the spine, we wipe off some product
12:34
You should know we had a dark contour on here. So let's not think about it. Let's use the side and let's press on some nose
12:42
If you do this part, do that, okay? And you see how it just smooths the harsh lines and that's what we need
12:48
And then this pointy part is where you have the highlight. You can do that to just smooth any harsh lines on that side
12:55
Now, around this side, we're going to go over here to just use the harsh lines in this area
13:03
Turning it this way to keep the same product on the same side to again, just smooth harsh lines
13:10
I hope you caught that because the contour and the highlight is looking
13:15
the blend is looking a lot better. Now, the setting powder we're going to use is Fae Airset Radiant Blue Setting Powder
13:21
And this shade is translucent. I know y'all are so confused on IG
13:25
Like, which translucent one is it? It's just translucent. That's the only one that I use, that I love
13:31
This is a brand new one too. I finished the other line that was sent to me in PR
13:35
This stuff is so good. Let me show you how I blend it. So first, just hold on to the top
13:40
Okay, so point the part of the sponge, the same part that has the concealer on it
13:45
Because it's good for there to still be some product on there. It's not working well
13:49
Taking some of the product on the sponge and then I pounce it onto the back of my hand
13:54
And then under my eye. So doing the back of the hand is so that there isn't too much product on the sponge. Okay
14:02
You want the product to be there, but you don't want there to be so much that when you put it onto your face, you look crazy
14:08
So, same thing again, pouncing. And see how it just melts into the skin so seamlessly
14:14
Okay, this is a new product that I have not tried before. Haus Lab Power Sculpt Velvet Bronzer
14:20
The color is Deep Level 12. If I'm confused, I want you to comment and let me know
14:24
If you plan on using it, I don't know. All I see is this is a bronzer
14:30
Although, because it is cool, meaning it's red, it's warm, I feel like this is going to be a contour on me
14:37
Given the angle of this brush right here, I'm going to use this for my bronzer
14:40
It's a contour. You get what I'm saying though. I'm going to use this one because it'll fit right onto the sides of my face really, really well
14:47
This also could be used, however, for a blush. Because look, the angle of it
14:52
So this is a number six brush. You can decide to do what you want
14:56
The one I'm thinking of to use as a blush brush is number four
15:00
Because it is so fluffy, but it's more on the flat side. And I like to put my blush on in a flat manner
15:07
But you see how these two could really be used interchangeably? I could use it for my contour right now too
15:12
But I'm going to use the angled one. So taking some of the product on the angled side like this
15:18
Just a little bit. Angled side like this. Just a more. Here we go
15:24
And that's our blush. Ooh. Okay. Oh yeah. Oh yeah. We're out here
15:30
What do you think? Okay, I guess. Okay, Gaga. Nice and cool
15:35
Maybe even neutral. So if this had a little bit of warmth to it, it would still be really nice too
15:41
What's throwing me off is the fact that my highlight is really light
15:46
Basically, my highlight is pretty cool as well. Not warm. So because this is also cool toned, it's giving a little bit gray
15:54
Not enough warmth. Okay, not enough orange and red. Now, this guy
15:58
Don't worry because we are going to warm the face up with my face powder
16:03
Which if you're not sure what I mean by face powder. Or if you think you know what I mean by that
16:07
I'm sure you don't know what I mean by that. Less excess product on the chin
16:12
So make sure you watch my video on face powders and how I use them
16:15
I'm going to show you right now. But you're probably like, where are you going? That video will explain it to you better. Okay
16:21
Okay, so this is the Elf Cosmetics Camel Gold Highlight Foundation in the color 610C
16:26
I'm just looking at it. You see warmth. Okay, and I'm going to use the fluffiest, biggest brush in this kit
16:32
Of course, I'm fluffing it even more so because I want it to spread
16:35
Okay, this is the number two brush. That's going to give a lot of highlight. Hold on, let's tap off the excess a little bit
16:41
Starting here. Lightly punching it into position. This is a very soft, fluffy brush
16:48
This feels really, really good. And of course, I'm going to keep bronzing the face. Hello, I'm going to use my Tarte Intruder Gravitating Luminizer in the color Swamp
16:56
I wipe off excess product from the back of the sponge. Taking it onto the product which is on my hand
17:01
Putting it on the hand first does warm it up and helps me to spread
17:05
I didn't get enough, so let's do that. And of course, I was steering it out a little bit by
17:11
blending it onto my hands before putting it onto my face. Oh my gosh, I forgot I wanted to define my nose contour
17:17
So meanwhile, you know I love to do that. So same house, last product, same brush
17:22
This is number 18. And I'm just going in the same way
17:27
I am going lightly. Although you still see it. I want you to see it. Hello
17:32
But I am, I am pressing very lightly. For blush, I use this one other time and I really do like it
17:37
This is the One Side Tactic Star Cheek Popper 3D Brush Trio
17:42
And it's a fire starter. Is that also part of the name? Who knows, okay
17:45
So there's pretty, get the F out of here. Or get the F out
17:51
And then pop off, okay. I don't know what I want to do with cream today
17:55
Although I feel like I should. Finish the cream, let's do cream
17:59
But that's when the sponge be very multi-purpose, okay. That's industry. It be very multi-purpose
18:05
Squeezing it to fit right inside of here. Getting some of this cream brush onto the sponge
18:12
And bouncing. Gorge. Yes. Hello. Hi. Welcome. Wow, looks really good. And of course, you can go on top of this with the powders or just leave it
18:25
This looks good. Yes. This does dry down matte, right? Because it's not giving me shiny and I like that
18:33
Because I don't want it to be shiny right now. Wow, on the camera, I'm seeing a lot of pigments
18:38
In person, I'm seeing, I feel it gets more sheer. Let me stop while I'm at it because on the camera, it is giving, I see you
18:45
We see each other, okay. So that is really pretty. I didn't need to use the brush
18:49
But had I used one of the poly brushes, I would have certainly used the number four for this
18:54
FYI, if you do grab this, this is a great brush for blush like I told you
18:58
Just pounce it right up in here, honey. And then there's this brush which back in the day used to be popular
19:04
I never used it. I didn't like it. I tried it one time. I didn't like it. But this, you could take into your powder highlighter product and then go above the cheekbones
19:13
But I hate it because if you're not careful, it could leave a line as opposed to like you
19:19
saw me using a liquid highlighter. And with this sponge, I was able to disperse it more widely
19:25
Okay, so that's the confusion that this type of fan brush brings
19:29
If it was thinner, I suppose you might enjoy it down the middle of the nose
19:33
But it's just too big. Okay, this brush is too oil. This brush is too big, okay
19:37
If you want a brush that is just so in here and again, it's like why is this here
19:41
Why do you have this here? But that's fine. There are a number of other brushes that have great purpose and that's what matters
19:47
With these brush sets, you're going to have some that are great. Some of those, why did you miss this
19:51
Okay, now let's do the brows and then get ready to do the eyeshadow. Alright, brows are done
20:35
Normally at this point, I would use this blush, which I know you've seen in every single
20:38
video to do this. This is from Adidas' Jif. I do have a deeper Jif on my Instagram storefront
20:43
They're all over the place. I love it. It looks all crazy right now but let me just press it and squeeze it together again
20:50
I love it because this is the brush that I'm just used to. When I first started doing makeup, this is the kind of brush I would use from MAC
20:55
I have a few of them. In this kit, we have this blush, which is the number 15
20:59
And let's make this work. So I have some product on the back of my hand. This is a Jaclyn Ho concealer and the color is Deep Neutral
21:05
I got some product. Now, I wish that this blush was bigger because I'm used to the one I just showed you being
21:11
a lot bigger. But you can still make it work. Taking product from the back of my hand, spreading it in the middle of the brow
21:18
I like to carve under the brow. I do not carve above the brow
21:22
When I interviewed to work at MAC ages ago, I used to carve underneath and above
21:29
And they told me, honey, very plainly. If you're going to carve your brows like that, you should not work here
21:35
I said, oh, praise the Lord. Okay. I had to train myself not to carve the top and I have not done it since that day
21:42
I just carved the bottom. Okay. Bringing this down. And then we're going to use the finger to blend it all out
22:02
This is actually a really good concealer for the under the brow because it is self-setting
22:09
and it looks really good on the brow. It's a smidge satin, but it looks really good
22:14
Now, because of this here habit, I am going to set this
22:19
I'm going to use this one, number 15. I'm taking some of the Laura Mercier Translucent Honey Powder
22:26
I don't want to use the radiant one from Faye because I don't want this to be radiant
22:29
You see how that fits very nicely under the brow to set it
22:33
This is a Satin True Paint Popper Matte. I normally use Tintally. Lately, I've been using Self Ultra because it's a beige
22:39
Tintally is a white with a pink base. This is more of a white with a yellow base, essentially
22:43
And I didn't blend it. Both of them did. Using my finger to apply it, because you do want it to be warmed up on the finger in order
22:50
to blend it nicely. So honestly, with the blood flowing through our fingers, it's going to be warmed up regardless
22:57
And then, it's going to blend nicely as an eyeshadow base for our eyeshadow look. Let's hop into this Huda Beauty Wild Chameleon Palette, which I never used
23:05
I've had it for a while, though. So let's see what fun lucky's gonna come up with with this palette
23:11
So now, we're on to these smaller brushes. I'm going to stick, actually, with this number 15 brush that I used to set the brow bone
23:18
We're going to go with this color first. Right here in the crease. Nice pigment
23:22
This brush shape is really good to fit right here in the crease
23:27
So press in to find the area between your brow bone and your eyeball
23:33
That's your crease area. Always packing off the excess. Now, I'm building this color up
23:37
Now, I'm going to build up these colors using the other fluffy brush that's in here. This is the number 14 brush
23:43
I'm starting off with this color right here, and then I'll make my way over to this color
23:46
Now, I'm using the 15 brush again. Back with that first color, to lift it up above this plum color that I just used to
23:57
make sure that it's still there. Like a peek-a-boo, you know? It's not a peek-a-boo at all
24:02
Here we go. Lightly. Very lightly blending this right now. Always packing off the excess
24:09
Very lightly applying that. Now, same type fluffy-ish brush. I'm going to take that darker purple that I told you about
24:17
We'll be packing it on, packing off the excess as always, right here in the corner
24:31
Alright, I want to open up the inside of the eye, since I decided to do a halo
24:35
Back with this same brush that I used to put the concealer under my brow
24:40
This is the number 16 brush. Taking the same concealer from my hand
24:44
And I really should do a cut crease, but it's going to end up being like a little baby cut
24:48
crease, you know? I feel like using this little color right here
24:52
So, let's do that. Okay, now this has become a very challenging eye look, obviously
25:07
But I'm trying to use as many brushes as I can to show you that you can do so much with these brushes, just by the price
25:13
This is the number 19 brush. And I'm going to take the same color from my crease and help it blend out these harsh lines
25:21
So, this is that first color that I put down. Trying to create a gradient here. Okay
25:27
Also going to smooth out the harsh lines. This one's high, we're going to fix it with purple, don't worry
25:31
Okay, now to the first purple. And then this same brush that we used with the darker purple
25:37
Here we go. Just lightly going over everything to blend it. Still leaving the middle there though
25:43
Can you see that? Still left it there. I hope I went in too much
25:49
I was going to say I'm going to fix this eye right here. There we go. Fixed
25:55
And actually, it looks like I'm going to be using a little bit more of this purple. I'm going to use a little bit more of this purple
25:59
I'm going to use a little bit more of this purple. And actually, it brightens it up more
26:04
So, let me do that on this side too. Alrighty, let's bring all these..
26:08
This is a long eye look, okay? Let's bring all these colors down to the bottom
26:12
And actually, this number 19 brush is going to be great to get right up underneath
26:16
So, I'll use that. Starting off with that first color, which is this one right here as a reminder
26:20
And you know I love a good inner eye highlight. So, we're going to go with this gold snake-like pattern eyeshadow color
26:24
This is the 25 brush. Taking some of this. And this is building up very nicely
26:30
What do you think? Comment and let me know. This look is coming together so nicely
26:36
So, this is a lip gloss. For the out of phase sense, I'm going to use this
26:40
I'm going to use this. And I'm going to use this. And I'm going to use this
26:46
And I'm going to use this. And I'm going to use this
26:51
And I'm going to use this. And I'm going to use this
26:55
And I'm going to use this. And I'm going to use this
26:59
And I'm going to use this. And I'm going to use this
27:03
And I'm going to use this. And I'm going to use this
27:07
And I'm going to use this. And I'm going to use this
27:11
And I'm going to use this. And I'm going to use this
27:15
And I'm going to use this. So, links down below. Style is E-20
27:21
Also links below. If you look at that. My style. I'm a proud, accomplished, great heart, light, camera, lashes
27:29
My style. Oh, wait a minute. I forgot to do eyeliner. I can't do it
27:37
I am just getting rid of myself. Hang on. Top eyeliner. The next step
27:46
I'm going to do my lashes. I'm going to do my lashes
27:50
I'm going to do my lashes. I'm going to do my lashes
27:54
I'm going to do my lashes. I'm going to do my lashes
27:58
I'm going to do my lashes. I'm going to do my lashes
28:02
I'm going to do my lashes. I'm going to do my lashes
28:06
I'm going to do my lashes. I'm going to do my lashes
28:10
I'm going to do my lashes. I'm going to do my lashes
28:14
I'm going to do my lashes. I'm going to do my lashes
28:18
I'm going to do my lashes. I'm going to do my lashes
28:22
I'm going to do my lashes. I'm going to do my lashes
28:26
I'm going to do my lashes. I'm going to do my lashes
28:30
I'm going to do my lashes. I'm going to do my lashes
28:34
I'm going to do my lashes. I'm going to do my lashes
28:38
I'm going to do my lashes. I'm going to do my lashes
28:43
I'm going to do my lashes. I'm going to do my lashes
28:47
I'm going to do my lashes. I'm going to do my lashes
28:51
I'm going to do my lashes. I'm going to do my lashes
28:55
I'm going to do my lashes. I'm going to do my lashes
28:59
I'm going to do my lashes. I'm going to do my lashes
29:03
I'm going to do my lashes. I'm going to do my lashes
29:07
I'm going to do my lashes. I'm going to do my lashes
29:11
I'm going to do my lashes. I'm going to do my lashes
29:15
I'm going to do my lashes. I'm going to do my lashes
29:19
I'm going to do my lashes. I'm going to do my lashes
29:23
I'm going to do my lashes. I'm going to do my lashes
29:27
I'm going to do my lashes. I'm going to do my lashes
29:31
I'm going to do my lashes. I'm going to do my lashes
29:35
I'm going to do my lashes. I'm going to do my lashes
29:40
I'm going to do my lashes. I'm going to do my lashes
29:44
I'm going to do my lashes. I'm going to do my lashes
29:48
I'm going to do my lashes. I'm going to do my lashes
29:52
I'm going to do my lashes. I'm going to do my lashes
29:56
I'm going to do my lashes. I'm going to do my lashes
30:00
I'm going to do my lashes. I'm going to do my lashes
30:04
I'm going to do my lashes. I'm going to do my lashes
30:08
I'm going to do my lashes. I'm going to do my lashes
30:12
I'm going to do my lashes. I'm going to do my lashes
30:16
I'm going to do my lashes. I'm going to do my lashes
30:20
I'm going to do my lashes. I'm going to do my lashes
30:24
I'm going to do my lashes. I'm going to do my lashes
30:28
I'm going to do my lashes. I'm going to do my lashes
30:32
I'm going to do my lashes. I'm going to do my lashes
30:36
I'm going to do my lashes
Online Video
Beauty & Fitness
Cosmetology & Beauty Professionals
Make-Up & Cosmetics
Clean Beauty