Up next in 10


he 18ft lb torque specs for the thermostat
seems a little high. I would double check the torque values!!!!
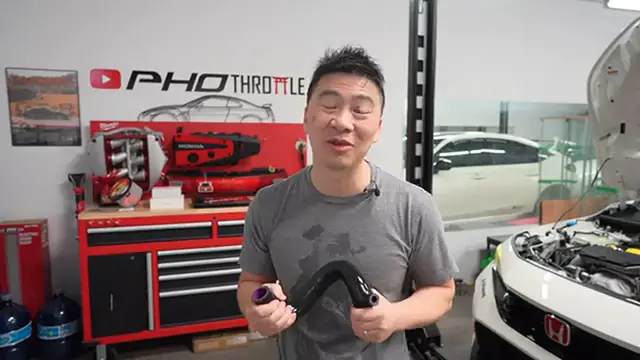
In this weeks vlog I install the Acuity Instrument's Super-Cooler, Reverse-Flow Silicone Radiator Hoses. First off they look just as cool as they preform! Now that the FL5 has been on the market for more than a year. More and more of them are being modified and tuned and heat soak/over heating is a more common issue. With the Acuity Instrument's Super-Cooler, Reverse-Flow Silicone Radiator Hoses it should help elevate some of the high temps. Acuity Instrument's Super-Cooler, Reverse-Flow Silicone Radiator Hoses are a very simple, cost effective way and relatively easy to install. Can't wait to install them on the FL5!
//Creative Commons Attribution Licence video (Reuse allowed)
Show More Show Less View Video Transcript
0:00
All right guys, welcome back to the channel
0:01
So before we start today's vlog, I want to say you guys were so close to 15,000 subscribers
0:08
That's a huge milestone, 15,000. It's been a long journey. Thank you to everybody that has been supporting me and watching the channel for all these years
0:17
It's been quite a long time and I didn't think I'd ever make it this far
0:21
There's a few times I almost threw in the towel, but I kept at it
0:25
And again, you guys, thank you for everybody that's... supported the channel from day one. There's going to be so many more things happening and I'm so
0:34
excited to share with you guys this journey that I have in my life. So thank you again for supporting
0:40
you guys. 15,000. Let's get right into today's vlog. I've done a review on them before
0:52
acuity instruments, reverse flow silicone radiator holes. These are absolutely amazing. If you want to know
0:59
more about them and what they do. Hit the card up top in the corner here. And yeah, just you guys got
1:06
to get this for the FL5 or the Integrity Type S. D.D.E.5? Yeah, DE5, I think. Let's get right into it
1:17
Let's install these today, you guys. It's go be fun. Let's go. So first things first
1:23
we're going to go ahead and remove the under tray so we can get access to the drain hole
1:27
and we can drain out all the fluids. So here's the plan
1:35
So this is the drain hole or a drain plug, the pet cock or whatever the thing is called
1:40
So what I did is I attached the rubber holes to it where the drain hole comes out
1:45
Instead of let's letting the coolant fly everywhere. Hopefully it works. Let's see if it works
1:49
If it doesn't, it doesn't, whatever. But let's go ahead and drain this out
1:53
Okay, wish me luck. Let's see if it works. Okay, I'm going to take an empty water bucket
1:57
see if I can save it come through it out so the mistake I did was I took out the
2:06
drain plug all the way and then I went up top and I was like oh man it's not coming out
2:10
anywhere so I went up top and I did I took the radiator cap off the uh cooling
2:15
reservoir and I'm like holy I can hear the water just just coming out everywhere and
2:20
it's it's all over the floor you guys so just keep that on mind when you guys do this
2:27
put the drain plug in, loosen it just a little bit, and then undo the radar, uh, the overflow
2:33
uh, radiator cap because it'll, it'll come spewing it out of there. Like, I don't know, it's dumb
2:39
of me, but yeah, because at first I'm like, how come it's not coming out? It's just slowly
2:44
slowly draining out. And, uh, yeah, that's what happened. So don't make the same mistake as I did
2:50
All right, so the next step I'm going to do is I'm going to go ahead and unplug the temp sensor and then take the actual sensor out itself. And then we're going to go ahead
2:57
and replace it with Acuity Plug that the supplied us here. And this is 17 mil
3:03
It's kind of nice that they even tell you it's a 17 mil rate on it. So let's go ahead and do that right now
3:09
Like that. Pretty simple. Get that aside. And then you're going to get ahead my 17 mil
3:20
It was very tight. The Acuity Instruments, they supply us with the O-ring here
3:25
So make sure that when we unplug that, or take that out the sensor out, the old ring from the OEM comes with it so it's not double
3:32
double O-ring in in there. That would be a problem. Put a rag there just in case. Hopefully you guys
3:38
can see. Probably water's going to come flying out here. There we go. And the old ring is right there
3:44
Yeah, make sure. The QDies are awesome. They're awesome, you guys. They put the torque specs and everything on
3:50
there and the size of the nut or the bolt. You know how they'd be scrambling around looking for torque specs and
3:55
stuff that's this I think everybody should be doing that okay so I'm gonna go
4:00
ahead and torque this down according to acuity nine foot pounds that's not a whole
4:06
lot okay so this next step is only applies to the FL5 and the Integer type S it the temp sensor relocation bong that will go into the tube here So this trick I learned from the boys over at AHC the YouTube channel
4:28
They work on a lot of Honda's inaccurus. But I would have just put it in there and trying to tighten it up and it would have moved everywhere
4:35
So thank you to those guys for showing us this trick here. So what we're going to do put in the vice grip
4:40
I'm going to tighten it down so it doesn't move. You're going to put your temp sensor down here
4:44
And again, this is a 17 mil, this is a, no, this is a 24 mil, this is a 17 mil, and put it in, make
4:52
sure the O rings there. And then you're gonna take your torque wrench and again, nine foot pounds
5:04
Not a whole lot. Okay, I took the rubber off. No one likes rubbers anyways, you guys. We're all dog in it right now. Use condoms, you guys. Oh man, now this thing moves
5:30
Seriously? All right. Done. That's it. Thank you to those guys over at AHC. A little bit of more
5:44
here but there we go it works okay now let's go put it on the tube okay so next we're
5:52
gonna basically move this onto this hose here you're gonna get the supplied worm clamp
5:56
or what these things are called you're gonna put it on but keep in mind that you need
6:01
access to this if you ever need to like move that sensor around put it to where you can
6:06
actually access it in the future so what I did was I put a little bit of���
6:10
on it just so that goes in a little easier loop is always good
6:14
and because it should be tight. Okay, there we go and then we're gonna get our seven mill
6:28
And you're gonna tighten this down. Again, keep in mind the orientation of where it's gonna be
6:33
So this is gonna be the top according to the QD. So I'm gonna, let me just put it facing up like this for now
6:41
And we go ahead and tighten it down. All right. So now that it's finished draining, I'm going to go ahead and tighten the drain plug back up
6:48
Nice and snug. I'm going to go ahead and remove everything else. So here's the game plan
6:52
So what I'm going to do is I'm going to do everything up top here. I'm going to take out all the clips or the hose clamps from up top
6:59
And while we're at it, I'm going to go ahead and change out the thermostat to a spoon thermostat
7:03
It should lower the or it should open 10 degrees lower. So you should keep the engine a little cooler
7:11
So that should help again. at spirited driving. So yeah, that's the game plan to have less big of a mess
7:19
I'm gonna do everything on the top first because all the coolant should have been on the
7:22
bottom of the radiator. So that should eliminate a lot of a big mess. So this is the top one first
7:29
According to acuity instruments instructions, you're supposed to take off this pipe here
7:33
just so that you can have access to the clip on the top here. But I can see that I can get access
7:39
to it pretty pretty easy. So I'm not going to go ahead and do that when I skip that
7:43
stage there so let's let's start with this one first there we go that's off let's
7:51
see if I can reach in here I think you can get them off Amazon these holes
7:56
clamps up for tight spaces and they have this like an adapter that goes in there
8:00
clamps onto it and locks in so you don't have to worry about these ones but there we go we got it off and go ahead and pull this hose off here hopefully
8:09
there's no coolant everywhere let's break this loose So sometimes these are stuck on there pretty good
8:15
So just instead of using a set of a flathead, just damaging everything
8:20
Let's see. Break that loose. Oh yeah, she's on there pretty good
8:35
There lubricant when you need it eh Ah there you go A little bit
8:49
There go. Give it a twisting motion. Oh man, the struggle, eh? Who? Who
9:01
Nothing comes easy in life. Oh, one second guys. There we go
9:11
Okay, so up next we're gonna go ahead and take off the thermostat, which is 310 mils
9:22
Okay, so now we're gonna go and lift up the car and then remove the holes from the bottom and it should just come right out
9:31
I'm gonna go ahead and remove the clamp here and hopefully it comes off pretty easy
9:40
there we go okay that's the easy part and I'm gonna go ahead and pull this off right back guys
9:45
alright no shit of a lot you guys that was quite a struggle bleeding hands got it out it's
9:50
when it's sealed up it's sealed up really good man the struggle is real guys so yeah so now
9:57
I'm gonna go ahead and move on we're gonna put the thermostat in and there's
10:01
is the factory OEM one looks identical to the spoon or spoon looks identical to the OEM but
10:06
that's pretty much what it is. So let's go ahead and put that in and put the 10 mills back in
10:11
and then finish up with the install. So I'm thinking the bottom one is going to be the hardest one
10:16
I'm going to put the top one in first just so that it doesn't move around on me. All right
10:21
so then you're going to torque these down to 18 foot pounds. All right, so I want to go ahead
10:27
and install this one first. I believe it goes like this. I opted to use the factory clamps instead of the supplied by acuity
10:42
Okay, that should be it. I'm going to go ahead and opt on moving this one back first so that it's out of the way
10:52
And of course, no good. Well, at least now we know, can't do it
11:00
You have to use the acuity ones that they supplied. Okay, so next we're going to put the longer holes in here
11:07
We're just going to snake it all the way down. And the orientation that the QED says is labels are facing up
11:18
Okay, there you go. Just going to leave it a little loose right now. And then we're going to go in and connect the bottom
11:24
All right, so we're almost done for the clamp. I'm going to have the clamp facing out this way
11:28
That way you can just have access to it. And then I'm gonna push it in here
11:32
So last but not least, we're gonna go ahead and un- well
11:36
when we unplug the sensor here, we just got unclip it from the fan shroud
11:41
and make sure we plug it into the relocation kit. Right up top, right there
11:47
All right guys, so I'm pretty much almost all done. I just gotta put the coolant back in
11:51
So some of you guys are probably wondering why I switched out the factory thermostat
11:55
with the spoon one. So the spoon one opens up at 68 and all the one
11:59
and all the way fully open at 71 and then compared to the factory one it starts to
12:06
open up at 78 and fully open at 90 so there's a big difference almost like a
12:11
10 degree difference so this should alleviate any of the overheating or keep the
12:17
engine cooler quicker and to pair it up with the acuity instruments silicone
12:23
hoses should keep the FL5 a lot cooler quicker All right, so we're pretty much almost done the install
12:40
All the coolants back in, airs all purges out of the system
12:44
But there's one more thing I want to do that under the engine bay once while we're here
12:49
It's the motor mount bolts. I got some beautiful ones from Chasing J All right so the motor mount kit from Chasing Jays only comes with these two bolts and this nut here It doesn include the battery or these two bolts for the other side of the bracket
13:04
So I asked them to include these two and send me one of those nuts too
13:08
or those screw. So it'll be all complete. So here's the plan because it's the motor mount
13:13
I don't want anything just to go out of alignment or whatever. I'm gonna do one bolt at a time
13:17
So I'm gonna start with this one, which is a 19 or, yeah, 19, so I don't know
13:23
I can get to this one. Okay, we have a problem. The deep socket is actually not deep enough. Good thing I checked
13:28
So we might have to borrow one from Honda from one of our Honda friends. No good
13:36
So I didn't have the right Allen key or Allen socket. So the biggest Allen socket I had was at number 10. And what we need was number 12. So keep that in mind. A lot of us don't have this size. So I had the bore from my good buddy either. Thank you
13:53
Jay for always coming through. So the torque for this one is 74 foot pounds
14:00
Okay, we're gonna repeat that for the next one. All right, thank you Jay for coming through again
14:05
This is the socket that I needed. It's a number 19. It's pretty deep
14:14
Where's like a charm? Okay, so they supply us with the titanium washer and of course the nut for this one
14:21
And again, this one is 74 foot pounds. So chasing Jays nut is a 21
14:28
Factory is 19. So I got lucky this one actually fits. The two bracket bolts here are a 14
14:40
41 foot pounds. Last but not least, the ground nut or bolt here
14:46
And this is a number five, Alan. That's it. These are all done
14:52
Looks absolutely amazing. Chasing J's. Can't say enough. So again, this comes with the kit
15:01
And then I had to order that one separately by itself or added to the order and these two
15:06
So just message them and then they'll send you the right kit
15:11
Because if you just order it, it'll just come with these two bolts and that one nut
15:16
Nice. All right, guys. So that's it for this week's log. I want to say big thanks to Acuity Instruments for sending us all the parts
15:26
well, all the holes is for the radiator. Fantastic fitment, you guys
15:30
That's one thing that I always rave about is the fitment is always spot on and it makes
15:35
the job so much easier. So the only thing, the only hiccup that we had for the coolant was when we refilled it
15:41
it had a big airlock in it and for some reason the temperatures wasn't coming down
15:46
So I didn't capture it on camera. after turning on their fans and letting it circulate
15:51
We got the airlock out of there. Just by giving it a few revs, even though a lot of people say online
15:56
don't turn the fans on, but this time we turn it on. Call a friend, said, turn it on, let it cycle
16:02
And then, yeah, because when we turn on the fan, it just did not blow any warm or hot air
16:07
Anyways, the engine's already up to temp. There's no hot air. I knew something was wrong
16:11
So came a call, he said, you know, just turn on all your fans, let it cycle
16:16
and then, yeah, worked like a charm. Airlock was out of there, cooling was all good now
16:20
So car is fine and I think that's pretty much it. Chasing Jays is making the interior or the engine bay look even nicer
16:28
And I know a lot of you guys have been asking me to do a driving vlog for the tune that I have that I've been installed
16:38
So that will be coming up next. Hopefully we get it on the Dino 2 to see what the off the shelf map tune actually produces
16:47
So look forward to that vlog. Don't forget to smash the subscribe button you guys and turn on the notifications to you guys don't miss anything
16:53
And that's it for me today. See you guys in the next week's vlog. See ya
Autos & Vehicles
Vehicle Repair & Maintenance
Custom & Performance Vehicles
Vehicle Modification & Tuning