Up next in 10

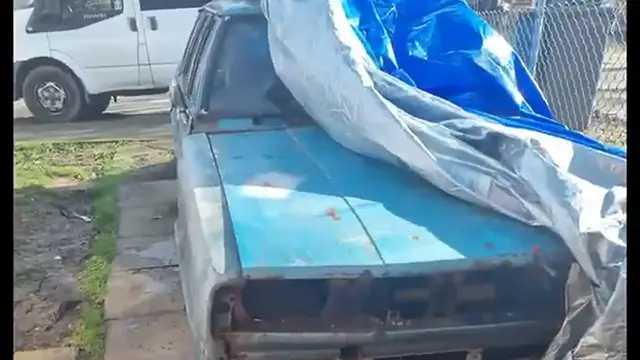
Cortina Mk4 Ghia 2.3 V6 Restoration || Chassis Rail in & Foot Well Repair P5 (P37)
Jul 3, 2024

In today's video you will watch me finish putting the chassis rail in & repair the foot well on my Cortina Mk4 Ghia estate.
Please like and subscribe if you want to support me and my cortina (courtney).
Thank you for watching and supporting me and courtney the cortina!
//Creative Commons Attribution Licence video (Reuse allowed)
Show More Show Less View Video Transcript
0:00
���
0:31
Another day. Today is Wednesday and this is what I'm working on at the minute
0:40
I've got tacked in. I've now slipped down the side so that I can push the metal in and it lines up with the thing there
0:52
That's butt welded. I'm repairing where this hole was. It's going up to the gearbox tunnel here
1:01
Because that goes to there and then this bit here will run over the top of this with the lip going down
1:09
And as it gets to about here it will run over a little bit here. And then obviously the whole lip that comes from here will go over the top all the way across here
1:19
And then this will come over the top of it slightly. So that's where I'm at
1:27
So when I weld that, if you look at the gap there when I push it in, it lines up with the floor edge
1:34
So that's butt welding where the metal just runs straight across instead of welding this metal on top of this
1:40
Which leaves it raised. I don't like that. I like it to look like one uniform piece
1:46
And obviously when it's welded and grinded it's technically just one piece again isn't it
1:51
Because that's what I love about butt welding. People always say it's not safe but it's the best welding you can do because the metal becomes all one
2:04
So that's how far I've cut and I'll be back with you when I've welded this in
2:09
I've now cut all that out. All that's been cut out ready for me to do the new
2:15
So that's today's job. Just to get all that filled in. Starting with this corner
2:24
This is the bit I cut out. Which is very very horrible. It looks like someone's welded metal upon metal
2:32
And it's heavier than it's supposed to be. So that's what I cut out
2:37
And then I'm going to start making a new one. I've got to build a lip coming down, round, meeting the floor edge
2:52
I'll get back to you when I've started that. Right, that's what I've come up with so far
3:00
Just to make the rounded edge for the sill. So that the sill can come through there, weld to all of this
3:08
And then obviously I'll snip off the excess afterwards. That's what I've come up with
3:15
To get that nice perfect round shape. That's what I've done so far
3:22
I'm just trying to make sure it's all lined up properly so that the sill can run from here to here
3:27
I'm just trying to make sure it's all lined up properly so that the sill can run from here on the inside and up into here
3:35
And weld back onto here where it used to be. Because this bit here is part of the top of the sill
3:41
So it's going to go round, up, over here, back to it's original sill, down
3:48
And then be welded from the outside here. Then I've just got to make that bit of floor edge
3:54
I've got to then trim it, butt weld that into there. Trim that, butt weld that into there
4:03
And that's it. And then I've just got a big piece to put in there then
4:09
Awesome. I'm going to fix this bit first, so that that joins up with this and then the lip comes over
4:17
And then I'll just put one big piece in right up to this, if I can
4:24
Yeah, I should be able to. Yeah, definitely. So, that's it. I'll be back with you when I've done more
4:33
See you in a minute. Hi everyone. This is what I've been doing on Thursday
4:41
Building all that in there. It's all got to be grinded. I've only just finished welding it
4:51
I've put in a new inner bit here, which the sill will go to
5:00
It will come through here, up to here, around this and then I'll trim the excess off
5:06
So that's for there. And then obviously the inner sill will go from here, from there, all the way up to there
5:19
Through here and onto the lip here. So it will be like that
5:24
And then welded to this where it's supposed to be. Because this is still the remaining of the inner sill bit here
5:30
So, that I'll be finishing off tomorrow. Now, I've just repaired it here
5:40
This bit comes over and that lip there joins with this lip
5:45
And then when I make this bit, I'm going to be running it down and it's going to have the lip coming over here
5:51
And then it will be spot welded across here and then some seam sealer straight across
5:57
Seam sealer all up in here, around in here, when it's all in
6:02
But this is the floor so far. I've still got some grinding and cleaning to do
6:10
That's the other plug for there. That's it so far. Now the only thing I'm not sure about is that this access panel in there, like that
6:24
Do I bother with that or shall I just put a sheet of metal up there and just leave it
6:29
I think it's an access seat and maintain this. But it would have to go in like that and over the top
6:37
I'd have to make a new one. We'll see. Give me your advice on it
6:43
That's it. Now, if I grab this little clip here, the whole car moves with it so it's solid
7:02
Not going nowhere. Seam welded. I really have just got to grind them flat and comes through the other side as well on the bottom
7:15
Yeah, all the way across. So that'll be grinded and then that'll look like one piece
7:25
Now I have come to the conclusion after fixing this floor. I mean I can even move the car by this now
7:33
All this used to move. Right, my conclusion. I've replaced this. I've replaced that
7:45
That. Made the inner sill. Made here. The only original part of the floor that's left
7:55
Is this bit going up there. This bit. And this bit. I've pretty much made the whole floor
8:09
Now, where this runs up. This here. I've made the extension bit here
8:19
So, what I did was I put the metal on top of something like that
8:23
What I did was I put the metal on top of something like this and I knocked it through. Gave it a shape
8:29
I'm not sure if one of those will go there. But I ain't bothering. So, that's it so far
8:37
But if I do put that back there. I'm going to have to trim this out a little bit
8:43
For that to sit down here like that. So, we'll see. Might be good to have it original there
8:50
So. What else? So, tomorrow I'm doing that bit. And that. There's only a little bit left now
9:02
That'll be all one piece. And then as I said, it'll come down
9:07
Down here. Over this. And up to about here. And then it'll be swap welded
9:15
Like it's supposed to be. Along with where this runs. And you've got like a lip here
9:21
It goes over. It'll run. Up with that. And then you'll have a lip coming up to here
9:29
Swap weld it all the way across. Then seam sew the lip. And then that'll be like factory
9:35
This floor. Is solid. Because the bit of metal that I put in
9:42
Goes onto the chassis rail. This bit goes to the chassis rail. This bit is on the chassis rail
9:48
This is connected. To that that's on the chassis rail. This is connected to this
9:53
That's also on the chassis rail. And this is. I can move the whole car
9:59
I can't believe how strong it's gone now. All the chassis rails in
10:07
So both chassis rails are in. So this car is now. Fully intact
10:13
Not in half no more. Completely solid. Alright. Let's see if I can
10:22
Get on this floor. And jump up and down on it. Solid
10:34
And that is all I've got left. Just that bit and that bit. And then obviously that great big hole at the back
10:41
I'm not too worried about that now. That'll probably take me about two, three days to do
10:49
That'll be in the next video. Obviously in the next video I'll also show you the finished product of that
10:56
So, yep. I'll see you in the next one. Please like and subscribe
11:02
Thank you for watching and supporting me
Autos & Vehicles
Classic Vehicles
Vehicle Repair & Maintenance
Manufacturing
Vehicle Modification & Tuning