Up next in 10


I have been watching the makeup YouTube world for years now and only recently have I learnt some of the best tips and tricks from the pro's! YouTube is saturated with Instagram style makeup, and I have fallen down that rabbit hole but now I am wanting a more fresh look and these tips have really helped me. Let me know you're best makeup tips below 💕🤗
//Creative Commons Attribution Licence video (Reuse allowed)
Show More Show Less View Video Transcript
0:00
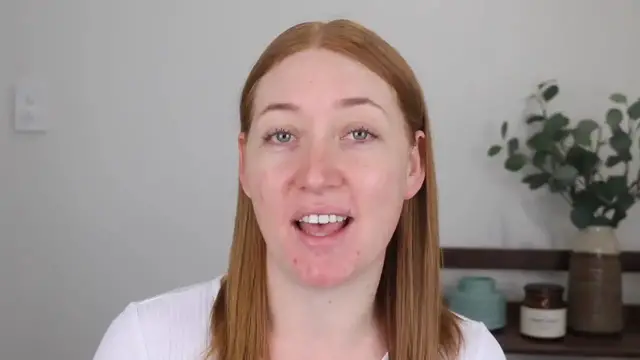
Hey guys, welcome back to my channel and if you're new here, my name is Tanika and in today's video
0:05
I am going to be showing you some of the tips and tricks that I have learned from the YouTube pros as
0:11
well as some professional makeup artists. I've been using these techniques in my routine for a while now
0:16
so I really wanted to share them with you. On one side of my face I'll be showing you the new tips and tricks and the other side will be how I used to do it
0:24
If you enjoyed this video while you're watching, make sure you give it a thumbs up and let's get into it
0:29
Alright, let's bring it in, shall we? Get a good look at this skin
0:33
Oh, as you can see, I've got some big pips going on today
0:39
So I'm just going to go ahead and cover them up. I do have a full video going over how I cover my redness and my breakouts
0:46
so I'll link that down below if you want to go watch it. Alright, so starting out with some tips and tricks from Robert Welsh
0:53
everybody's new favorite makeup artist and YouTuber. Isn't he just the best? He is just so knowledgeable and all his information is super useful. He's cute, he's funny
1:05
I just love watching him. So the first tip I learned from Robert is to not take your foundation up so high under your eyes
1:12
All you're doing is putting a necessary product in that really delicate area and it's just going to look at more..
1:20
look at... what did I just say? And it's just going to make it look more cakey and crepey. So on my right side
1:30
I'm going to take the foundation right up under my eyes and blend it all the way there
1:36
Whereas on this side, I'm only going to bring it to about here. So now that the foundation is applied, you can see that this side looks rather
1:58
scary under the eyes, but the concealer is going to be more than enough to cover that. Whereas on this side
2:03
I've just got an extra layer of product that I don't necessarily need. Now when it comes to concealer
2:08
I'm sure we've all heard of Robert's ways. I don't follow it exactly, but what I have learned from this is that less is more
2:16
I don't need to go in with this big triangle of concealer because it's just too much
2:23
Especially for me, I do have quite a lot of fine lines under my eyes
2:27
so too much product just settles into them and can make it look very crepey and it makes me look much older
2:34
So I'll be going in with my L'Oreal Infallible More Than Concealer. I bloody love this stuff
2:40
It's super full coverage. On the right side, I'm going to go in with a nice big triangle and
2:47
on the left side, I'm just going to pop a bit in the inner corner and on the outside
2:52
So if I bring you in, you can see that there is great coverage on both sides
3:11
but on this side, the concealer has already started to settle into my fine lines
3:17
Applying too much concealer can also affect your makeup look if you are using it to highlight your face
3:24
For me, because I'm so fair, I don't really use concealer to highlight
3:27
I just like to use a concealer that matches my skin tone or is maybe just a shade lighter
3:32
but I don't go too excessive because can you really get much lighter than this
3:36
But if you do use concealer to highlight, just keep that in mind because if you're bringing it all the way down here as opposed to just a little bit under your eyes
3:45
it is going to affect the way it looks on your face and what points are highlighted
3:51
Next is something you hear Robert just absolutely hates and it's baking under the eyes
3:58
Now, I have never really been a huge baker under the eyes. I have tried it out a few times and I find it always leaves my under eyes looking heavy
4:09
dry and really crepey. So I do like to apply powder though with a sponge and just lightly dip it into the loose powder and set under my eyes
4:19
If I don't go in too heavy with the powder, it still looks really nice
4:24
But I also saw a video of Sir John doing Desi Perkins makeup and he is Beyonce's makeup artist and he went in
4:32
with this L'Oreal Infallible Powder. It's called the Magic Loose Powder and he used a small brush and just lightly applied it under the eyes and
4:42
it looked absolutely flawless. I had previously tried this powder out as well with the whole sponge technique
4:50
I was just talking about and it was far too heavy. It just did not look good, even though I went in with a lighter hand. So when I changed it up and used the brush
5:00
Wow, what a difference, seriously. So today I'm going to use that technique, but I am going to be using my model's prefer
5:08
Mineral Finishing Veil Powder. So on this side, I'm going to heavily apply the powder under the eyes
5:14
whereas on this side, I'm going to lightly apply it with a brush. So if I were to apply it with my sponge, I would literally take that much product
5:23
But what I'm going to do for the purpose of kind of baking and applying too much powder
5:28
is really pack my sponge full of powder and pack it under there
5:36
Oh, it looks so bad already. Oh my word. Oh my word
5:43
Then I've just got this brush here by Focalor. It comes in a brush set, it doesn't have a name on it
5:49
but it's just a pointed powder brush. I've got a tiny bit of product
5:54
I'm just going to dust that under the eyes. I also like to get around the side of my eye here
6:02
because when I smile, I get a lot of lines and my makeup can settle into there
6:07
So I make sure I set that area. All right, let's zoom it in again and get a load of this
6:15
Look how crepey that under eye is compared to the rest of my face
6:22
Look how crepey that under eye is compared to this one. As I said, I do have fine lines, so they're not going to be perfectly smooth
6:31
But the difference between this eye, where I packed on the powder, and this eye, come on
6:39
Next for the face, I've been watching some videos from Jamie Genevieve and Alexandra Annell
6:45
I'm pretty sure her name is, about bronzer and blush placement. And seeing how the placement of these products can actually make a difference
6:53
to the structure of my face. So for bronzer, I have been paying more attention to keeping it on
7:01
this upper part of my cheek, instead of just bringing it all the way down. And also making
7:08
sure that the brush I'm using isn't too big. The brushes I've always used for bronzer have
7:13
been on the smaller side. I really love this one here, it's the 126 Luxe Cheek Finish by Zoeva
7:21
And then lately I've been using this large angled contour brush by Sigma. So here is how big they
7:29
are for size reference. And so listening to their techniques, what they're recommending is not using
7:36
brushes that are around about this big. So if I just compare, you can see here that these two
7:44
brushes are going to give you a much more precise placement of your product, as opposed to these
7:51
So using a big brush like this, and just carelessly putting bronzer on, you're not really
7:58
placing the bronzer where the sun is naturally going to hit your face. Whereas using a smaller
8:04
brush like this, you can get right in that cheekbone and just carefully place it along the
8:10
hairline and under the jaw as well, if you like to put it there. I'm going to go in with my Fenty
8:17
Sunstalker Bronzer in the shade Indah Sun. Beautiful shade for super fair skin. So on the right side
8:24
I've got some bronzer on my blush and I'm just going to carelessly dust that all around
8:34
Then on the left side, I'm going to be using my angled brush and I'm going to start by placing this
8:41
in the contours of my cheeks and lightly brushing back and forth. If I were contouring, I would be
8:47
using a much cooler tone product to really get that shadow, but using a bronzer and placing it
8:54
directly in the cheekbone there, is still going to give you a lot of shape to the face without
9:00
having to use a specific contouring product. I'm then going to lightly bring that up the side of my
9:07
face and onto my hairline, just to add a bit more warmth. And then with whatever's left on the brush
9:14
I'm just going to apply that directly to my jaw, just for a little bit of shape and warmth. So as
9:23
you can see on this side, I've just got a little bit of bronzer here. It's placed very strategically
9:28
It does make my cheekbone look quite structured, whereas on the right side, you can just see this
9:34
bronze everywhere. I know this pimple is very distracting as well, so it doesn't help, but it
9:41
doesn't look structured at all and it just kind of looks splotchy and messy. Same kind of deal for
9:47
blush. It does come down to the brushes that you are using. So these two here are some of my
9:53
favorites when it comes to powder blush. This is the 132 Luxe Powder Finish by Zoeva, and then this
10:02
one here is the 127 Luxe Sheer Cheek, and this one is cut on more of an angle. So these are both quite
10:11
tiny brushes. I'll just compare them to the bronzer ones for reference. And then this brush here is by
10:19
Real Techniques. As you can see, it's a lot bigger, so you're going to get a messier placement of your
10:25
brush. Blush! And then when it comes to placement, I usually put my blush just all on the apples of my
10:32
cheek and then bring it up. But lately, I've been trying to just put it on this higher part of my
10:38
cheekbone, and I find that it gives my cheeks more of a lifted look, and it's just not as messy as
10:47
when I have the blush all over the apples of my cheeks. Now, blush is one of my favorite products
10:52
I feel as though it really brings that life back to my really fair skin, so I do rely on it heavily
10:59
So I've just been playing with the placements and seeing what I like most. So let me just show you
11:05
what it can look like in those two different positions. I'm going to be using the Maybelline
11:10
Fit Me Blush in the shade Coral. Another little tip actually, if you've got breakouts, try not to
11:16
use a blush that has a shimmer or a sheen to it, because all it does is accentuate those breakouts
11:22
Try to use a matte blush if you do have a lot of breakouts on your cheeks. This blush does have a
11:27
sheen to it, so you'll see that these breakouts here are going to look quite up in your business
11:34
So with the big brush, I'm just going to pop that all over the cheeks, bring it right onto the apples
11:41
and then on the other side, I'm going to be using the Zoeva 132 brush and not bringing
11:46
it down as low onto the apples of my cheeks. So the difference here, this side looks much more lifted, whereas I feel like this side
11:58
looks rather dragged down and heavy due to the blush placement. Another area that I have been
12:04
experimenting with are the brows. So I'm sure you've seen everyone do soap brows for a long
12:10
time now. It was never really a trend I got on board with, but I recently saw Alexandra do a
12:15
video about brows and hers are quite sparse as well, and just seeing how beautiful they looked
12:22
I was like, all right, I need to try this. Because as you can see, I don't have a lot going on. They
12:28
are tinted at the moment, so they look a lot more there than usual, but my arches are quite sparse
12:37
They're just, they need some work, okay? And usually I can go quite overboard with the pencil
12:43
or the pomade because you just like keep going and then you've got to match them and you know how
12:49
it is. But anyway, I recently purchased the Patrick Tarr Shaping Wax. Now this, you don't need
12:58
I don't need it either. Just get a bar of soap, okay? That's all we need here. If you don't have
13:04
a product like this or a bar of soap, just go in with a brow gel that has quite a strong hold to it
13:11
and pop that through your brows first before you go in with another product. So anyway, I get some
13:18
spray, spray it in, get my spoolie, rub it in, and I brush my brows up with this product. Get all the
13:31
hairs coated there so they're looking nice and hairy and bushy because that is the vibe I'm going
13:39
for. And then I use the other end of my spoolie to just flatten the brows down
13:47
And then any that are a bit too crazy, I just brush, brush them back down. Get into place there
13:55
thank you. So while I let this brow set and before I go in with any other product, I'm just going to
14:01
do my other brow how I was previously doing them. So I've got here the Maybelline Brow Ultra Slim
14:07
Pencil which I freaking love, but this is a darker colour. So this is soft brown. I'm going to brush
14:16
my brows up with the spoolie and then just fill in the brows. So I like to draw underneath first
14:26
lightly fill in the front here, and then draw the top of the brow
14:38
And as you can see, I've got quite a bit of arch to fill in there
14:45
So I've matched the pencil to the shade of my brows and as you can see, it's just very bold and dark
14:53
because I've tried to fill in a lot of area. So now on this side, I'm also going to be using a
14:58
Maybelline Brow Ultra Slim Pencil, but this is in the shade Blonde. Now this shade is a lot lighter
15:06
than my current brow, but it's going to give me a much softer finish on the front here. So I'll do
15:14
the same thing and I'll draw underneath. I'm also not going to take this all the way down my tail
15:24
because I do have a few hairs there, so I'm not going to completely fill that in with a pencil
15:30
As you can see, the front of this brow is just so much lighter and natural and it kind of has
15:36
that more ombre effect by using the lighter pencil. Next, I'm going in with this Emko Beauty
15:43
Feather Touch Brow Pen. If you want to change your brow game, you need to get yourself a brow pen
15:50
These things are freaking amazing. I know there's one by Urban Decay, MAC, Glossier has one, I just
15:58
heard Flower Beauty come out with one, so there are a few options out there. Now this shade is
16:03
darker than the pencil I used, but what it does is it just draws light little strokes that look
16:08
like real hairs. So instead of having this bold brow look, I'm going to have a nice hairy, bushy
16:15
brow look. So let me show you. So instead of filling the tail of my brow in with the pencil
16:22
I'm just going to draw a few more hair-like strokes in there. And then for the arch
16:27
I'm just going to lightly flick the pen to fill that area in. For the front of my brow
16:34
I'm just going to do a few light strokes so that it looks nice and hairy
16:43
And then again, just fill in the top of my brow with small, small strokes. So as you can see
16:49
this brow has ended up being quite dark as well, but it doesn't look as bold and threatening and
16:56
scary as this brow does. The last tip I haven't really put into practice, but I just wanted to
17:02
have a chat about it, because I noticed that Robert Welsh talks a lot about using eye primers
17:07
instead of concealers. And I have always been a concealer as an eye primer kind of gal
17:12
but he says that concealers contain oil, therefore it's going to become oily on your lid
17:19
and break up your eye makeup. So if you have any eye primers that you recommend
17:24
I would preferably like one that covers up the discoloration, which is why I like to use a
17:30
concealer, because you get that nice blank canvas. But if you have any eye primers that you recommend
17:36
that cover up the discoloration and just keep your eyeshadow lasting all day, then please leave me a
17:41
comment down below, because I would love to try it out and give that technique a try. Alright guys
17:47
well that is all for today's video. If you enjoyed watching, please give it a thumbs up as it really
17:51
supports my channel. And let me know down below if you use any of these tips and tricks, or what
17:57
else you have learned from the pros, because I would love to know for myself and test them out
18:02
If you're new to my channel, I would love it if you would take a look around and consider subscribing. You can also come follow me on Instagram. Otherwise, I hope you're all having
18:10
a fabulous day, and I'll see you in the next one. Bye
Beauty & Fitness
Cosmetology & Beauty Professionals
Face & Body Care
Make-Up & Cosmetics
Sun Care & Tanning Products