Up next in 10


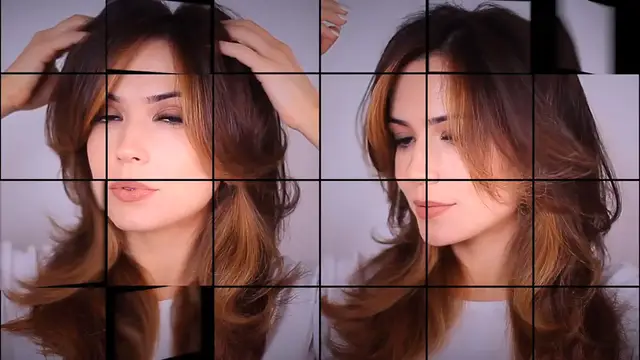
GRWM My Go To Hair & Makeup QUICK ROUTINE for Spoonies Or Beginners
//Creative Commons Attribution Licence video (Reuse allowed)
Show More Show Less View Video Transcript
0:00
For today's video, I thought that I would combine my three super quick tutorials into one video
0:06
My easy salon blowout, my two-minute eye, and my fast foundation routine
0:11
I am all about getting ready with as little effort as possible, especially because I have a chronic illness
0:17
And sometimes I want my illness to be invisible even to me when I look in the mirror
0:21
And as someone commented recently, we don't want to waste our spoons getting ready for an event that we need the spoons for
0:27
So let's get started. I would suggest starting off with your hair so that you can have it up and out of the way as you go
0:33
And all you need for this salon blowout is one or two hair scrunchies and a hair straightener
0:38
This is my favorite thing in the world. I don't know why I look so annoyed looking at it
0:42
Is this the face that I make when I love something? But anyway, I love the Luriel steamer pod
0:47
I've had it for about seven plus years, I think. It's amazing. I like to start off with air dried hair
0:52
So I washed it the night before. I let it air dry. And that way I use less heat, but also less time getting ready
0:57
Now, if you have bangs, you want to start with your bangs first. We won't be doing anything until the end
1:02
but what I want you to do is to section off your bangs and tie them off in front of your face
1:07
And it kind of looks like a little unicorn horn. It's just tied right in the middle so you can still see on either side
1:12
Now take a section behind that at the top of the head. Try to keep these sections straight to make it easier
1:19
These first few sections that you're doing are very important. So make sure you're taking your time to get them just right
1:25
So with your first section, you then want to take your straightener or flat iron, place it at the top, and roll your way all the way to the end
1:34
Now pick up that scrunchy and tie this section off. In the same way that we did with the bangs
1:39
You want to keep this quite tight at the roots right behind the section of the bangs
1:44
And remember to keep this position as you add to this. Then you want to take a section behind that and do exactly the same thing, sweeping the hair straightener over, bringing it in like a little sweep
1:55
swishing motion, curbing the edges over the face. We don't want to go away. We want to sweep
2:01
around and close to the face. Then just untie the previous section and add this and retie
2:07
Again, try to keep it tight to the front of the head. Then just take a section behind that
2:12
and repeat the same motion, sweeping it over and around. And then what do you do? You've guessed it
2:19
You're going to untie the previous section, add this section, and retie again. And you're going to do
2:23
this all around the head until you get to the side of the ears. I like to pull everything in front
2:28
of my ears forward. We're going to wait to the end to style that. I'll show you why. Now, I don't have
2:32
very thick hair. I have a very small amount of hair. So this ponytail is working quite well in the
2:37
top. But if you have a lot of hair, this is going to get heavy really quickly. So if you can't
2:41
keep adding hair to this because it's too heavy, you can just rest them at the back of your head
2:46
Just make sure the crown of the hair is in this ponytail. But I have thin hair so I can get
2:50
it all up there. I've actually never noticed my highlights from from this angle, they look pretty good considering I do it myself with like the cheapest
2:57
hairlightening products ever in the supermarket. Now that we have that main section of hair
3:03
done, we can then go to the front. I'm going to take the front tie out, that little section
3:08
for the bangs, the little uticorn horn, remember? And I'm going to do this in three steps
3:13
Step one, we're going to roll this straight down in front of our face. Step two, split the bangs
3:19
in half vertically and add the side sections into the side. that. This time the straightener is going to go up and back away from the face, creating a little
3:28
swoosh at the side. And then for the third step, we're going to half the bangs horizontally
3:34
So we have a front and a back. Take the back section. And this time we're going to bring this
3:39
down in front of the face, but flip it upwards. So the opposite of everything that we've done so far
3:45
So this time it's going down and flipping upwards to create this little kick at the end. Then pin the
3:49
sections at the side and just let it cool down. And once it's cool down, then once it's cool
3:53
down and you removed this section and the bobby pins Look at the movement You would swear that you had rollers in that you use maybe a round brush and a hair dryer So much volume so much lift but it so much easier to do this way And you can trust that once you take this out
4:10
you just pull out the bobby pins, pull out the hair scrunchy, your hair is going to look great
4:15
No worries about the little kinks that you get in your rollers sometimes, or whether or not your hair
4:20
has cooled properly. It's all working really well together. And the longer you leave this
4:24
the better it's going to be. So you can actually leave this up while you do your makeup
4:28
Now speaking of makeup, let's do a super speedy smoky eye. This literally takes two minutes per eye. It's so quick
4:36
So the first step is obviously to prime the lid. So I'm going to be using a sponge because it's so much quicker to get an even layer all over the lid
4:43
This is going to make sure that we have a even tone right from the lash line all the way up to the brows
4:49
And you can use an eye shadow primer. You can use a little bit of concealer as long as it's kind of on the drier side
4:53
And this is going to give your eyeshadow something to hold on to. Now the first brush that you're going to need is a fluffy brush. This is the E26. This is an essential brush. And you want to hold this in the bunny position. So two fingers on top, this is just going to give you the maximum control that you can have over this brush. So taking your favorite fluffy brush, you want to apply an eye show that's at least one shade lighter than your skin tone and it should be matte. You can also use a translucent powder if you prefer. You want to focus this from the crease line, blending upwards towards the brows. So keep it right at the crease line, blending upwards. What this is going to do is
5:26
help speed up our blending process later. So avoid the lid completely. Make sure it's only in the
5:31
crease and blending upwards towards the brows. Now, if you're really good at applying your midtone
5:36
or your transition shade, you can just skip the step right away, but I do find that it helps speed
5:40
up the application. Now put that fluffy brush down for a minute and pick up a pencil brush. This is
5:46
the E26 by Blank Canvas Cosmetics. It has a little tip to it. It's a little denser and smaller
5:50
I like to hold it like I'm holding a pen and pick up a darker eye shadow. So as dark as you want to
5:56
for your smoky eye. We are doing a push and glide motion working right at the lash line. Now if you're
6:02
new to makeup, aim for your lashes. Get as close to those lashes as possible. If you pretend you're
6:07
trying to hit your lashes, you're actually going to hit right above it and it's just going to
6:11
make it so much easier for you. But for people more experienced with makeup, basically you're working
6:15
this across the lash line. And you want to build this up very slowly. So go from the inner to the outer
6:21
corner of the lash line, building up as you go. The more sheer layers you apply
6:26
the deeper this will look and also the longer it will last. But if you don't have too much time, you can just go in really quickly with a lot
6:33
but just make sure you're stamping it down there so it really adheres to the lid
6:37
And you should end up with something that looks like this. Now pick up that fluffy brush again
6:42
This time we're going to be holding it like a pen with our finger on the top
6:46
We don't want too much pressure so hold it a little further down on the handle. And we're going to apply an eye shadow that's at least one shade darker than her skin tone
6:53
or you can use your bronzer, you can use your contour, it's totally up to you. Now you want to aim above the lash line, so above that line that we've already
7:01
created, and you're sweeping this over and back, and then into the crease. And you can sweep down
7:06
into the darker eyeshadow if you feel like you have too many harsh lines there and just very slowly
7:11
start to build this up. Now, I want you to focus on the lid and just into that crease to start with
7:16
and then you can very slowly start to move upwards into the crease. And you should end up with
7:21
something that looks like this, and then we're going to very slowly bring this higher and higher
7:25
but it should get sheer and shear as it reaches the eyebrows. If you bring your hand a little higher, it will actually help with your blending process
7:33
It will create this sweeping motion in a straighter line, which means we're going to get it in exactly the place that we need it
7:40
Blending this slowly upwards so it disappears as it reaches the eyebrows
7:45
We want to leave a small gap underneath the eyebrows so there are eyebrows to look lifted
7:49
Now, if you feel like you've overblended, don't worry, you can just go back in with a little bit more of that darker eye shadow
7:54
and that will just create a little bit more smokiness right of the lash line. Now if you have lashes on like me or you have eye shadow that has fallen down onto your lashes
8:02
what you can do is just take a little bit of eyeliner and just cover any of that fallout so your lashes look darker again Now you can do this with mascara but I find that it actually a little trickier to do It so much easier if you just kind of dot and coat the lashes with a little bit of liquid liner or even black eye shadow
8:18
Now with whatever's left over on the pencil brush from previous use, you can just apply this underneath the eyes to create that sultry finish
8:25
What I like to do is press it down at like a 90 degree angle and smudge this underneath the eyes
8:31
But I know that some people struggle to hold their hand in that position. So what you can do is just bring your hand nice and high and sweep this underneath the lashes
8:39
Keeping it nice and high will make sure the tip is hitting right underneath. And then finish off with mascara
8:44
And what I like to do for the lower lashes in particular is do a little tapping motion
8:49
I really like to build up my lower lashes when I do a smoky eye just to bring the entire look together
8:53
So on the lower lashes, we're just doing this little tapping motion. We're not pulling them through because we don't want to drag the eyes downwards
8:59
Just keep it right at the top of the lashes right before they're about to curve and go downwards
9:05
And there you go. A sultry smoky eye in just a few different steps and you can get this down to two minutes with a little bit of practice
9:11
Now you're like, okay, my hair is done, I've got this smoky eye. What should I do about my face
9:15
Because I want to get makeup on there really quickly. I'm going to tell you it's all about your hands
9:20
Now I know not everybody likes using their hands. Trust me, I'm not a big fan of it either
9:24
But sometimes it is so much quicker to do. However, if you're really against it, I do have a tutorial using one
9:29
brush which does make it so much quicker too. I'll link that below and above. I've already
9:33
applied moisturizer after I cleansed my face this morning so we're going to skip primer
9:37
and go straight to foundation. Now because we're going to be applying the foundation with our hands
9:41
we want to wash them really well but I also like to do this extra step which I hear from
9:46
people is really helping them and it's to spray your hands with some setting spray. This will
9:51
just help the makeup glide on your face a little bit easier but it also stops your hands
9:56
from absorbing too much of the foundation and we're pumping the foundation direct
9:59
onto the palms of our hands. So the palms of our hands first. I'm mixing two different
10:04
types of foundations and I'm using the exact same amount that I would use if I was applying it
10:08
with a brush. Now I have tried this with matter foundations but it doesn't work as well because it
10:13
tends to dry onto your hands. So maybe use a little extra spray if your foundation is more in the
10:18
matte side or try switching out for a more hydrating foundation if you're using this step. You want to
10:23
rub the palms of your hands together. Don't use your fingertips yet. Just rub the palms of your
10:28
hands together to mix that foundation and spread it out just on the palms. Now dip your fingers into the
10:33
palm of your hands, keeping your fingers nice and tight so that they're nice and flat and the foundation
10:38
doesn't get in between because we don't want to waste any. Now with your fingertips, you want to start at
10:43
the forehead. You want to start in your forehead and work your way down because the fingertips
10:47
tend to dry out a lot quicker. But we also need our fingertips to get in and around our hairline
10:52
get in and around our brows. And then what we can do is lean back and use the palm of our hands and
10:57
press this onto our cheeks. Now obviously you probably have your hair up. I probably should have put
11:02
my hair up, but it should feel like you're blending in an SBF. That's what's so great about this
11:07
You don't really even need to look in the mirror to see what you're doing. I have walked around my
11:13
house checking on dinner, seeing if my bread is burning in the oven and I had this kind of working
11:19
away using my hands to blend this in. Now to use every last drop that's on your hand
11:24
re-spray them and then you can start to build this up a little bit more
11:27
and blend this over your face if you need a bit more coverage or blend this down your neck
11:32
It will be a little bit more on the shearer side, so it's great for blending this down your neck
11:35
Now you do need a makeup wipe or a towel handy when you're doing this
11:39
So put that on your list when you're doing this step because you need to clean off your hands
11:43
A lot of breakouts actually occur because of our hands being full with makeup
11:47
and then we're touching other makeup products, and then that dries out, and then we tend to break out
11:51
So if you want to see a whole video on how to keep your makeup clean, I will link it above and below
11:55
I also like to remove any excess from my lips. And I do have a trick for removing any excess from your brows and your lashes or your hairline if that happens to you
12:04
Take a spoolie or a clean mascara one Wrap it with a makeup wipe and keep it kind of tight so some of the bristles almost like pop through but not fully and run this over your lashes and your brows your hairline wherever you
12:16
have excess buildup and you'd be surprised how much you manage to clean off. Sometimes that buildup
12:21
can just make our eyebrows look a little crusty so it's great to get rid of it. Then take off the
12:25
wipe and use the dry spoolie just to brush over the brows again. This is just going to make sure
12:30
they're in place for us. Now I'm pretty happy with the coverage but if you do want more coverage, you can
12:34
go in with a little bit of concealer. I like to use the concealer that's at least one shade
12:38
lighter than my skin tone to add some dimension. And the older I get, the more I work in
12:43
upwards angles, just to give my skin a little bit more lift, a little bit more brightness. And
12:48
you can use a sponge, a brush, your fingertips to blend this out. Now, if you have nails
12:53
like me and you find that blending around your eyes is too difficult because you keep poking
12:57
yourself in the eye, what you can do is bend your index finger. And this edge creates a little
13:02
padded effect, which is very similar to the pads of the tips of your fingers. It also allows you to
13:07
get right underneath the eyes. Next, I'm going to use a setting spray to set everything in place
13:12
Even if you use powder, I would still recommend using a setting spray first. I'd also recommend
13:16
fanning it dry with a piece of paper, a book, or a fan like I am doing, so that it all dries
13:22
at the same speed. You can then go in with powder if you feel like you need to, but I'm just going to
13:27
skip right to the next step. Now, for the next step, I'm going to be using the large supersized
13:32
F20. If you're not a big fan of using your hands to apply your makeup, you can use this brush to apply
13:37
everything, which really cuts down on time. So for the next three steps, we're just going to be
13:42
using this brush. We're going to roll one side, one side only, into our sculpting product
13:47
roll this onto the face, blending this into the hollow of the cheeks, blending this over the cheeks
13:52
and blending this around the hairline. Try to make sure you're keeping it to just that one side that
13:58
you've coated. Now turn the brush to the opposite side. roll this in your highlighter or any other products that you'd like. Just make sure it's the opposite
14:07
side. And I'm just sweeping the highlighter wherever I want to catch the light. And then for the final
14:11
step, we're going to apply blush using the top flat part of the brush. Now you want to leave your
14:17
blush to last because otherwise your sculpting products, your highlighters, your bronzers, whatever
14:22
you used might have a little bit of a tint of that pink or peach or purple or whatever blush that you've
14:29
decided to use. And there you go. You have your eyes done, your face. done, your hair done, you're all glam in under 30 minutes. Keep your lipstick in your hallway
14:38
in your purse, in your car, just so you can really quickly apply it. I also keep a little bag
14:43
with earrings, a ring, just by my front door so I can grab it and head out even though
14:47
I barely ever leave the house. So it's not something that I have to worry about too much. I mostly
14:51
just go downstairs to hang out with Davy. And I want to say a special thank you to everyone who has
14:56
created a safe space for me to share my illness. I did put up a short recently about my pots
15:02
flare up that happened during this filming. I wanted to share the reality of living and working
15:07
with an illness as much as I would love to have stopped and taken some time to rest. I have to pay my
15:13
bills. I have massive bills that are coming up soon for my health that I need to get more tests
15:20
done and they are very expensive. So I needed to pull myself together to finish this video
15:26
And I do love creating videos as well. Unfortunately, my illness is so unpredictable that
15:31
even if I took time, I never know how it's going to respond. I could take an hour, a day, a week
15:37
and it might never change. So it's best for me to just put on a brave face and keep going and just rest
15:44
afterwards. And I'm not alone in living like this. This is a reality for so many of us
15:50
Spoonies, as we call ourselves. And I want to thank you for letting me share, showing support
15:56
sharing your stories. You know, I always say, always be kind to yourself and be kind to others
16:01
And the reason I say that is because you never know the reality that somebody is living in
16:06
But that kindness still has to begin with you, which is why I always say it first
16:10
Be kind to yourself, my friends. And I will see you in the next one
Beauty & Fitness
Cosmetic Procedures
Cosmetology & Beauty Professionals
Face & Body Care
Make-Up & Cosmetics
Unwanted Body & Facial Hair Removal
Hair Care
Hair Loss
Beauty Services & Spas
Other