0:00
This is the chewing gum box. This will hold our circuit from part one of the
0:10
chewing gum box LED nightlight project. If you haven't seen part one for this
0:27
project I suggest that you go ahead and check out part one that way you know how to
0:33
make the circuit that we're going to be using to place in this chewing gun box
0:38
here's the LED nightlight circuit that we made in part one this is the circuit
0:43
that we are going to place inside the project box that we are going to make
0:49
here in part two I'm going to grab my ruler now and I'm going to get a
0:55
rough measurement to determine how the circuit should fit inside the box. I'm using the ruler from the bottom of the PCB to the
1:04
center of the LEDs, and I'm reading a measurement of about four and a half centimeters. Again, I'm just
1:11
trying to get a rough measurement. Here, I'm using my ruler to measure from the outside of the red LED
1:18
to the outside of the blue LED, and it looks like I'm getting a measurement of about two centimeters
1:24
Here I'm wanting to get a measurement from the left side of the PCB board to the red LED
1:31
And it looks like I'm getting a measurement of about 1.1 centimeters here
1:37
Recalling the measurements I had made, I'm going to get my permanent marker
1:44
and transfer those measurements onto the face of the chewing gum box
1:49
I'm making sure to add a little bit more to my measurement
1:54
from the bottom of the box to account for the thickness of the bottom of the box inside
2:00
because when you place the PCB board inside, you have to account for that slight thickness of the material of the box
2:24
Okay now it time to cut the hole in the box for the LEDs to fit through
2:32
I'm using these pair of scissors that I had lying around near my workstation
2:37
So please do not try this. You could get hurt and get seriously hurt
2:42
I shouldn't be doing it, but please use the proper tools to do this, such as a rotary tool or some other proper
2:48
or some other proper tool to cut the holes open in your own project box if you need to do this
3:01
Again, I'm going to say do not try this. Do not try using a knife to try to cut open the hole
3:07
Use proper tools. I'm really trying to be careful here because I don't want to stab myself with the sharp end of this
3:16
of these pair of scissors here, and I don't want to cut myself either, so I'm just trying to take my time
3:23
and I probably should get up and get the proper tool, but sometimes I get lazy, and I'm too
3:29
focused on the project, and I do stupid things. Okay, I got the whole cut open now. I'm going to
3:36
get a rasping tool from my Leatherman pocket knife. This is my most favorite knife that I have
3:43
I use it all the time and I keep it near me because there's always a use for it
3:49
I love it. But I'm going to use the rasping tool to take off some of the burrs around the cut in the hole
3:55
and make it a little smoother and much nicer for the LEDs to fit through
4:01
Okay, now I want to prepare to start cutting out a hole for the switch
4:06
What I'm going to do here is take a very rough measurement using the switch instead of the ruler
4:17
And I'll make some marks with my permanent marker, getting an idea of where and how I want the switch to fit on the side of this chewing gum box
4:36
Okay, now it's time for me to cut this hole out. Again, I'm using these pair of scissors here
4:43
They very sharp Remember do not try this You can get hurt pretty badly if you not careful Again use the proper tools
5:13
I'm going to use the rasping tool again to clean this hole up and get some of the burrs off
5:24
Okay, now I need to remove the switch from the circuit to be able to feed the wires through the box
5:32
If you remember from part one of this two-part series, that I went ahead and solder the switch onto the circuit board, that way I was
5:43
that I could test the circuit itself and make sure that the LEDs would turn on
5:49
So now I need to take them off so I can feed the wires through the hole
5:53
and then solder the switch back to the wires. But I'm getting a little ahead of myself, so I'm getting a little ahead of myself
6:12
So I'm going to go ahead and take the circuit back out because I need to put some of the hot glue onto the PCB board
6:21
That way I can secure it inside the box and it won't be flopping around all over the place and it will stay where it's supposed to be
6:31
Be sure that you're careful when you're using the hot glue gun because the hot glue gets very hot and a lot of times when you're using it and it gets on your hands and it sticks to your hands
6:42
and then it ends up burning your hands and it's not very fun when you get it that hot glue all over your hands
6:48
So just be very careful when using it Okay, let's place the circuit in the box now and stick it in there and now it'll be secure and it shouldn't go anywhere
7:03
Now I going to feed the switch wires through the hole for the switch again and then I will solder those wires to the switch
7:18
Now I just need to solder the switch back to the circuit
7:37
Okay, now that the switch is attached to the circuit again, I'm going to grab the 9-volt battery and attach it to the battery snap connector
7:46
That way I can test to see if the LED lights still come on and everything is the way that it should be
8:03
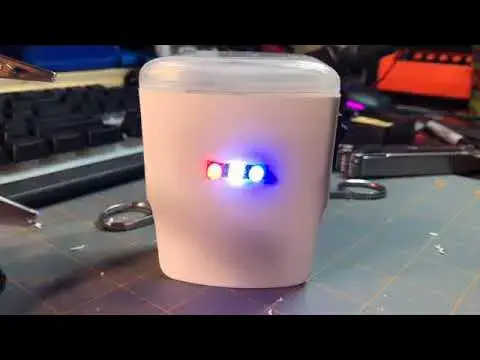
Okay, the LEDs turn on, so the switch works. I'm going to insert the switch in the hole that I made for it on the box and were that much closer to getting this project complete
8:16
Okay, everything seems to work fine. I'm just going to place the battery inside the box
8:28
Now all I got to do is put the lid back on and I'll test it out some more
8:37
Here's a look at the inside
8:56
I think we pretty much got this project complete. This was a really fun project and I'm really glad that you joined me in making it
9:17
I hope that you were able to make your own chewing gum box LED nightlight
9:21
and share it with your friends, with your family. This one's going to be for my daughter and I know she's going to enjoy it
9:29
I really appreciate you joining me and remember keep at it and stay motivated
9:34
Thank you for watching