Up next in 10


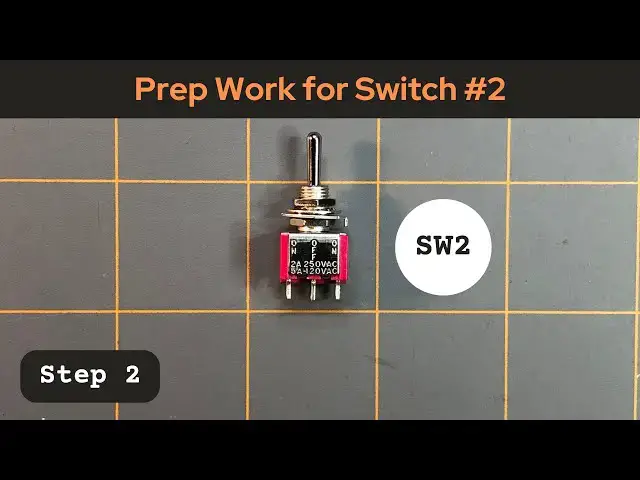
Prep Work for Switch #2 (SW2) - Step 2
Project: "The Ultimate DIY 3220-Point Breadboard"
This is a supplemental video to our page titled "The Ultimate DIY 3220-Point Breadboard".
The purpose of this video is to show how to prepare switch #2 (SW2) for The Ultimate DIY 3220-Point Breadboard project. In this video we connect wires to the terminals we need to make switch #2 work the way we need it to for this project.
The printable schematics and the entire "How-To" build for this project can be found at our website:
https://motbots.com/the-ultimate-diy-3220-point-breadboard/
Video for Our Website Page: "The Ultimate DIY 3220-Point Breadboard"
Page URL: https://motbots.com/the-ultimate-diy-3220-point-breadboard/
Description: This is a supplemental video for a post made on our website.
Website: https://motbots.com
#motbots #motivatedrobotics #learnelectronics #electronicsproject #project #breadboard #switch #toggleswitch #dpdtswitch #howto #diy
Show More Show Less View Video Transcript
0:00
Okay, we're now on step two for switch two
0:05
This time it's a little bit more involved because we're going to be doing something a little different here
0:12
If we look at this printout of the schematic for our power supply for the 3220 point breadboard project, you can see this
0:29
this on our website at mottbots.com underneath this project for this 3220 point breadboard
0:37
project but anyway if we look here we can see switch two in the schematic and step two here for
0:45
switch two we're still working with this green wire we just attached in step one for switch two
0:52
what we want to do is we want to go about halfway down the wire
1:00
and what we're going to do is we're going to cut away
1:03
about an eighth of an inch to a quarter of an inch of wire sheathing
1:07
we're going to cut it off leaving a small section of wire exposed
1:12
about the center of the wire. So the way I'm going to do that
1:17
is I'll take a project knife or a.k.a. an exacto knife. And again, like I said, we're going to remove a small section about center the way down the wire. And the reason why we want to do this is because if we look at the schematic here on switch two for terminal two
1:51
we can see that terminal two goes this way and there's a connection point here from
1:59
terminal three of switch one that connects to this wire which is this going to be this
2:07
green wire here and then the wire continues down and connects to this wire coming
2:14
from terminal five of switch two so what I want to do is say that
2:21
The green wire here, this wire coming from Terminal 2 of Switch 2, this is Switch 2
2:30
about, I'm just going to say about halfway down the wire, I want to remove a small section of the wire to expose the wire in here
2:38
so that later I can connect the wire coming from Terminal 3 of Switch 1
2:44
which I have switch one here that we set up before for Terminal 3
2:57
That's this green wire here. And I'm going to eventually connect the end of this wire to that center point of this wire
3:10
So let me... kind of guesstimate about center of the wire and I'm gonna make just as I don't want to cut all the way through I don't I'm not pressing very hard I'm just kind of making a guide cut for myself you can't see it because it's so small
3:34
and I will kind of press with my thumb
3:48
I'm putting some pressure onto the wire to kind of make a cut just through the sheathing
3:58
I don't want to cut into the wire underneath. I'm just taking my time constantly turning the wire around
4:07
I know you cannot see this at the moment. but I'm just adding pressure, taking my time, going around the wire, basically making a slit in the wire
4:26
And I think I may need a sharper blade than this. I'm going to use this one
4:34
See if that works better. I think it does. And once I'm satisfied
4:51
with this, I'll move just a little bit down the wire and I'll do the same thing
5:03
I just want to expose a little bit of the wire and then what I'll do is I'll try to cut that little section out
5:19
making sure I'm being careful not to cut myself and then I'll remove that section of sheathing
5:33
So you can see here, I'm going to spin it just a little bit
5:40
You can see here that I have a section of that wire exposed here
5:53
And as I said I want to take the wire from Terminal 3
6:09
So I need to be sure that I'm getting Terminal 3 here, referring back to this diagram here
6:24
Terminal 3 was here, and we had placed, if you remember, a ring connector on Terminal 5
6:33
So my Terminal 5 should have a ring connector, so I know this is Terminal 5
6:40
So this shorter green wire must be my wire from Terminal 3
6:48
And if I refer back to the steps for Switch 1, when we were preparing switch one on step number three
7:01
For switch one, we did cut a six inch piece of wire
7:05
and we attached it to Terminal 3 of Switch 1. So now I wanna take the six inch length of wire
7:15
for my switch one here on Terminal 3. And I wanna remove
7:23
just a little bit of the sheathing from the end of the wire, just enough to expose it, maybe a little bit more
7:38
And what I cut off, I'll make... Actually, I want to expose a little more than that
7:47
maybe about a half inch, maybe. Because what I want to do is I want to be able to wrap this end of wire around that section of wire that we split
8:12
And then we'll solder it all together. But first what I want to do is I want to take a piece of heat shrink tubing
8:21
I want to cut a section of this off because I don't need the whole thing
8:28
I'm going to cut, I don't know, about an inch or so of the heat shrink tubing
8:41
and what I want to do is I want to make a slice in this heat shrink tubing
8:47
not all the way through but I just want to slice about a third of the way down
8:54
on this side along the length of the heat shrink tubing. So I'm going to eyeball about a third of the way down
9:07
I'm just going to pierce it enough to get in. I'm not going all the way through, and I'm going to slice it, being careful
9:21
Let's try to set it down here. I'm not going all the way through
9:28
I'm just trying to slice this section open. Okay, that's all I want to do
9:37
I'm only cutting this section, about a third of the way down
9:44
I did not go all the way through to the other side, just this side, like so
9:57
And what I want to do is I want to take this piece of heat shrink tubing
10:02
and I want to place it on the green wire that's on switch
10:07
to the one that we have the exposed wire here in the middle
10:13
I wanna slip it on the wire, the non-sliced in first, so here's my end that I slid open
10:23
I'm putting the other end first, and I wanna slide it all the way down
10:28
across that gap that we made, and just slide it all the way to the other end
10:37
Now I want to take another piece of heat shrink tubing, and I want to cut or make a slice just like I did with the other piece
10:54
But I want to slice about a quarter of the way down, and I want to slice all the way through
11:01
So I'll go about a quarter of the way down. Now I'm pressing harder
11:06
making sure I'm going all the way through to the other side so that both sides have a slit through it
11:26
So now we can see that this piece of heat shrink tubing is sliced on
11:36
both sides about a quarter of the way down. And we want to take this piece of heat shrink tubing and put it on that green wire that's on
11:51
terminal three of switch one that we have already prepared previously and slide it over that wire the non in first So where I cut it is on this end
12:13
And I'm just going to move it down all the way and get it out of the way for now
12:20
Now what I want to do is I want to solder the six inch length of wire on terminal
12:29
3 of switch 1, I want to solder that wire to that section that's exposed on the green
12:40
wire on terminal 2 of switch 2. So I'm going to grab my helping hands and set it here
12:53
what I want to do is place switch one here
13:02
I think I want to put it here and then I want to take switch two
13:11
I'm going to place it here I guess actually I'll put it here
13:19
and then I'll hold the wire with this one I guess like so
13:29
So I'm taking the wire in Terminal 3 of Switch 1. I want to
13:40
wrap it around the exposed section of wire on switch 1
13:50
switch one the wire that's on or sorry the wire that's on switch to
13:58
terminal two two. I just want to make sure that I'm
14:09
wrapping it around pretty good and then I'm going to come back
14:14
and solder that together. Making sure that my two heat shrink tubes are on the wires and ready to go later
14:36
So let's see, I'm going in like this. Now I may end up melting some of the sheathing here
14:49
because it's kind of a tight fit here. But that's okay. It's going to be covered up by the heat shrink tubing
15:00
Anyhow, just need to solder it together. So now what I want to do is I want to slide
15:19
The heat shrink tubing that's on the 6 inch length of green wire on switch 1, terminal 3
15:31
the one that we cut about a quarter of the way down and cut all the way through
15:37
and I want to push that piece of tubing, the heat shrink tubing, up to the T here
15:45
and I want it to slide all the way up and a lot
15:49
over. I don't know if you can see that, but let me remove that. So I slid it all the way through. You can see that it's sticking past that T there. And I'm going to take the heat gun
16:19
And I'll heat this heat shrink tube. And I'm just going to work my way around
16:36
And I'm going to clamp the end with my fingers here. Because this heat shrink tube has that glue stuff that's inside that when it heats up
16:49
It kind of melts in there and that glue within the heat shrink tubing really adheres to everything
16:58
So I just want to be sure that I clamp the end there to try to seal off the exposed tea that we made here, the wiring and soldering
17:13
okay once that's good we can take
17:23
this other heat shrink tubing that we slid all the way down to this end
17:34
of this green wire that's attached to terminal two of switch to
17:40
where we made that slit in it about a third of the way down, but it doesn't go all the way through
17:48
And what I'll do, if I can, is I want to try
17:54
to slip it over that T there kind of like so I might need to
18:12
cut that end off a little bit. And slide
18:32
that over the T. And I'll try to rotate this so you can see
18:44
So you can see that this tube goes over the T here
18:49
And I'm pushing the tube all the way to the end of the slit that we made
18:55
So the end of the slit's going to butt up into that T
19:00
And this whole section of the tube is going to cover that T
19:05
And then later we'll come back with another tube, heat shrink tube
19:15
and we'll come from this direction to help cover it all up
19:25
So now I'm going to take the heat gun and heat this section up
19:34
I want to use my fingers and kind of guide this part here to go down
19:41
Kind of wrap it over the best of that I can
19:57
It doesn't have to be perfect. Just trying to cover it the best we can
20:06
Okay. Now I want to take another piece of heat shrink tube and just need enough for the other side of the T that we don't have a piece of heat shrink tubing on
20:27
I'm going to slide it down. And I think what I want to do is probably cut about a quarter or a third of that piece
20:46
Actually this one's a little longer. About a third down this piece, but not all the way through, like we did for that section of heat stream tubing
20:56
string tubing so I'm going to go about a third of the way and I'm going to have to go
21:08
go off camera here maybe I don't want to cut myself when I'm going about a third of the
21:16
way and only slicing one side of the tube not all the way through like this
21:26
Like that. Just this side
21:36
Not all the way through. And now I will slip it over the T
21:48
This time I'm going the cut or slit side first. and I want to slide it up and over T and try to push it all the way until the end of the slit butts up against the T
22:26
and heat this section of tubing. Okay
22:36
It's not perfectly sealed. Stop falling. It's not perfectly sealed, but
22:46
it's better than having it exposed and it's definitely better than using
22:52
electrical tape because I don't like using electrical tape. electrical tape. It's just not very good stuff and it's can be messy. So I think this heat
23:07
shrink tubing will do better. So now we've taken our green wire about six inches
23:20
or so we attached it to terminal two of switch two and then we made our slice
23:29
about midway down the wire in order to attach the six inch section of green
23:38
wire that's attached to terminal three of switch one we teed that together
23:46
and then we protected all three sections coming into this T with this heat string tubing
23:55
So that was step two for switch two and the next step we have is step number three for switch
24:03
two for our DIY 3220 point redboard project
#Electronics & Electrical
#Electronic Components
#People & Society
#Electromechanical Devices