0:00
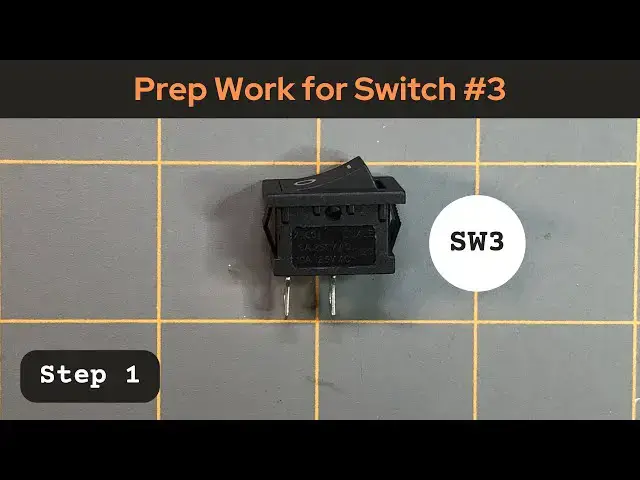
Okay, now we're on step one for switch number three for our DIY 3212.20-point breadboard project
0:08
The first thing that we'll need to do is to get some wire
0:14
In this case, we're going to be using red wire and cut a length to about six inches
0:23
I've already got a piece cut here, and I've already stripped the end of this one
0:29
wire at about a quarter inch back so it's ready to go
0:37
The next thing that we'll need is a spade connector, a female spade connector
0:46
And mine looks like this. Some of them do come with its own heat shrink tubing, but this one comes with its own
0:59
kind of plastic jacket here and it just so happens to be red to match the red wire
1:07
So what we'll do is we'll take our connector and then we'll stick our stripped end of wire
1:15
and place it down into the hole Make sure it all the way in And I can just see the end of the wire poking out right here
1:35
And what I'll do is I'll take our crimping tool and and oh, try not to mess this up
1:52
Uh-oh. I'm just barely holding this with the crimping tool. Well, if I can get it on there
2:07
may take you a couple of tries to do this. Let me reopen this up again
2:19
I'm gonna go this way with it. So we can see. I'm trying to be as neat as I can with it
2:32
That's why I'm having such a hassle. And then I gonna clamp down on it when I ready to go And then I release Do a couple of tugs to make sure it good and tied on there
2:50
And that end of our wire is ready to go. So next we'll be stripping the other end of the wire with our wire
3:05
our wire stripper at about an eighth of an inch or so we'll do a couple of twists I'm going to set that
3:20
down because I need to get a ring terminal now and I'm going to use a ring terminal
3:30
similar to the one that I used for one of the steps for switch number one that we did
3:39
to prepare switch one for this project. Again, currently we're working on switch number three
3:51
And just like we did with the female spade connector, we'll just slip the wire through the
4:00
hole you can just see it sticking out right there and we take our crimping tool and crimp down on it release do a couple of tugs to make sure it on there
4:23
and this wire is ready to go I can get my switch now now
4:32
Remember we're using a rocker switch as switch number three. Here is my rocker switch with its two terminals
4:44
It's just an on-off switch. And we can go ahead and take this female spade connector
4:56
And I'm going to connect it to the on side of the switch
5:01
and that's represented by this little line here. And what will happen is we'll end up attaching this ring terminal here
5:14
to a binding post later on for our output supply for our 9-volt battery supply