live_tv
Livestream Starting Soon
00
Hours
:
00
Minutes
:
00
Seconds
Up next in 10


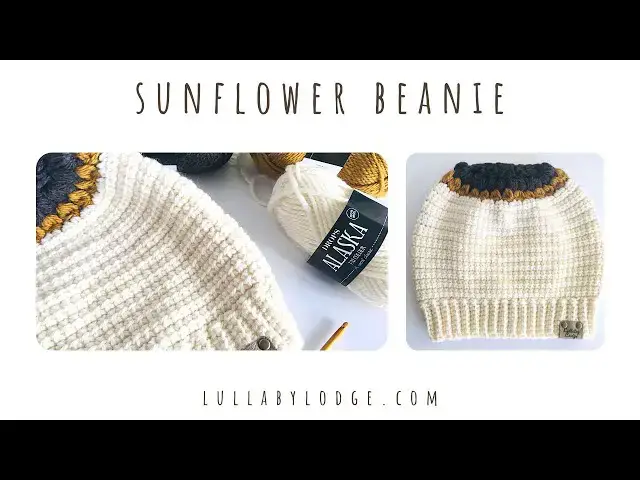
Inspired by Van Gogh's famous painting, sunflowers always make me feel so happy, I love the cheery brightness of the petals and the intricate honeycomb effect of the seed head. This hat will keep your head cosy even in the coldest weather...
For the full list of materials please see accompanying blog post - https://www.lullabylodge.com/2020/12/sunflower-beanie-add-little-sunshine-to.html
A printable pdf version of this pattern is available in my online stores -
Etsy - https://www.etsy.com/uk/listing/913789318/crochet-sunflower-beanie-pdf-pattern?ref=shop_home_active_1
Ravelry - https://www.ravelry.com/patterns/library/sunflower-beanie-7
For matching scarf -
https://www.youtube.com/watch?v=n3nh6LrbIL4
Crochet supplies - https://amzn.to/4aRZ74b (affiliate link)
Video recording equipment - https://amzn.to/4e58U9N (affiliate link)
Shop for yarn - https://www.lovecrafts.com/en-gb?utm_medium=affiliate&a_aid=7f83a24a (affiliate link)
Show More Show Less View Video Transcript
0:00
Okay, so we're going to start off by making a slip knot on our hook
0:07
And then we're going to chain four. One, two, three, four. And then we will join to the first chain to form a ring
0:21
And then we chain one. And now we're going to start working into the first chain
0:29
working into the ring. So we're going to put 12 single crochets into the ring
0:33
1, 2, 3, 4, 4, 5, 6, 7, 7, 7, 7, 7, 7, 7, 4, 5, 6, 7, 7, 7
0:59
eight, let's just scoop those round a bit. Nine, ten, eleven, and twelve
1:12
Okay, so now we're going to slip stitch into that first single crochet to finish off the round
1:21
If you've worked over your end as you go along like me, you can just give that a little bit of tug and that will tighten up that centre a little bit
1:28
Okay, so we're ready for a round two. So we will chain one
1:34
And then we're going to single crochet into that first stitch. Chain three, one, two, three
1:44
And single crochet into the next stitch. Chain three
1:53
single crochet into the next stitch chain three and we're going to continue
2:01
around putting a single crochet and a chain three into each stitch and I
2:07
will meet you back at the end of the round okay so here we are at the end of the round
2:13
and we're going to finish with a slip stitch into that first single crochet
2:19
So now we have 12 chain spaces going around and I recommend that you count here just to make sure
2:27
otherwise the rest of the your hat will not be the correct size if you miss one of these loops out
2:33
Okay so it's time for round three. We're going to start the round by putting a slip stitch into that first space
2:43
and then chain one and a single crochet into the same space
2:48
the same space chain three and a single crochet into the next space chain three and we're
3:02
going to continue around with a single crochet and chain three into each space and I'll
3:08
meet you back at the end of the round okay so here we are at the end of the round and we will
3:15
We'll finish the round off by putting a slip stitch into that first single crochet
3:24
Okay, so we're ready to start a round four. We'll start with a slip stitch into the next chain space
3:32
And now we are ready to work our puff stitches, so we will pull up a loop to the height
3:37
that you want the puff stitch to be. Yarn over, hook into the chain space and pull up a loop, and then we'll do this
3:45
four times in total, so that's two, three, four. And then we'll yarn over and pull through all of those loops
3:56
and chain one to look, stitch in place. Okay, so let me show you the puff stitch again, yarn over
4:05
hook into the space, pull up a loop, pull the loop up to the height that you want your puff stitch
4:11
and then we'll do this four times in total, so three more times. One, two, three
4:20
Then yarn over and pull through all of the loops. And chain one to lock that in place
4:27
So we're going to continue around and put two puff stitches into each of these chain spaces
4:34
And I will meet you back at the end of the round Okay so we back at the end of the round and we going to finish that round off by putting a slip stitch into the top of that puff stitch And don worry
4:50
here if your sunflower looks a little bit roughly or wobbly. This will sort itself out after we
4:57
add the next few rows. So now we're going to fasten off. We cut your yarn
5:05
Make sure you fasten off securely. And then just weave this tail in before you start the next round
5:22
I like to go one way for a few stitches and then
5:33
back in the opposite direction and then once you work over these stitches on the next round
5:41
that tail will be completely locked in that won't be going anywhere okay we're ready to start
5:48
round five so we're going to join in our new colour in any of the chain spaces between your
5:54
puff stitches so pull your yarn through and now we're going to work a beginning cluster stitch
6:01
so you'll chain two and then the cluster is worked as if you're doing a double crochet
6:09
but only working the first part of the double crochet so yarn over
6:13
hook into the space pull up a loop, yarn over and pull through
6:18
two loops so your chain two counts as your first part of the stitch
6:22
and then we're going to do two more of those so yarn over pull up a loop
6:27
yarn over and pull through two and one more And now we're going to yarn over and pull through all of those loops
6:38
And then chain one to lock that stitch in place. So that's your beginning cluster
6:46
And in the next space we're going to work just a standard cluster stitch, that's yarn over
6:52
Hook into the chain space, pull up a loop, yarn over, pull through two
6:58
And we're going to do this three more times. and then we'll yarn over and pull through all the loops and then chain one
7:13
So we're going to put one of these cluster stitches in each of these spaces around
7:19
I will meet you back and we get to the end. Okay so here we are at the end of the round
7:27
And we will finish that round off by placing a slip stitch
7:31
into the top of the first cluster and then we're going to fasten off and make sure you
7:45
weave in that end before starting the next round okay so we're ready to start round six
7:54
so we're going to join in any stitch with a slip stitch
8:04
and then we're going to single crochet into that same stitch
8:13
and then you will want to place your marker into that first single crochet
8:22
like so. Now as we're working around we're going to work into the top of each stitch but also into the space between each stitch
8:39
So we will work into two stitches, work into a space. Work into two stitches, work into a space and we'll do that all the way around
8:46
So into the next stitch we're going to do a half double crochet
8:52
like so and into our next well it's actually going to be a space and the next space we're going to do a linked double crochet
9:04
now to do the linked double crochet it's a bit more tricky because this first stitch is a half double crochet
9:09
but you have this horizontal bar here the top of the stitch in the double crochet it be in the middle of the stitch so you put your hook through there first let me just show you where that is again Put your hook through there and then we pull up a loop This counts as the yarn over of your double crochet
9:28
Then you finish off the double crochet as normal. So your hook will go into that space, pull up a loop
9:34
yarn over pull through two and yarn over pull through two. Okay, so from now on we're going to put a linked double crochet into every
9:45
stitch and space around. So your hook goes through that horizontal bar
9:51
pull up a loop, and then finish off the double crochet as normal
9:55
So hook goes into the next stitch, pull up a loop, yarn over, pull through two
10:02
and yarn over, pull through two. I'll show you that one more time. Through the horizontal bar, pull up a loop
10:09
into the next stitch, pull up a loop, yon over, pull through two
10:14
you're on overpool through two and what this does is it actually links your
10:18
stitches together so you don't have any big gaps in between those double crochet so it's still quite a
10:24
fast stitch it works up nice and not quite as quickly as double
10:28
crochet but it still works up really quickly but you don't have any of those gaps so it's going to
10:32
keep your head really nice and warm okay so we're going to continue
10:36
all the way around and I will meet you back at the end of the round okay so here we are at the end of the round
10:44
worked all the way around back to the beginning again now the linked double
10:48
crochet lends itself very well to working in a spiral so we're not going to be
10:52
joining here we're going to continue now for the beginning of round seven so
10:57
take your marker out and we're going to put a link double crochet into that
11:04
first stitch like so and then you
11:14
want to put your marker back in. You need to remember to do this every round so you
11:19
know where the beginning of the round is. And then continue with your link
11:24
double crochet in every stitch around. Like so. Okay so we're now going to
11:39
repeat round seven, nine more times or and until your hat measures 8 inches from the top of the crown
11:50
And you're going to want to leave the last three stitches unworked
11:54
So I will meet you back again when I've worked the rest of the beanie
11:58
Okay, so here we are. We finish the main body of the beanie
12:04
Now we have the last three stitches that have been unworked. So in our next stitch we're going to put a linked
12:14
half double crochet so hook goes through that horizontal bar pull up a loop and then you work a half
12:21
double crochet into that stitch hook through pull up a loop yarn over and pull through all of those
12:28
loops in the next stitch we're going to put a single crochet and in the final stitch a slip stitch
12:39
so we can remove that stitch marker now and there we go. So now it's time to start working the ribbing for our beanie. So we're going to use a small
12:51
hook for that. So we're going to swap the 5mm for a 4.5mm hook. Now if you start working your
13:01
ribbing and feel like it looks a little loose, you can even go down to a 4mm hook if you
13:06
if you like. Okay, so we're going to chain nine. One, two, three, four, four
13:14
five, six, seven, eight, nine. And now we're going to start working into those chains
13:23
We're going to put a single crochet in each chain along, skipping the first one
13:28
So into that second chain, single crochet, and then a single crochet into each of those
13:37
So we're going to have eight in total. So you continue to work your single crochet stitches all the way along
13:51
Okay it just up the last one now There we go So we now have eight single crochet worked into that starting chain
14:10
We now are going to slip stitch into the base of the beanie. So into that next stitch that hasn't been worked into
14:18
your slip stitch. And then into the next stitch, another slip stitch
14:24
Like so. And now we're going to turn. Next we will skip these first two slip stitches
14:32
and then we're going to start putting single crochets into each of the single crochets here
14:39
But we're only going to be working into the back loops from now on. So we skip two and single crochet into the back loop
14:48
And you do that into each of these single crochets. So make sure you're working into the back loops only
15:07
And here we go in the last stitch. So that's eight single crochet we've worked there
15:14
So now we chain one and we turn. And now we're going to work back the other way, doing exactly the same
15:23
single crochets into the back loop. It can be a little bit fiddly working into the back loops
15:42
Here we go. And sometimes that last stitch is a little bit tricky to see, so it might be helpful to count to make sure you're getting all eight
16:02
There we go. And to finish that row, we're going to slip stitch into the next two stitches of the beanie
16:09
So that's one, two, and then we turn. So we're going to repeat the last two rows until we've worked all the way around the beanie
16:20
And I will meet you back. when I get to the end. Okay, so once you've worked all the way around your hats
16:28
it should look something like this. We're now going to chain one, and then we need to turn the beanie inside out
16:37
and we're going to crochet these two edges together. So first you want to put your hook into the first stitch here
16:46
this is the underside of the stitch, and then into the back loop on the other side here
16:51
and make a single crochet. And we're going to do that to every stitch
16:59
along the edge of your ribbing. Now if you prefer, you can sew this together
17:11
You can just use some yarn and a needle and you can whip stitch your edges together
17:21
I always like to use crochet though I just I find it easier
17:26
I don't enjoy sewing very much. Okay, so here we are. So we're just working all the way across with our single crochets
17:38
Making sure we're only working into the back loop there. And here we've got our last stitch, this one
17:45
Sometimes a bit tricky to find. There we go. That's the last stitch
17:56
And then you will fasten off. And all that's left to do is just to weave in your tail
18:06
Okay, and that's what the join looks like there. So there you have your sunflower beanie
18:16
I hope you enjoyed the pattern. And I will be back with more patterns like this
18:20
with more patterns like this. Take care now. Bye-bye
#Arts & Entertainment
#Hobbies & Leisure
#Crafts
#Fiber & Textile Arts