Up next in 10

Easy Textured Crochet Hat Tutorial | Modern Block Stitch Beanie (Beginner-Friendly!)
Nov 23, 2025
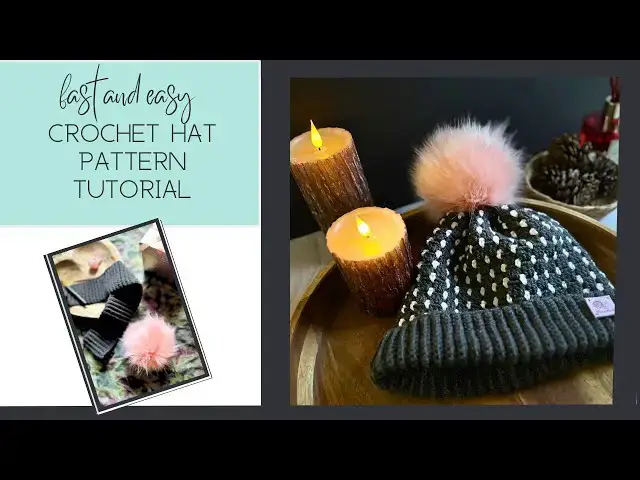
Crochet this modern, textured beanie with me!
This hat features a stretchy ribbed brim, bold block-stitch texture, and simple colorwork that looks designer but is surprisingly easy to make. If you can single crochet and double crochet, you can absolutely finish this hat.
This video walks you through the entire process:
✔ Ribbed brim (worked flat and joined)
✔ Clean, invisible brim seam
✔ Setting up your multiple-of-3 stitch count
✔ Block stitch texture rounds
✔ Color-changing technique (no carrying yarn!)
✔ Adjustable height for a fitted or slouchy look
✔ Tips for clean stitch transitions
Skill Level: Beginner to intermediate
Yarn: Worsted weight (but easily adaptable)
Sizes: Fully adjustable — from fitted to slouchy
See the blog post for more details: https://livechilllife.com/crochet-and-knit/modern-crochet-hat-pattern-textured-block-stitch-beanie-video-included/
🧶 Get the written pattern here:
https://livechilllife.etsy.com/listing/4410235907/beginner-friendly-crochet-hat-pattern
Subscribe for more:
Crochet tutorials, pattern roundups, and cozy maker lifestyle content every week.
Buy me a coffee: Ko-fi.com/livechilllife
Subscribe to the newsletter for monthly discounts, tips and free patterns: https://livechilllife.com/
Try my project tracker for free: https://livechilllife.com/crochet-and-knit/project-tracker-page-for-crochet-and-knit-patterns/
My books:https://livechilllife.com/shop-my-books/
My vintage recipe cooking channel: https://www.youtube.com/@100yearoldrecipes
My Etsy shop: https://livechilllife.etsy.com
If you make this hat, tag me on Instagram so I can see your version!
Happy stitching, Makers. 💛
Show More Show Less View Video Transcript
0:00
In this video, I'm going to show you how
0:02
to make the Felicity crochet hat. It's a
0:05
fast and easy project that is beginner
0:07
friendly. The written pattern is in the
0:09
description, but if you're an
0:11
experienced crocheter, you can probably
0:13
just follow along.
0:15
[Music]
0:25
So, to join the band, this looks a
0:27
little funny. My file for the full band
0:30
headband got or brim got corrupted. So I
0:33
had to work up another piece so I can
0:35
show you how to do the join.
0:38
All right. So put your ends together.
0:40
Decide which side you want on the uh
0:42
what's going to be when you flip up
0:45
side if that's how you like to wear your
0:47
hat.
0:50
And then come back through and match up
0:53
all your stitches.
0:57
And I'm going to use a slip stitch.
1:00
Bring them through and then go into
1:03
that. So that starting chain has that
1:06
kind of um loosey
1:09
stitch cuz you worked in the front part
1:12
of the stitch, not the back bump. And
1:15
then go into the back loop
1:18
of the corresponding stitch
1:23
and slip the stitch. Whoops. I think I
1:25
lost my yarn there. Let's do this again.
1:29
Go into my stitch and then that back
1:32
loop. Whoops. Come on, Stephanie.
1:36
Get it together. Okay. Come through. And
1:38
then slipping the stitch again. Going
1:42
into the loop here on this side. Back
1:45
loop. So the V's
1:48
go into the back one of those. Pull
1:51
through.
1:53
Slip the stitch.
1:56
So, I'm just going to go all the way.
1:57
And you really need to watch when you're
1:59
working your ribbing that you don't lose
2:01
count of your stitches. It's so I've got
2:04
a noisy car out there. It is um so easy
2:07
to as you're going, it starts to slope
2:10
downward because
2:12
you've missed a stitch along the way.
2:14
So, I always count when I'm doing these
2:16
brims. It's usually just, you know, for
2:18
mine, I chained 17, so I have a 16
2:21
stitch brim. I would just count first
2:24
stitch full single crochet, then count
2:26
my 14 back loop only, and then my final
2:29
stitch is a full single crochet to equal
2:32
16. I would always count, otherwise,
2:37
you know, it happens to the best of us.
2:39
So, just make sure that you've got the
2:41
same stitch count all along the way so
2:43
your brim does not end up crooked,
2:46
shorter on one end.
2:52
Okay? I'm just finishing. All right. So,
2:54
I'm going to finish this and then we
2:56
will go on to starting to work the body
2:58
which will be worked in the round. So,
3:01
get your accent color out
3:04
or maybe you're making your brim in an
3:06
accent color and then moving to this
3:09
kind of a I don't even want to say
3:11
deeper color. You you use the colors you
3:14
like. You can get really creative with
3:15
this. Maybe you're using a rainbow yarn.
3:22
Aren't it so fun? All right, so I'll
3:24
meet you back for the next step. All
3:26
right, so I finished all my stitches.
3:28
You can see nice clean look. And then
3:32
start I'm going to work in my starting
3:34
tail as I chain around
3:38
my single crochet.
3:44
All
3:55
right. Okay. So, I finished my round
3:58
and I'm going to join in that first
4:00
stitch with slip
4:15
and then oops, I don't want to chain.
4:17
I'm going to do a stacked stitch as my
4:20
first stitch. There's one. And then I'm
4:23
going to go into this inside front loop
4:27
and make my second stitch. This does
4:30
count as a double crochet.
4:34
So there's one. And then I'm going to
4:36
just work double crochet all the way
4:38
around
4:42
rest of the row or the rest of the
4:44
round.
4:49
Make sure you get every one of your
4:50
single crochet. so that you maintain
4:53
your stitch count.
4:58
You see in the pattern that's going to
5:00
vary based on the size you're making and
5:02
the yarn you're using.
5:07
Just make a note of that. Write it down
5:08
on your pattern or whatever your scrap
5:11
of paper. If you have my one of my
5:13
project trackers, write that up there in
5:14
the notes section
5:17
in case you have to reference it back
5:19
again.
5:30
Did you know I designed project
5:32
trackers, large print and regular print
5:35
for small, medium, and large size
5:38
projects? The link is in the description
5:40
to get your own or you can try it for
5:43
free.
5:45
There's a download on my website, link
5:47
in description.
5:49
All right. So, I finished my round of
5:50
double crochet. Slip to join at the top
5:54
of that
5:57
uh that the stacked
6:00
two stacked stitches that create the
6:03
double crochet. I can't find my words.
6:05
Okay. So, I've marked that stitch and
6:07
then now really anywhere you can bring
6:09
up your accent color.
6:14
I'm going to do that with a slip knot.
6:17
Actually,
6:27
let me insert my hook. So, where I'm
6:29
putting it is under or in between that
6:33
stack stitch. That's not that one. It's
6:36
this one.
6:38
Bring up
6:43
and work a single crochet.
6:47
Then chain two
6:51
and skip one 2 3 double crochet and work
6:57
your next single crochet. Now you're not
7:00
working into the stitch. You're working
7:02
between the posts. Let's do another one.
7:05
Looks like my yarn split. Let's get
7:08
that. Okay. Chain two.
7:12
Then one, two, three stitches. one, two,
7:15
three posts. Go down
7:18
and work that next single crochet. Chain
7:22
two,
7:24
skip one, two, three posts,
7:27
and work the single crochet. So, I'm
7:29
going to do that all the way around.
7:34
Let's do one more. Chain two.
7:37
One, two, three. in between the posts.
7:42
Single crochet. Give that delicate
7:45
little peekaboo look for our hat. Right,
7:49
I'm at the end of my round. So, I'm just
7:51
going to slip into that first stitch
7:54
that I made
7:57
my yarn
8:01
and then replace my stitch holder
8:07
to hold this open while I work the main
8:10
color
8:11
rounds.
8:17
So you won't really have many ends to
8:19
weave in unless you have to add in yarn
8:22
if you're working, you know, from
8:23
leftover skins.
8:26
Okay. So from here
8:33
tangled up.
8:35
I'm going to chain two
8:41
and then work three double crochet into
8:43
that chain two skip three space.
8:49
One
8:52
2
8:53
and three.
9:00
Skip over to the next and do the three
9:04
double crochet into the chain two space.
9:14
Again, skip over to the next chain two
9:19
space and work three double crochet
9:21
clusters.
9:28
You can see our little peekaboo pink or
9:31
whatever your accent color is showing.
9:37
So, we're going to repeat this until
9:39
we've got the correct height.
9:52
Really simple. Right.
10:06
So, I'm finishing this round and I'm
10:08
going to show you
10:11
join.
10:14
I'm going to switch out the stitch
10:17
holder.
10:20
Right.
10:28
So, here I am. It's time for me to bring
10:29
up the pink. So, I changed out my stitch
10:32
holder
10:34
or stitch marker, but it's just holding
10:36
open the stitch to the contrast color.
10:39
So, this one you do need to again,
10:40
you've got to chain for height. And this
10:43
one I just chain one for these and I
10:45
just go and work it right into the
10:49
stitch.
10:51
You see I have it started quite a bit
10:53
aways from here. That's I just I I
10:57
always notice that things tend to
10:59
migrate when I work this pattern. You
11:02
have to tell me if that's the same with
11:04
you.
11:07
And keep working. So, I'm going to keep
11:09
working this until I reach the height of
11:12
my hat that I want it to be for the
11:15
head. So, I've got a guideline. Again,
11:17
you can see in your pattern,
11:21
your guideline if you want maybe a
11:22
little bit of a slouch to it
11:26
or a bit of a closer fit, but this is
11:28
going to have a nice little gathering up
11:30
at the top because we're not going to be
11:33
uh narrowing it.
11:37
Just keep working
11:39
around. Nice easy stitch to work.
11:49
All right. So, I've worked some more
11:51
rows and I just want to show you again
11:54
just how easy this is. So, I finished my
11:56
round. I did my crochet two. Here's the
11:58
end of the
12:01
um round that
12:03
is worked this way. And I'm just going
12:05
to slip stitch into that first top of
12:08
that first stitch that I made. Pull up.
12:16
Move the stitch marker to the nonworking
12:19
round.
12:22
So there's no um tails. It's so nice.
12:26
And sometimes I find when I work this
12:28
stitch, I've made several things with
12:30
this with this stitch. Sometimes it
12:32
starts migrating over. So maybe if
12:34
you've been working here, you find
12:37
because you don't have to bring it up at
12:38
the same place. You'll see as you're
12:40
working this what I'm talking about.
12:42
This will make more sense as you go. Um
12:46
I'll find that. Okay. Well, here I am
12:48
here and now I'm working here because
12:50
we're doing several rows of these when I
12:52
started here. That's just the way it is.
12:55
So, as long as you have your full
12:57
rounds, everything's fine.
13:00
It's kind of a foolproof thing. All
13:02
right. So for the double crochet row
13:06
here in the back, you can see it still
13:08
looks good on the inside.
13:10
You'll crochet two just for your height.
13:13
This does not count as a stitch. Just to
13:15
bring it up so that when you work your
13:19
stitches,
13:22
it's up high enough. It's not kind of
13:24
tugging at anything
13:26
from the round before. And then with the
13:30
accent color, you'll just chain one to
13:33
bring it up. It looks like there's three
13:35
here because of that chain two, but that
13:39
doesn't count and that's going to be
13:40
hidden. So, make sure that you always
13:42
have your three double crochet into that
13:44
cluster section, that chain two space.
13:55
Uh oh, I think I'm working over my yarn.
13:57
That is one thing you need to watch out
13:58
for. that you're not working over that
14:01
non-working yarn
14:05
and keep your yarn from getting tangled
14:08
too when you're changing out colors
14:10
working without cutting in between color
14:13
changes. Oops, I grabbed it back there.
14:16
Come on, you little stinker. There you
14:18
go.
14:24
Coming along. Looks so pretty.
14:31
All right. So, I finished the height of
14:34
my hat. So, now we've got to cinch up
14:36
the top. If you'll bear with me, I've
14:38
done my wrist is sprained. I can use my
14:41
hand, but I have just have to be careful
14:43
with how I move it. Um, so let's get
14:47
this cinched. This is a standard
14:50
cinching process. So, you'll weave your
14:52
yarn through. I made quite a long tail.
14:57
I don't think I'll need all that. Just
14:59
kind of back and forth. And we're going
15:00
to do this more than once. So, just
15:03
start threading
15:05
in and out. In and out these tails. Get
15:09
this. There we go. Just kind of like
15:13
this. In and out. In and out.
15:18
Like so. All the way around.
15:23
Right. So, I've just finished my
15:26
all these tails everywhere.
15:28
All right, finished my first round. So,
15:30
I'm going to cinch it up. Hold my
15:33
starting tail, which is here.
15:40
Just pull it
15:44
snug.
15:56
and it'll come together. And then I go
15:59
around a second time just to really
16:02
close it up well.
16:06
And then add my
16:08
topper.
16:16
Oh, that tail is from where I had to
16:18
join my yarn.
16:24
Go. So, it's going to start looking like
16:27
a hat.
16:29
Okay. So, let me go around one more
16:31
time, attach my topper, and then my hat
16:34
is done. I'm going to move on to gloves.
16:37
That's a different video,
16:43
but they come together pretty quickly.
16:46
[Music]
Hobbies & Leisure
Crafts
Fiber & Textile Arts