live_tv
Livestream Starting Soon
00
Hours
:
00
Minutes
:
00
Seconds
Up next in 10

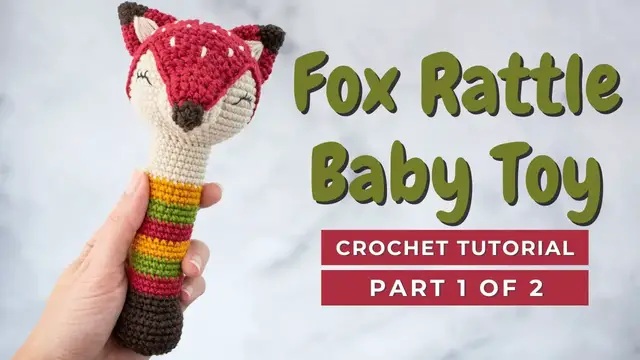
Complete tutorial for this sleepy Fox crochet toy pattern for baby!
FOR PART 2: https://youtu.be/Gaahksr9Axk
Chapters:
0:00 Fox amigurumi crochet toy intro
0:31 Fox Head
09:52 Rattle toy handler
19:42 Fastening off
You can find the complete Fox amigurumi crochet pattern free on my website here:
https://littlecrochetfarm.com/sleeping-fox-crochet-baby-rattle-free-pattern/
For a low cost (3 USD) and printable pattern, you can find it here:
Etsy: https://www.etsy.com/listing/1184393598/fox-crochet-rattle-toy-pattern-amigurumi
Ravelry: https://www.ravelry.com/patterns/library/sleepy-fox-rattle-toy
If this video was helpful to you, consider supporting my channel by doing one of these little actions below:
★ You can like this video, or
★ You can share with your friends on social media, or
Show More Show Less View Video Transcript
0:00
Hello there! It's Anna here and welcome to Little Crochet Farm. Today I will show
0:05
you how to make this Slipping Fox Rattle. It's a beautiful pattern I designed for
0:10
a Bella Coco Crochet. It's a great pattern because you will practice how to
0:14
change colors you see here in a very nice way. You have seen probably the
0:20
chubby fox that I uploaded before and today we'll work with the chubby rattle
0:30
All right, super good. So we will start here with a magic ring or a magic circle. If you
0:39
don't know how to make the magic ring, you can check the description box below. There
0:43
is a link straight to a complete tutorial showing you how it's done, in case this is
0:49
too fast for you. So you start crocheting 6 single crochet in a magic ring. So here
0:55
let's work my 6 single crochet and as you can see here I will be working this
1:01
amigurumi with yarn under single crochet. If you don't know the differences
1:07
between yarn under the needle and yarn over the needle for the single crochet
1:12
leave me a comment in the comment box below. I will explain it to you and maybe
1:17
I will also shoot a video showing you how. This material I choose to work is a
1:24
very nice soft wool. One, two, three, four, five, six. And there is a lot of plies, so I will have a little bit of problems here
1:33
crocheting this sometimes. Alright, so for the second round, you will work six
1:38
increases, and you should have a total of 12 stitches by the end of this round
1:42
When I say increases, means that you will make two single crochet inside one
1:49
stitch. So here for example it's one single crochet and another one inside the
1:55
same stitch. Right? One single crochet here and another one inside the same
2:02
stitch. The written pattern it's in the description below. You can check the
2:08
completely written pattern there with all the materials I used. This I'm working with a 2.75 mm crochet hook and once you finish this round I like to
2:23
just double make sure here at the beginning of my thread so the beginning
2:31
of this toy it's very nice and closed and I make sure that my magic ring will
2:35
not unravel especially because I'm working with made in a wool it's a very
2:39
soft wool and is beginning of this magic ring can be a little bit opening
2:46
because of the quality of the material. Alright, for the third round you will
2:50
work one single crochet, one increase, repeat six times and you should have 18
2:55
stitches at the end of this round. Alright, so as always I will make the
2:59
first repetition here with you. So now I'm in the increase, that's very nice. So I
3:07
I will complete the round and this is how it should be looking like. So now for the
3:13
next round you will work 2 sc, 1 increase, repeat 6 times and you
3:18
should have 24 stitches at the end of this round, alright? Always remember here
3:22
I'm working with yarn under the needle instead of yarn over so you can see a
3:27
different shape of the yarn. See here? Great. Once you finish the round number
3:33
four you will work round number five, three single crochet, one increase, repeat six times
3:38
and you should have a total of 30 stitches at the end of this round. Okay, so here first
3:44
repetition, three single crochet, and now my increase. That's great! So you repeat all the
3:53
way until the end and I will catch you up for next round. Now here for round number six you'll
4:00
crochet 4 single crochet, 1 increase, repeat 6 times and you should have a total of 36 stitches
4:07
at the end of the round here. I suggest you to always count how many stitches you have at the
4:12
end of each round, just to make sure you're right on track and in case you need to unravel, it will
4:19
not be too many rounds. Alright? So here, finish up. And for round number 7, you will work 5 single
4:27
crochet one increase, repeat six times and you should have 42 stitches by the end of this round
4:34
Okay? So here let's work our first repetition. If you have any questions leave them in the comment
4:41
box below. I always like to hear what is your questions, if you have any doubts it's good
4:47
for me to shoot better and improve my video tutorials for you. Okay? So here's the first
4:52
repetition and great once you've finished this is how it should be looking
4:58
like now for round number eight you will work six single crochet one increase
5:03
repeat six times or all the way until the end and you should have 48 stitches
5:09
at the end of this round okay so here it my first repetition and now my increase here
5:24
super good i'm working with yarn under the needle for the single crochet because it's very tight
5:30
you can see it here the stitches are very closed together okay so for round number nine it's a bit
5:37
different you will work 15 single crochet, one increase, repeat three times and you should have
5:44
51 stitches at the end of this round. So I will work fast here because it's just single crochet
5:50
the first repetition 15 and then you make one increase here. Okay so you repeat this all the
6:02
the way until the end or you make 3 repetitions and count for 15 stitches at
6:08
the end of the round. Now we will work only with single crochet. You will not
6:13
have any increases for these next rounds so for round 10 to 17 you will work 51
6:22
single crochet. So work your repetitions here, complete your rounds until round 17
6:28
and I will catch you up for round number 18. Super good! So this is how it should be looking like once you finish all the rounds with 51
6:38
single crochet and now we will start with the decreases. So here for round number 18 you will
6:44
work 15 single crochet, 1 decrease, repeat 3 times and you should have 48 stitches at the end of the
6:51
round. Alright, here for amigurumi I use the invisible decrease, which means you
6:58
will grab only the front loop of the stitches, like here I will show you front
7:02
loop and the front loop of the stitch next to it, and you finish, wait, under, with
7:08
the single crochet. There is a link in the description showing you how to make
7:13
the invisible decreases. Okay, now for round number 19 we will start decreasing
7:20
6 by 6, all right? 6 stitches per round. So here you'll work 6 single crochet, 1
7:27
decrease, repeat 6 times and you should have a total of 42 stitches at the end
7:32
of this round. So I will work the first repetition here with you, right here
7:42
and now front loop, front loop of the stitch next to it, right? 2 stitches
7:51
becoming one, one invisible decrease here. Repeat this all the way around and this
7:57
is how you should be looking like. Not you but your toy. Great, so for round number
8:04
20 you will work 5 single crochet, 1 decrease, repeat 6 times and you should
8:10
have a total of 36 stitches at the end of this round. Okay? Super good! So now for
8:16
the first repetition we will work together. Front loop of the stitch, front
8:23
loop of the stitch next to it, and finish your single crochet. Okay? Repeat all the
8:29
way until the end. And now let's move on for round number 21. Here you will work
8:36
4 single crochet, 1 decrease, repeat 6 times and you should have a total of 30
8:41
stitches at the end of this round. Count how many stitches you have just to make
8:45
sure you're right on track. Okay? And always use a stitch marker. I forgot to
8:51
mention at the beginning of the video. Here is my decrease. Great. I used just a
8:57
different piece of color yarn to have my stitch marker. Great. Now you finish round
9:04
21, you're moving on for round 22, you will work 3 single crochet, 1 decrease
9:11
repeat 6 times and you should have a total of 24 stitches at the end of this
9:16
round. Okay, so this is the last round with the decreases for now because we
9:23
will start shaping up soon the rattle, okay, the handler of the rattle. Alright
9:28
so here's my decrease, repeat all the way around and I will catch you up here
9:33
soon. Great, now I'll stop here a little bit to add stuffing material and here you can add as much
9:41
stuff, as penny stuffing material you want. I like my toys to be very firm in this case because it's
9:47
a baby toy I work with the yarn under so the stitches are very tight and no stuffing material
9:53
will be leaving off. Okay now for the round number 23 you will work with front post single crochet
10:02
okay i like to work with the front post single crochet because this stitch will be on top of the
10:09
of the round making a very nice division between the head from the handler of this rattle so the
10:18
front post basically you will work between the posts of the stitch all right and here i'm working
10:24
with the yarn over the needle so I can have a larger nice stitch so the shape is very
10:31
nice okay so here you can see pretty well how it done Inside outside and normal single crochet You work in between the posts of two stitches okay And this is the effect that we are searching
10:47
for, to be on top of the round, okay? I will complete all the way around and I will show you
10:52
how it looks like. Great, so this is how it should be looking. You see it's a very nice edge between
10:59
the head and the handler. This is the effect that we search for when we work
11:03
with the front post single crochet in crochet toys. Alright? Okay, so now for
11:09
round 24 to 29 it will work just single crochet and you see that from
11:16
this round on I'm back on working with the yarn under the needle. Okay? I already
11:23
got the effect I want and now I'm coming back to where I'm crocheting
11:27
everything here. Great! We will start here now our first color change. I will work
11:34
with the yellow yarn that I chose. So for round 30 to 32 you will work 24
11:41
single crochet. So this is how we're gonna work here from now on. You will
11:45
change your colors. Here I will show you how I like to do my color change. I like
11:51
to start in the first stitch with a slip stitch, okay? And then I continue working
11:56
normally. There is a link in the description below showing you the four
12:01
most used ways to change colors in crochet toys. This is my favorite one
12:07
but there you can choose the one that suits you better, alright? Super good
12:13
Once you've finished all these three rounds with the orange, with the yellow
12:16
you will work with the green or to whichever color you decided to change. So
12:21
for rounds number 33 to 35 you will work 24 single crochet again with the green in this case
12:30
Once more I'm starting with the slip stitch in the first stitch, because that's how I like to
12:35
do my color changes. Go to the link below and check the four most used ways and choose how
12:41
you want to change your colors. That's great! Once you finish three rounds with the green
12:48
I will change to the red one and you will work 36 to 38, 24 single crochet
12:56
Once again I start with the slip stitch in the first stitch of the round and I continue normally
13:04
Okay, super good! This is the repetitions that we will make, so it's nice and it's interesting to the baby
13:13
Great! This is the result after you change all of these three colors
13:17
stop a little bit and start adding stuffing material, because as the
13:22
handlers start going higher it's more difficult if you leave to add stuffing
13:27
material at the end. So now you will repeat around 30 to 38 one more time
13:33
And this I will not show you here, because it's the same thing, it's the same
13:37
repetition. I will work with the yellow and then I will work with the green and
13:42
and then I will work with the red. Okay? I chose these colors to be nice and interesting for the
13:48
baby, so the colors are eye-catching and it's more interesting. I also forgot to mention that
13:55
you should add the rattle noise at the head when you're stuffing the head or in the handler
14:01
depending on how much noise you want it to make. Super good! So once you've finished all the
14:08
repetition of this tree, color changes. You will work now round 48 to 50, back now
14:17
with a new color that we will add here, the brown color. Alright, so I grabbed the
14:23
colors that I used for the fox, that is the red, beige and brown, and I finished
14:30
here with the brown. Okay, so let's work a color change here and this is the last
14:36
color change we will work for this rattle okay so I will work this couple of rounds and I will catch
14:42
you up here later because we will work a little bit different to finish this crochet toy all right
14:51
so let me just organize here I like to crochet over the yarn so I can just cut it once I finish
14:59
with the color changes but in this case you can just give a simple knot because the knot will be
15:05
facing inside of the toy so nobody will see the knot. So it's more practical I think
15:12
Super good! So see here is all the color changes. I started adding stuffing material as I go
15:19
I will add my stitch marker here before I continue. I cut all of the threads because from now on we
15:25
will work only with the brown color until we are done with this toy. So now for round 51
15:33
you will work 24 back loop slip stitch, okay? So we will make one full round here only with the slip stitch
15:43
So grab just the back loop of the stitch and make a slip stitch
15:50
This thread there is a lot of flies in The yarn can really be breaking with your needle so just pay attention if you working with a very soft yarn like this one that I working now
16:03
Alright, so slip stitch all around and I will catch you up for round number 52
16:14
That's great! You see this line here? This is what we are searching for
16:18
because for now on we will work on this line that you can see it, and the round with the slip stitch will be facing inside of the toy
16:27
This will give a nice sharp edge between the ending of the rattle and the beginning
16:34
Okay, so now for round number 52 you will work on the remaining front loop that you see, which is this line that it's formed
16:42
So, 3 single crochet, 1 increase, repeat 6 times and you should have 30 stitches here at the end of this round, okay
16:52
So, as you can see here, only the front loop. The front loop
17:07
Okay, very soft yarn. It's a very nice the feeling, the touch feeling of this medina wool. Super good! Great, so here's my first increase
17:21
now I will continue making the repetitions and I will catch you up here for the next rounds
17:30
Alright, super good! You see this round here with the slip stitch is facing inside and we have a very
17:35
nice and sharp edge. That's why I like to work this way. Okay, so now for round 53 to 57 you
17:45
will work just 30 single crochet. So here once again is just repetitions. You work all of your
17:52
rounds here and I will catch you up once you finish the round 57 so we can get the directions
17:59
for round 58 and we will be almost done with this first part of the rattle. Then we'll
18:06
start working on the fox face. Super good! So here, once you finish the round 57, you'll
18:15
work for round number 58, we'll start working the decreases. So for round 58, you will work
18:22
3 single crochet, 1 decrease, repeat 6 times and you should have a total of 24 stitches
18:29
at the end of this round. Here, once more, I will advise you to count how many stitches you have
18:36
in your round, so just to make sure that you have the right amount of stitches
18:41
Okay, so this is my first decrease here, repeat all the way around. And now for round number 59
18:50
you will work two single crochet, one decrease, repeat six times and you should have a total of
18:55
18 stitches at the end of this round. We are almost done with this. We will stop here once
19:04
you finish this round. Okay and we'll add the final stuffing material. So here is when you finished
19:13
adding your stuffing material so we can move on for our last round before we close this toy
19:20
Alright, and for round number 60 you will work 1 single crochet, 1 decrease, repeat 6 times
19:28
and you should have a total of 12 stitches at the end of this round, okay
19:33
This is our last round and then I will catch you up here so we can fasten off this toy
19:41
Very great! Super good! So this is how it should be looking like
19:47
Now you cut this yarn leaving a little bit of tail so we can fasten this off
19:54
Add inside your sewing needle or your tapestry needle, whichever needle you are working with
20:02
And now here, okay, yeah, better, you will start inserting your needle in the front loop
20:09
of the stitch, okay? Just the front loop of the stitch. You don't need to pull it yarn tight here, you can just insert because we will pull the
20:18
yarn tight to close once we grab all of the front stitches
20:23
Okay, it's very soft. I'm grabbing a little bit of stuffing material
20:29
You can insert your finger a little bit and it will help you to prevent to grab the stuffing material
20:36
Once you've finished all of the front loops, you pull it tight
20:41
see and it will be very nice, neat and closed. Now I'll just double secure here inside the
20:50
stitches to make sure this will remain closed. So on this last round I make a couple of
20:59
times going around and we fasten this off. There is a link in the description that shows you how
21:06
fast enough only this it's a very nice tutorial you can take it you can check
21:11
it out in the description
#Arts & Entertainment
#Crafts
#Fiber & Textile Arts