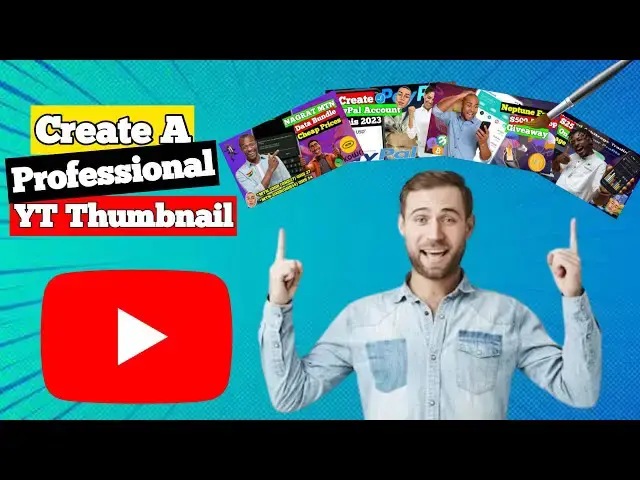
Looking to stand out on YouTube in 2024? Learn how to create a professional thumbnail that will make your videos pop! In this tutorial, we'll show you step-by-step how to design a thumbnail that grabs viewers' attention and boosts your click-through rate. From selecting the right images to choosing eye-catching fonts, we've got you covered. Don't underestimate the power of a great thumbnail - it could be the difference between your video going viral or being ignored. Watch now and learn the secrets to creating a thumbnail that demands clicks in 2024!
Explore my website at https://kd-techhub.blogspot.com
#youtubethumbnail #youtubethumbnailkaisebanaye #youtubethumbnailtutorial #youtubethumbnaildesign #youtubethumbnailsize #youtubethumbnailphotoshop #youtubethumbnailkivabebanabo #youtubethumbnailcanva #youtubethumbnailediting #youtubethumbnailkaisebanaen #youtubethumbnailkaiselagayevideomein #youtubethumbnailapp #youtubethumbnailmaker #youtubethumbnaildesigninphotoshop #youtubethumbnailtemplate #youtubethumbnailand #youtubethumbnailandtitle #youtubethumbnailandroid #youtubethumbnailandvideoediting #youtubethumbnailandbannermaker #youtubethumbnailtelugu
#Thumbnail #YouTube #2024Tutorial
Show More Show Less View Video Transcript
0:01
yeah so today I'm going to be showing
0:04
you guys how to create a professional
0:06
looking YouTube
0:08
tannel so without wasting much of your
0:11
time let's
0:13
begin with the video so first you have
0:16
to have an application called pxel app
0:19
which is available on both the iOS
0:22
device and then the uh this thing and
0:25
the Play Store so when you have the
0:28
application you open up
0:31
application so open application you have
0:34
this message but you have to click on
0:37
allow and you delete this test over here
0:42
and you you see this three vertical dot
0:45
over here click on it and then
0:47
select image size so right here we have
0:51
to change the image size to 1920 which
0:55
is the width and then the height to
0:58
1080 which is HD HD quality thumbnail
1:05
then you press okay so the size of the
1:08
this thing will change so right here
1:10
this is where you have to start editing
1:13
everything so as you see this plus icon
1:17
over at the top over here you click on
1:20
it and then you press from
1:24
Gallery so when your gallery open you go
1:28
to your images and then select where
1:32
your stock images are the stock images
1:35
that you want to use for the
1:38
design you select your stock
1:48
[Music]
1:54
images so I'll be selecting this
1:58
one
2:02
now over here you have to
2:06
resize the image to your
2:10
need so as far as I'm going to be
2:13
creating a thumbnail for this video I'm
2:16
going to be using this stock image you
2:18
can find any stock image at thought you
2:21
want on
2:22
Google yeah Google or Google Chrome you
2:25
download them and then use remove.bg to
2:28
remove their background
2:30
and then use them for your this thing
2:34
your thumbnail
2:36
designs so you have to adjust the the
2:39
size and then whatever over
2:43
here so you you just follow how I'm
2:46
doing everything and you'll get it so
2:49
you press over here and then you lock it
2:53
down and go back to the gallery your
2:56
gallery and then select another stock
2:59
image
3:01
so I'll be
3:04
selecting one of the thumbnails over
3:09
here then I'll resize it I'll make it to
3:12
be
3:13
small and I'll turn it in a different
3:16
way like this I'll go to the gallery
3:19
again and then select another
3:26
one so you you just have to follow how
3:29
I'm doing this thing the idea you just
3:31
have to get the idea from how I'm doing
3:33
the thumbnail then you can do your own
3:37
thumbnail so this one you have to place
3:39
it at the back so you see this dot at
3:42
the side over here you click and hold
3:44
and drag down to bring the thing the
3:47
image one image beneath another one so
3:51
you have to adjust
3:55
it
3:57
okay then you go to gallery select
4:00
another one again so we just have to
4:03
keep on doing this like that like this
4:05
if you want to add another image you go
4:07
to Gallery select another image and
4:13
edit so you resize it
4:18
again
4:23
yeah and
4:25
then place it over here this one should
4:28
be at the top
4:32
yeah and then we go to Gallery again and
4:34
then select another
4:45
one resize it turn
4:56
it and then we move to the side over
4:58
here and then bring it
5:00
to the bottom of this one so over here
5:03
we are going to match all the images to
5:06
be together at one
5:08
place so that you not suffer moving down
5:12
one by
5:16
one so to be able to merch the merge the
5:19
images you have to go to this place and
5:23
then click on
5:24
this menu over here and then select the
5:28
images that you want to me
5:30
so I'll be selecting the four images and
5:32
then click on uh the third icon next to
5:37
the this thing that P over here then
5:40
they will ask you are you sure you want
5:42
to match the selected object because
5:45
after meing the selected object there's
5:47
no way of undoing it again so you click
5:50
on okay then it will bring all the
5:53
images together at one place then you
5:55
click on the M check button and then
5:58
select it
6:00
so I'm going to resize
6:10
it now to bring this on to this place
6:14
more little
6:28
bit
6:42
so as you can see everything start
6:44
getting to Lo good so I have to make
6:47
sure I align
6:48
this this correctly to
6:52
the uh the
6:57
image okay
7:00
let
7:12
[Music]
7:28
see
7:33
[Music]
7:57
let load this one again
8:09
so yourself you just have to make sure
8:10
you do everything to make it look good
8:13
so we going to Lo this one over here and
8:17
then the next thing to do over here is
8:19
to go to the gallery again and then and
8:22
if you have the video that you going to
8:24
be making if there's a logo about what
8:25
you're going to be making you then add
8:28
the logo to the
8:36
video so since I'm making a YouTube
8:39
thumbnail I'm going to be adding the
8:42
YouTube logo over
8:46
here you can you can add it anywhere you
8:49
want that the place that you think it
8:52
will look good in the image you add it
8:54
over
8:58
there
9:28
for
9:31
then we are going to add test to
9:35
the to the Thum so over here I'm going
9:39
to name
9:41
it great
9:46
professional make sure when you are
9:48
naming it the title should not be that
9:51
much long because it will not look
9:54
nice let's L this one
9:58
first
10:00
go to the test
10:04
option the test color you leave it on
10:07
white and then the font we
10:11
select uh what is this one Chun five we
10:15
select font which is the Chun five that
10:18
font is bold and clear for everyone to
10:20
see on the T and then is make the test
10:25
board then you change
10:29
you you allow an stroke for it the
10:33
stroke should be black then you scroll
10:35
back to the background you enable the
10:39
background and then change the
10:40
background color to any color thought
10:43
you want but I prefer using background
10:45
color of red yellow and black because
10:50
those ones they usually beautiful
10:53
one this
10:55
thing the thumbs the
10:58
thumbnails
11:00
yeah if you think the color is not deep
11:02
you can come to this side and then make
11:04
it deep like how I'm doing
11:13
it okay I think I have to change the
11:15
title to create
11:19
a
11:21
yeah let's change the
11:26
size and then bring it
11:31
here be down a little bit then you add
11:35
another test
11:39
again create a
11:42
[Music]
11:46
professional YT
11:49
Thum which is the YT which is the
11:57
YouTube
12:03
the same thing you change the this the
12:05
background
12:07
to
12:09
Black make sure the black is
12:12
deep
12:17
yeah and then we change the
12:24
stroke change the font to Chun five
12:57
for
13:27
for
13:57
for
14:12
enable a stroke again we just go over
14:15
the same
14:19
steps over here we going to change the
14:21
background color to
14:27
red
14:33
[Music]
14:36
yeah you change this TR to White because
14:41
the background color is red
14:45
yeah okay
14:46
okay change the
14:49
font to Chun
14:52
five and then this one Bo go back to the
14:57
stroke change it to
15:00
Black and then reduce the stroke
15:08
size yeah think this on is
15:21
good then this one you move the th to
15:24
the
15:27
professional
15:57
for
16:25
you're going to change here to the YT
16:41
[Music]
16:53
and then when you are done you go and lo
16:55
all the
16:57
test and then then add a background
17:06
image I'm going to be using this
17:08
background
17:10
image so you res it to
17:15
F the whole place then you go to this
17:18
side and then move the image to the last
17:23
bton yeah like
17:27
this and then
17:29
if there's anything that you think is
17:31
not nice according to the background you
17:33
go and lock it and
17:34
[Music]
17:35
change mistake
17:39
here so I'm going to be resizing
17:46
this yeah so I think this one is okay
17:49
even though it's not that much
17:50
professional but at least it's somehow
17:54
okay to get you more views so when you
17:57
are done you you just have to click on
17:59
this save button over here then click on
18:02
save as image you change the format to
18:06
PNG and then leave the dimension on the
18:09
costume one you selected first and then
18:11
click on save to
18:17
gallery now our image is done saving
18:20
let's go back to our gallery and check
18:27
it
18:35
go to here it
18:39
is so this is our Thum over here so all
18:42
that you have to do now is just to go
18:44
and then upload the Thum to your video
18:48
yeah so that's it for today guys if you
18:51
have any further more questions you can
18:53
ask in the comment section below and
18:56
please don't forget to subscribe to the
18:57
YouTube channel for more updates like
18:59
this and if there's any video that you
19:03
want me to make for you to understand
19:05
what is going on in the on the
19:08
internet feel free to ask in the comment
19:11
section see you on my next video
19:17
bye


