Up next in 10

Learn how to do Control Valve Calibration using the HART communicator for a fieldbus instrument.
** VIDEO TOPICS **
0:00 Metso Valve Positioner
0:20 Fieldbus Blocks
1:26 Auto, Cascade and OOS Modes
2:26 Transducer Block
2:40 Calibration
3:17 Automatic Travel Calibration with Position Feedback Tuning
4:27 Out of Service Mode
5:04 Control Valve Calibration Started
7:00 50% Calibration Status
8:14 Calibration Success
9:00 Auto Mode
9:31 Cover Valve Positioner
👉👉 Get Full Course Here:
https://www.udemy.com/course/foundation-fieldbus/?referralCode=728C4743D1981BB10255
✨ FOLLOW US ✨
Show More Show Less View Video Transcript
0:00
So, let's see the blocks inside the
0:02
Foundation Fieldbus parameters. The
0:05
first one is resource block, transducer
0:08
block. Okay, we'll see the all blocks
0:10
here.
0:11
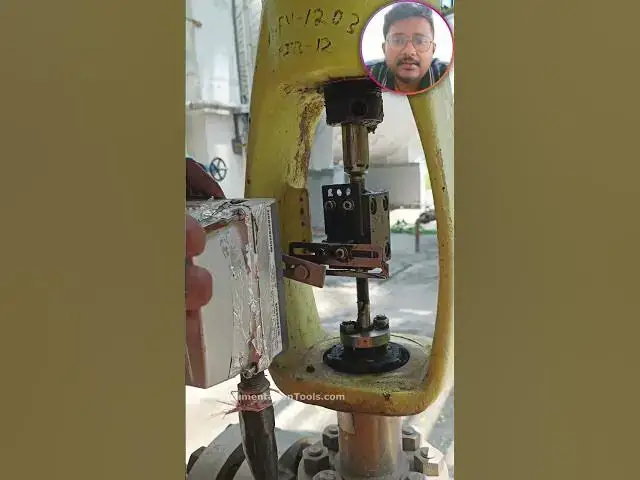
What is the tag name of our instrument?
0:13
11 FV1203.
0:15
This is assigned to a analog output
0:17
block.
0:18
For control valves, it is a analog
0:20
output. That is why the block type is
0:23
analog output here.
0:25
And the block tag is 11 FV1203.
0:29
If it is a flow transmitter, then we
0:31
will use analog input block.
0:34
Okay?
0:36
This is only resembling the type of
0:38
instrument. We are using digital
0:40
communication between your field device
0:43
and DCS system. Let's see the available
0:45
blocks in this positioner. And this is
0:48
entered into the resource block right
0:50
now.
0:51
And in resource block, we will have the
0:54
all parameters related to your valve
0:56
positioner. The manufacturer ID, device
1:00
type, model, your device revision, your
1:03
DD file version. Device description file
1:06
is very important.
1:07
Now, let's see the block types.
1:11
AI, AO, DI, DI
1:15
and DO.
1:17
PID.
1:19
Uh this is input select, output select.
1:21
Okay, fine. So, these are the blocks
1:23
available in this positioner. Okay?
1:27
Remember, each block have mode.
1:31
In Foundation Fieldbus, whenever you're
1:34
using a block,
1:36
then you have to put that mode in auto
1:38
mode or cascade mode.
1:41
If you are not using a block, then you
1:43
have to put that block in OOS,
1:47
out of service.
1:50
In this valve positioner, we are using
1:51
only AO, block type AO. This is a analog
1:55
output instrument. That is why this AO
1:57
block is enabled. For valve positioner,
2:00
we usually put this block in cascade.
2:03
Other blocks we will put in auto mode.
2:06
If you are not using a block, we have to
2:08
put in out of service. You can see the
2:11
PID we are not using here, out of
2:13
service. Block type DO, digital output
2:15
we are not using, out of service.
2:19
In my case, I don't have any
2:20
requirement, that is why I'm not using.
2:22
If you have a requirement, you can use
2:24
these blocks also, no issue.
2:27
Now, I will go to the custom.
2:30
I need to go to the transducer block to
2:32
do the calibration.
2:36
See, this is a transducer block. Here,
2:38
you can see different menu items.
2:41
And then I have to go to the calibration
2:44
for doing the automatic calibration. So,
2:47
I will go to calibration and press
2:49
enter. I am using the arrows here, uh up
2:52
arrow, down arrow, left and right.
2:55
So, that for the navigation, I can do it
2:57
inside the communicator. Okay?
3:00
And then I will go to the automatic
3:02
calibration. I will press enter. Right
3:04
now, the calibration command is idle. We
3:06
are not using any calibration. Now, I
3:09
will change this command. See?
3:13
I'll press enter again.
3:17
Again, I'll press enter.
3:19
And I'll I'll touch here. I'll see the
3:22
available commands.
3:25
See, these are the options available for
3:28
the calibration.
3:30
Start automatic travel calibration and
3:32
position feedback also included.
3:35
Second one, only travel calibration.
3:38
The third one, position control tuning,
3:40
one-point calibration, etc. I want to do
3:44
the automatic travel calibration and
3:46
position control tuning. So, that
3:48
calibration will be completed with
3:51
feedback adjustment. Okay?
3:54
So, I have to select that first one,
3:56
start automatic travel calibration and
3:58
position.
4:01
And then I have to press okay.
4:04
And I have to press send.
4:07
See, one error came.
4:10
What is the error? Wrong mode for
4:13
request.
4:15
Whenever you're doing some work in
4:17
Foundation Fieldbus, you have to put
4:20
that respective block in out of service.
4:24
That is why the command is not accepting
4:26
right now.
4:27
Now, I have to press the mode.
4:30
Now, I have to remove the auto mode and
4:33
I have to select out of service.
4:36
Now, I will remove the auto mode and I
4:39
will select only out of service.
4:42
Because right now, I'm doing the
4:45
calibration and this device or control
4:48
valve is not available for the
4:50
operation.
4:51
Okay?
4:52
And press okay.
4:58
Click yes.
4:59
And press send again, send button. Now,
5:02
it will take the command. Calibration
5:05
will be started.
5:09
See, the automatic travel calibration is
5:11
started. Now, the valve will move
5:14
automatically between predefined stem
5:17
positions
5:18
and the position feedback also adjusted.
5:22
The valve positioner algorithm, now it
5:24
will start and it will check for
5:27
different points.
5:30
See the cal, cal means calibration. It
5:32
is at five.
5:34
It has to reach 100 to complete the
5:36
calibration.
5:39
It will take some time.
5:41
2 minutes to 5 minutes. Okay?
5:44
Depends on your design.
5:48
The valve will automatically travel.
5:51
There is no need to do anything now. We
5:53
have to wait for some time.
5:56
You can see the status on the display
5:58
also or on your HART communicator.
6:02
This is our valve positioner display.
6:05
Remember, you can do the calibration
6:07
from your display also without
6:10
connecting the HART communicator.
6:12
But in this case, I want to show you the
6:14
HART communicator, that is why I'm doing
6:17
it from the HART communicator.
6:20
Right now, the status is 44.
6:23
It will reach 100. Until then, we have
6:25
to wait.
6:27
Meanwhile, you can see the valve stem
6:29
position also. It will move.
6:32
And the status also will be updated on
6:34
your
6:36
HART communicator.
6:38
Remember, whenever you put the block in
6:41
out of service, the DCS will not control
6:44
this valve.
6:45
Even if the DCS gives some signal to the
6:48
control valve, it will not operate.
6:51
So, you must put this block in auto
6:54
mode, then only
6:56
the DCS can control the valve. See, the
7:00
calibration is still running. There are
7:02
no errors right now. What type of
7:04
calibration is going on?
7:06
Automatic calibration plus position
7:09
feedback adjustment. Now, the status is
7:12
60. 60% is completed. We have to wait
7:15
till 100%.
7:18
So, these are the pressure gauges. You
7:19
can see the input and output pressures
7:22
also here during the calibration.
7:25
You can also see this knob. The knob
7:27
will move so that you can understand the
7:29
valve open or close status. Now, it is
7:33
at 65%.
7:35
71%, 75.
7:38
In Foundation Fieldbus, you have to
7:40
understand the block names and which
7:44
blocks we use for the configuration of a
7:46
control valve or a transmitter.
7:49
For transmitter, we use AI block.
7:52
For valve, we use AO block.
7:56
Resource block and transducer block are
7:58
common.
8:00
Now, we reached 90%.
8:03
You can see the knob status also.
8:06
Based on that also, you can see the
8:08
open or close status of a control valve.
8:12
95%.
8:15
See, the calibration is completed.
8:17
You can find the successful message.
8:19
See, successful on the display.
8:22
Calibration is completed. You can see
8:24
the same status on your HART
8:26
communicator also. Now, we will see the
8:28
same status on your HART communicator.
8:34
This is a successful calibration.
8:37
See, the calibration was successful,
8:39
indicates no error.
8:41
Okay?
8:44
Calibration was successful.
8:48
Remember,
8:49
our job is completed, but we have to put
8:52
the mode again in auto mode. We have to
8:55
remove the out of service.
8:57
Because our job is completed.
9:04
I have to press mode again
9:07
and select out auto
9:10
and deselect out of service, OOS.
9:16
Okay.
9:18
Yes.
9:22
That's it. The calibration is completed.
9:29
The calibration is completed. So, we
9:32
have to remove the HART communicator and
9:35
again, we have to cover the valve
9:38
positioner.
9:41
The job is completed.
9:43
This is how you can do the control valve
9:46
calibration using our HART communicator.
9:50
Remember, it takes time
9:53
for a Foundation Fieldbus based device.
9:57
For doing the control valve calibration,
9:59
we usually do with the valve display.
10:03
Because it is very easy and fast.
10:08
If you don't have a display,
10:10
then you can do it with your heart
10:12
communicator. Or you can do it from your
10:15
control room also. If you have a plant
10:18
resource manager in your Yokogawa DCS
10:21
system.
10:23
Thank you.
10:25
Please like our videos and share our
10:27
courses with your friends and
10:29
colleagues.
#Jobs & Education