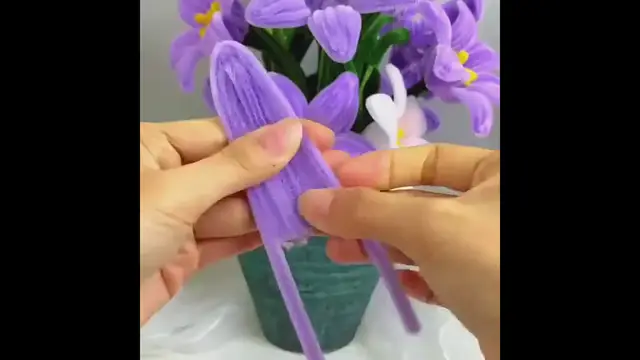

Brighten Your Space with DIY Pipe Cleaner Flowers
Oct 29, 2024
I recently dove into a simple yet delightful DIY project: crafting flowers using colorful pipe cleaners. This easy and affordable craft is perfect for all ages, allowing you to create cheerful flowers that never wilt. Whether you're looking to add a pop of color to your workspace or make a fun gift, these pipe cleaner flowers are a great choice. Here's a step-by-step guide to making your own!
Materials I Used
Creating these vibrant flowers only requires a handful of materials:
Pipe cleaners in various colors (green for the stems and assorted bright colors for the petals)
Scissors
A pencil (optional, for shaping the petals)
Small beads (optional, for the flower centers)
Step 1: Choosing Colors and Creating Petals
I started by picking out the colors I wanted for each flower. I chose bright shades—pink, yellow, blue, and red. For each flower, I selected five pipe cleaners for the petals. To form the petal shapes, I wrapped each pipe cleaner around a pencil to create a uniform curl.
Once coiled, I slid them off the pencil, leaving me with five curled pieces. I then shaped each coil into a teardrop form by pinching one end to create the rounded petal look.
Step 2: Assembling the Flower
To assemble the petals, I gathered all five shaped pipe cleaners at their pinched ends. I twisted them together tightly to secure them. At this point, the petals started to look like a real flower, with all the coils radiating outward from the center.
Step 3: Adding a Center to the Flower
For the flower's center, I opted to use small beads for a touch of contrast. If you don't have beads on hand, you can use a tightly coiled pipe cleaner in a contrasting color. I threaded the bead through a small piece of pipe cleaner, then twisted it securely at the center of the flower.
Step 4: Creating the Stem
For the stem, I used a green pipe cleaner. I wrapped the green pipe cleaner around the base of the flower, right where the petals were secured, and twisted it a few times to hold everything together. I left the rest of the green pipe cleaner straight to act as the flower's stem.
Step 5: Adding Leaves
To complete the look, I decided to add a few leaves. I cut another green pipe cleaner in half and shaped it into two small leaf forms. I attached them by wrapping each around the stem near the middle. The leaves added a lovely, realistic touch to the flowers.
Tips for Your Pipe Cleaner Flower Craft
Experiment with Petal Shapes: You don’t have to stick with teardrop petals. Try creating different shapes like spirals or zigzags for a unique look.
Mix and Match Colors: For a fun and colorful bouquet, mix different colors in a single flower. Rainbow flowers can look super eye-catching!
Add Sturdiness: If you want your flowers to stand upright, wrap the stem around a wooden skewer or a piece of wire to give it extra support.
Use Glitter Pipe Cleaners: For a little sparkle, try using glittery pipe cleaners for the petals—they add a beautiful shimmer in the light!
Conclusion
This DIY Pipe Cleaner Flower Craft is a fantastic project for all ages. It’s a quick way to create something cheerful and decorative, and it's incredibly forgiving—there's no right or wrong way to design your flowers! Whether you make a single flower or a whole bouquet, this craft is sure to bring a smile to your face.
Try it out, and feel free to share your creations! Happy crafting!
Show More Show Less