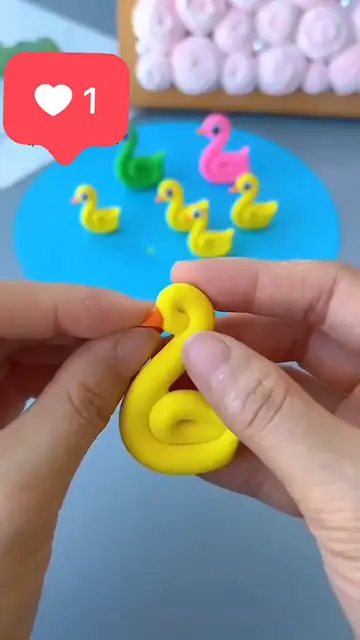

How to Make a Cute Clay Duck
Dec 6, 2024
As someone who loves creating adorable miniature crafts, I recently stumbled upon a fun project: making tiny clay ducks. These little creations are perfect for adding a playful touch to your desk, shelf, or even as part of a miniature scenery. Today, I’ll walk you through how I made my own yellow clay duck.
Materials You’ll Need:
Yellow modeling clay
A small tool for shaping (like a toothpick or sculpting tool)
A flat, clean surface to work on
Optional: Black and white clay (for eyes) or a permanent marker
Step 1: Shape the Body
Start by taking a small piece of yellow clay and rolling it into a smooth oval shape. This will form the duck’s body. Flatten one end slightly to make it easier to attach the neck.
Step 2: Craft the Neck
Take another small piece of yellow clay and roll it into a long, thin cylinder. Carefully bend it into an “S” shape to mimic the graceful curve of a duck’s neck. Attach one end to the flattened part of the body, pressing gently to secure it in place.
Step 3: Add the Head
Roll a tiny ball of yellow clay to form the duck’s head. Attach it to the top of the neck, ensuring it’s firmly in place. You can use a sculpting tool or toothpick to blend the neck and head seams for a smoother look.
Step 4: Sculpt the Beak
For the beak, pinch a small amount of yellow clay into a triangle shape. Attach it to the front of the duck’s head. If you have orange clay, you can use it instead for added realism.
Step 5: Create the Wings
Flatten two small pieces of yellow clay into teardrop shapes. Attach them to the sides of the duck’s body to act as wings. I gently curved the tips upward to give my duck a dynamic and playful look.
Step 6: Add the Eyes
If you’re using clay for the eyes, roll tiny black balls for the pupils and even smaller white dots for highlights. Place these carefully on the head. Alternatively, once the clay dries, you can draw the eyes using a marker.
Step 7: Finishing Touches
Check your duck for any uneven spots or seams and smooth them out with your fingers. Once satisfied, let your clay duck dry (if air-dry clay) or bake it according to the instructions on your clay package.
Bonus: Create a Duck Family
Why stop at one? I made a whole family of ducks by repeating the process with slightly different sizes. You can experiment with poses, colors, and even accessories like tiny hats or scarves!
Why I Love This Craft
Making these little clay ducks was not only fun but incredibly relaxing. It’s a simple project that requires minimal materials, yet the result is so rewarding. Plus, these ducks make great gifts or decorations for any animal lover.
Show More Show Less