Up next in 10

The video "How To Make A Thumbnail In Canva (For YouTube)" provides a step-by-step guide on creating eye-catching thumbnails for YouTube videos using Canva. It covers essential design tips, best practices, and Canva's features to help users craft professional and engaging thumbnails that attract viewers and boost video clicks. Ideal for beginners and experienced creators alike, this tutorial aims to enhance your YouTube channel's visual appeal and effectiveness.
Show More Show Less View Video Transcript
0:00
How to make a thumbnail in Canva for YouTube
0:02
Hey guys, welcome. In this video, I'm going to show you how to create a thumbnail in Canva for YouTube
0:08
So let's get into it. First of all, you're going to go to Canva.com and you can create an account on Canva for free
0:14
or you can get the Canva Pro. Creating an account is really easy
0:18
You can use your email address or your Google account and you will get an account on Canva
0:22
So on Canva, we can create logos, we can edit our videos, we will be able to create invitations
0:28
and much, much more. With Canva, we also create YouTube thumbnails for free, and it literally takes like five to ten minutes to create a very good thumbnail for your YouTube video to get more views and engagement
0:40
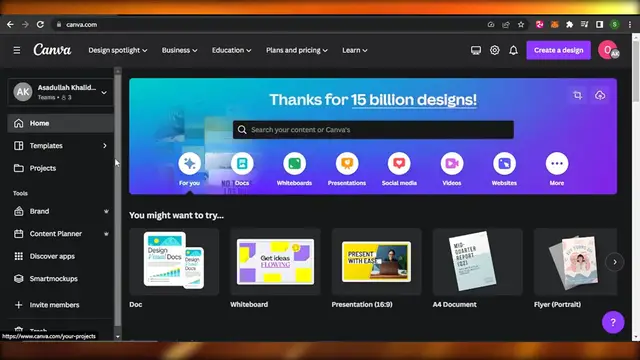
So let me show you how you can do it. First of all, once you get to Canva.com, this is going to be your dashboard
0:46
So in your dashboard, you can actually either go and click on created design and then click on custom size and select the size of your thumbnail
0:54
Or what you can do is, as a complete beginner, you can search for thumbnail in the search
0:59
bar right here and it will show you a lot of different templates that are available
1:03
You can see we have more than 17,000 templates on Kenva and there are free templates available
1:09
too. All you need to do is just customize the text and you will get your template. You can see
1:14
these kind of templates right here. We have this thumbnail here. Then we have this kind of
1:19
thumbnail. This one right here for a vlog. You can see very good templates are available or you can
1:24
start from scratch too. So let's actually select a template from here. I will show you how to
1:29
customize a template as well or how to create one from the scratch. So to customize a template
1:36
let's actually go for this one right here. So you can see this is a thumbnail design that is
1:42
already created for us. It's a template. And now all I need to do is just like simply change the
1:48
text and I will get a thumbnail. So let me show you how we do it. For instance, the topic for my YouTube
1:53
video is like top 10 for our YouTube channel. We create videos like this. So I'm just going to go for like
1:59
top 10 SEO softwares. So you will add your text and then what you're going to do is you're going to just
2:08
customize a little bit, adjust it like so and put it here
2:13
And then we have like thumbnail here written. But I'm going to delete this and here what I'm going to do is I'm going to add the text
2:19
which is going to be heading again. And we can actually just get rid of that text and customize it
2:26
Review. So you can see a thumbnail is ready in. just two minutes Like literally in one minute I have a thumbnail ready We have this person here and we got the text We got like a you know thumbnail ready I want to change the background for this thumbnail So we can change the color from here We can even change this person
2:45
Then we have different elements that I can use. We can use different text
2:48
If I want to change the text font, you will just select the text from here, select the fonts, and you will customize completely
2:54
So this is how we customize a template on Canva to create a thumbnail
3:00
Now let me show you how to create a thumbnail from the scratch. So it's going to be really easy
3:05
Quite similar, let's go with the same topic, top of SEO software review
3:11
Let me show you how we create something like this from the scratch. So here, first of all, let's change the background color
3:16
So this time I'm going to go with a yellow color for the background because it kind of like gets your attention
3:22
So here we have the background. Now we're going to go to the text. In text, we're going to insert our text first, which is going to be top 10 SEO software
3:33
Let's actually go with one by one. So I'm going to go with top 10. Then we're going to add another heading
3:38
Why I'm going for a different, you know, text because it's easy to customize them then
3:44
SEO softwares review. So I have my text added. I will customize it now
3:51
So before I customize the text, I'm going to go to the elements and search for different elements that we have
3:57
I want to, now it depends on you. If you want to add a person, let's say you want to add a woman on your
4:03
thumbnail. So you're going to search for a woman, go to the photos, and here you will find a bunch of
4:08
different women photos here. And what we can do is if you're using Kenva Pro, you will be able
4:15
to remove the background too. For instance, I have this image right here. You can select any of these
4:24
We have this. So you can see we have this image. What I can do is click on added image and click on
4:30
background remover and it will remove the background for me to add then I will just have this woman and I will
4:37
add her to my thumbnail so that actually becomes really easy if you're using kenva pro if you're not
4:42
using kenva pro what you can do is you can go to the elements and you can go to the graphic section you can
4:49
look for women and then you can look for an image that doesn't have a background or you can
4:55
simply add an image in a frame we can also do that and so there are different ways to
5:00
to add an image in the thumbnail. So I will just remove the background for this one and it will be ready
5:06
There you go. You can see now I have a you know image without a background. So for instance
5:12
this is like your own image That what I want to show you You will upload your image You go to the upload section on and canva click on upload file and upload your footage here And then you will just remove the background So this is what it will look like You will upload your image We go to the upload section on Kenba click on upload file and upload your footage here and then you will just remove the background So this is what it will look like You will have your own image on the thumbnail
5:26
So we have our text. In our text, what I'm going to do is I'm going to go to the lines and shapes
5:31
And in our lines and shapes, I'm going to look for a shape, which is going to be this one here
5:38
And I will add this shape in the background. And because it is going to be something like this
5:45
So if you want to go for this, so you can add it. That's what I'm going to do
5:49
I will just place it here for top 10. Let's actually customize the text first and then I will add the background
5:55
So to customize the text this time, what I'm going to do is I'm going to just select the text that we have
6:01
And we're going to go to the bold section, make it bold. Then we're going to go to the, you know, fonts
6:06
So for a thumbnail, the font should be really, you know, prominent and it should be bold and it should be not
6:15
italic i would say but you can go for an italic phone too if you want to create like an aesthetic
6:20
um a thumbnail for your um let's say for your vlogs and if you have an aesthetic video then you can
6:27
go for uh fonts like that too but for me what i'm going to do is i'm going to go for this uh you know
6:32
font right here so we will now expand it a little bit and place it here and then what we're going
6:39
to do is we're going to add a background here so you can see this is the background for this one i can
6:44
add another one of these and then I will change the maybe background color for this one
6:49
We can add right click and you will be able to send it in the background. So you can see this is
6:54
what it will look like. I did the same thing. We selected this as a background and then I changed
6:59
the color. Once you select an element, you can change the color for it. For instance, you just
7:04
click on it and then you will be able to change the color and the size as well. Then what you can do
7:10
is you can go to the element section here. In element, you can search for arrow
7:14
So once you search for arrow, you're going to switch to the graphics here
7:18
And in graphics, you can select this arrow here or you can go for the others ones as well
7:23
You can see there are different types of errors that we can add
7:27
So I kind of like went with this one here and then I added one here. Again, if you want to add like in thumbnail, you have something like from this to this
7:36
then you will add the arrow. And we have like this arrow here, which is very static
7:40
So different elements can be added with Canva. Once you have added it here, now you can see it looks pretty simple
7:47
What we can do is we can go to the element here and I can search for a gradient
7:52
And let find a good gradient to add in the background So you can see I go for the graphics because in graphics you can change the color according to your taste So this one is a yellow gradient that I see So what I can do is I can
8:06
maybe add this one in the background to add a little depth to it or I can go with something else
8:13
We have this one right here. We have this type of gradient as well. So let's select this one and
8:18
change the color. So that's what I'm going to do. I'm going to actually get rid of this gradient
8:22
and let's like this one and I'm going to actually add it in the background here like this you can see
8:29
now it has been added what I will do is I will click on this transparent option and make it very
8:35
transparent first of all let's actually change the color to and I'm just going to give it a darker yellow
8:42
color not the same color as the background because then it will just blend in and it won't pop out
8:48
and let me have here so for this one again I'm going to go with this color so you can
8:52
this is the color now. It's also transparent. You can see I made it late. Let's actually take it to
8:58
50 and we're going to send it to backwards. So you right click, send backwards and it will be sent
9:04
to the back. Now you can see it's in the background and this is where it looks like. We have like
9:10
a page run in the background now that's a little prominent and it's making our text and our image
9:16
pop out a little bit. When it comes to the image we can go to the elements again and maybe add
9:22
you know, some sparkles. Anything you want to, you can search on Canva. So let's see, we have these
9:29
graphics here. Okay, this is the one that I was looking for. And what I'm going to do is I can add
9:34
it here. And we will change the color to white. So you can see, this is where it looks like. I can
9:39
now add more elements into it. And then I will be able to use this thumbnail. So you can see we
9:44
have two thumbnails. This is the one. This is a template that I customized. And this is the one that I
9:49
start created from the scratch. This is this kind of template but we can also go for very cute
9:54
templates as well. If for instance you have a vlog channel then you will create something like this
10:01
for instance. I'm just going to select it. There you go. You can see this is one of the thumbnails that you
10:05
can go for. So all of these templates are available on Kenva or you can create something from the
10:10
scratch very easily. All you need to do is just go to the elements first upload the images then in
10:16
elements, you will be able to add a lot of different things to your thumbnail and create high
10:20
quality thumbnails for your YouTube channel. Once it's done, click on share, click on download and
10:26
download your thumbnail as PNG and upload on your YouTube channel. This brings us to the end of the
10:31
video. I hope that I was a big help. Don't forget to give this video a big thumbs up
10:35
Leave a comment down below. Turn on bell notification and subscribe to YouTube channel
#Clip Art & Animated GIFs