Up next in 10

Discover how to streamline your project management with ClickUp in 2024! This comprehensive tutorial is perfect for beginners looking to boost their productivity and organization skills. Learn step-by-step how to set up your workspace, create tasks, manage projects, and collaborate with your team using ClickUp's powerful features. Whether you're a freelancer, small business owner, or part of a large organization, this guide will help you master ClickUp and take your project management to the next level. Don't miss out on maximizing your efficiency - watch now and transform the way you work!
Show More Show Less View Video Transcript
0:00
How to get started with ClickUp of a project management
0:03
In this step-by-step tutorial, I'm going to be showing you how we can do this. Welcome to Tech Express. My name is Stephen
0:08
In today's tutorial, I'm going to be showing you how we can get started with ClickUp. I'm going to be showing you the features, how we can create our very first task manager
0:17
how we can add, customize our spaces, our dashboard, and even we can change our product view from list, board, timeline, and much more
0:26
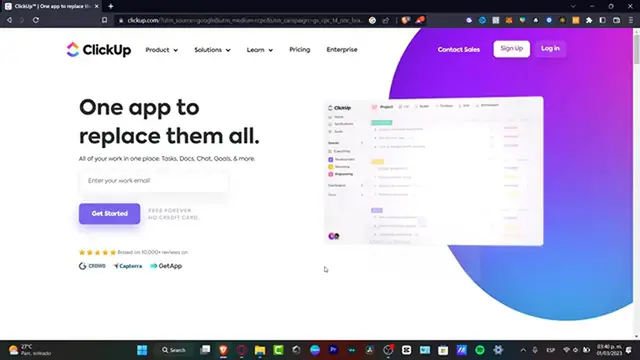
So let's jump into it. As you can see, I'm already here into ClickUp
0:29
So the very first thing that I want to do is to create an account totally for free
0:34
So let's go into sign up or just locate the section that says enter your work email and get into get started
0:40
After that, it's going to be asking for our full name. We have to provide once again the email and we have to choose a passcode in order to continue
0:48
After you have successfully filled all of that, want to go and to play with click up
0:52
The verification code from your email is actually just really easy. You need to go back and just provide the code
0:58
So as you can see, our mission here is to make you more productive
1:02
You will take only a minute. So what you want to do is to hit into Let's Do It
1:06
So it's going to be helping us to start by creating our very first workspace
1:12
So what I want to do is to name this, depending on what is the name of my company, the organization, or the project when I actually, let's say, started to work
1:20
In my case, I want to delete this part and go for the name of my company
1:25
And let's go into Next. Now it's going to says customize your workspace avatar
1:30
In my case, I want to choose this color. And here what it says drag and drop and image or browse
1:35
I'm going to leave it like that, and then go into How I'm Happy So Far. Now choose your favorite color theme
1:41
This is going to be helping us to track like more company, logos, our brand, and much more
1:46
Let's just focus into this color and go into I'm happy so far. Notice how the design is going to be filled up as we are filling everything into ClickUp
1:54
Now, how many people would you be working with? In our case, let's just type something to easy, like from two to five people
2:01
How do you want to start using ClickUp? I'll start using egg up for, let's go for project management
2:07
If you don't see that in here, you'd have to worry about that. Let go and try to look for project management or product Or let go for PMO And hit into Next Now how did you hear about us What you want to import of course is to go into YouTube
2:23
And here, invite people to your workspace. This is the part what you want to import the email address of the people where you want
2:30
to fail into your workspace. After you have added those, let's go into Undone
2:36
So they're going to be receiving an email confirmation that you can be invited into our
2:40
workspace so you can start working inside this section. Now, do you use any of this application
2:45
What you want to do is to the input all the elements that you choose to use into your actual
2:51
workspace with team workers. In my case, we could go for Google Hangouts, the test code
2:56
the Zoom, and the Microsoft Teams. After that, I'm going to hit into I Am Good. And then we have to
3:01
use any of these tools for phoic management. Let's go for no things. And hit into play with ClickUp
3:07
And just like that, the click up is now going to be ready to get started
3:11
As you can see, we have the left part of our home, the notifications, our favorite, all our spaces, and of course our dashboard and documents
3:20
So in order to get started, what I can show you recommend is to create something like really, really easy so you can don't feel like you are like to lust to them
3:30
So here, as you can see, we have these spaces. You have the space here, and you have my dashboard
3:35
Here into my taskboard, I can start creating my very first dashboard
3:39
I can hit into plus. And here, what I can do is to see how I can be, like, adding some tasks, workload by status on much more
3:49
Let's go for task list. And here, let's go for dues for March, 2023
3:57
The location, I'm going to go for space, the one that we have just created before, and leave it into add my widget
4:05
So now if I go into spaces, I have my space here and I have this new list that we just created
4:12
There we go. So in order to get started, what I control just do is to go into the list view so you can
4:19
see how it's going to be like more accurate for you and your team
4:23
We have the list view we have the board and we have the calendar In my case I do love to work with my team workers using the calendar so they can be tracking like the dates they have to make the dues of their actual tasks Or you can
4:37
go into boards. The board's going to be helping us just to drag and drop all the elements that
4:42
needs to be done. For example, this project, since it is a do-list, I can change that in progress
4:48
and after that I can change that from complete. And automatically, this element is going to be
4:54
added now into the complete section. You can add a new status if you want to, or you can just delete all the elements
5:00
For example, instead of going for completed, I'm going to go for, let's say, record it
5:05
Now let's focus into how we can add our very first tact
5:09
Here into the Digital List, I can locate the plus section, which is here
5:13
or I can go down in here where I can start a new task. So here, I'm just going to type something too easy
5:20
Let's say record a YouTube video like this, and hit it. into save. Now that I have created my task, I can go and open this task so I can see all the
5:34
descriptions and all the elements that I can start to add into my task. For example, here to the
5:39
upper side, focus here, what I can add dates. Let's say that I need to record this from Friday
5:46
to Monday. Hit it done. I have the time track it. Here, what you want to do, if you are working
5:53
with someone else, let's say that someone is recording the video for you. So I'm going to go into Plus, and here is my actual time tracker
6:01
So when the actual stuff, with the actual person, finished to work here
6:05
it's going to be appearing the time tracker. You hit into Stubbed. And lastly, we have to add a cover
6:09
This is like not too important. We're here into the description. Let's go and type something for our teammates
6:14
And you want to add, like, all your stuff, your custom fields. You can add those here. The checklist, of course, there are checklist marks
6:20
I'm going to go and hit into the backslades. once I have successfully added my actual list. And here as you can see, there's this little
6:29
button where I can assign this specific task for specific people. Let's go and add this element
6:35
And here I want to assign this from myself And I going to go once again and try to assign it to I can try to add more and more here As you can see here are both of them and it going to appear in here they assign it to So I can go into the X mark and then we actually good to go
6:54
Once again, the task that you're being doing, I can just drag and drop the elements
6:58
All the people who are inside ClickUp can do this and they can undo things
7:03
Now, the other thing that I can be showing you are the actual integrations and applications
7:08
that we can see clear into ClickUp. If you notice into the right part, we see that there's the actual zoom element, the Google Hangout, this code, and much more
7:18
These are all the elements that we choose to add into our dashboard since we told the application that we used this commonly
7:25
So for example, let's say that I want to start a meeting of Zoom. So click here, it says Zoom, and it's going to be sending us into the Click Automation Application
7:34
So as you can see, we have Click Apps, we have the All, and we have all the automation
7:40
here enabled. So that means that when I wanted to start an actual Zoom application, I can do that
7:46
inside the actual tracker. So here it says Zoom. I want to enable this. And there we go. Start a meeting
7:54
from within click up using the Zoom meeting button or the Zoom slash comment. And if I wanted to
7:59
connect, let's say something from my Google Drive, I need to just paste the link and automatically
8:04
it's going to be appeared in here. So when people checked out my actual task, here's going to be
8:10
appear in the links that I have just added. And here I can even create a subtask
8:15
Let's say, for example, we record a YouTube video and I go and create a subtitle
8:19
Let's go by a cheap camera. And here, once again, I can assign tasks to different people
8:26
and I can change the due date from, let's say, today. And hitting to close
8:30
This is how guys, we can get started here into the clickup. As you can see, there is almost a lot of
8:36
but really, really a lot of steps to dig in. But this is how, but this is just
8:40
like a basic way how we can get started with all our teammates workers so hopefully it was
8:44
very useful video for you don't forget to like and subscribe to the channel if you don't want to see
8:48
more amazing tools about the click up and how we can get started thank you so much for watching
8:53
the video guys and with that being said i can hopefully see you on the next video
#Business & Industrial
#Business Operations
#Computers & Electronics