Up next in 10

How To Register and Setup Midjourney Tutorial For Beginners
Show More Show Less View Video Transcript
0:00
Hello guys, I'm going to be showing you how you can get started with Medjourney
0:04
and step by step, of course, you don't have to worry about anything if you don't know
0:08
actually anything you want to get started. So, first of all, there's actually two things
0:12
that you need to take in mind. The first thing that I want to do, I'm going to close this
0:16
what I want to do is to open a new tab, like this
0:20
and I'm going to type Medjourney. So, as you can see, I do have
0:24
the Medjourney already here in the default, but if you don't find that you can go into
0:28
Medjourney.com fast forward slash application and this one is going to be sending you into your own account
0:36
If you go into the Google and you only type Medjourney like this, it's going to be sending you into the very first part, it's going to
0:44
appear in something like this. So, there's two ways and the easiest way to access here Medjourney
0:52
is to go into the sign in with Discord. So, Medjourney actually works with Discord. If you don't know what Discord is, it's an amazing place
1:00
to create some different chatbots and you can have more than just one conversation, team conversations, and I mean, it's really
1:08
easy to use. So, if you don't have a Discord account, just go into Discord and you
1:12
can sign in using your Google account, your Microsoft account, whatever you want to
1:16
Now, once you're here into Discord, what you want to do is
1:20
to sometimes it's going to be asking you to verify your account using a phone number
1:24
It's not that hard, guys. You just need to do that really, really simple
1:28
In my case, I need to go into the open Discord. You can download, of course, this application if you
1:32
want to. But in my case, I just want to leave it like that. And here
1:36
it's going to be sending me into the logging section. And after you sign it in
1:40
you're going to be seeing something like this. So, here into Discord, what you want to do is to leave this open so we can get started
1:48
into Medjourney. So, once I go back, I leave this like that, of course
1:52
I want to go now back into Medjourney. And here into Medjourney
1:56
what I want to do is to look out for the sign in with Discord
2:00
like this. So, if you already have an account here into Discord and Medjourney, you just need
2:08
to hit into authorize, hit into authorize like this. And it's going to be sending you into this part. So, what you can do
2:16
is to join the beta mode. And this one is going to be sending you
2:20
the invitation of joining Medjourney into inside Discord. So, once you hit into accept invitation
2:28
it's going to be redirecting you into this section that says Medjourney. So, we have done a very
2:36
simple step now, really, really easy to do. So, what I want to do now is to focus into how to get started using
2:44
Medjourney now that I have Medjourney integrated into my account. So, as you can see here into Medjourney, I have several stuff that people
2:52
are creating. So, what I want to do is to focus into having my own server so I can have my own privacy
3:00
So, what I want to do is to go into Medjourney and focus in here into the newcomer
3:08
rooms. So, you can go into 124 or 154, whatever you want
3:12
to do. You want to leave this like that. And before you can do
3:16
anything, you want to make sure that you already have a server created
3:20
In my case, I don't have this. I mean, I already have this already
3:24
created. And if you don't, go into add a server. Let's say create my own for me and my friends
3:32
And you want to choose the name of your server, a photo
3:36
and hit into create. In my case, I created this one that says AI images
3:40
So, go back here into Medjourney once again into the rooms of newbies. And here I want to locate
3:48
the team member list that appears into the upper side that says show member list
3:52
Look out for the one that says Medjourney bot. Like this. And look out for add to server
4:00
So, I'm going to click this option. And it says this will allow
4:04
the developer of Medjourney bot to use this and this. So, you want to
4:08
choose the server. So, what I want to do is to create
4:12
a new server here so you guys know how we can do this
4:16
to get started. So, let's go for example number one. Hit into upload. I'm going to go into my downloads. I'm going to be
4:24
choosing something really, really easy like this. And hit into create. So, once again, I'm going to go back here into my Medjourney
4:32
I'm going to do exactly the same thing that we just did before. Look out for the Medjourney bot
4:36
Add to server. And the one that we just created. Example number one. And hit into
4:40
continue. You want to enable all of the permissions so Medjourney can be working
4:48
properly. So, you don't have to worry about anything there. So, with that being said, scroll a little bit down
4:56
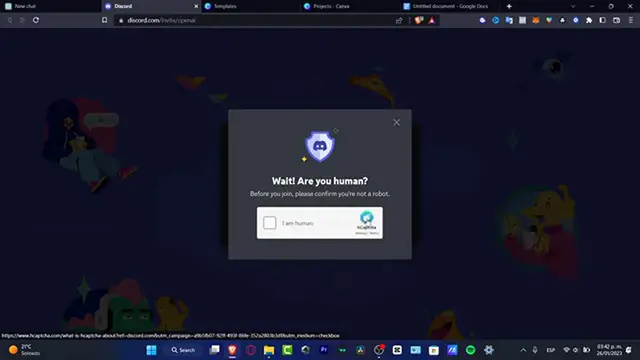
Look out for authorize. Beep up, beep up. As this code says. You want to scratch the part that says
5:04
I'm not a human. Or in my case it says I am a human, of course. Sorry for that
5:08
And the authorization has been completed now. So, hit into the X mark. Go into your server
5:16
that you created. As you can see this one says example number one. And this one it says
5:20
good to see you Medjourney bot. So, if I go into my general text channels, I do have now my Medjourney
5:28
available. So, you don't have to worry about creating some channels here. You have two by default. So, you want just to focus into the
5:36
general section. So, once you are in here, what you want to do
5:40
is to type the fast forward slash. And here you can see
5:44
the Medjourney bot comments. So, we can go for asked, blend, fast, help, imagine, info
5:52
invite and much more. In today's tutorial, we just want to focus
5:56
into one actual Medjourney bot comment. That is the imagine. So, here into imagine, you can ask wherever you want to
6:08
and what's going to be doing the actual server here is that it's going to be generating an image based on what you asked for into the prompt
6:16
So, before you can do that, if you ask for wherever stuff here, it's going to be asking you just to accept the terms
6:24
of use. Hit into accept and then you're good to go. If you type fast forward
6:28
slash info, it's going to be appearing the information about yourself, your type of subscription, your Java mode, the best ability
6:36
and much more information. In my case, speaking about device time remaining, I do not have any minutes yet
6:44
anymore, of course. But if you want to, let's say for example
6:48
you want to subscribe to something more, you want to go into the fast forward slash and I want to go for subscribe
6:56
Like this. Go into the enter mark and it says open subscription page. I'm going to go into the yep and it's going to be sending me
7:04
into all the costs of the meth journey. So, as you can see here is the basic plan
7:08
the standard plan and the pro plan. If you want to pay for yearly, of course
7:12
it's going to be costing you a little bit less. So, without taking in mind, I can go back
7:16
into this code. So, I'm going to be showing you something that I did here into my artificial
7:20
images that I created several weeks ago. For example, here I typed create an astronaut riding a killer whale
7:28
and navigating through the galaxy with mysterious creatures in a realistic style. High quality 4k. So, this is what
7:36
the computer generated for me, which I think is really, really amazing
7:40
So, once you have this generated, you're going to be seeing these options
7:44
So, U stands for upscale and B stands for variations. So, here if I choose U1, for example, it's going to be
7:52
telling the server to upscale the image number one, which is this one, 1, 2, 3 and 4. So, I choose the upscale
8:00
image number one and it throws me this. So, there we go. So, now what I did, once you have your image
8:08
what you can do is to make different variations of an image that you
8:12
have used or already created. So, I typed it here, make variations
8:16
and based into this image, the meth journey bot generated me four different variations of the same position
8:24
of my actual astronaut and killer whale. Like this one. So, I do exactly the same thing that I did before. It's going to be
8:32
asking you to, which one would you like to upscale or see best. So, I typed into
8:40
let's say this one, appears in here, and here I typed into two different realistic styles. So, in my
8:48
case, I think that the best option was the actual latest one because
8:52
this one is not that accurate. The whale is too weird here. So, I just stick around with this one and I download
9:00
this image. I can open this in a browser or I can look out for
9:04
my actual account and to meth journey. So, I can go into sign in, I can go into my gallery and here are all
9:12
my generated images that I have created so far. I can go into the plus one and here's my images into 4K
9:20
resolution. So, with that being said guys, this is how we can get started using
9:24
the meth journey bot. As you can see, it's a very, very amazing place to get started
9:28
So, don't forget to like and subscribe to the channel guys if you want to see more amazing
9:32
tools of the meth journey and how to get started and a few prompt ideas
9:36
Thank you so much for watching the video and I'll see you next time guys. Music Music
#Online Communities
#Other